The Lofoten Islands, Norway, are a place of unparalleled beauty and boundless adventure. Nestled within the Arctic Circle, this stunning archipelago boasts a plethora of breathtaking Lofoten day hikes that will take your breath away – each one more beautiful than the last.
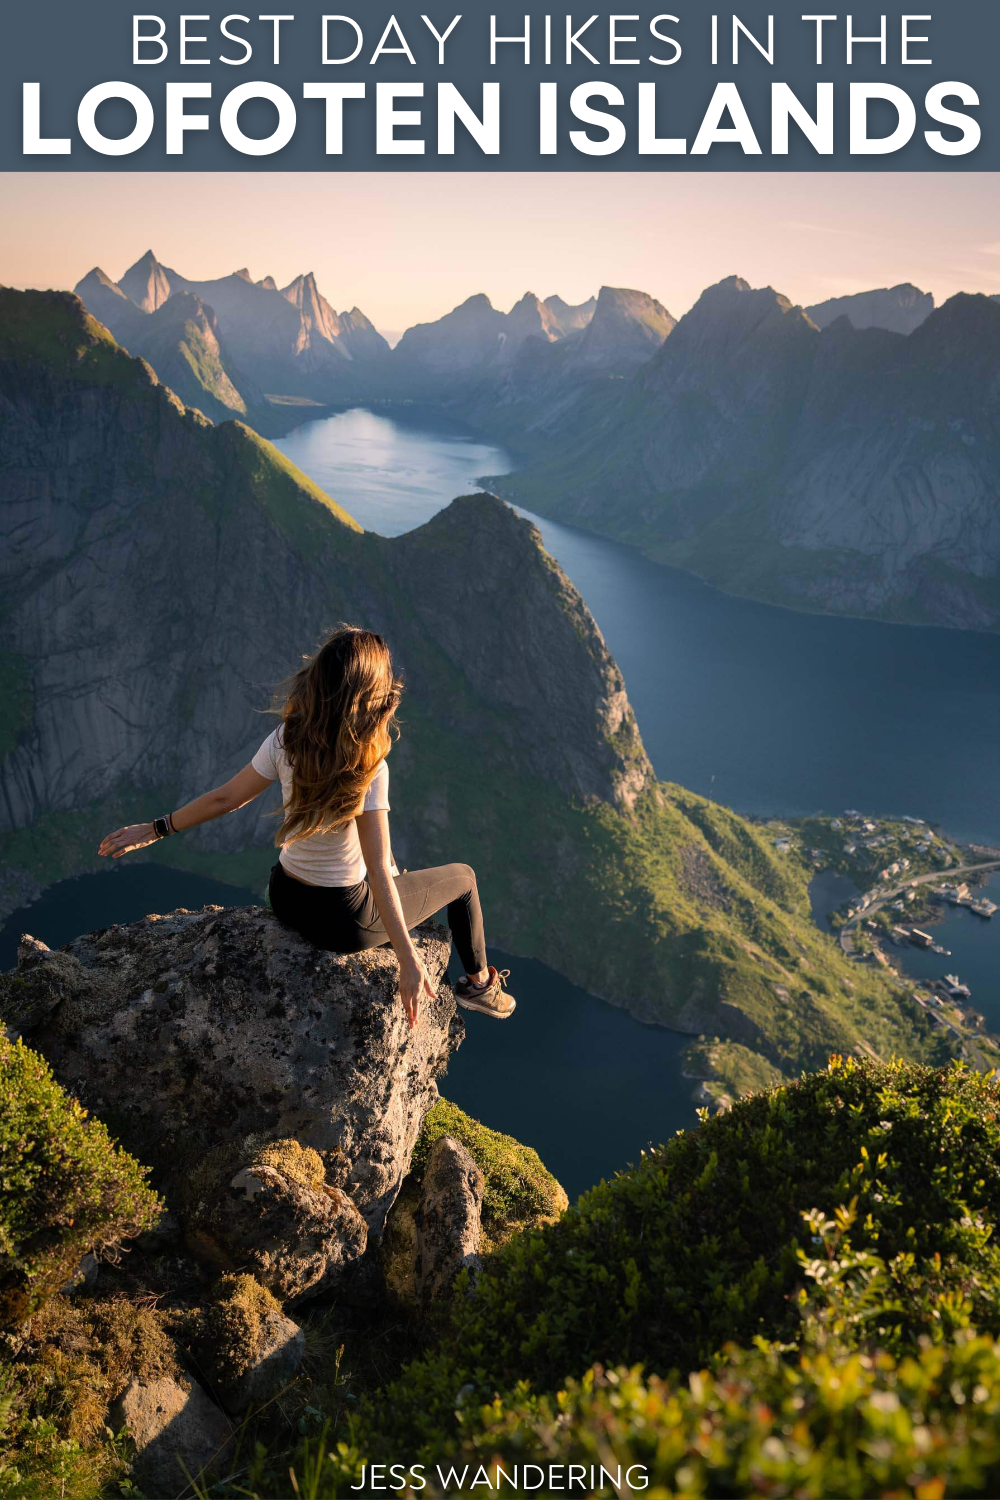
If you’re seeking a quintessential Norwegian experience, look no further than the Lofoten Islands hiking trails, where each step unveils dramatic vistas of soaring peaks, pristine fjords, and charming fishing villages.
In this blog post, I’ll share the best hikes Lofoten has to offer that Quin and I did during our one week trip to Lofoten. Honestly, they were all awe-inspiring in their own way, and I’m not sure you could really go wrong with any hike in this stunning area of Norway.
Whether you’re a seasoned hiker or a nature lover eager to explore the great outdoors, Lofoten’s diverse landscape caters to all skill levels and interests. From easy hikes in Lofoten following scenic coastal treks with turquoise waters as your companion, to challenging mountain ascents that reward you with the best views in Lofoten, there’s something for every hiker in Lofoten. That being said, the hikes in this post are primarily of the very steep but short variety.
So, lace up your hiking boots, grab your camera, and get ready to be mesmerized by the wonders of Lofoten as we delve into the top day hikes that showcase the pristine beauty and untamed wilderness of this Arctic gem!
Looking for more tips on the Lofoten Islands in Norway? Don’t miss my full 7-day Lofoten Islands itinerary.
***Some of the links in this post are affiliate links. Purchasing or booking through them earns me a commission that helps me continue creating more guides like this one.
When is the Best Time to Hike in Lofoten?
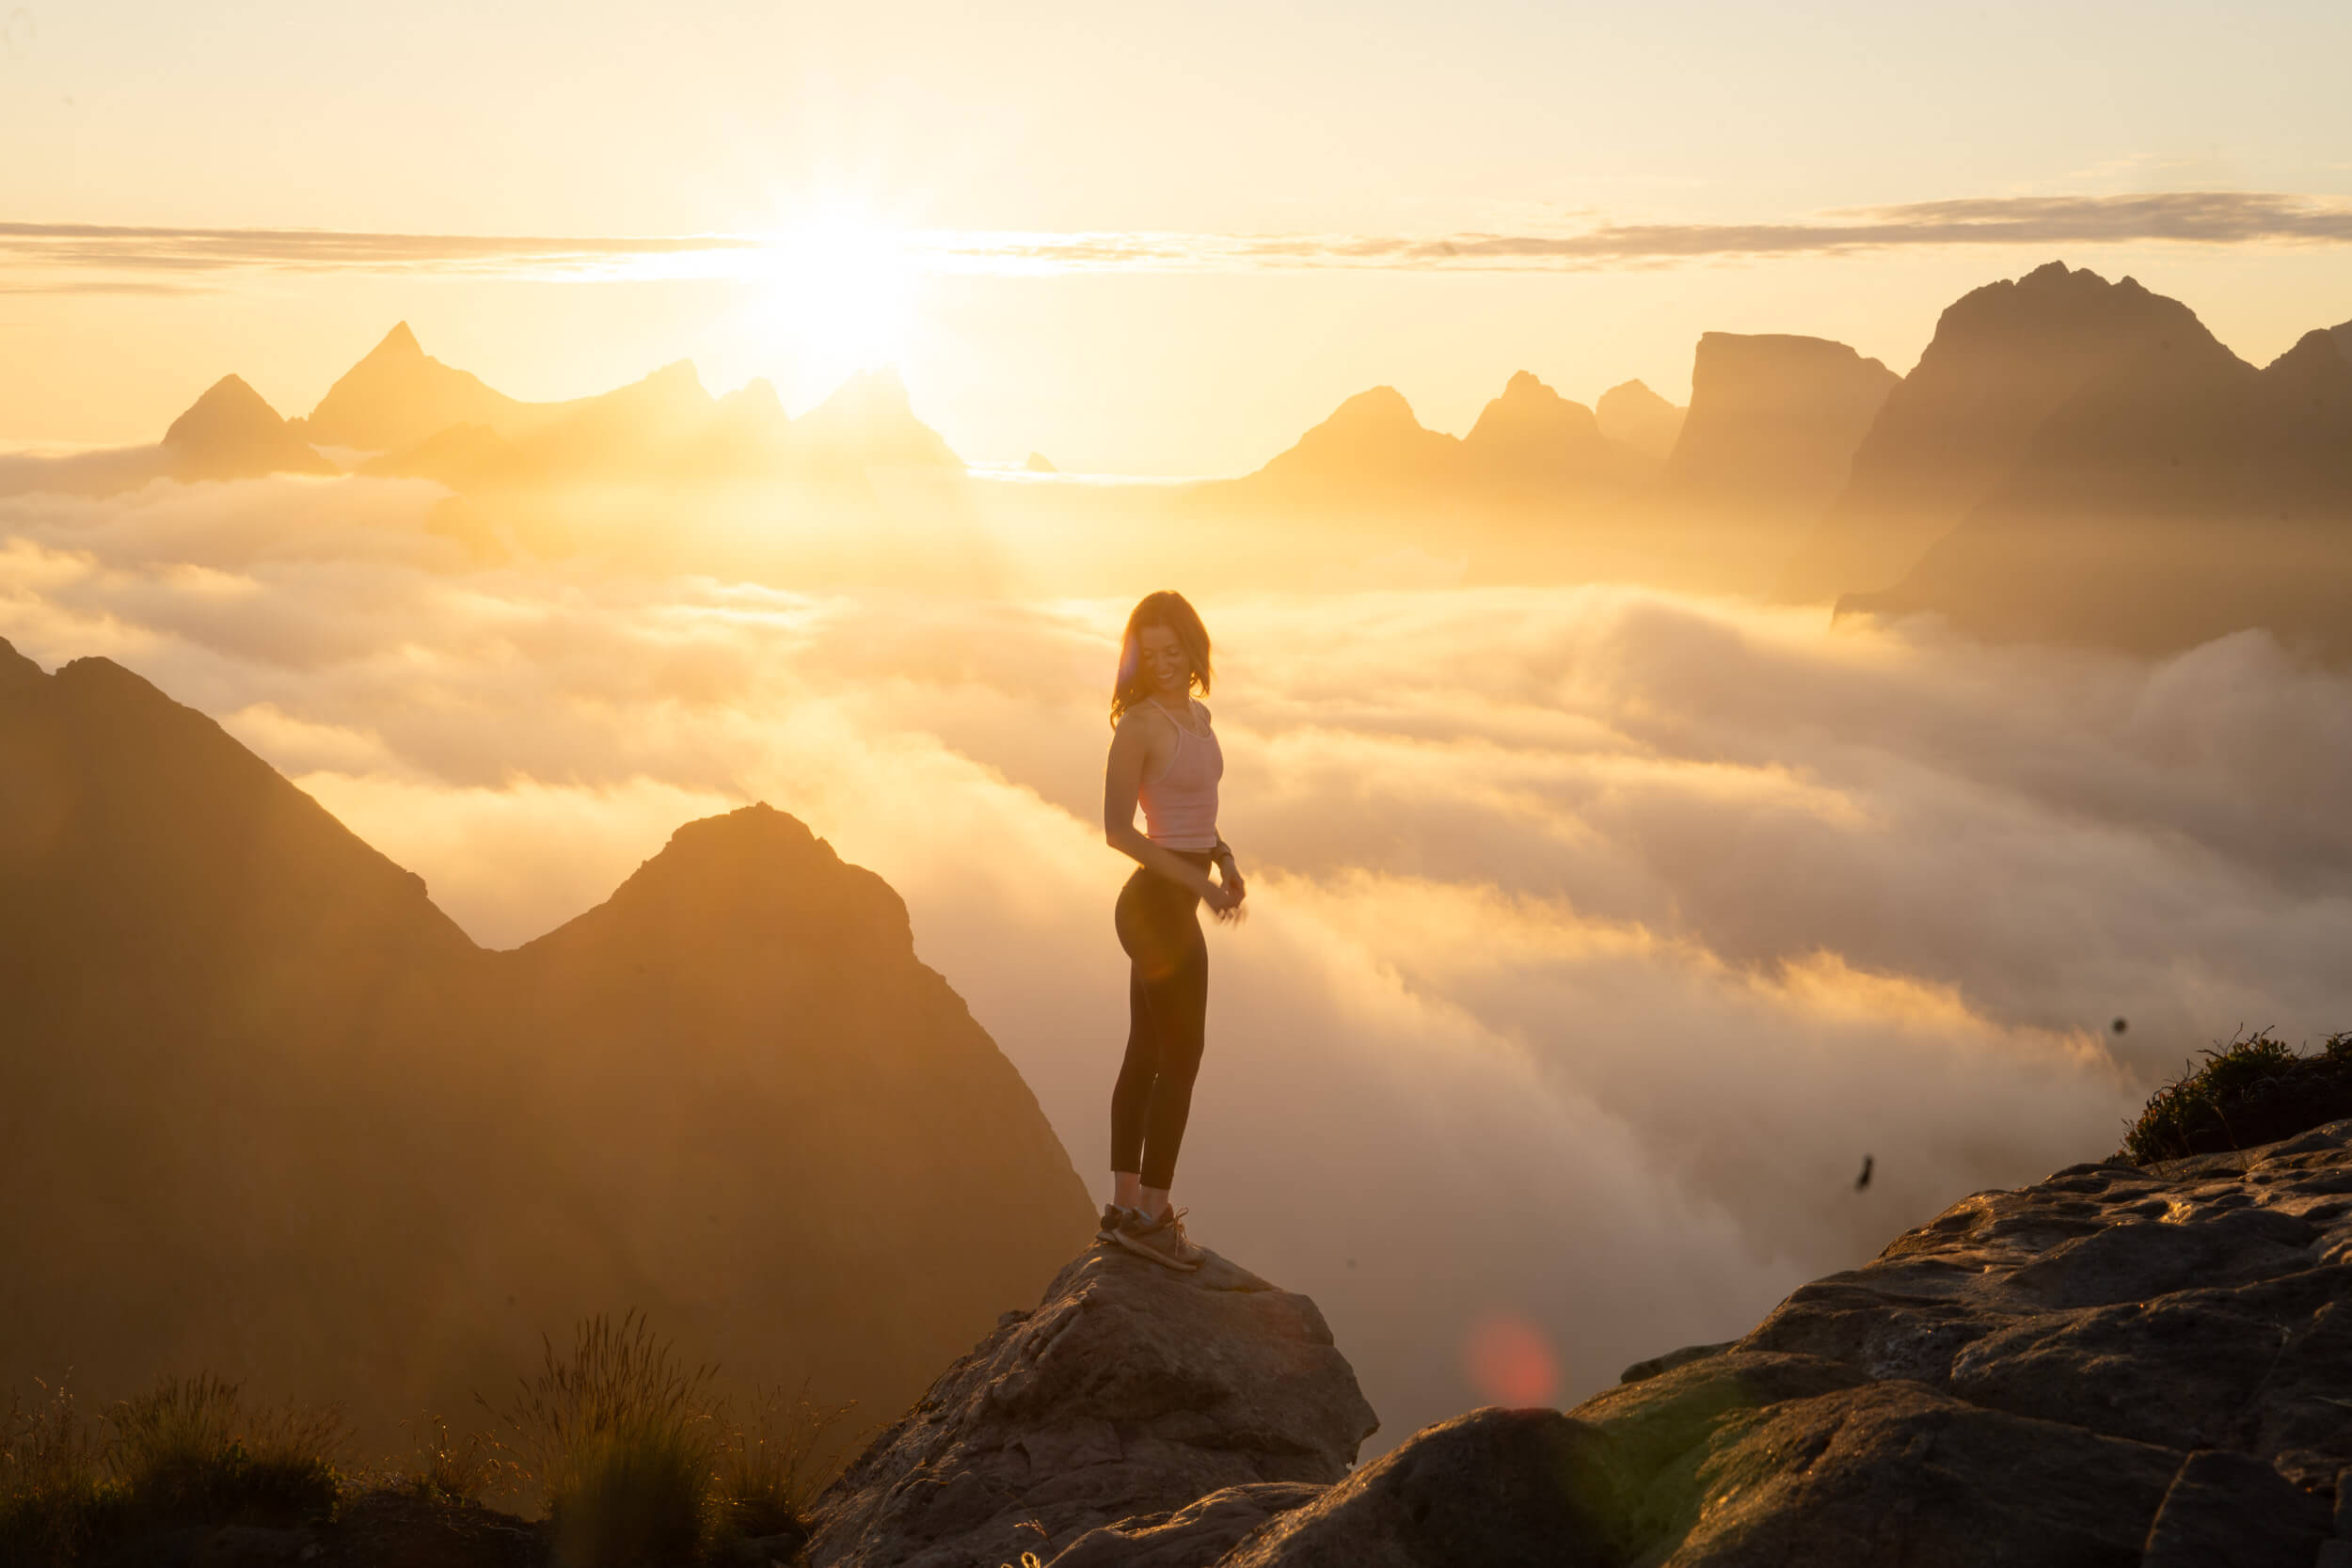
Hiking the Lofoten Islands is a bucket list experience for many avid hikers, but the long Lofoten daylight hours between late March and July make summer the perfect time for hiking in Lofoten.
Thanks to the Midnight Sun in Norway, the sun does not set for around 2 months every year and, despite it being summer, top temperatures in Lofoten are around 60F – the perfect temperature for hiking.
Of course, the shoulder seasons in spring and autumn are also popular times for hiking Lofoten, particularly in autumn before the snow returns.
Everything You Need For A Day Hike In Lofoten
Whether you are heading out for a quick day hike or something a little more ambitious, the right gear can make the whole experience smoother and way more enjoyable. This is the setup I’ve been using lately out on the trail, including the pieces I reach for again and again because they actually work in real conditions.
Storage
BACKPACK: Osprey Tempest 22 Pack for women and the Osprey Talon 22 for men. My go to when I need a little more space without sacrificing comfort. It carries beautifully, cinches in close, and has enough pockets to keep everything organized without feeling fussy.
RUNNING VEST: I’ve started using a running vest for hikes when I don’t need much gear because it keeps everything light, close, and easy to grab without taking off my pack. The Salomon Active Skin 8 has become my favorite because it fits like a hug, carries water up front, and has just enough space for the basics without ever feeling bulky.
Clothing
SUN SHIRT – The Crater Lake Hoody is my favorite sun shirt because it’s so light and soft it almost feels like air. It offers full UPF 50+ protection for long days in exposed terrain, so I don’t have to carry buckets of sunscreen.
SHORTS – You don’t need to reinvent the wheel here. Whatever works for you! I’ve been really enjoying the Lululemon Pace Rival High Rise Shorts and Outdoor Voices Warmup 5” Shorts.
HIKING PANTS – To be honest I’ve never been a big hiking pants person. I generally just wear one of my favorite pairs of leggings, because that’s what I’m most comfortable in. But this summer I picked up a pair of REI Trailmade Pants and they were nice! The Trailmade Pants are affordable, durable, and surprisingly versatile for hiking and backpacking. And I have to admit it was nice to have a pair of pants that were a bit more airy than leggings.
INSULATED LAYER (Down Jacket) – The Patagonia Fitz Roy Down Jacket is a cold-weather essential I bring on alpine or winter trips when serious warmth is non-negotiable. It’s stuffed with premium 800-fill down, so it’s incredibly warm for its weight. I’d recommend sizing down. But when I’m really trying to go lighter without sacrificing warmth it’s hard to beat Rab’s Mythic G Down Jacket. Best to pick this one up on sale if you can!
RAIN JACKET: The Rab Phantom Jacket is an ultralight, fully waterproof shell that packs down small and disappears in your bag until you need it. I’m a fair weather hiker, but in the mountains weather can change fast, so it’s great to have rain protection that doesn’t weigh me down.
Shoes
TRAIL RUNNERS – The Hoka Challenger Trail Running Shoes is my go-to shoe for warm weather hiking. I prefer trail runners over hiking boots because they’re lighter, more breathable, and dry quickly. I’ve worn mine on everything from day hikes to multi-day trips like the John Muir Trail, and they’ve been incredibly durable for how lightweight they are.
BOOTS – The Danner Inquire Chukka Mid is my favorite hiking boot! I wear it when I want more ankle support than a trail runner but still need something light and flexible. Or when I just want to look cute!
Hiking Gear Essentials
WATER PURIFIER – The Katadyn BeFree is my favorite filter for speed and simplicity. It’s ultralight, easy to squeeze, and perfect for quickly filling bottles on the go.
The Grayl Water Filter is much heavier but unbeatable for international travel or areas with questionable water sources because it removes viruses as well as bacteria and protozoa. It works like a French press—fill, press, and drink—with no need for extra bottles or gear.
HEADLAMP – Nitecore NU25 400 Lumen Rechargeable Headlamp
GPS COMMUNICATION – I carry the Garmin InReach Messenger Plus for peace of mind on backcountry trips — it lets me send texts and share my location even when there’s no service. The battery lasts for days, and it’s a small, reliable way to stay connected and safe when I’m off the grid. AND you can send photos and voice notes! Watch the video I made about the Garmin Messenger Plus! It’s one of my favorites.
SMART WATCH – I’ve been wearing the Garmin Fenix Watch to track my activity for years, and the JMT was no exception.
TREKKING POLES – Durston Iceline Trekking Poles. I just picked up the Durston Iceline Trekking Poles because I wanted something ultralight but sturdy to take pressure off my knees on big hikes. They’re incredibly light (under 10 oz per pair) and I couldn’t be happier with them.
MULTI-TOOL – Swiss Army Classic Knife
FIRST AID – Band-Aids, Leukotape, pain relievers, and antibacterial cream.
POWER BANK – Nitecore Power Bank
Camera
SONY RX100 VII – The Sony RX100 VII is my favorite compact camera for backpacking because it’s small enough to slip in a pocket but still delivers professional-quality photos. The 24–200mm zoom range makes it incredibly versatile, and it’s the perfect option when I don’t want to carry one of my heavier cameras but still care about image quality.
The Best Hikes in Lofoten
1. Reinebringen Hike
Distance: 2.2 km / 1.4 miles RT (1978 steps)
Elevation Gain: 448 m
Difficulty: Moderate
Time: 2-4 hours
Starting Point: The trailhead is conveniently located in the charming fishing village of Reine.
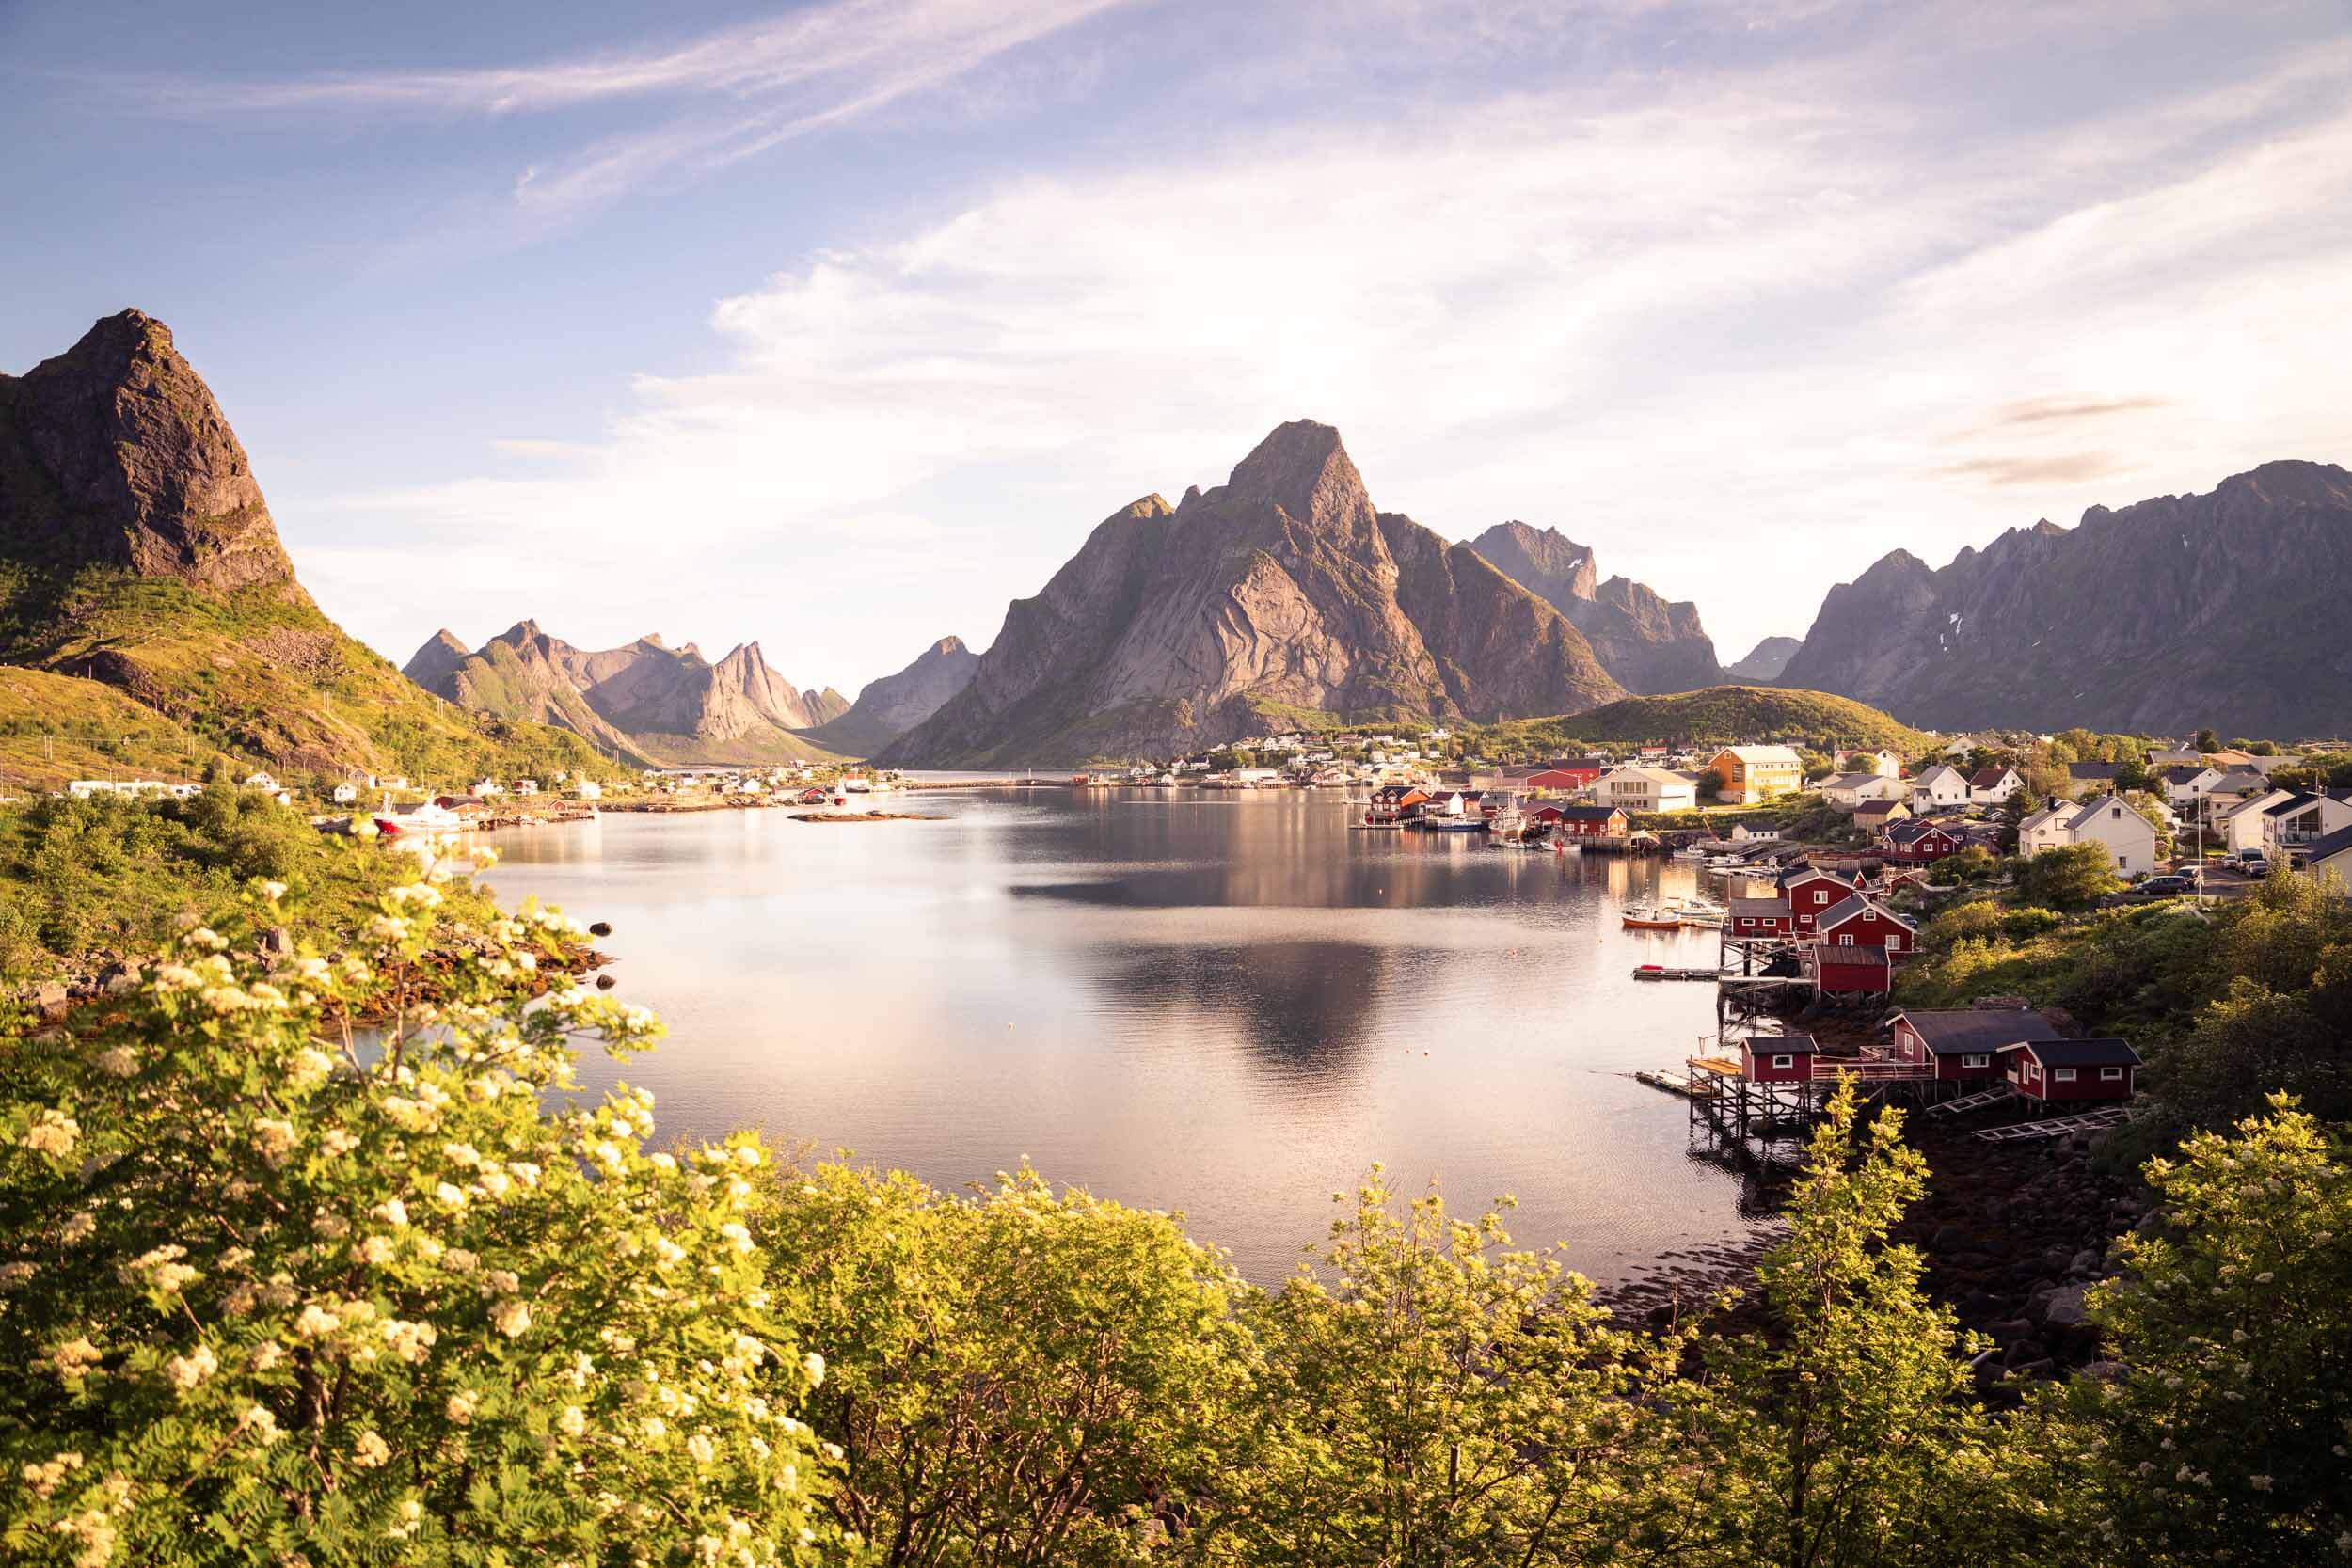
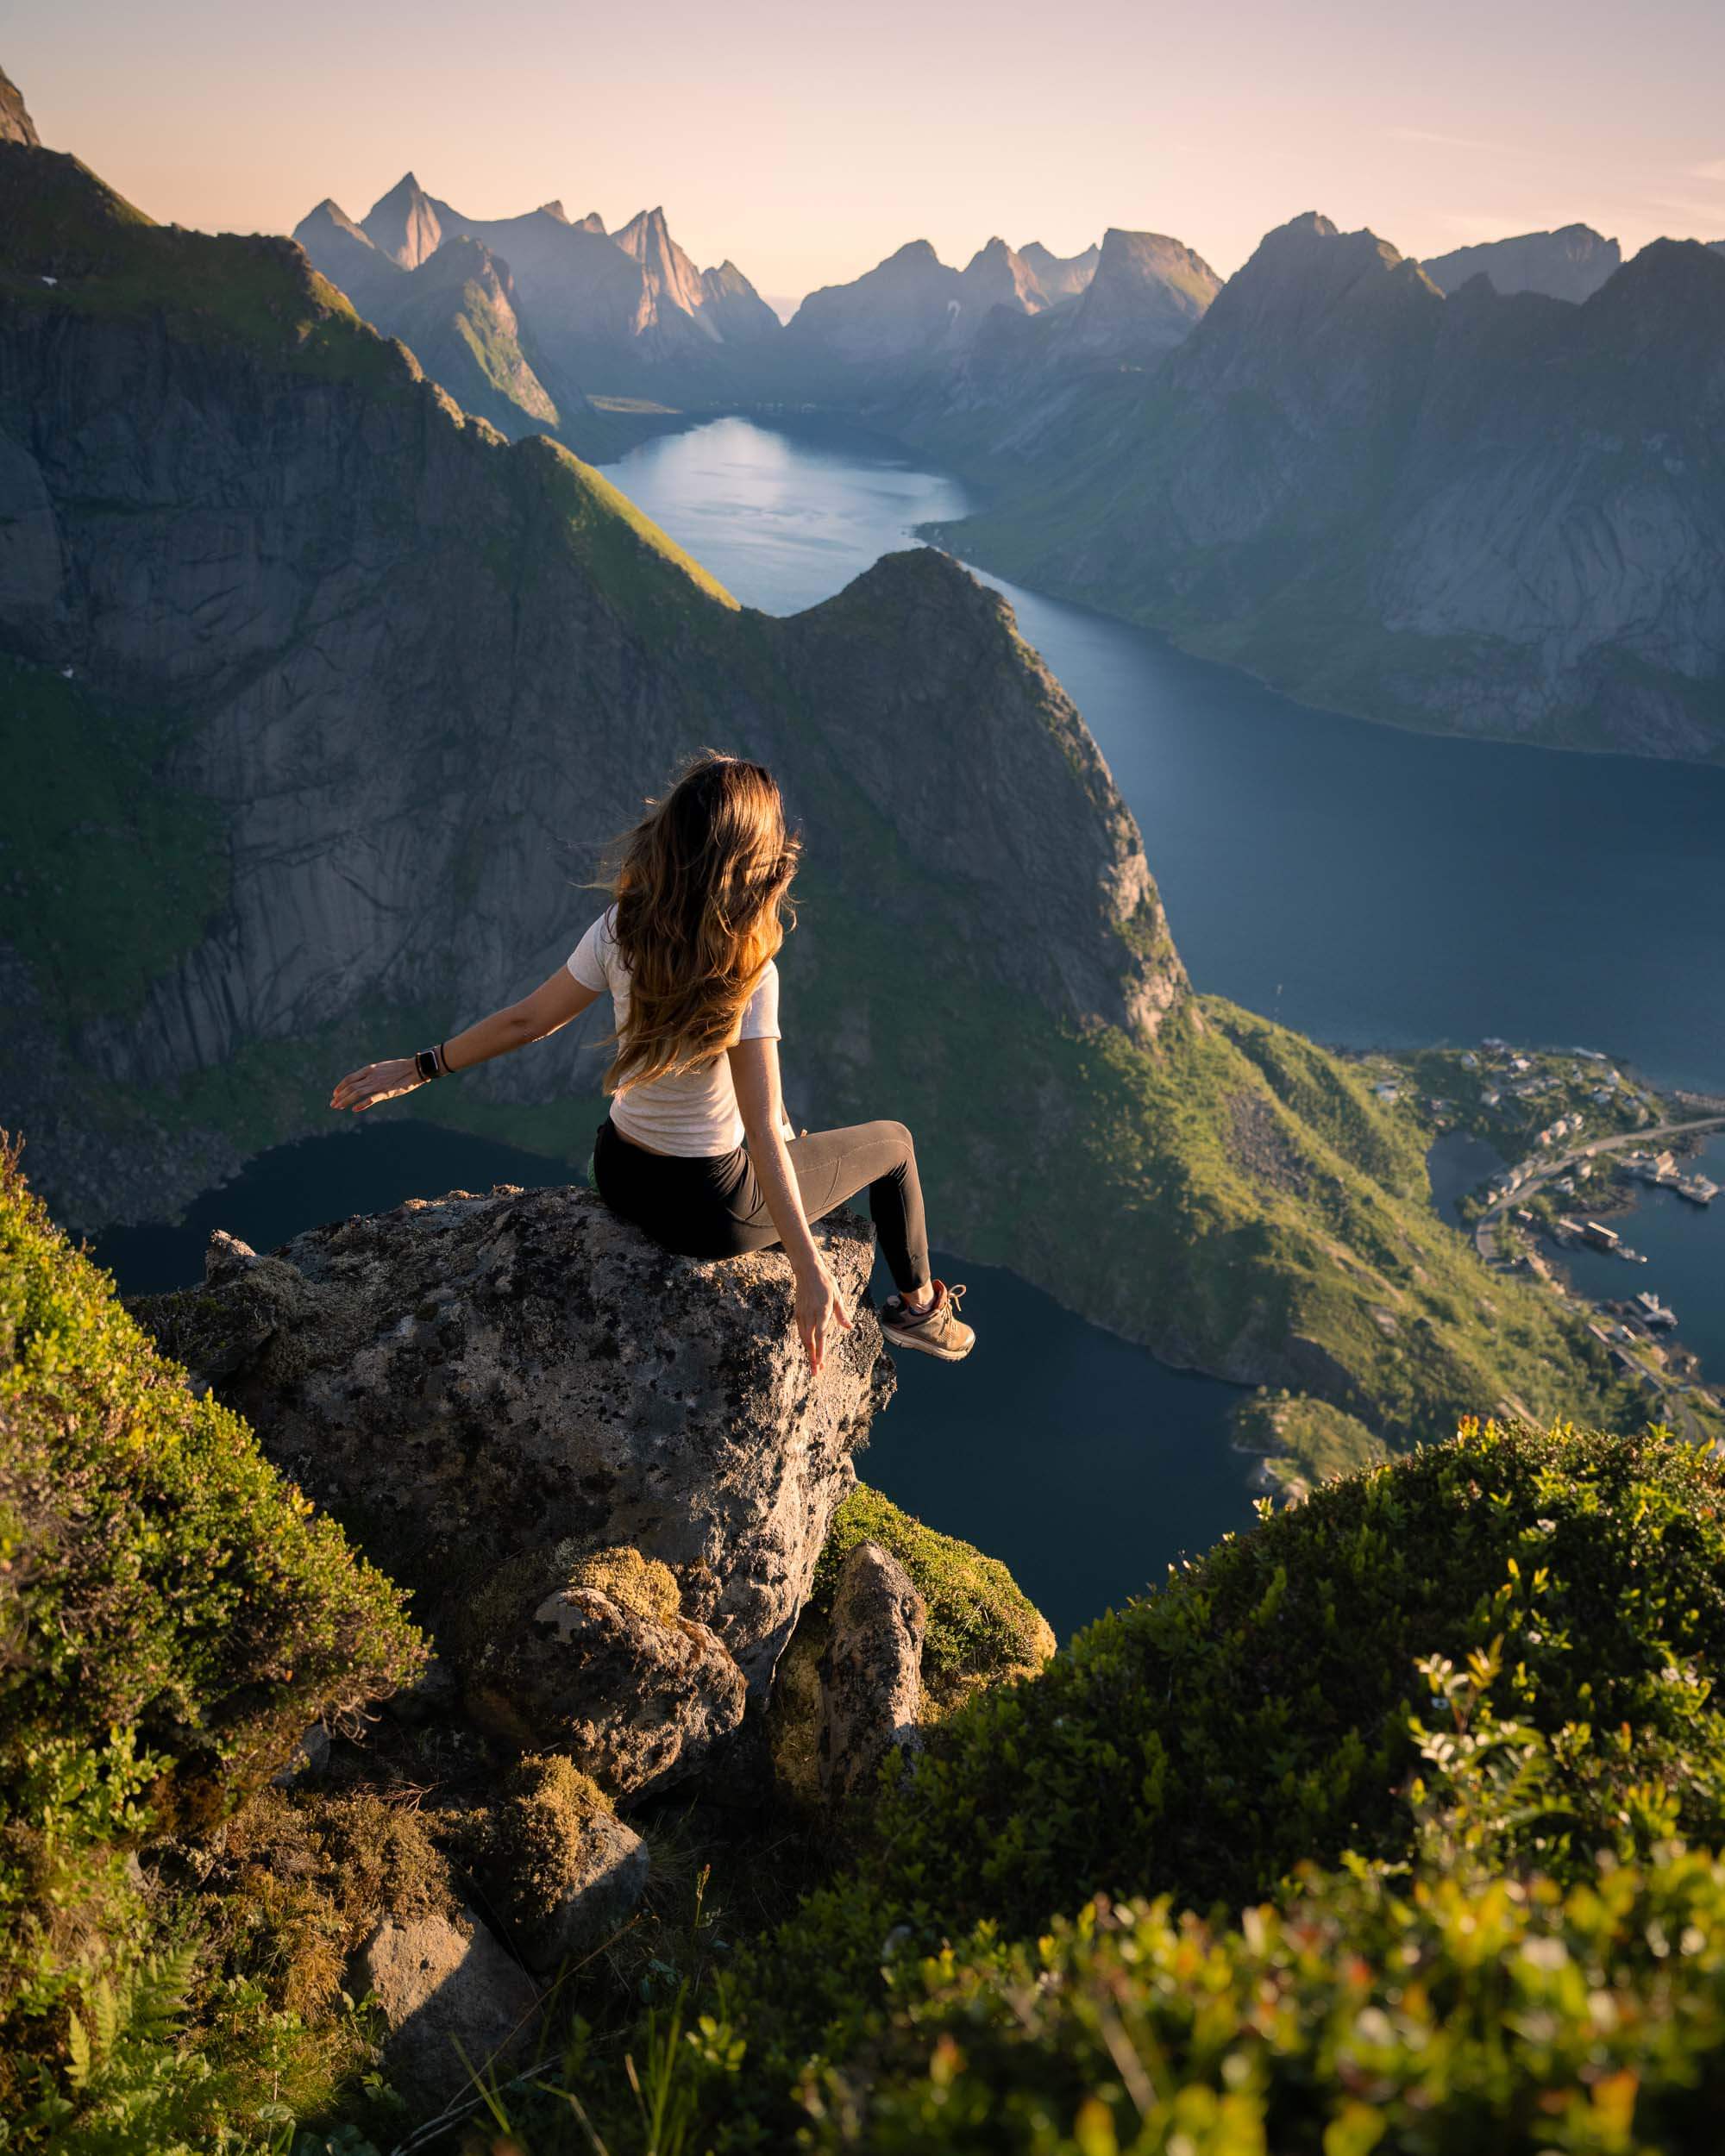
Reinebringen is arguably the most iconic hike in the stunning archipelago of Lofoten, Norway. It was also the first hike that Quin and I completed on our trip.
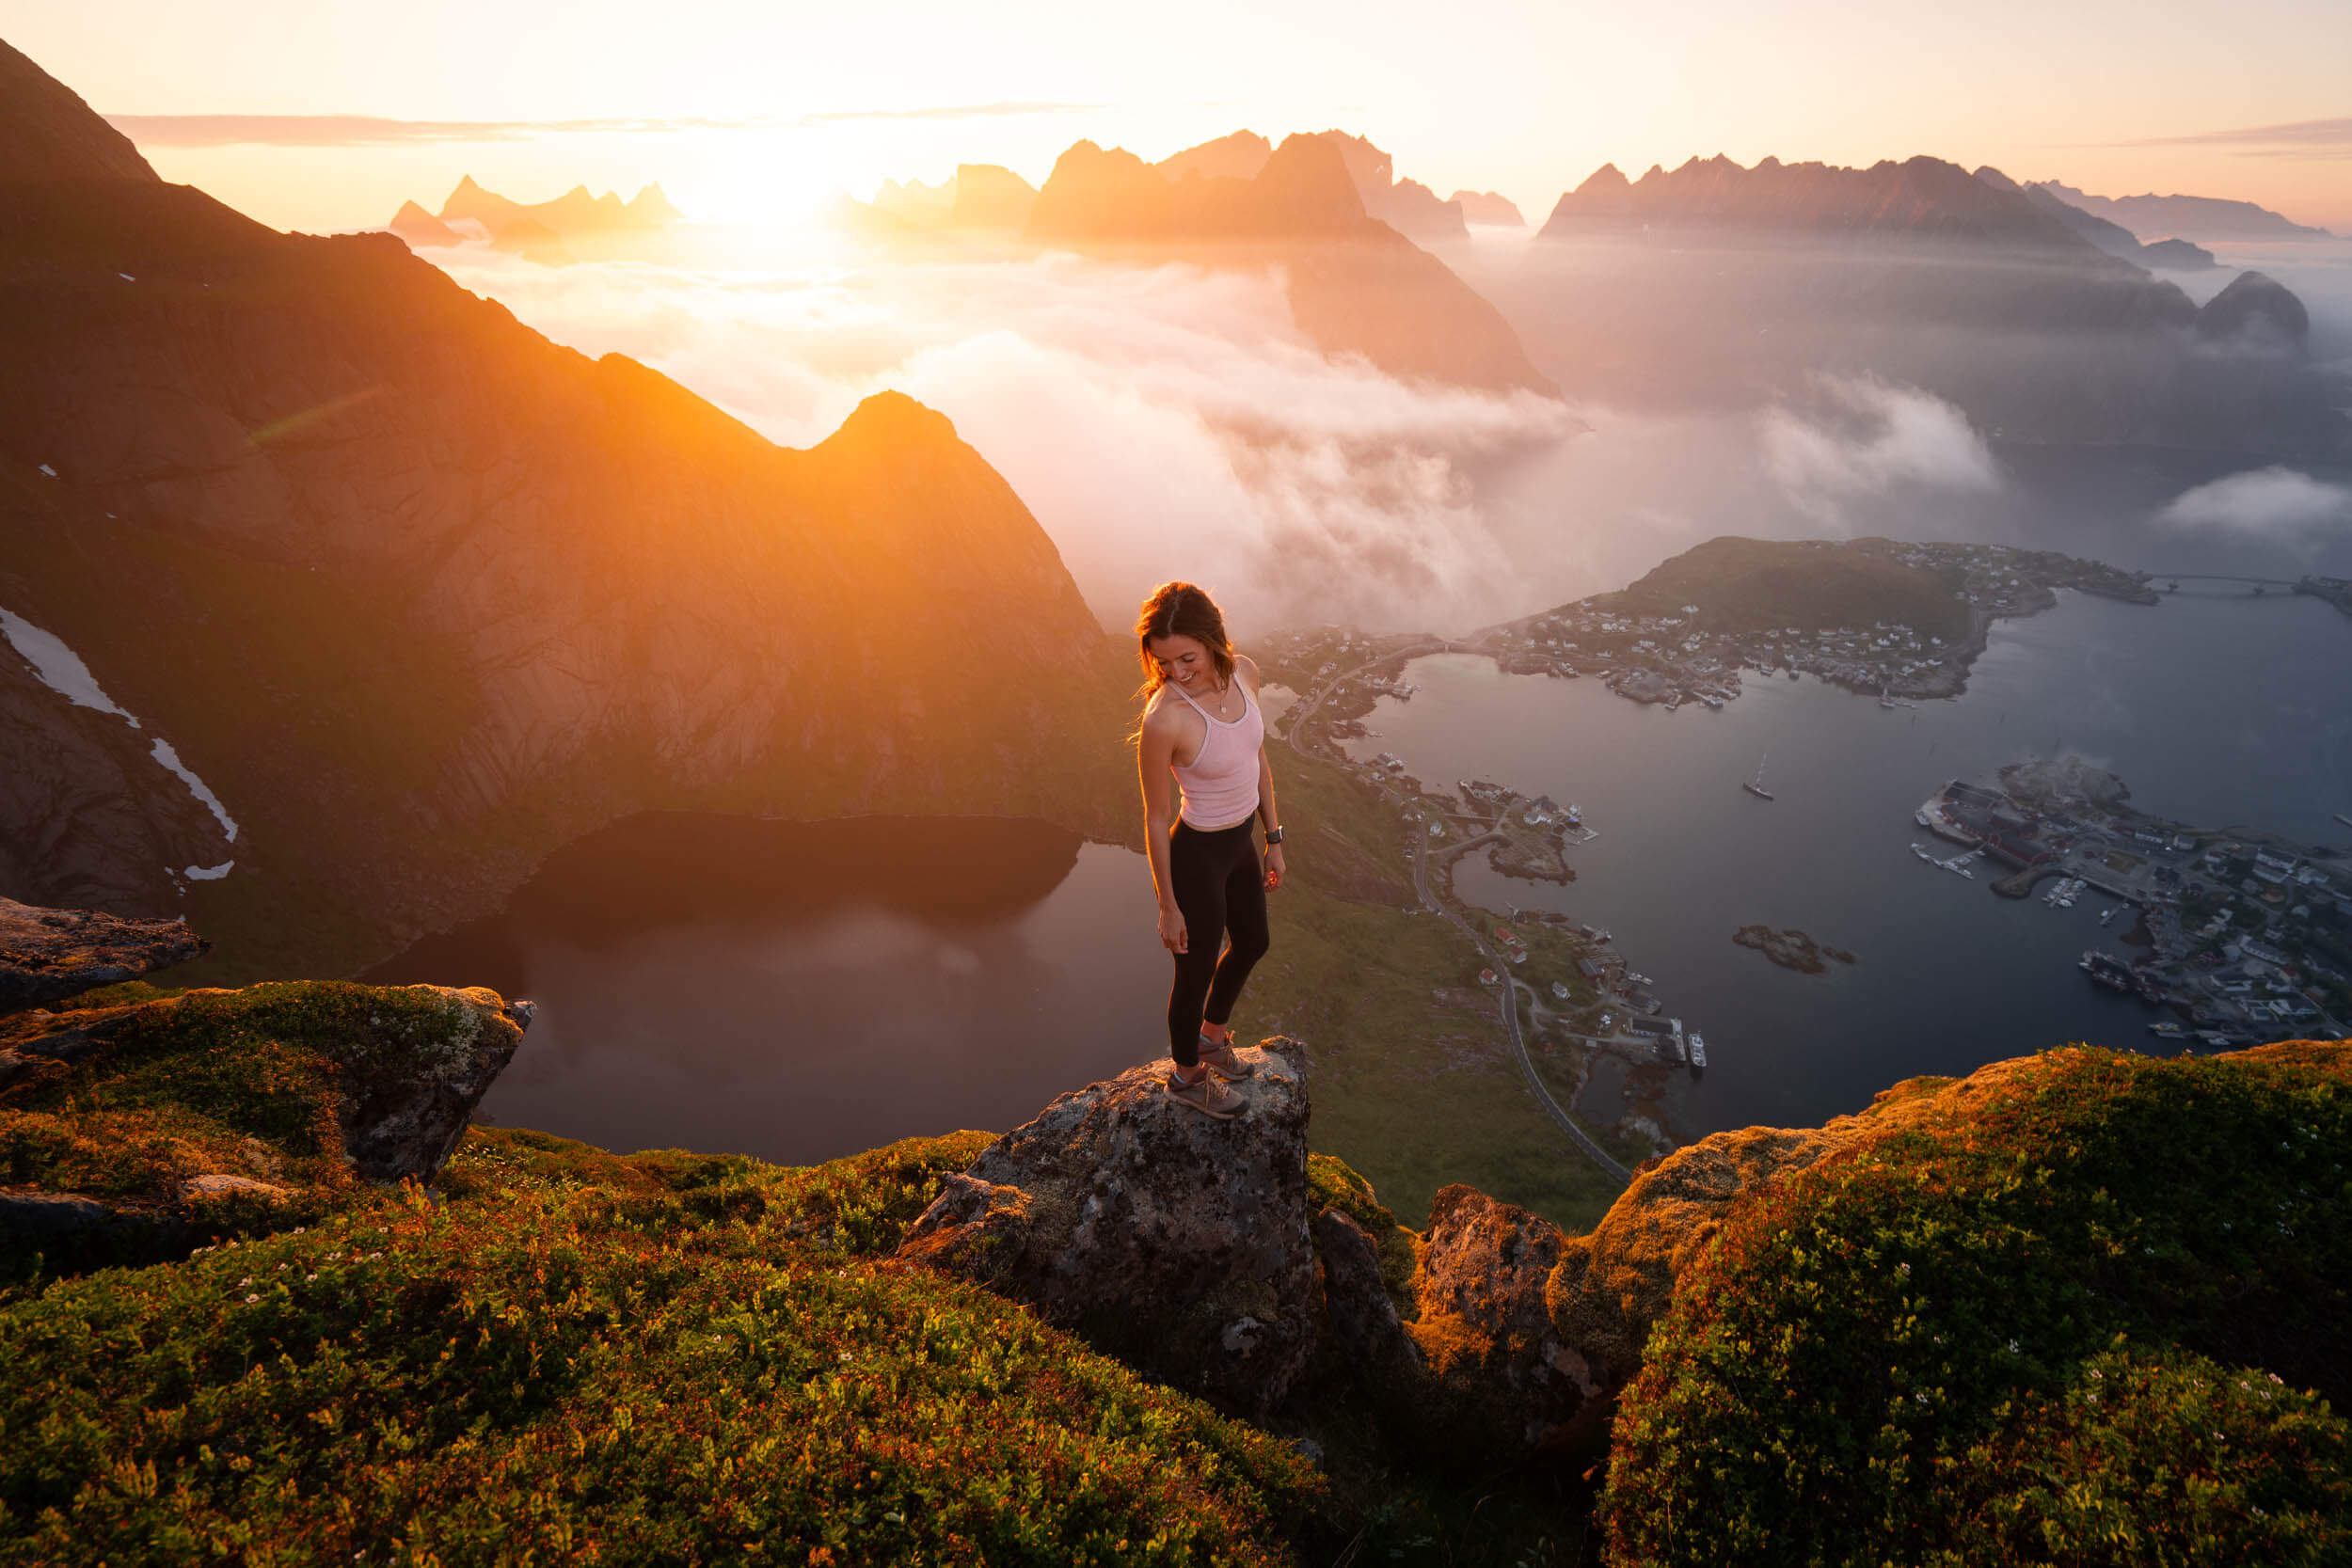
We flew into Leknes on a stormy afternoon and drove directly to our AirBnb in Reine. By the time we arrived, it was almost 1 am, but it was also clear outside, and despite our exhaustion, we decided to take advantage of the midnight sun and clear skies to do one of the best Lofoten hikes!
Our Airbnb was located right across from the Reine visitor center, so we walked the official Reinebringen trailhead from there. From town, the official start of the trail is a little under a mile and takes about 20 minutes. There honestly wasn’t any parking much closer than that, so expect to tack on a couple extra easy miles onto your Reinebringen hike.
From the trailhead, you’ll climb 1978 stairs straight up the side of Reinebringen. The stairs were put in between 2016 and 2020 to help cut down on erosion and make the trail safer to hike. While the sheer number of stairs might sound daunting, they actually made the hike exponentially easier. No tripping, no slipping, no mud – just one solid footstep after another.
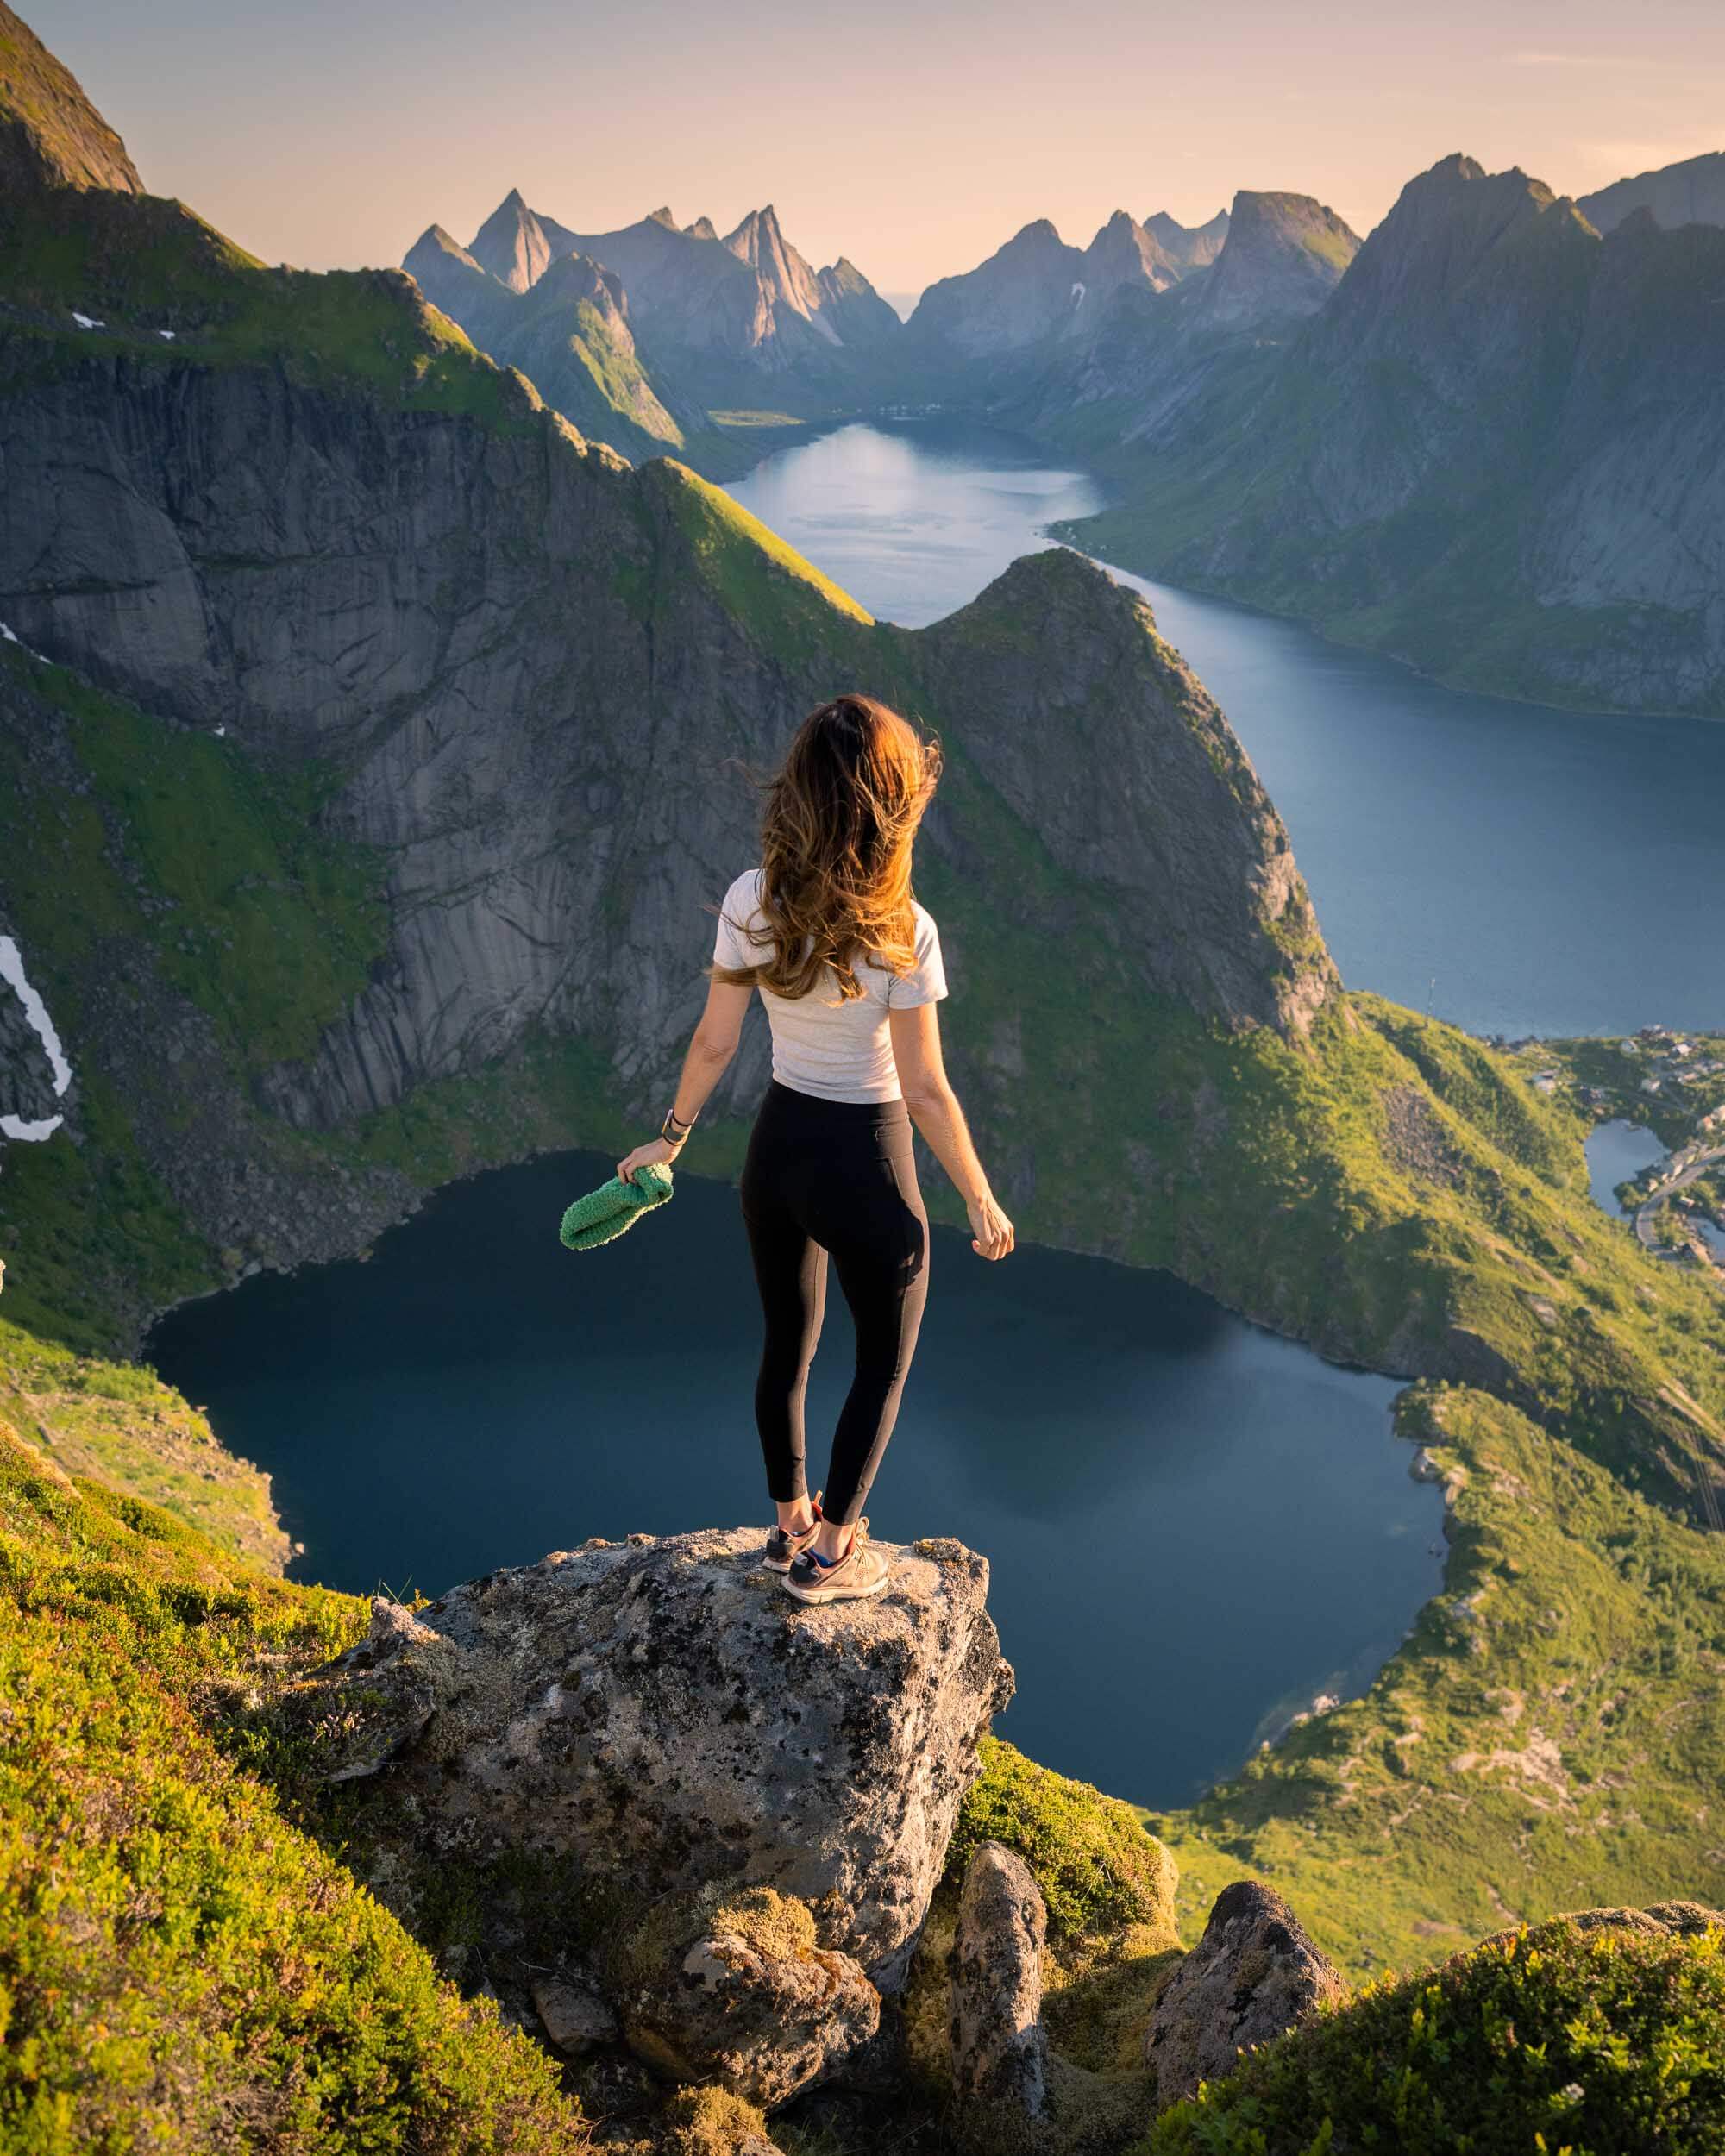
Because the trail runs up the backside of Reinebringen, its now famous view is hidden until the very last moment. But as soon as you clear the ridge, the full impact of the panorama is sure to take your breath away – if you have any left after those stairs!
The sight of emerald mountains cradling serene fjords and the picturesque fishing village of Reine far below is better than any postcard you may have seen leading up to this point. And as my eyes wandered across the sparkling Norwegian Sea, I couldn’t help but feel a deep sense of connection with the beauty of Lofoten.
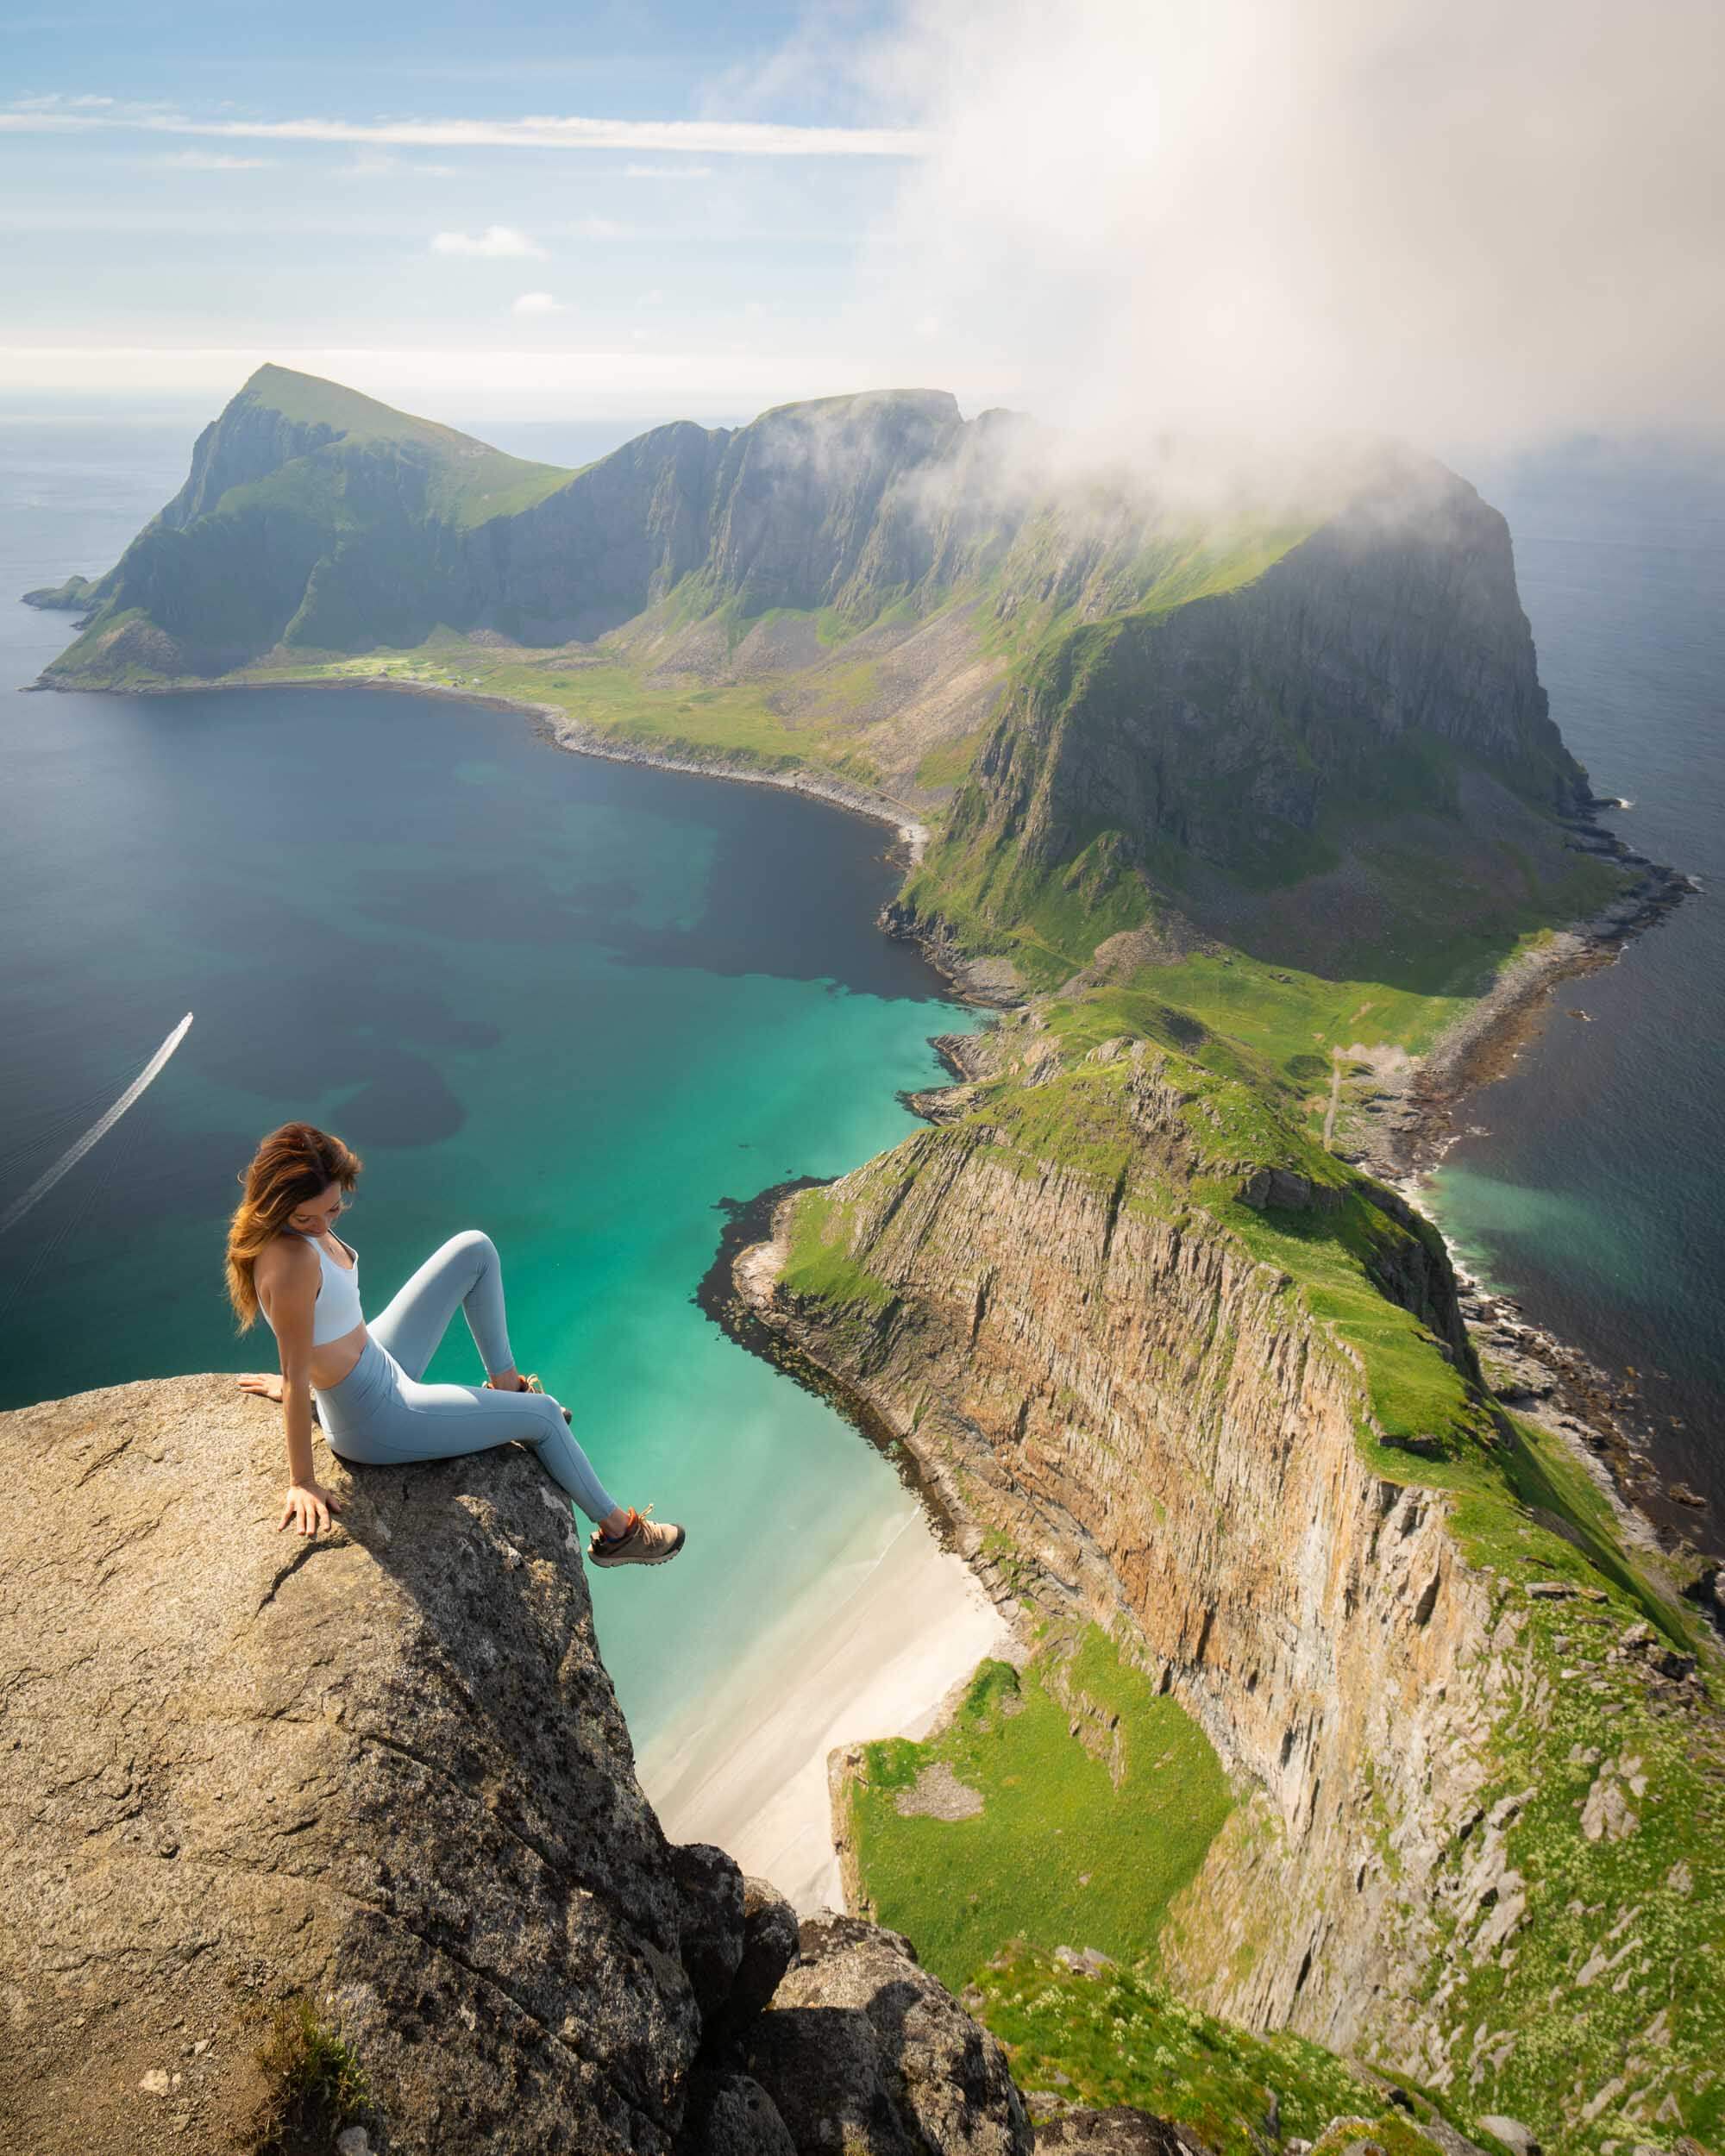
2. Håen (Håheia)
Distance: 6.4km / 4 miles RT
Elevation Gain: 4380m
Difficulty: Moderate
Time: 4-6 hours
Starting point: Take the ferry from Reine to Værøy Island. The parking for Håen is located in the top of the valley north of the main village of Sorland.
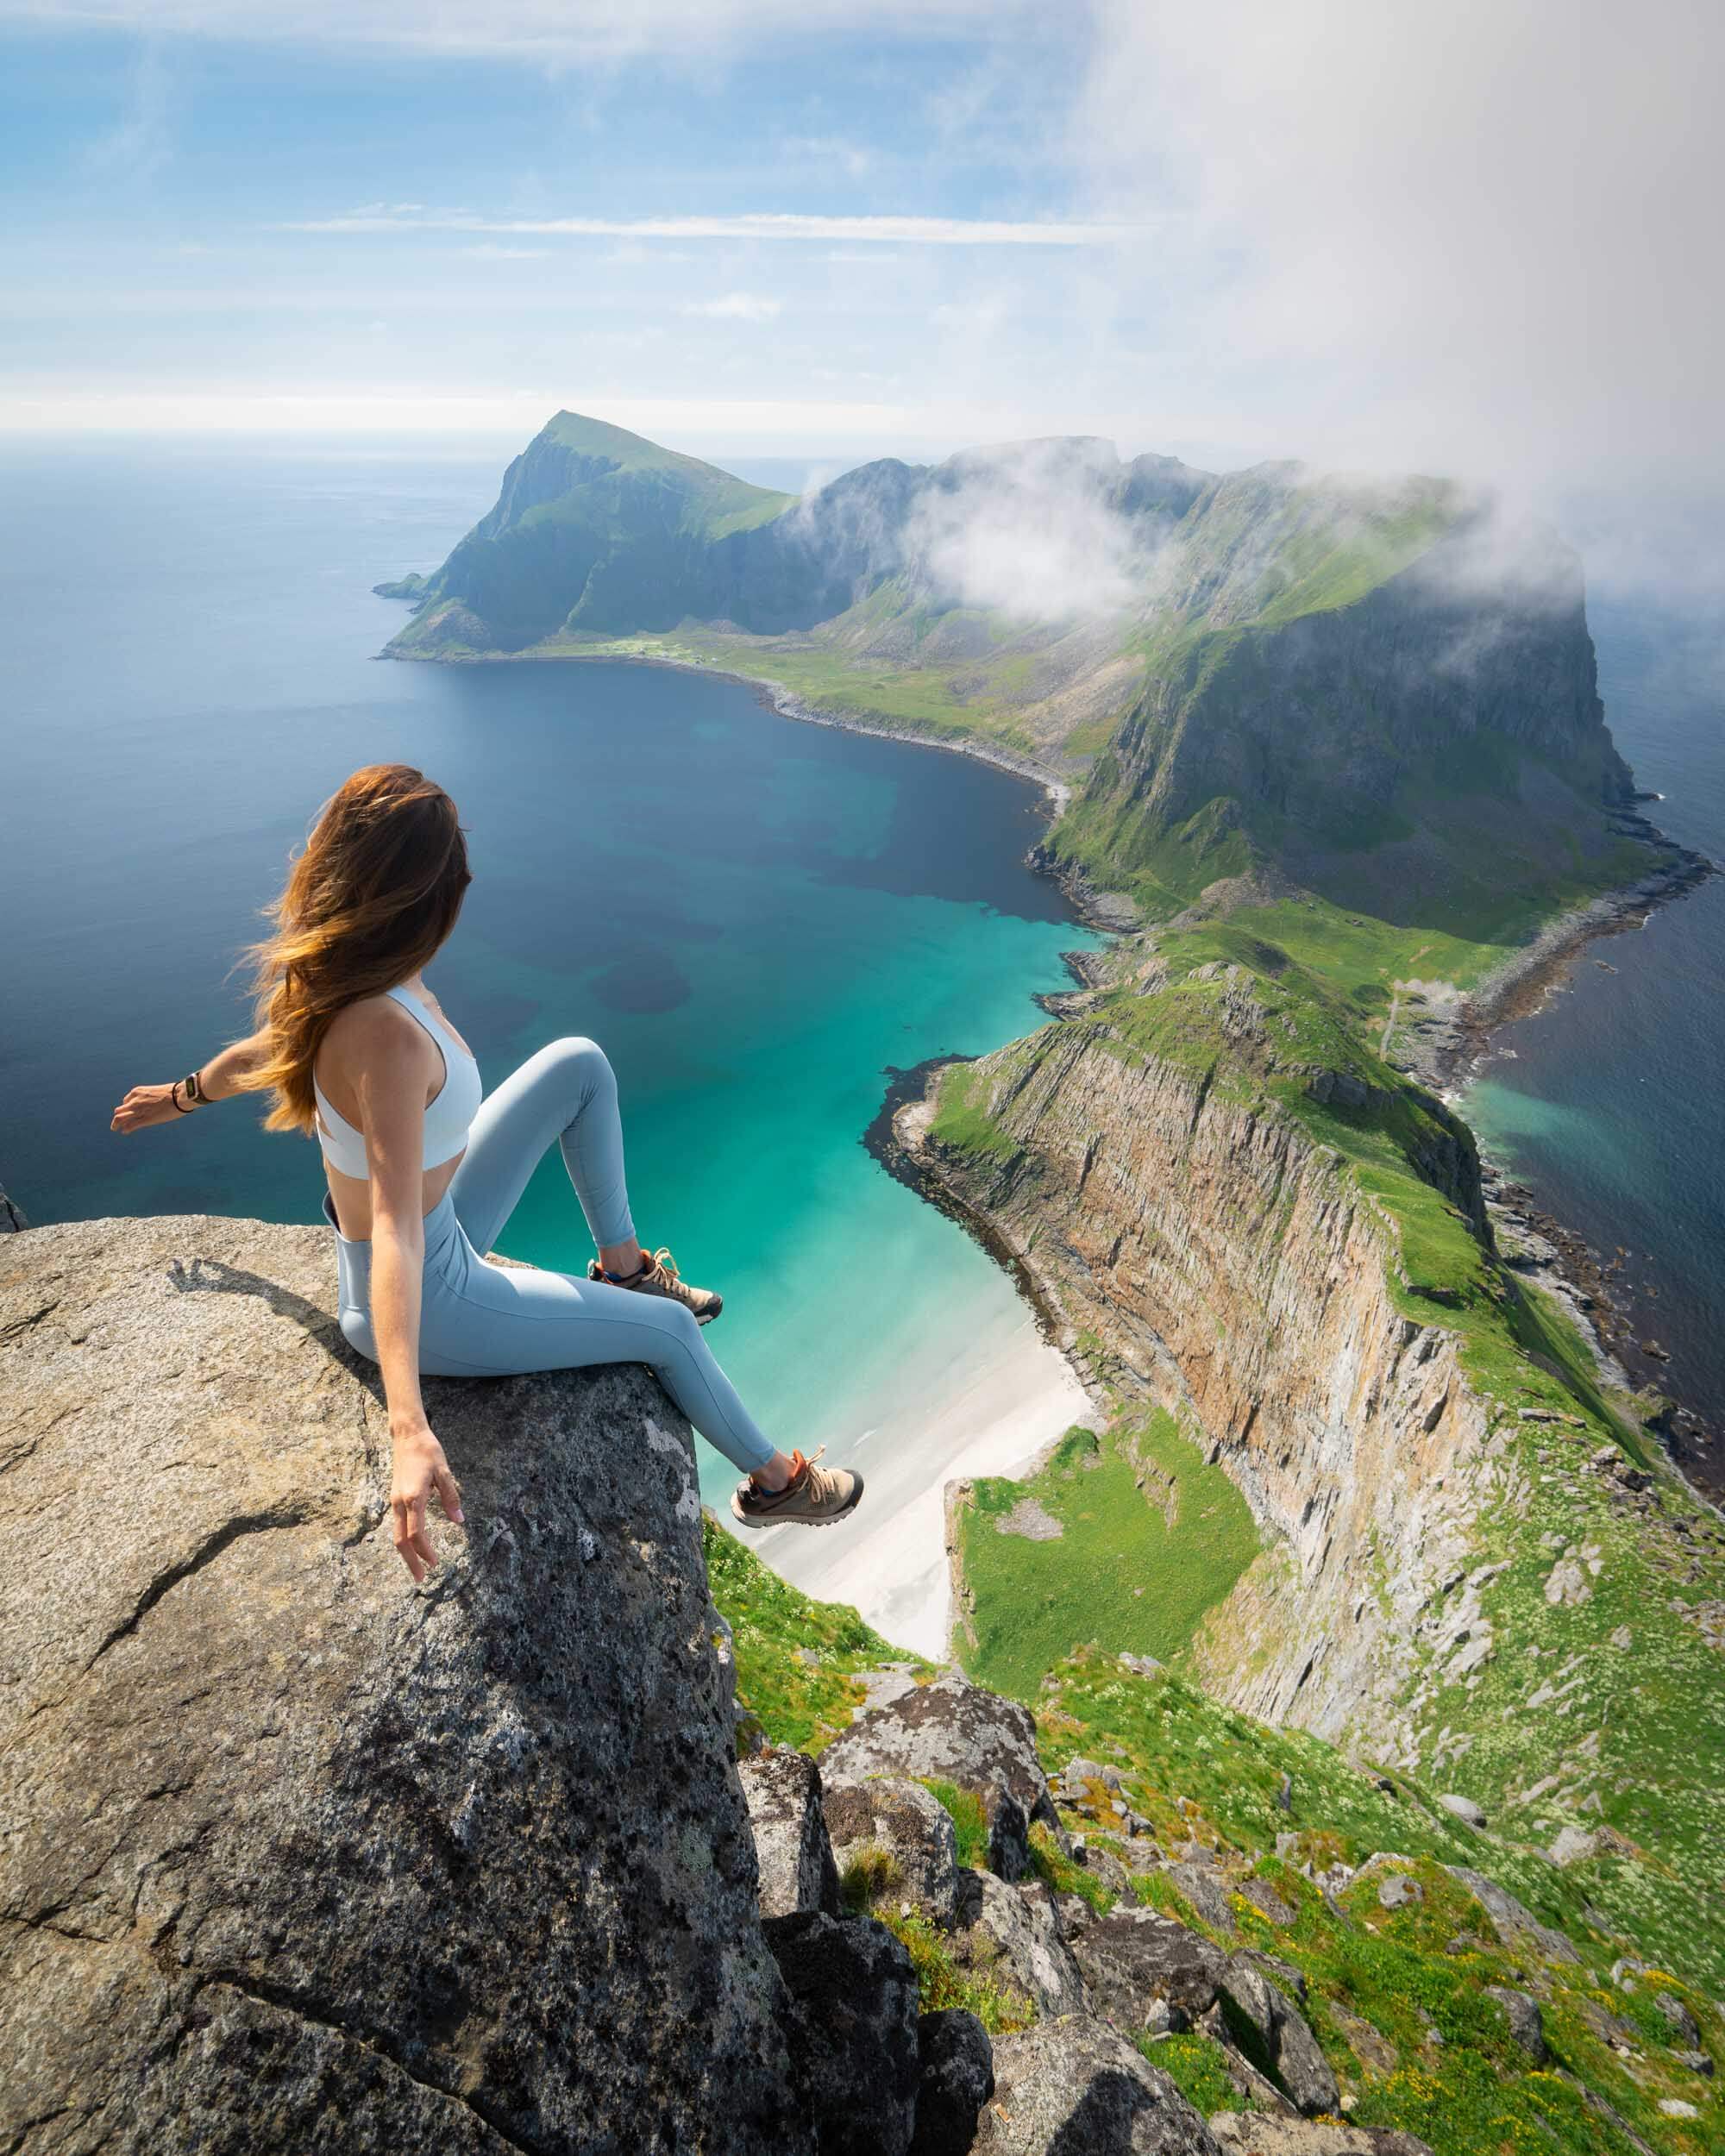
Hiking Haen was a bucket list hike in Lofoten for us and it’s definitely a hidden gem – thanks in part to the tricky way to get there – by ferry. The ferry itself isn’t the tricky part, but the ferry schedule means there’s one sailing in the morning to Værøy Island, and the return ferry doesn’t leave until after 9 pm, depending on the time of year.
We discovered that our return ferry wasn’t until 10.45 pm, but this was no problem – it gave us plenty of time (and daylight hours!) to complete this hike and explore more places on the stunning island of Værøy.
We took our rental car over to the island so that we would be able to explore after the hike. A large portion of the hike is actually along a paved road, but there’s still quite a bit of elevation gain over a short distance, similar to many of the other hikes we did in Lofoten.

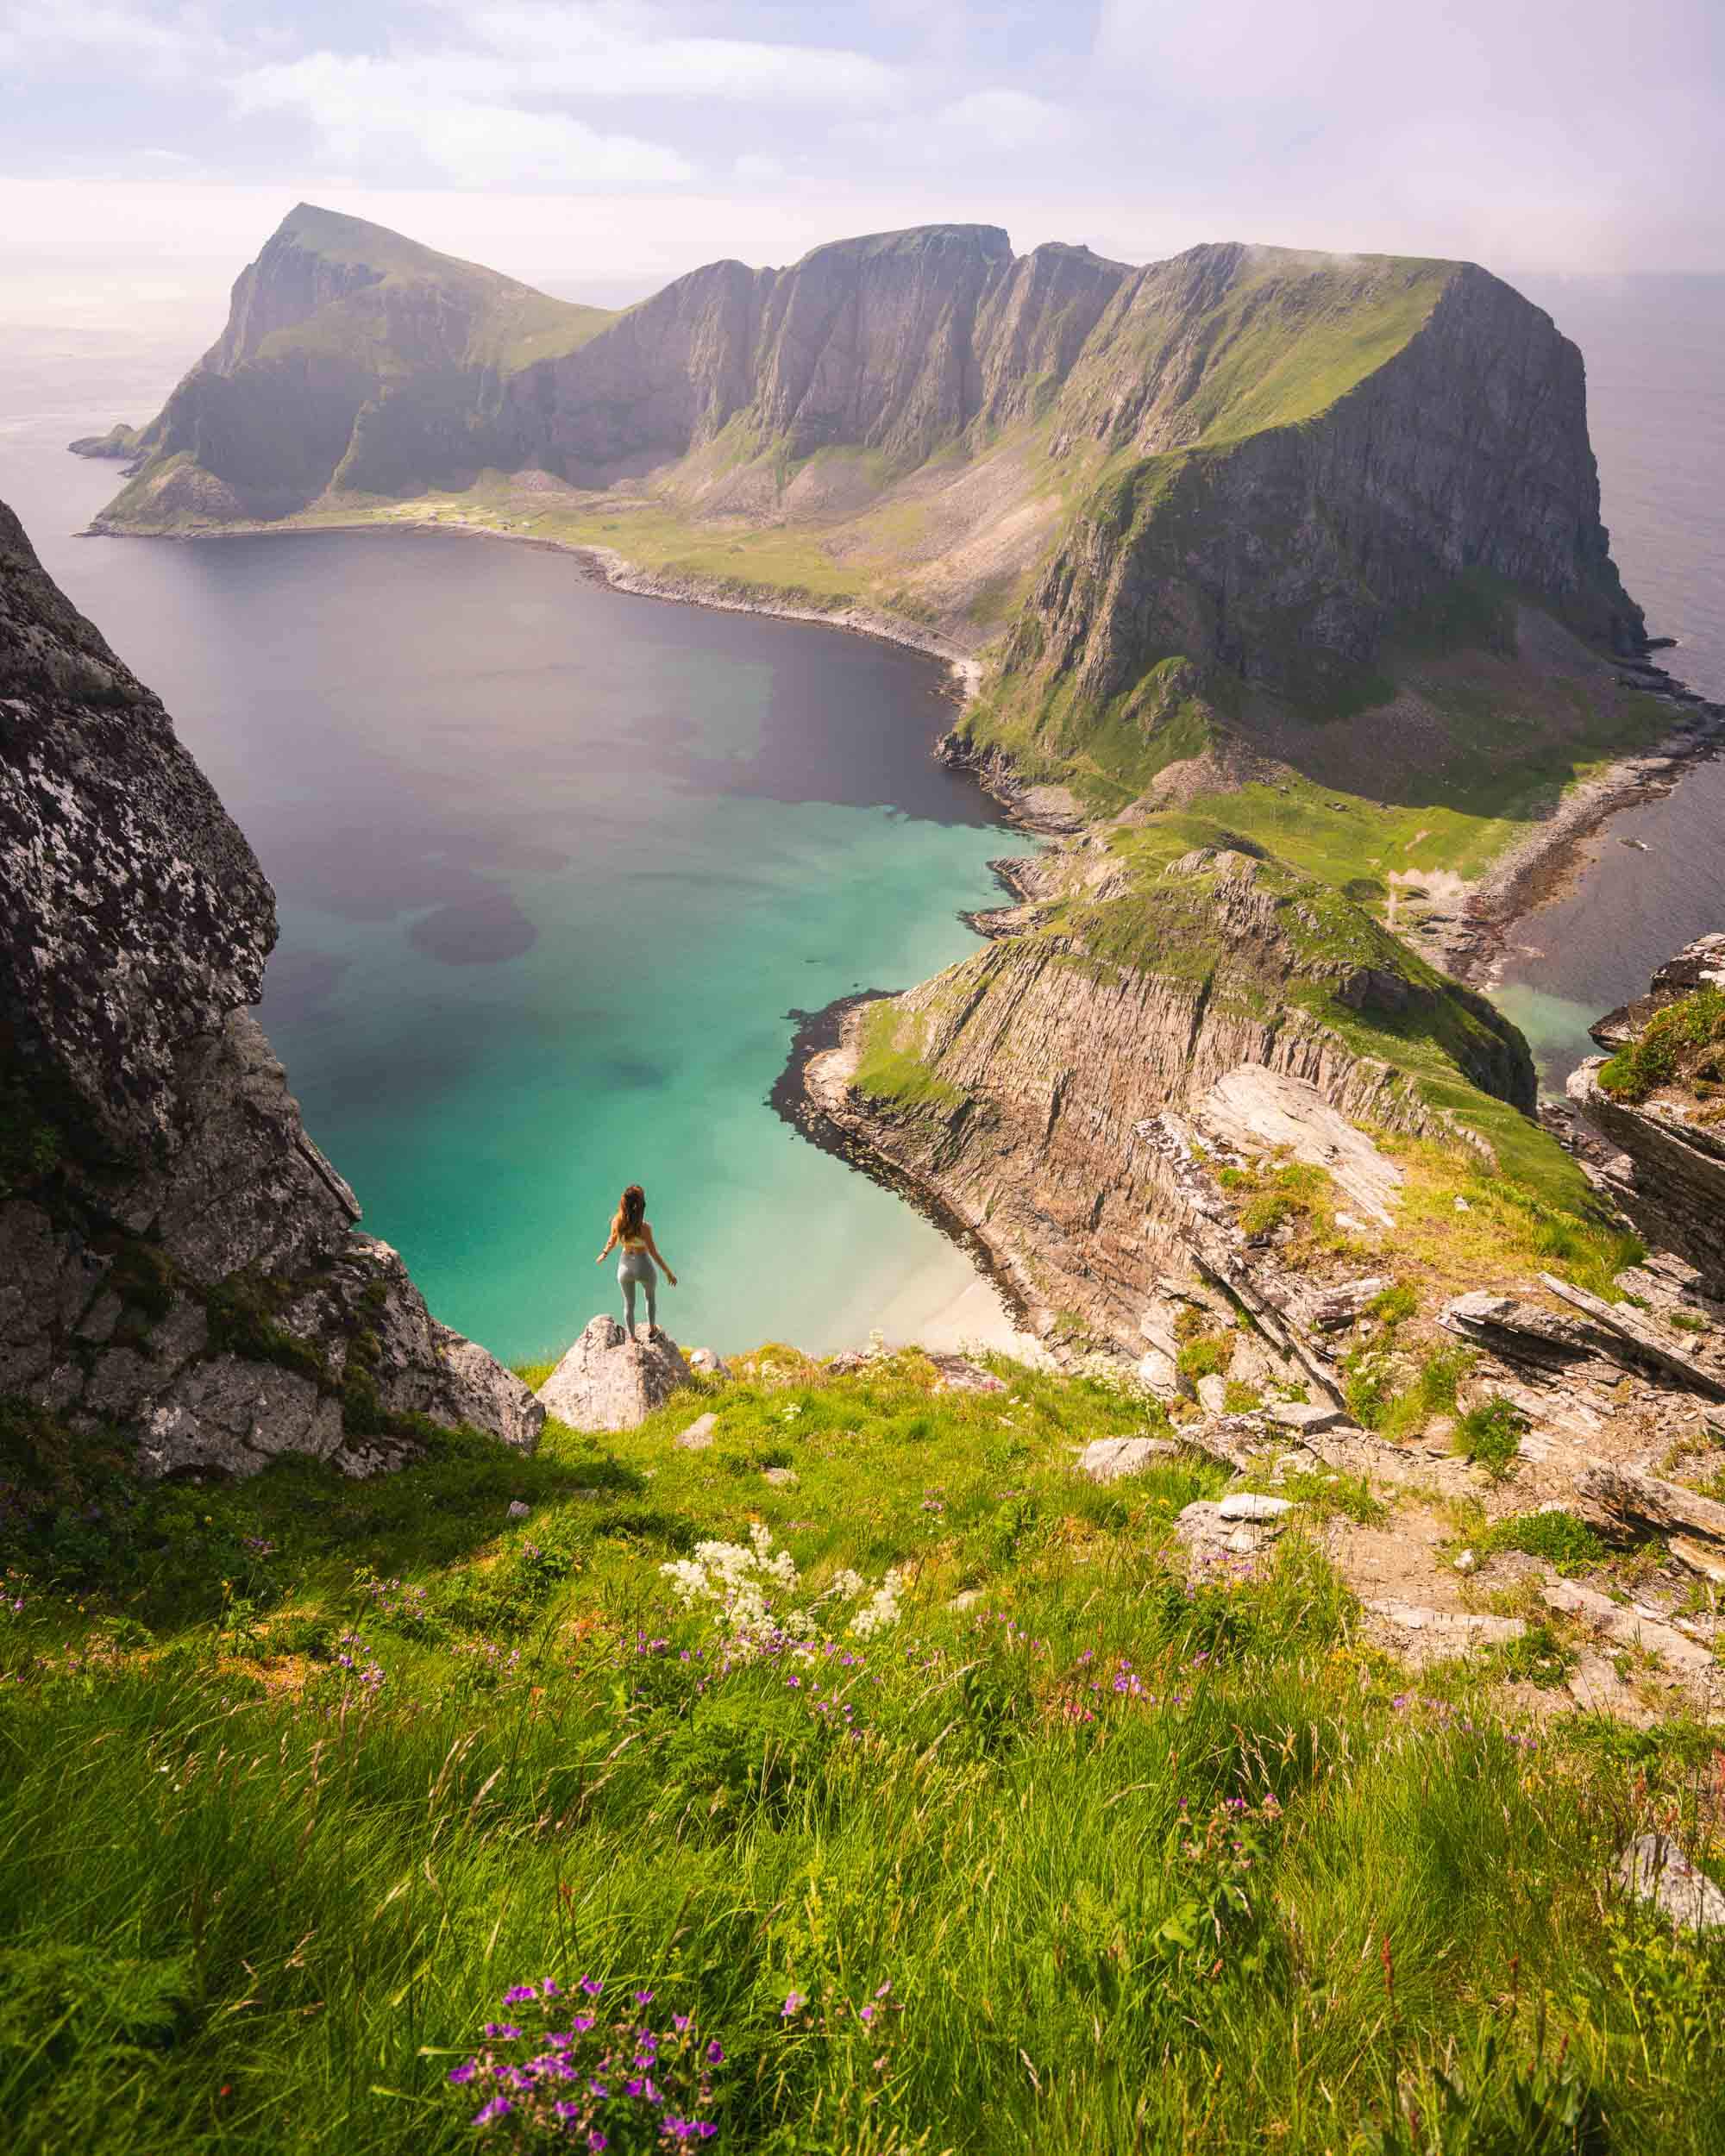
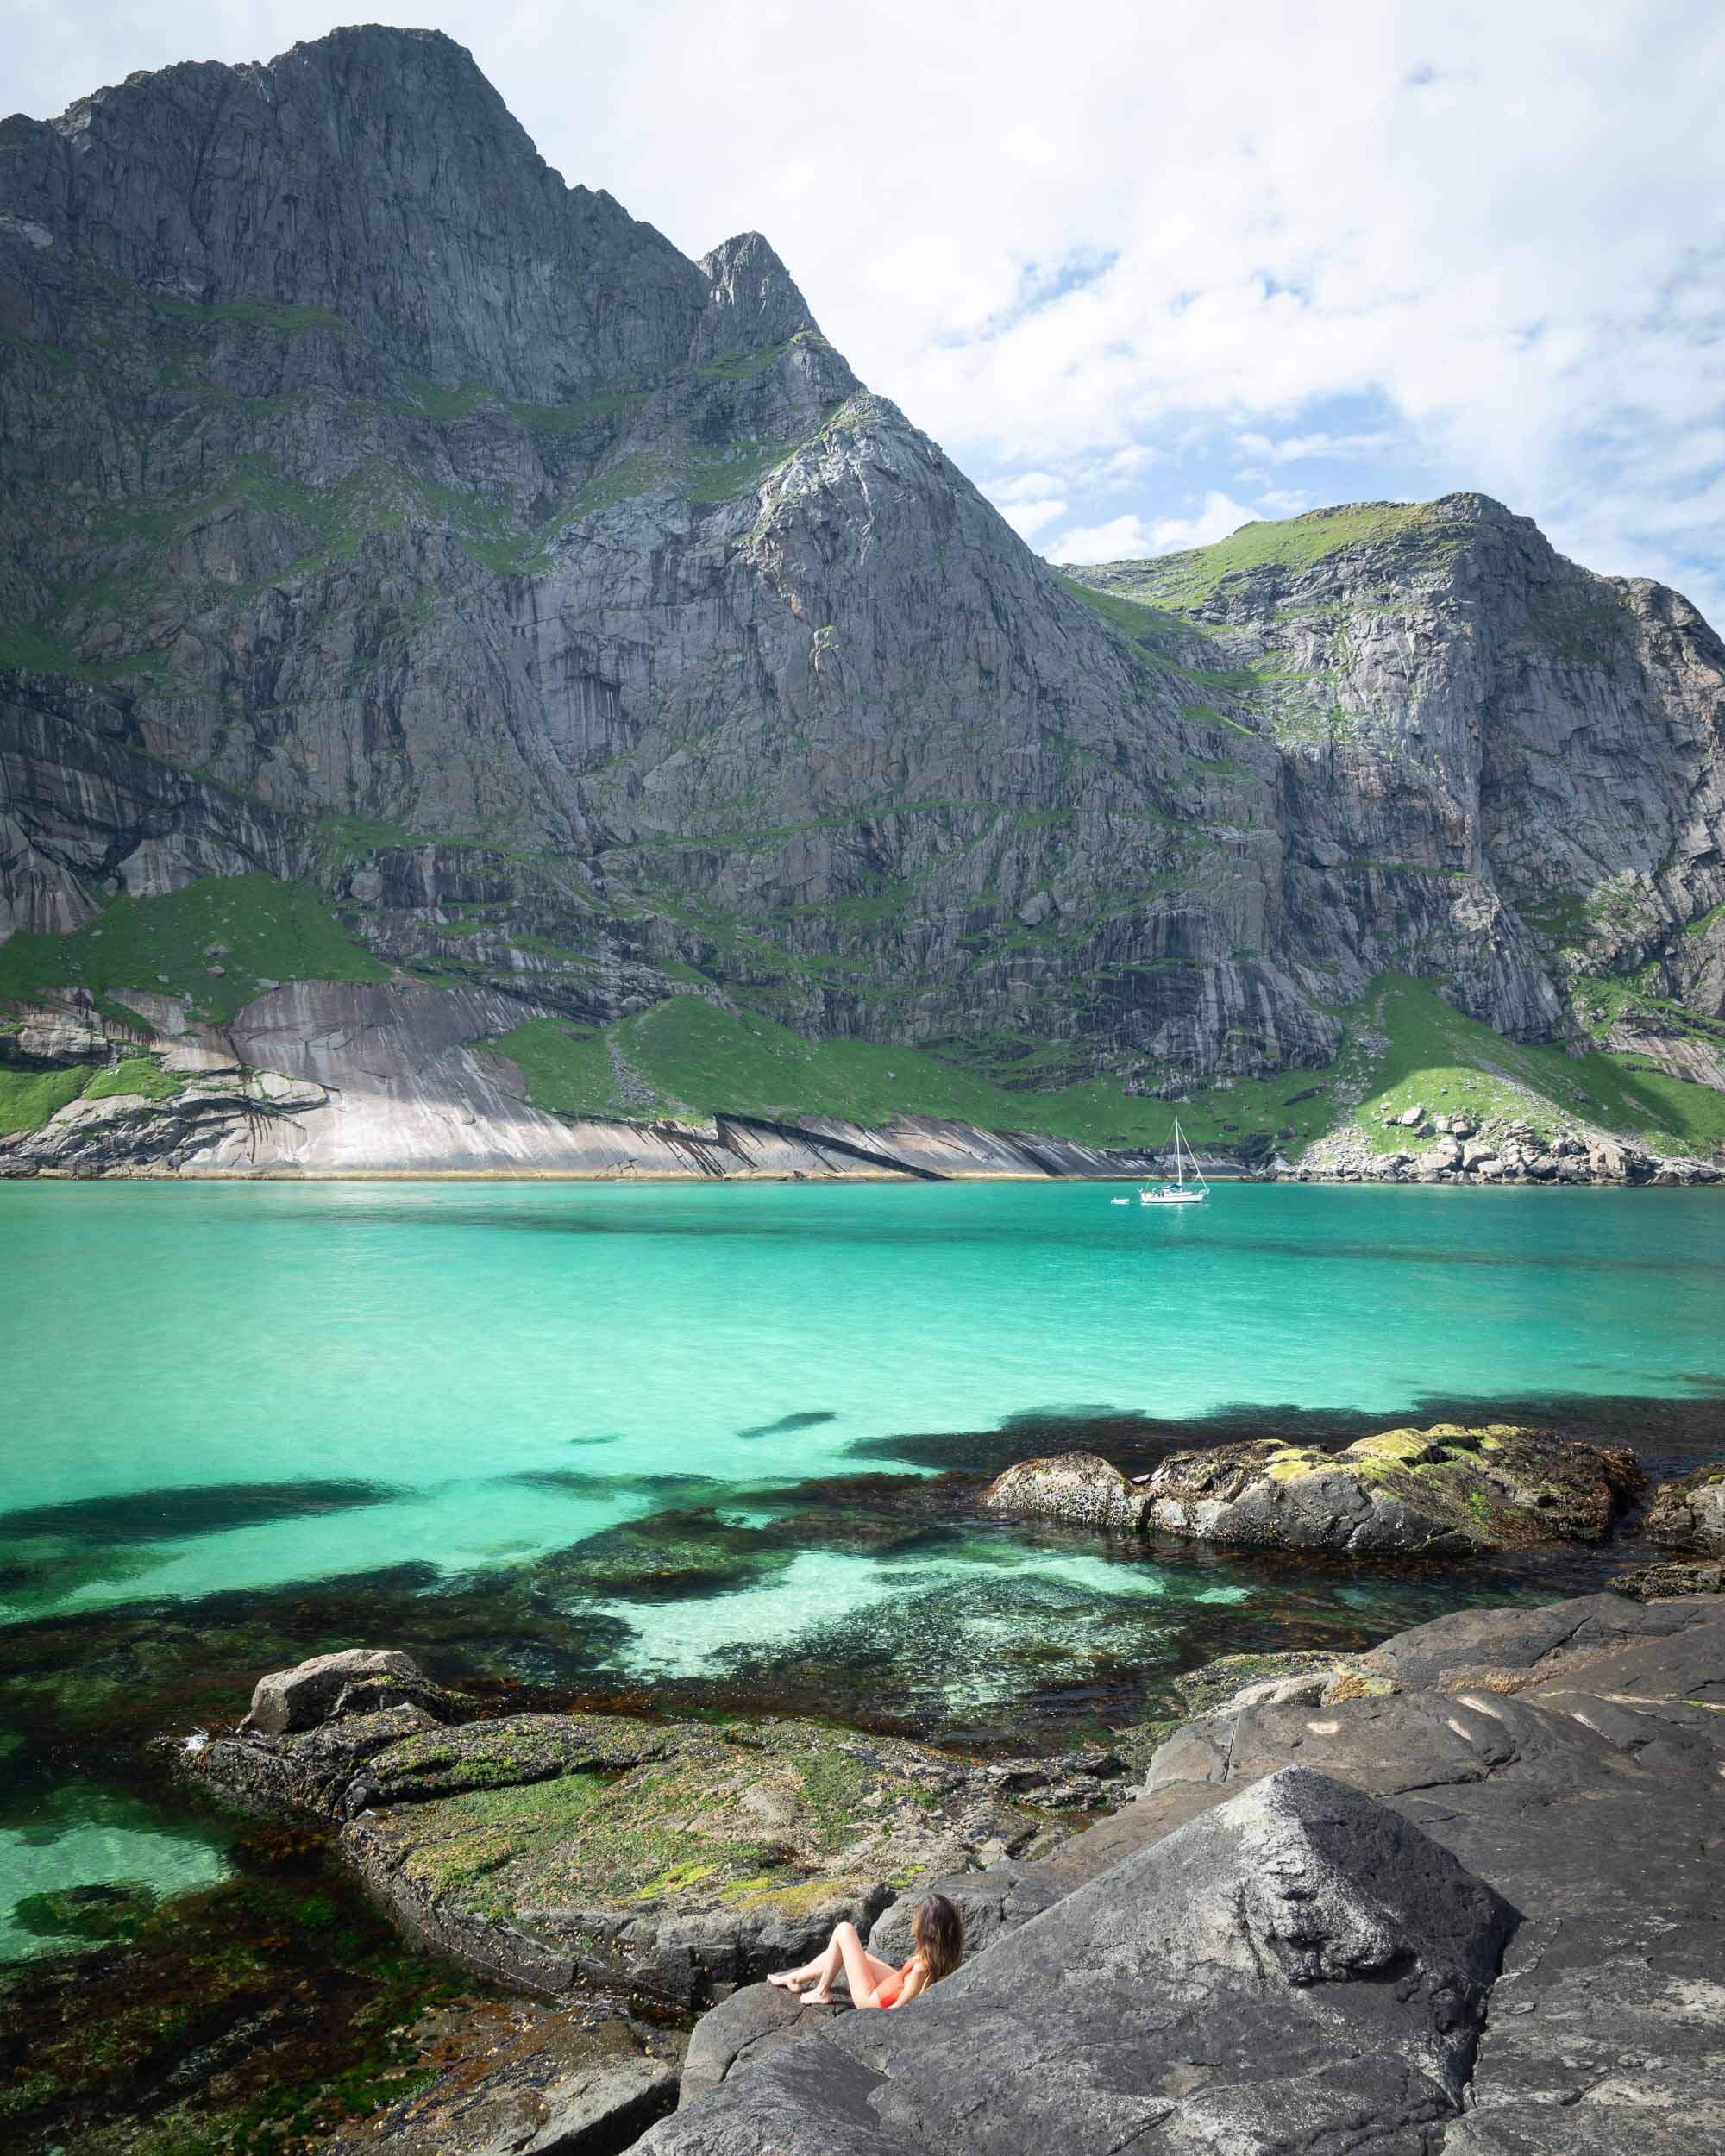
But the views from the top are totally worth it. A narrow, emerald-colored piece of land snakes into the distance, surrounded by vivid blue sea as mist and cloud roll over the peaks.
We hung out at the top for a while just to watch the constantly changing colors and landscape while we admired the azure blue waters and white sandy beaches below.
Since we had several more hours to kill (basically an entire day), before our ferry home, we hiked back down and took the chance to visit some of those stunning beaches we had spotted from the summit.
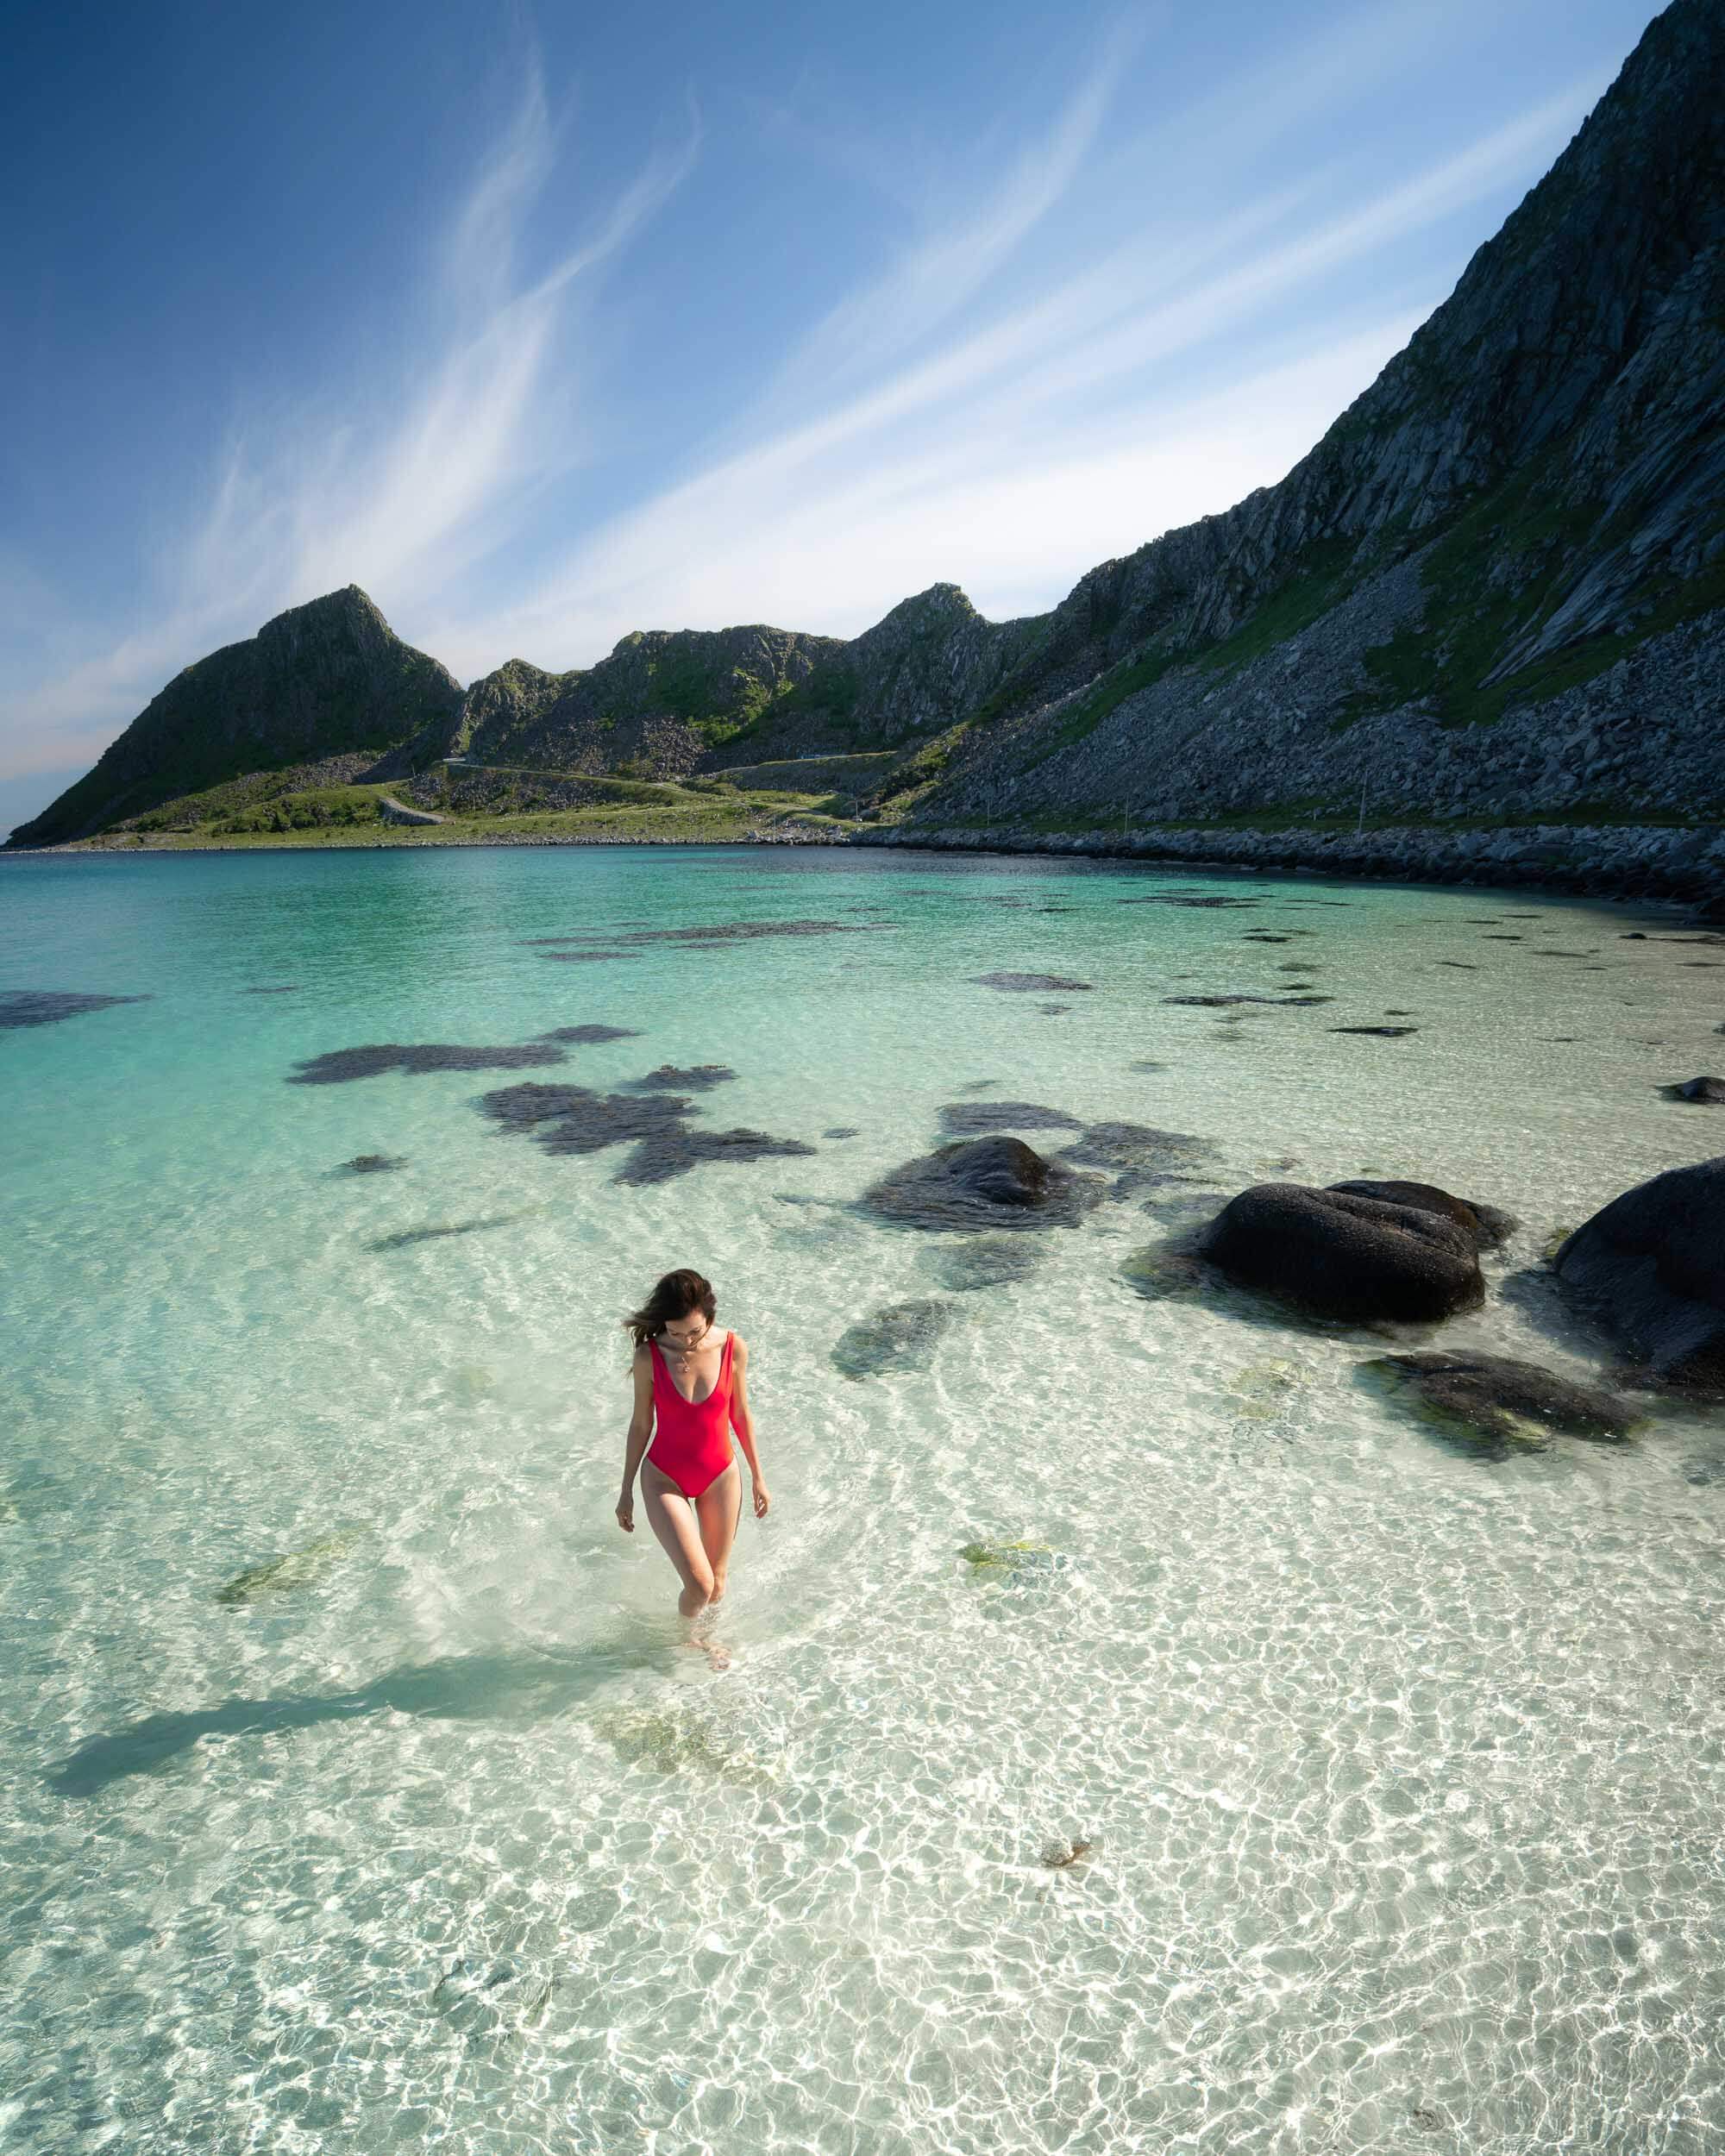
Nordlandshagen Beach is the perfect spot for cooling off after you hike, with luminescent blue water – don’t forget your swimsuit! But if you do and end up going for a skinny dip, no worries! No one in Norway will look twice!
3. Ryten
Distance: 7.5 km / 4.7 miles RT
Elevation Gain: 600 m
Difficulty: Moderately Difficult
Time: 3-5 hours
Starting Point: The trail to Ryten starts from the village of Kvalvika. We parked at the Fredvang parking lot for 100 NOK.
If there’s one viewpoint in Lofoten almost as famous as Reinebringen, it would have to be the view from Ryten’s summit. The Ryten hike in the Lofoten Islands is one of the most famous Lofoten hiking trails: a quintessential adventure, encompassing all the elements that make this region a hiker’s paradise.
With sweeping vistas that stretch across epic mountains and serene fjords, it offers a visual feast that’s simply awe-inspiring. The hike itself strikes the perfect balance of enjoyable challenge, making it both fun and slightly strenuous as you ascend towards the mountain peak.
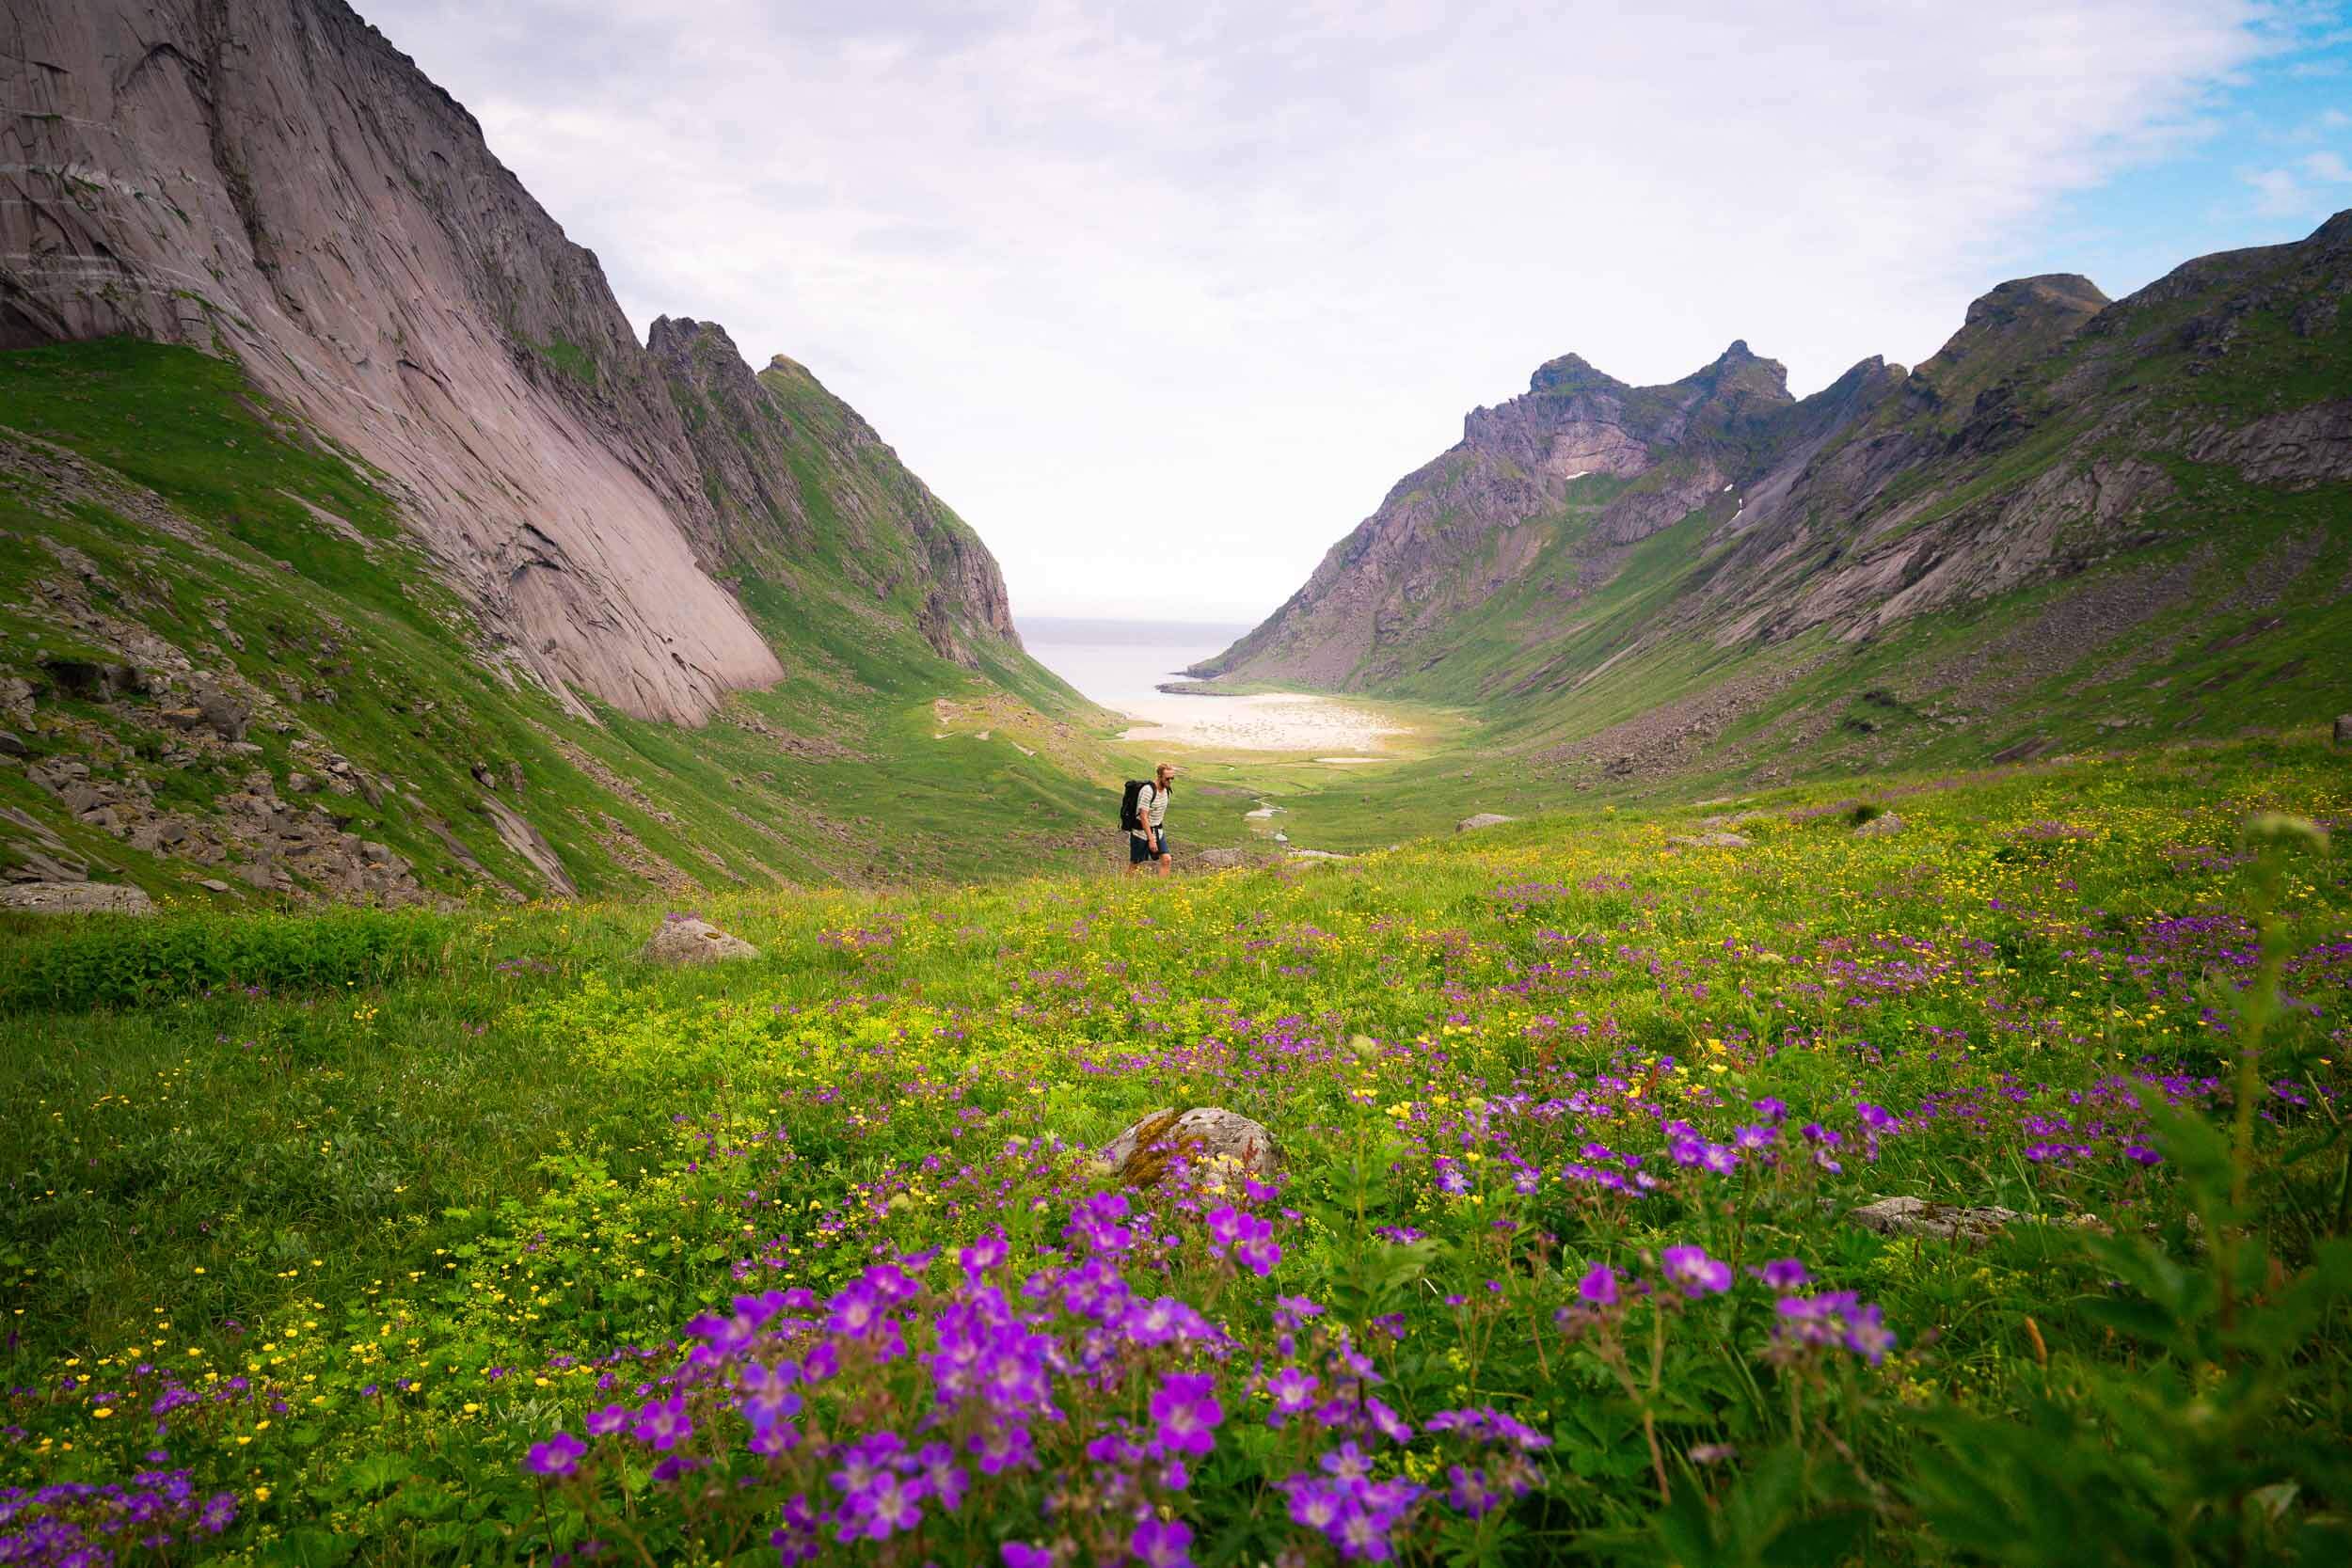
This trail begins on a series of boardwalks that presumably keep hikers out of the mud during wetter times. After passing through a beautiful flower-filled field the path begins to ascend through some more rugged terrain, passing by rocky slopes and fields of vibrant wildflowers during the summer months.
There are a couple of steeper sections toward the beginning, but chains have been bolted into the rock to assist when it gets slippery. As you gain elevation, the views become increasingly breathtaking. On one side, you’ll be treated to vistas of the vast Norwegian Sea, dotted with islands and surrounded by dramatic fjords. On the other side, the Lofoten mountains stretch out as far as the eye can see.
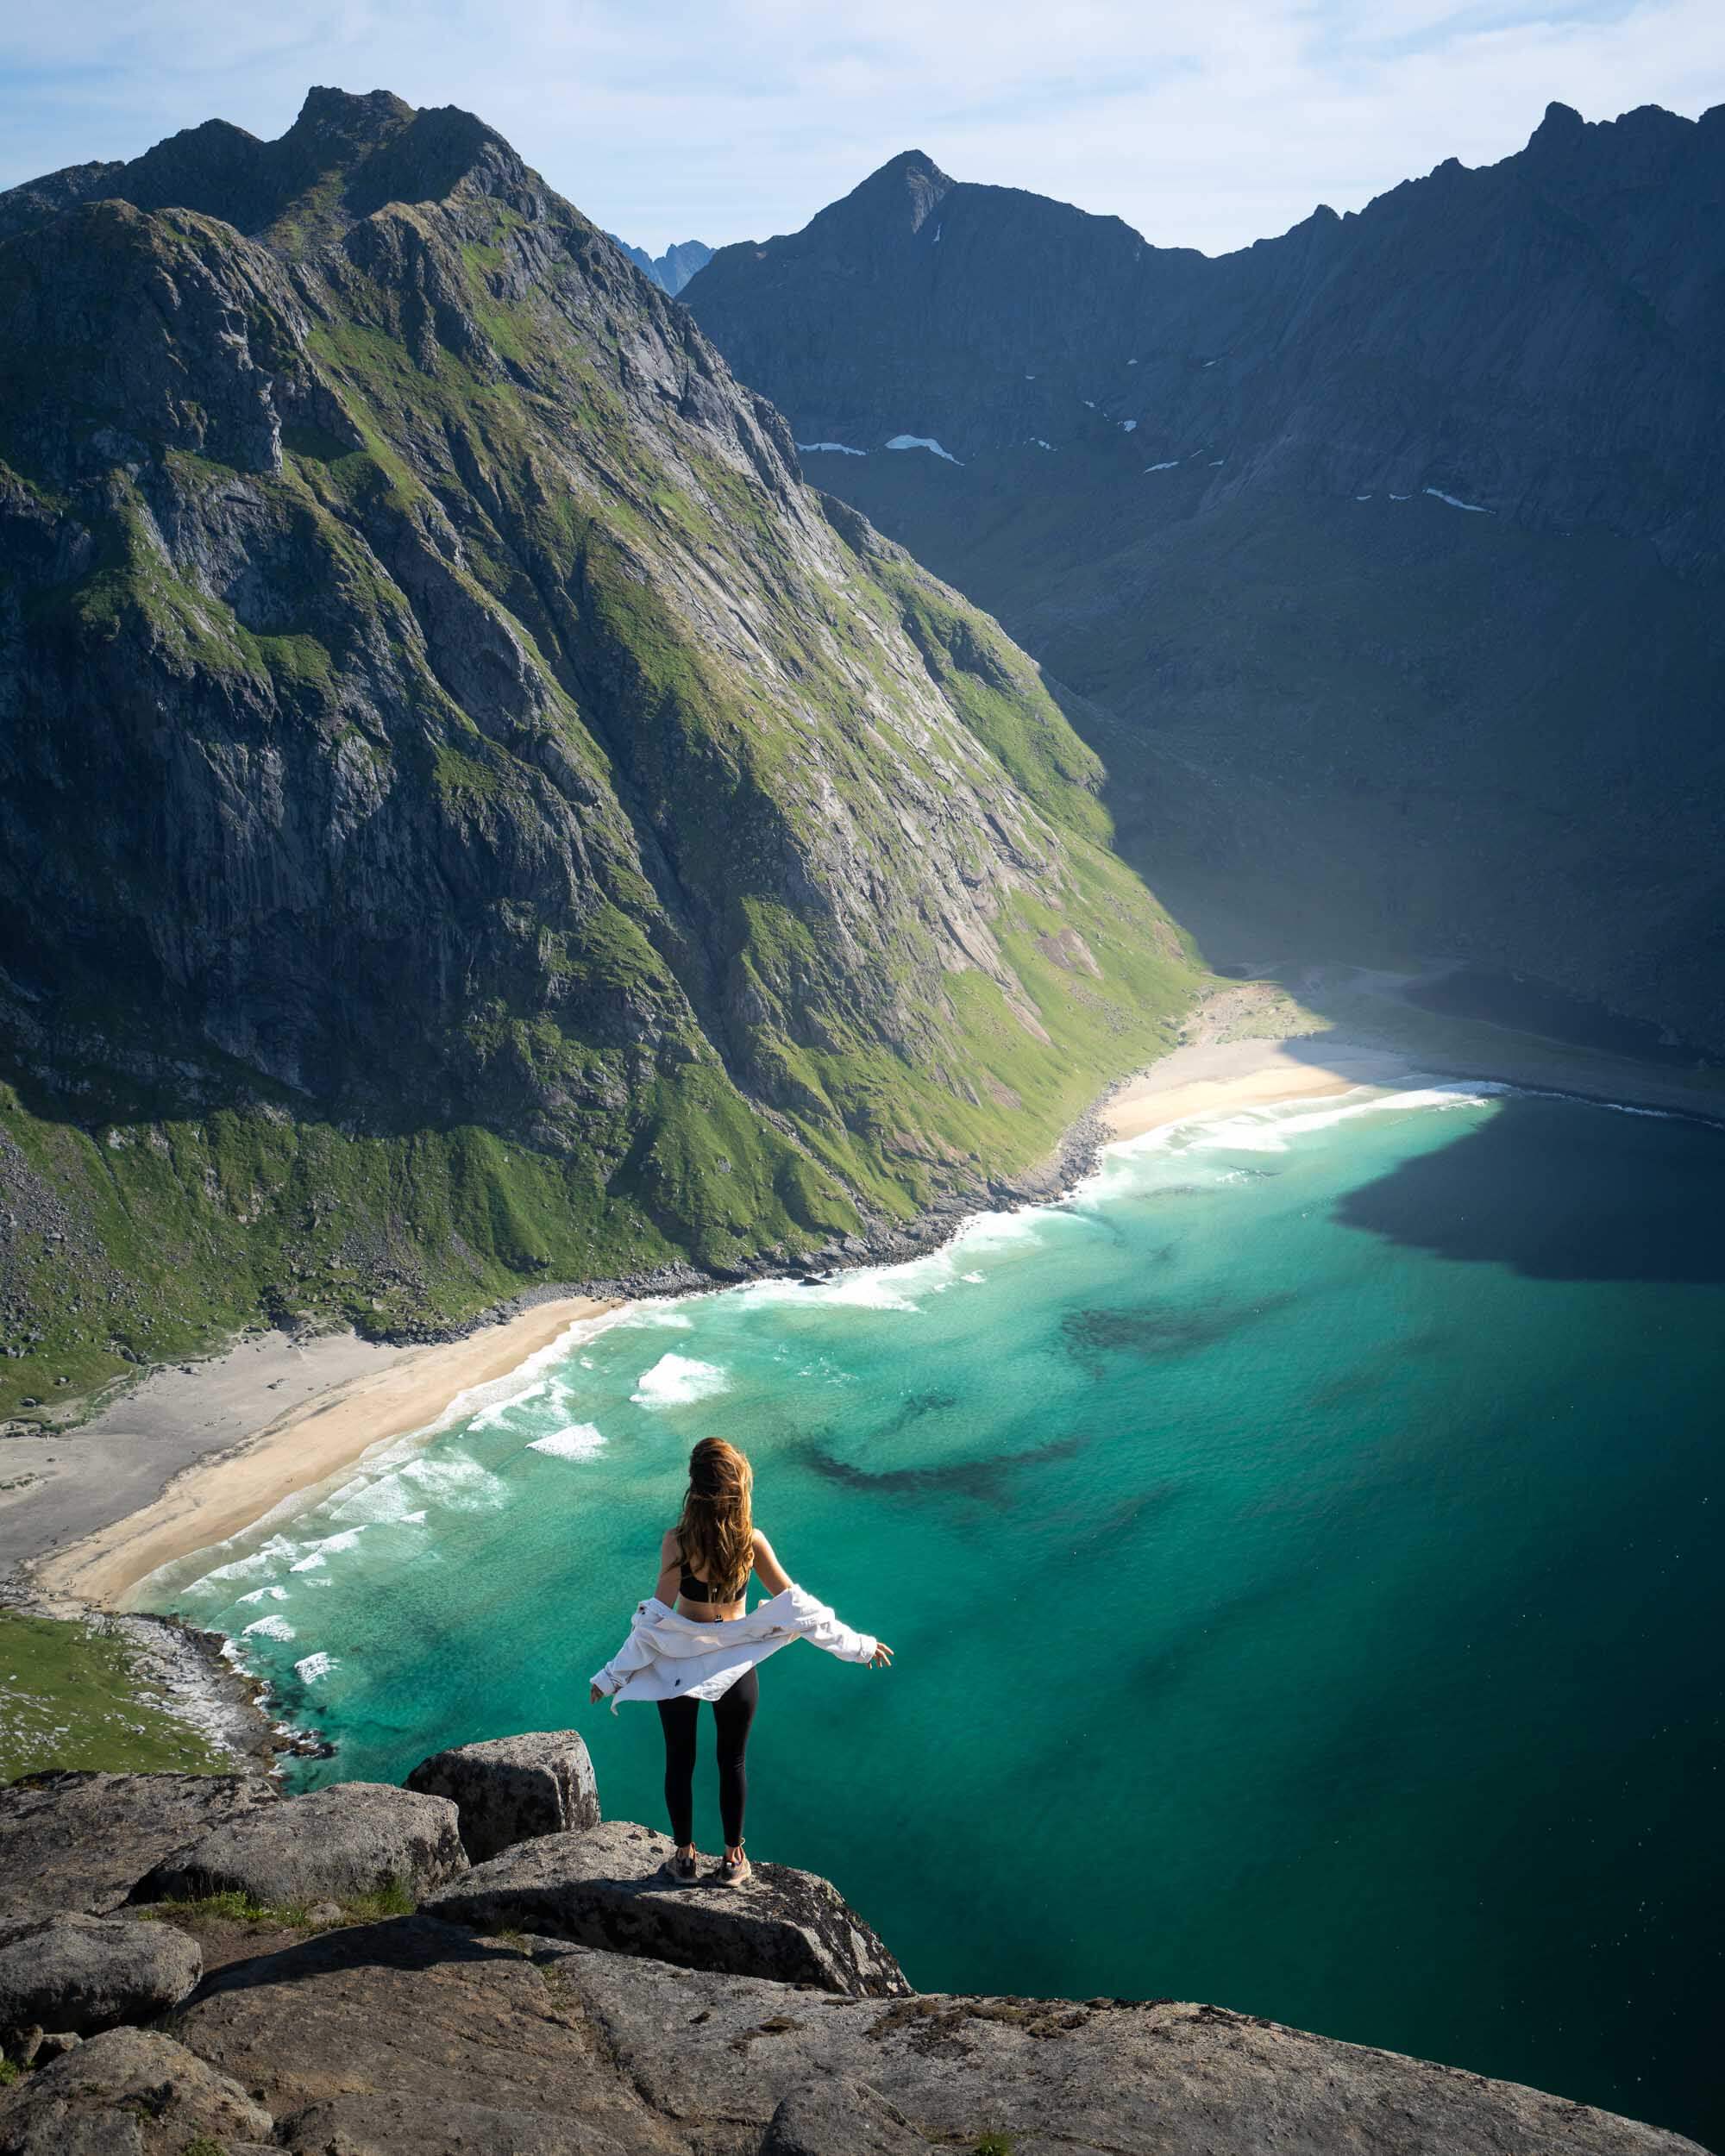
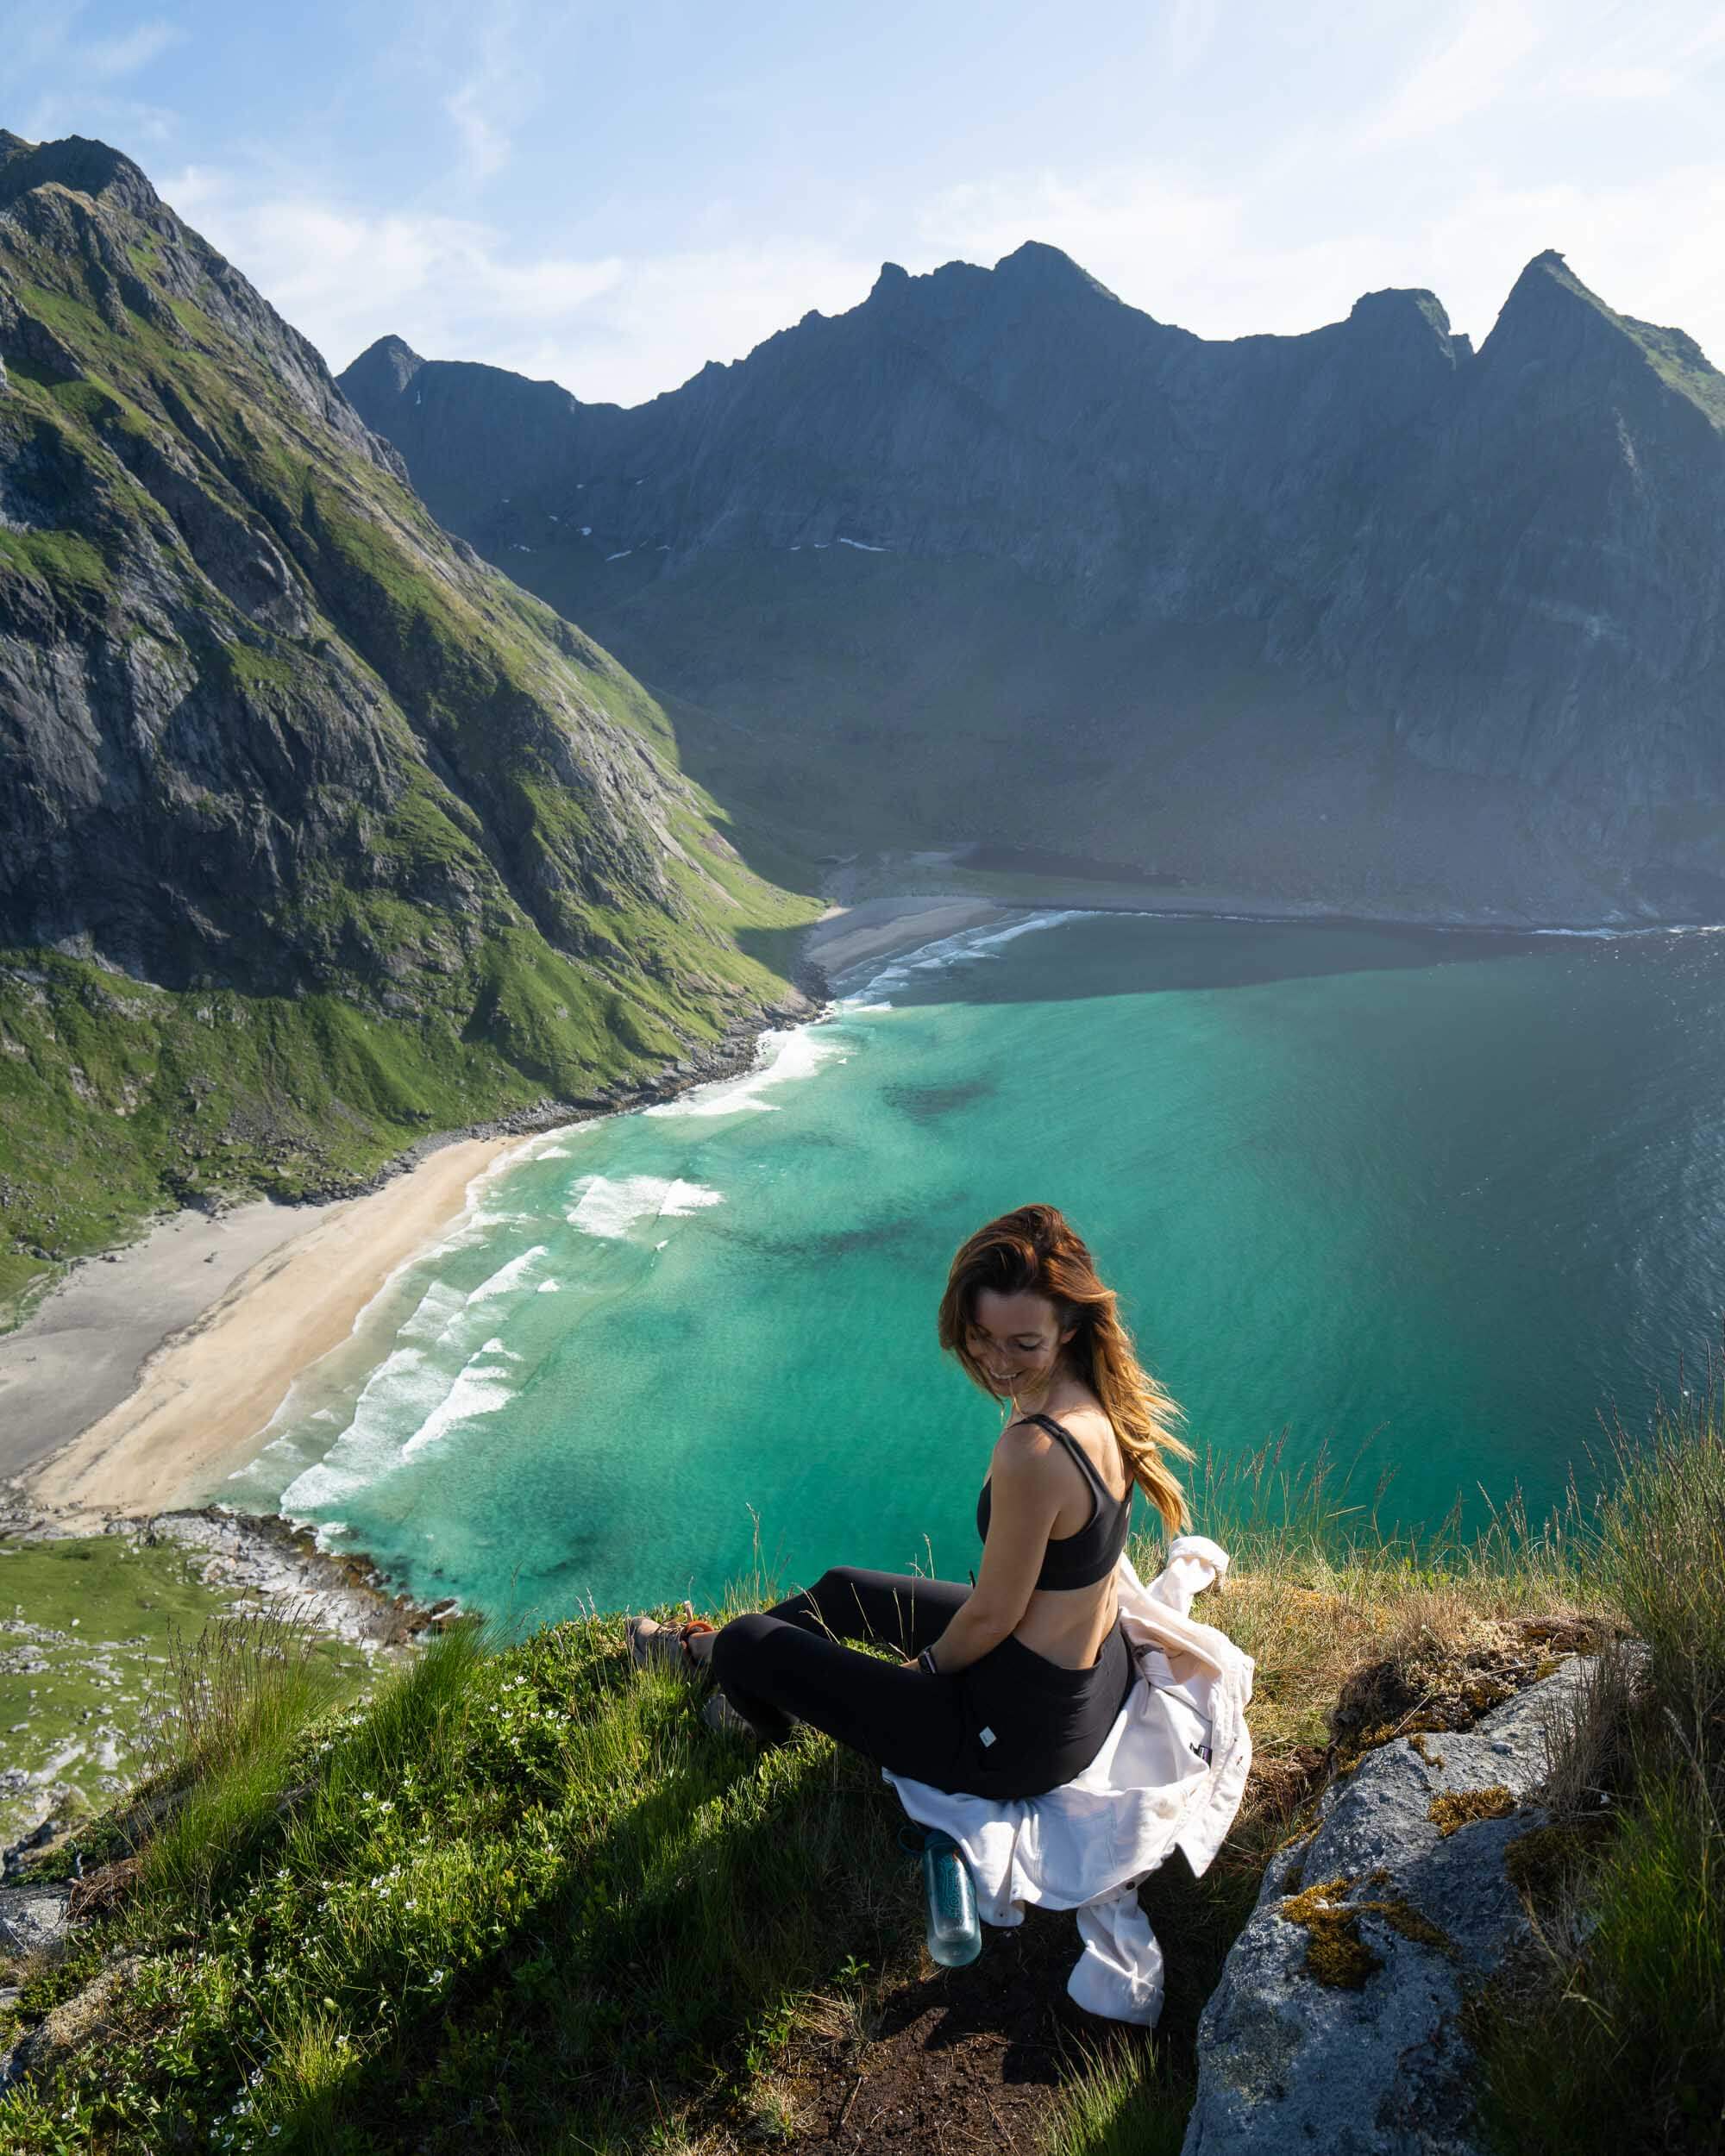
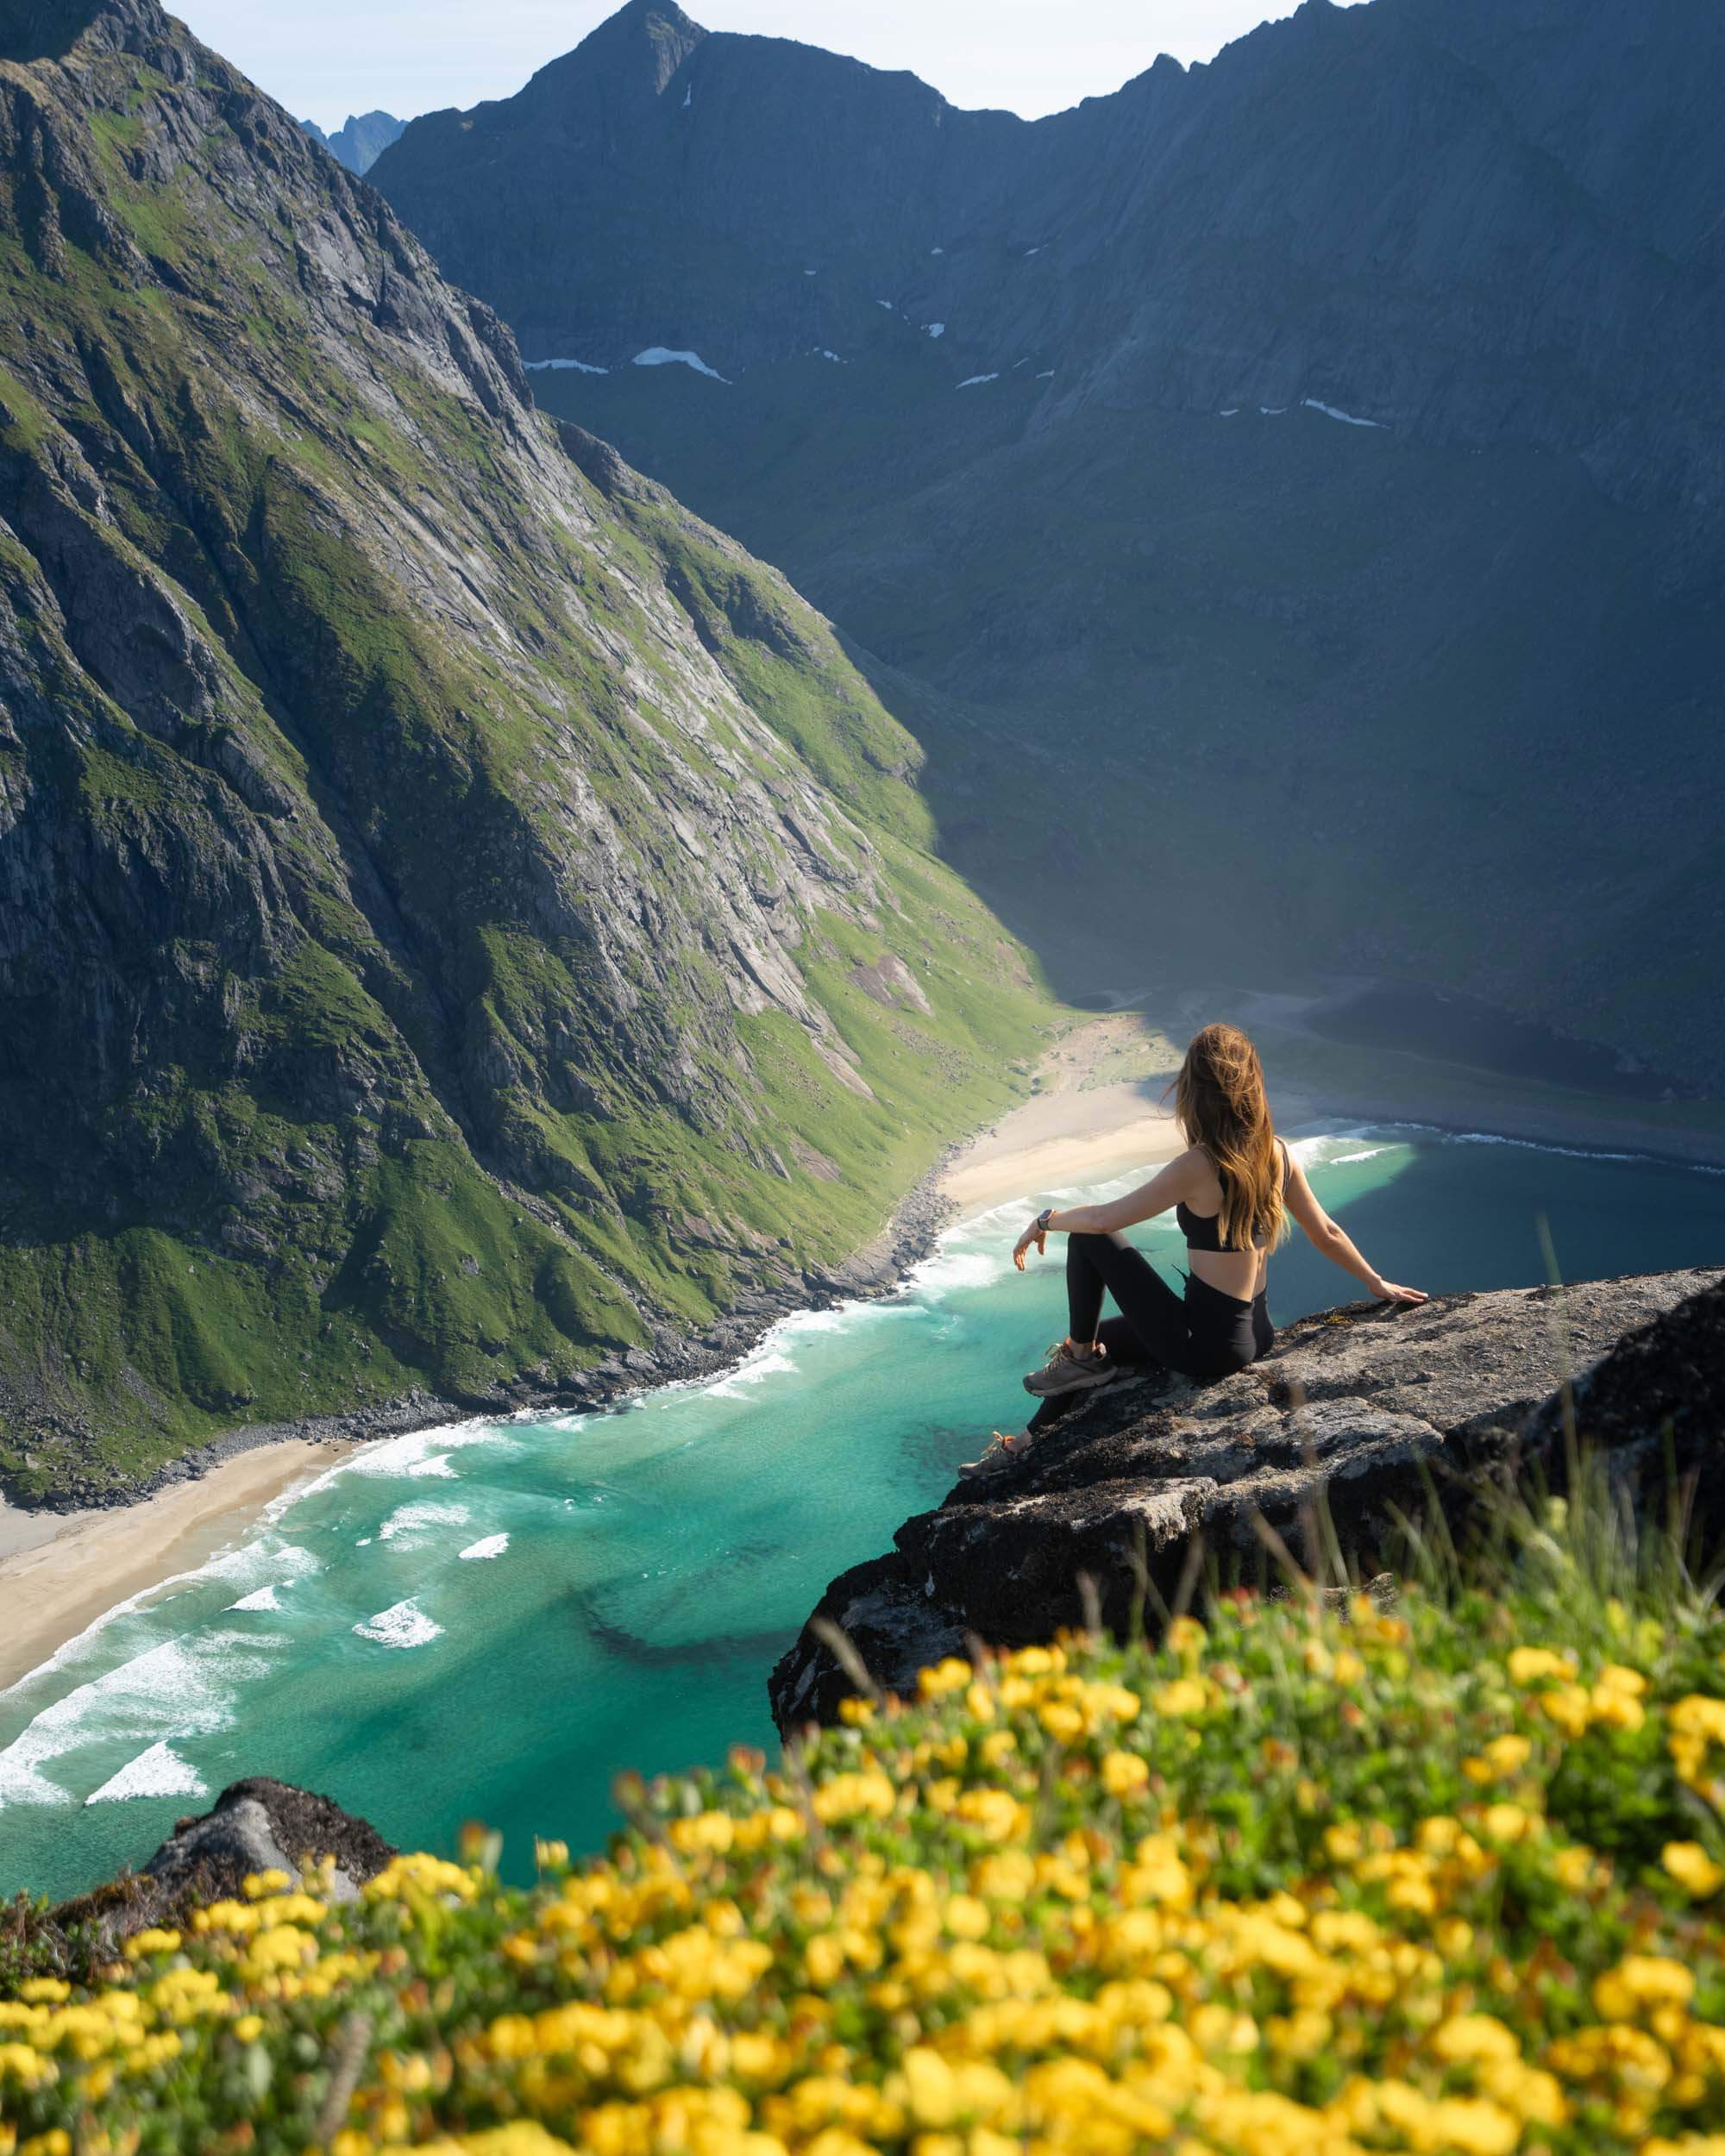
The highlight of the Ryten hike is undoubtedly the summit. From this elevated viewpoint, you can witness one of the most iconic and photo-worthy sights in Lofoten: the famous Kvalvika Beach.
The beach lies nestled between two rocky cliffs, forming a natural amphitheater of golden sand and turquoise waters – a sight that seems like a postcard come to life. To add to the thrill, you’ll discover a “mini Trolltunga.”
If your experience is anything like ours you’ll know you’ve arrived when you see the line of people waiting for this photo op. To be honest, it wasn’t our favorite view, and the number of people waiting made the experience less than ideal. We quickly took the requisite perspective photo — cropping out the ground to create the illusion of hanging over the edge of a cliff — and moved on.
From the top of Ryten, you can also see where the trail branches off and heads all the way down to Kyalvika Beach. Quin and I opted not to add this side trip this time around. But maybe next time!
Looking for more to do in Lofoten Islands, Norway? Here are some top tours to consider!
4. Horseid Beach
Distance: 9km / 6 miles RT
Elevation Gain: 453m
Difficulty: Easy
Time: 6 hours
Starting Point: Take the ferry from Reine to Kirkefjord where the trail starts
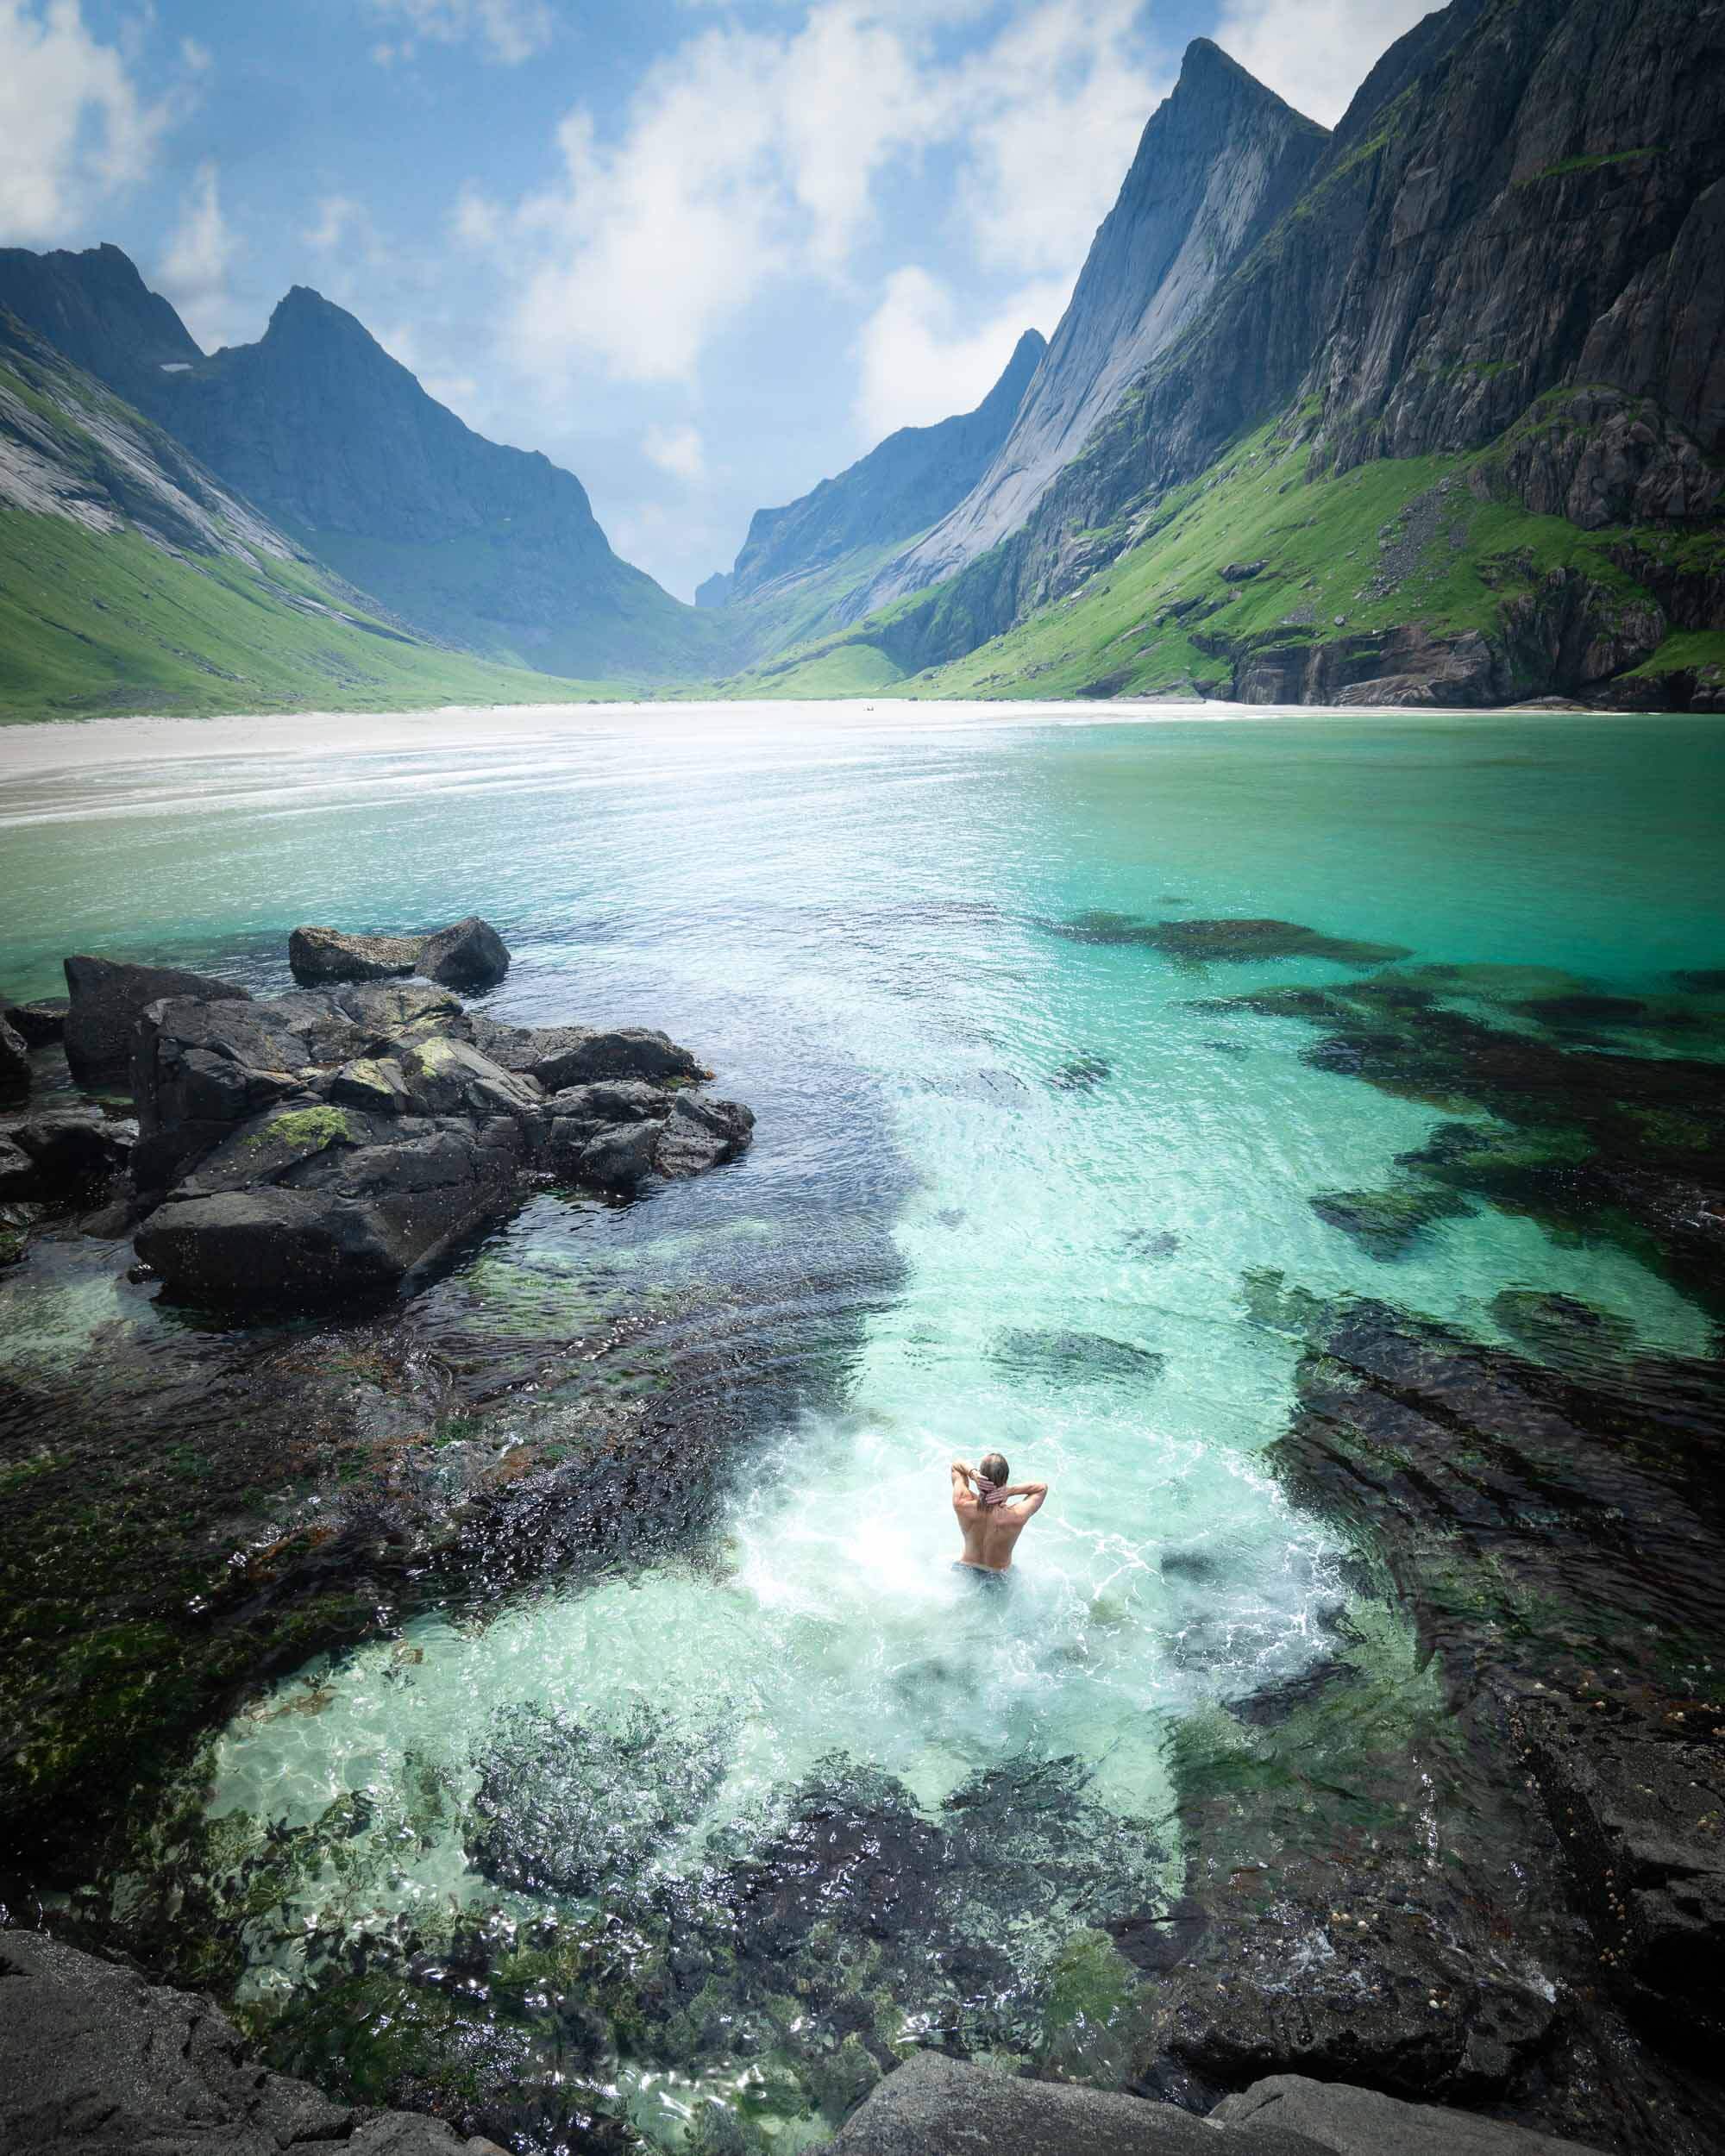
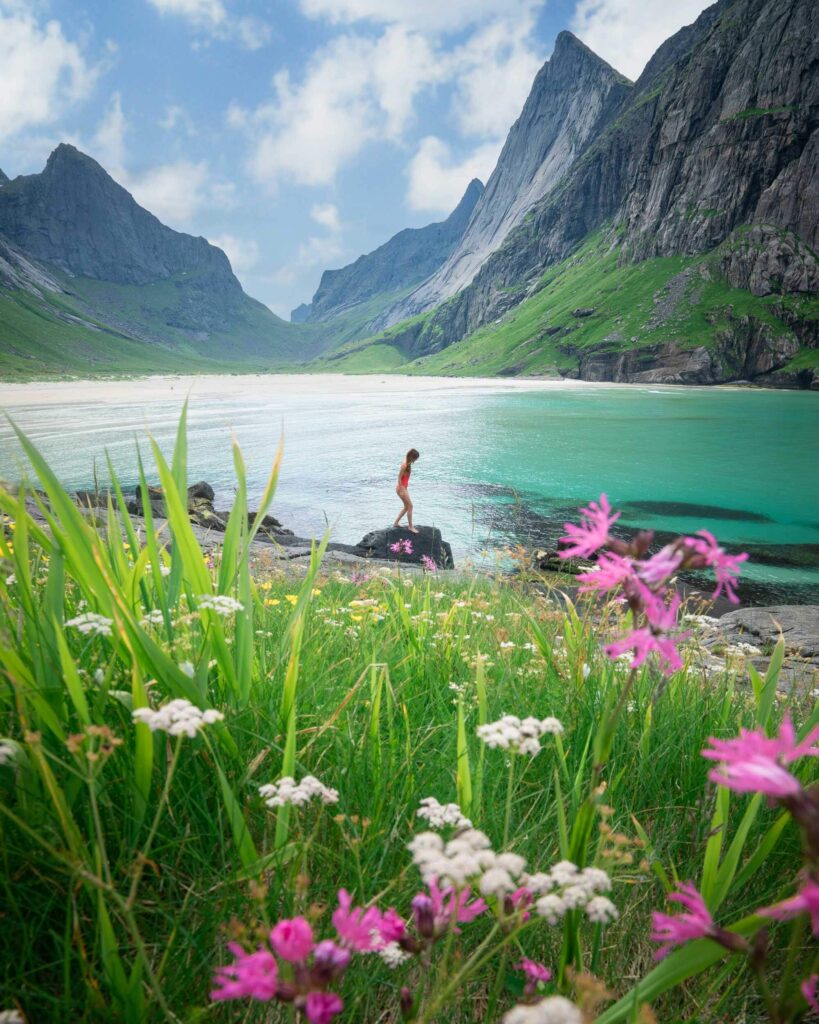
Horsed Beach is a hidden gem in the Lofoten Islands. And my only regret about this beautiful place is not coming prepared to camp there. With its stunning rock formation, soft golden sands, and clear turquoise waters, it offers a tranquil escape and a touch of mythical allure that left me wanting much much more. The unspoiled beauty of the surroundings and the peaceful ambiance make it a truly unforgettable destination.
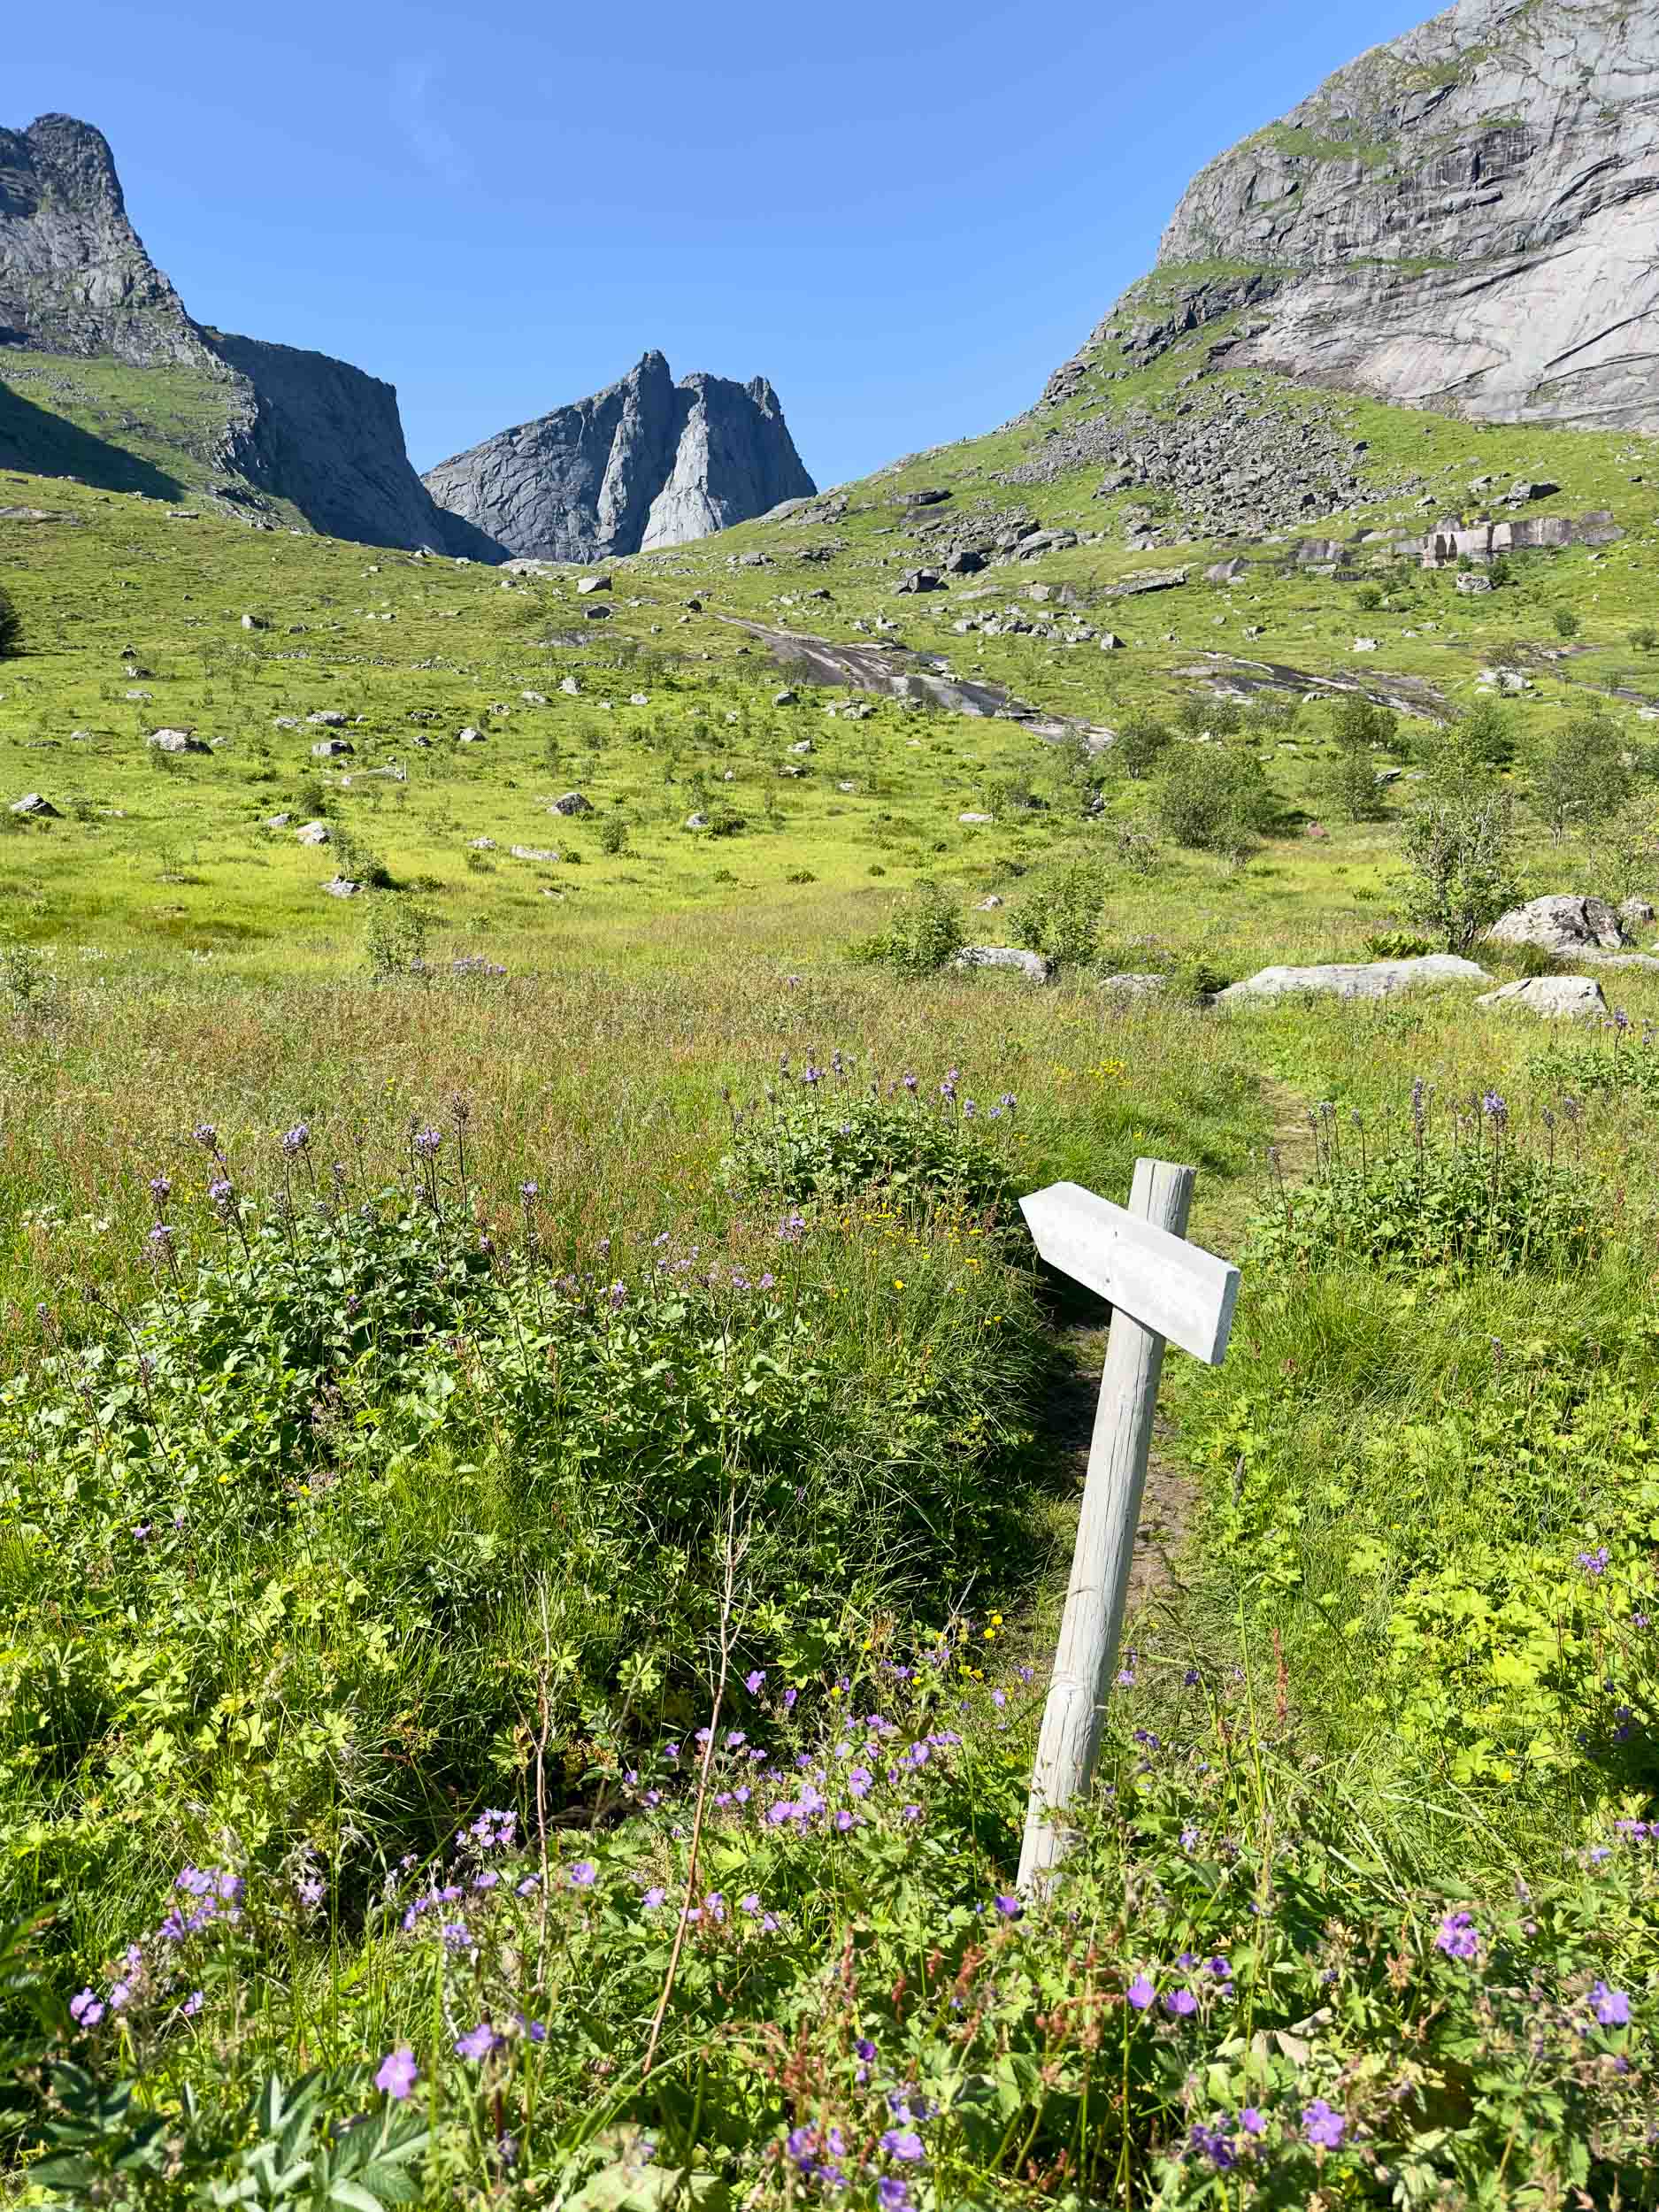
The great news is that this is one of the best easy hikes Lofoten has to offer, with a gradual incline and plenty of time spent walking through flower meadows and undulating valleys before you’re rewarded with the expansive view of Horseid Beach.
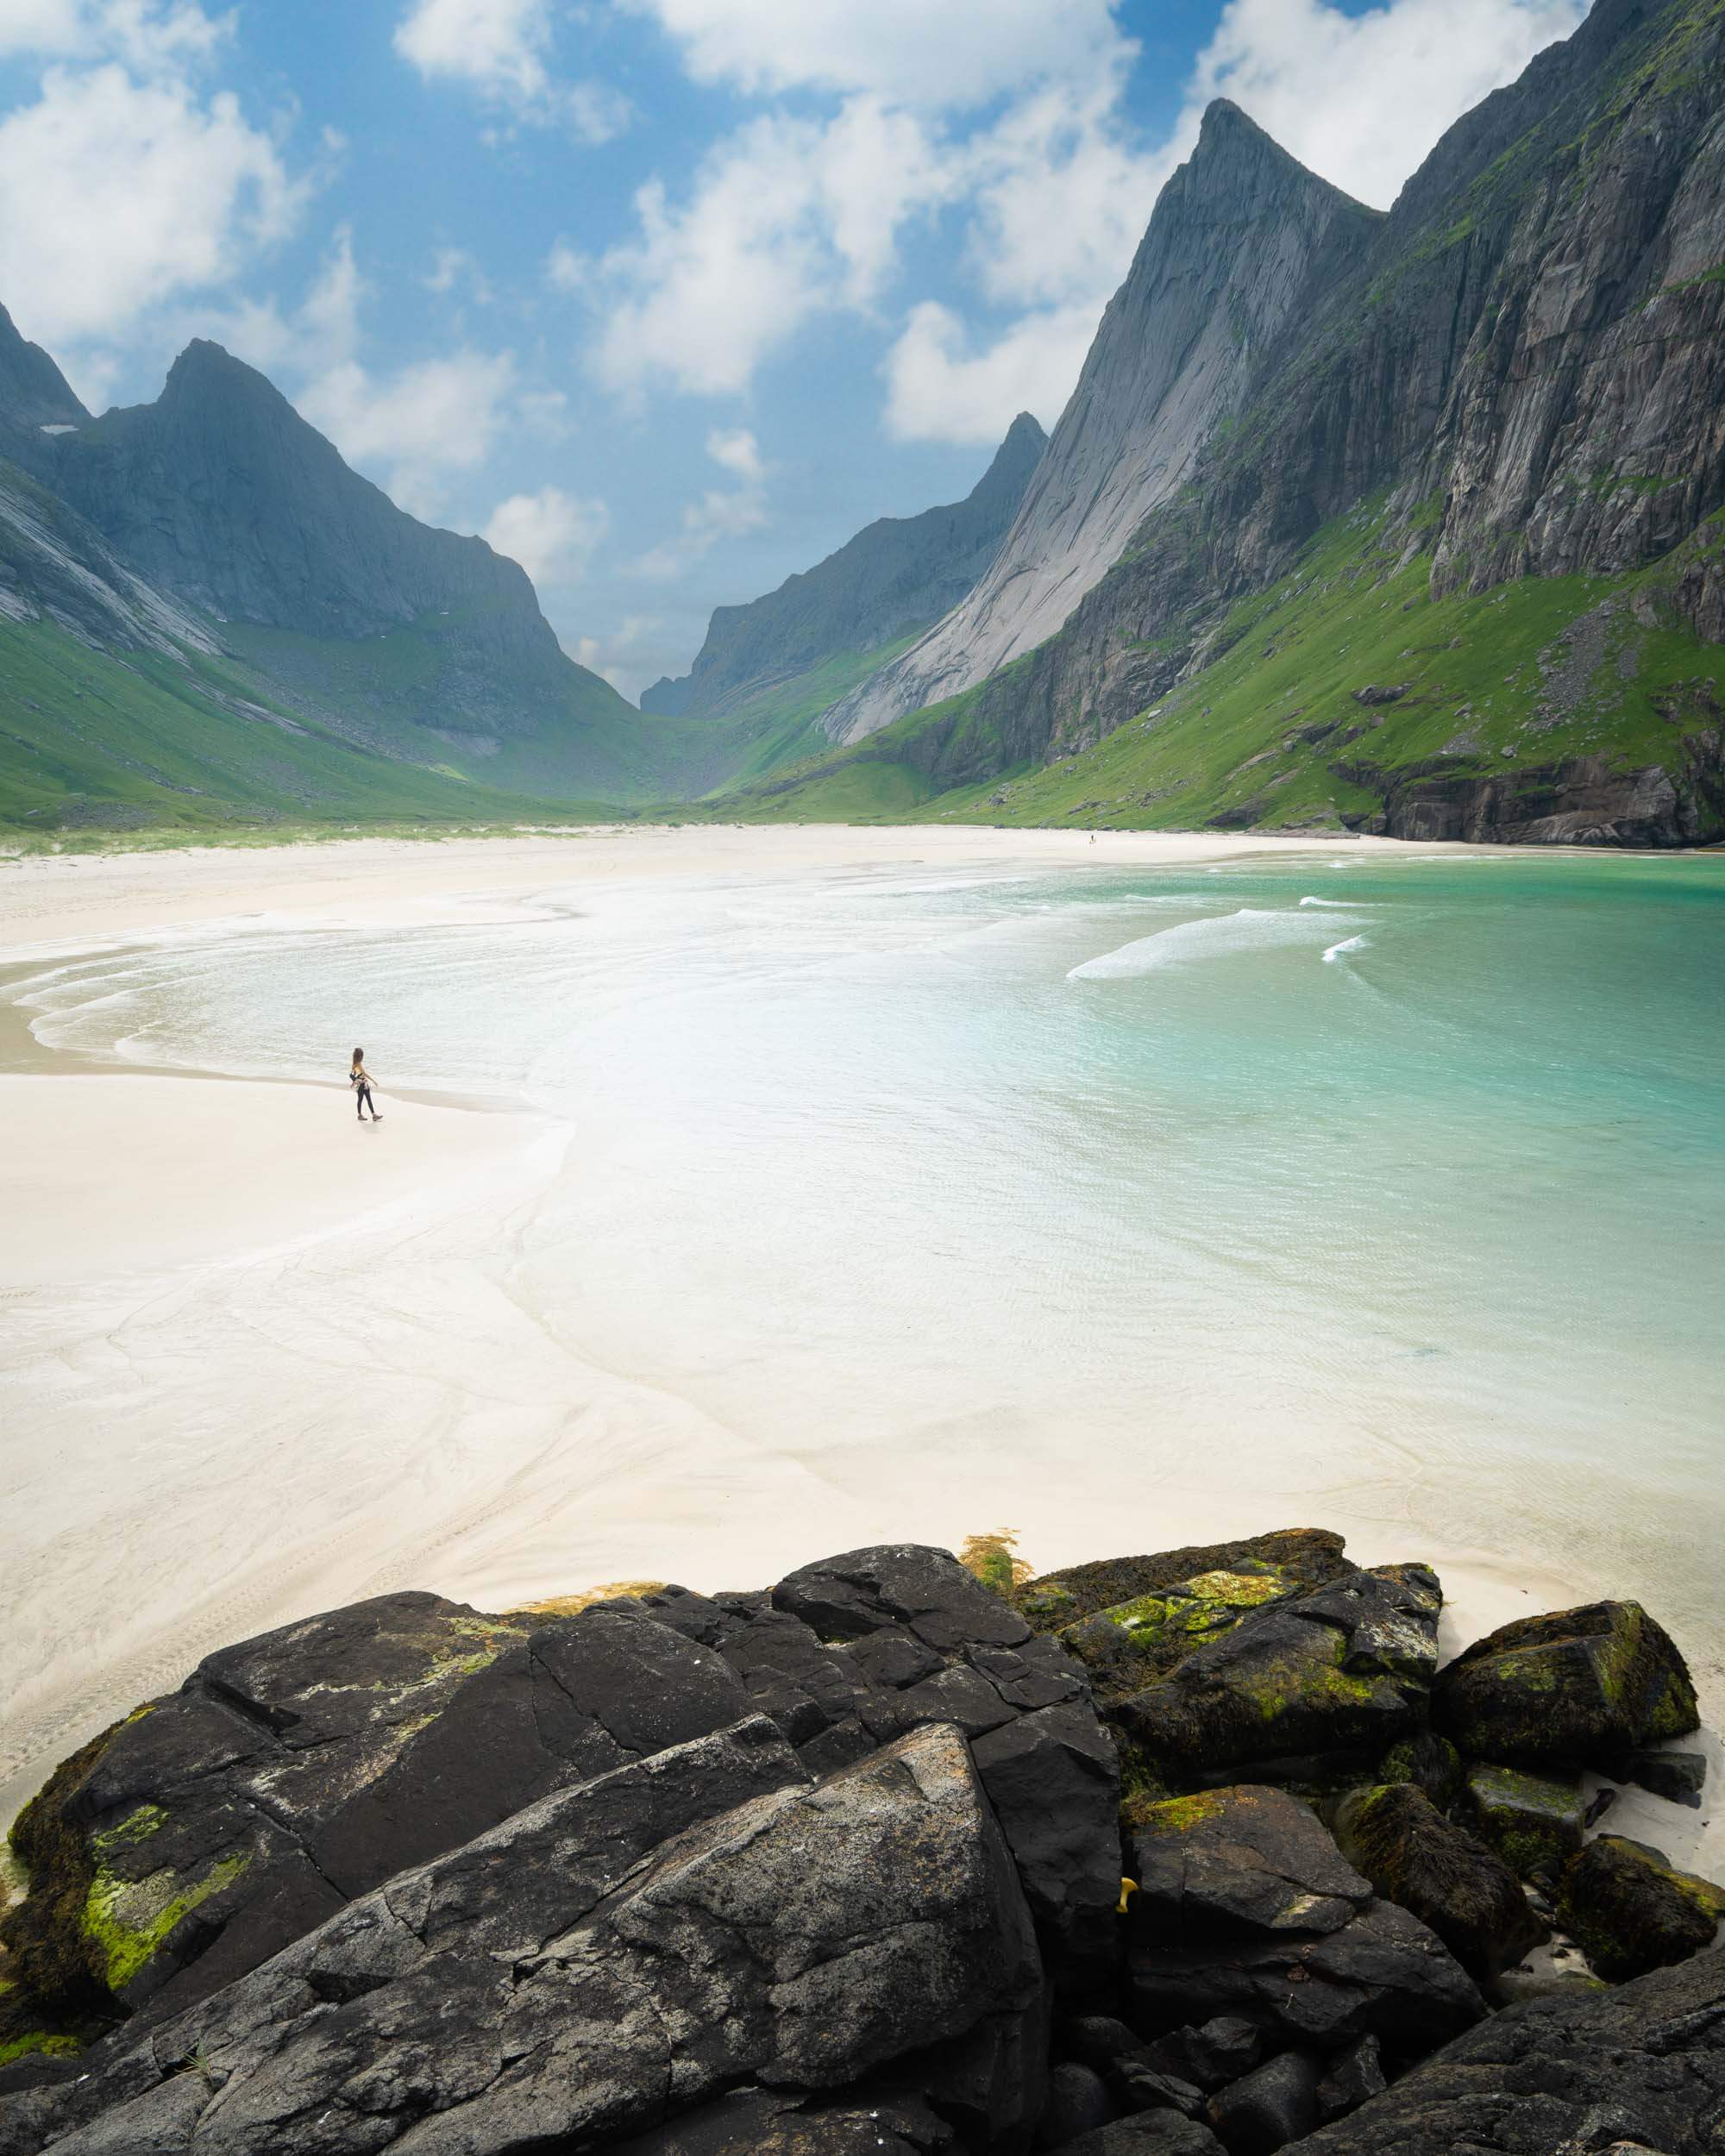
Despite the frigid waters, it really is worth bringing your swimsuit to take a dip in the crystal clear waters. This is such a hidden gem and many people are put off by the need to take a ferry, so we had this paradise beach all to ourselves.
5. Festvågtind hike
Distance: 2.4km / 1.5 miles RT
Elevation Gain: 500m / 1670 ft
Difficulty: Moderate
Time: 2 hours
Starting Point: The trailhead is just off the main road about 10 minutes north of Henningsvaer
The Festvagtind hike is a short but steep out-and-back hike which we managed to squeeze into our last day in the Lofoten Islands, along with another short hike.
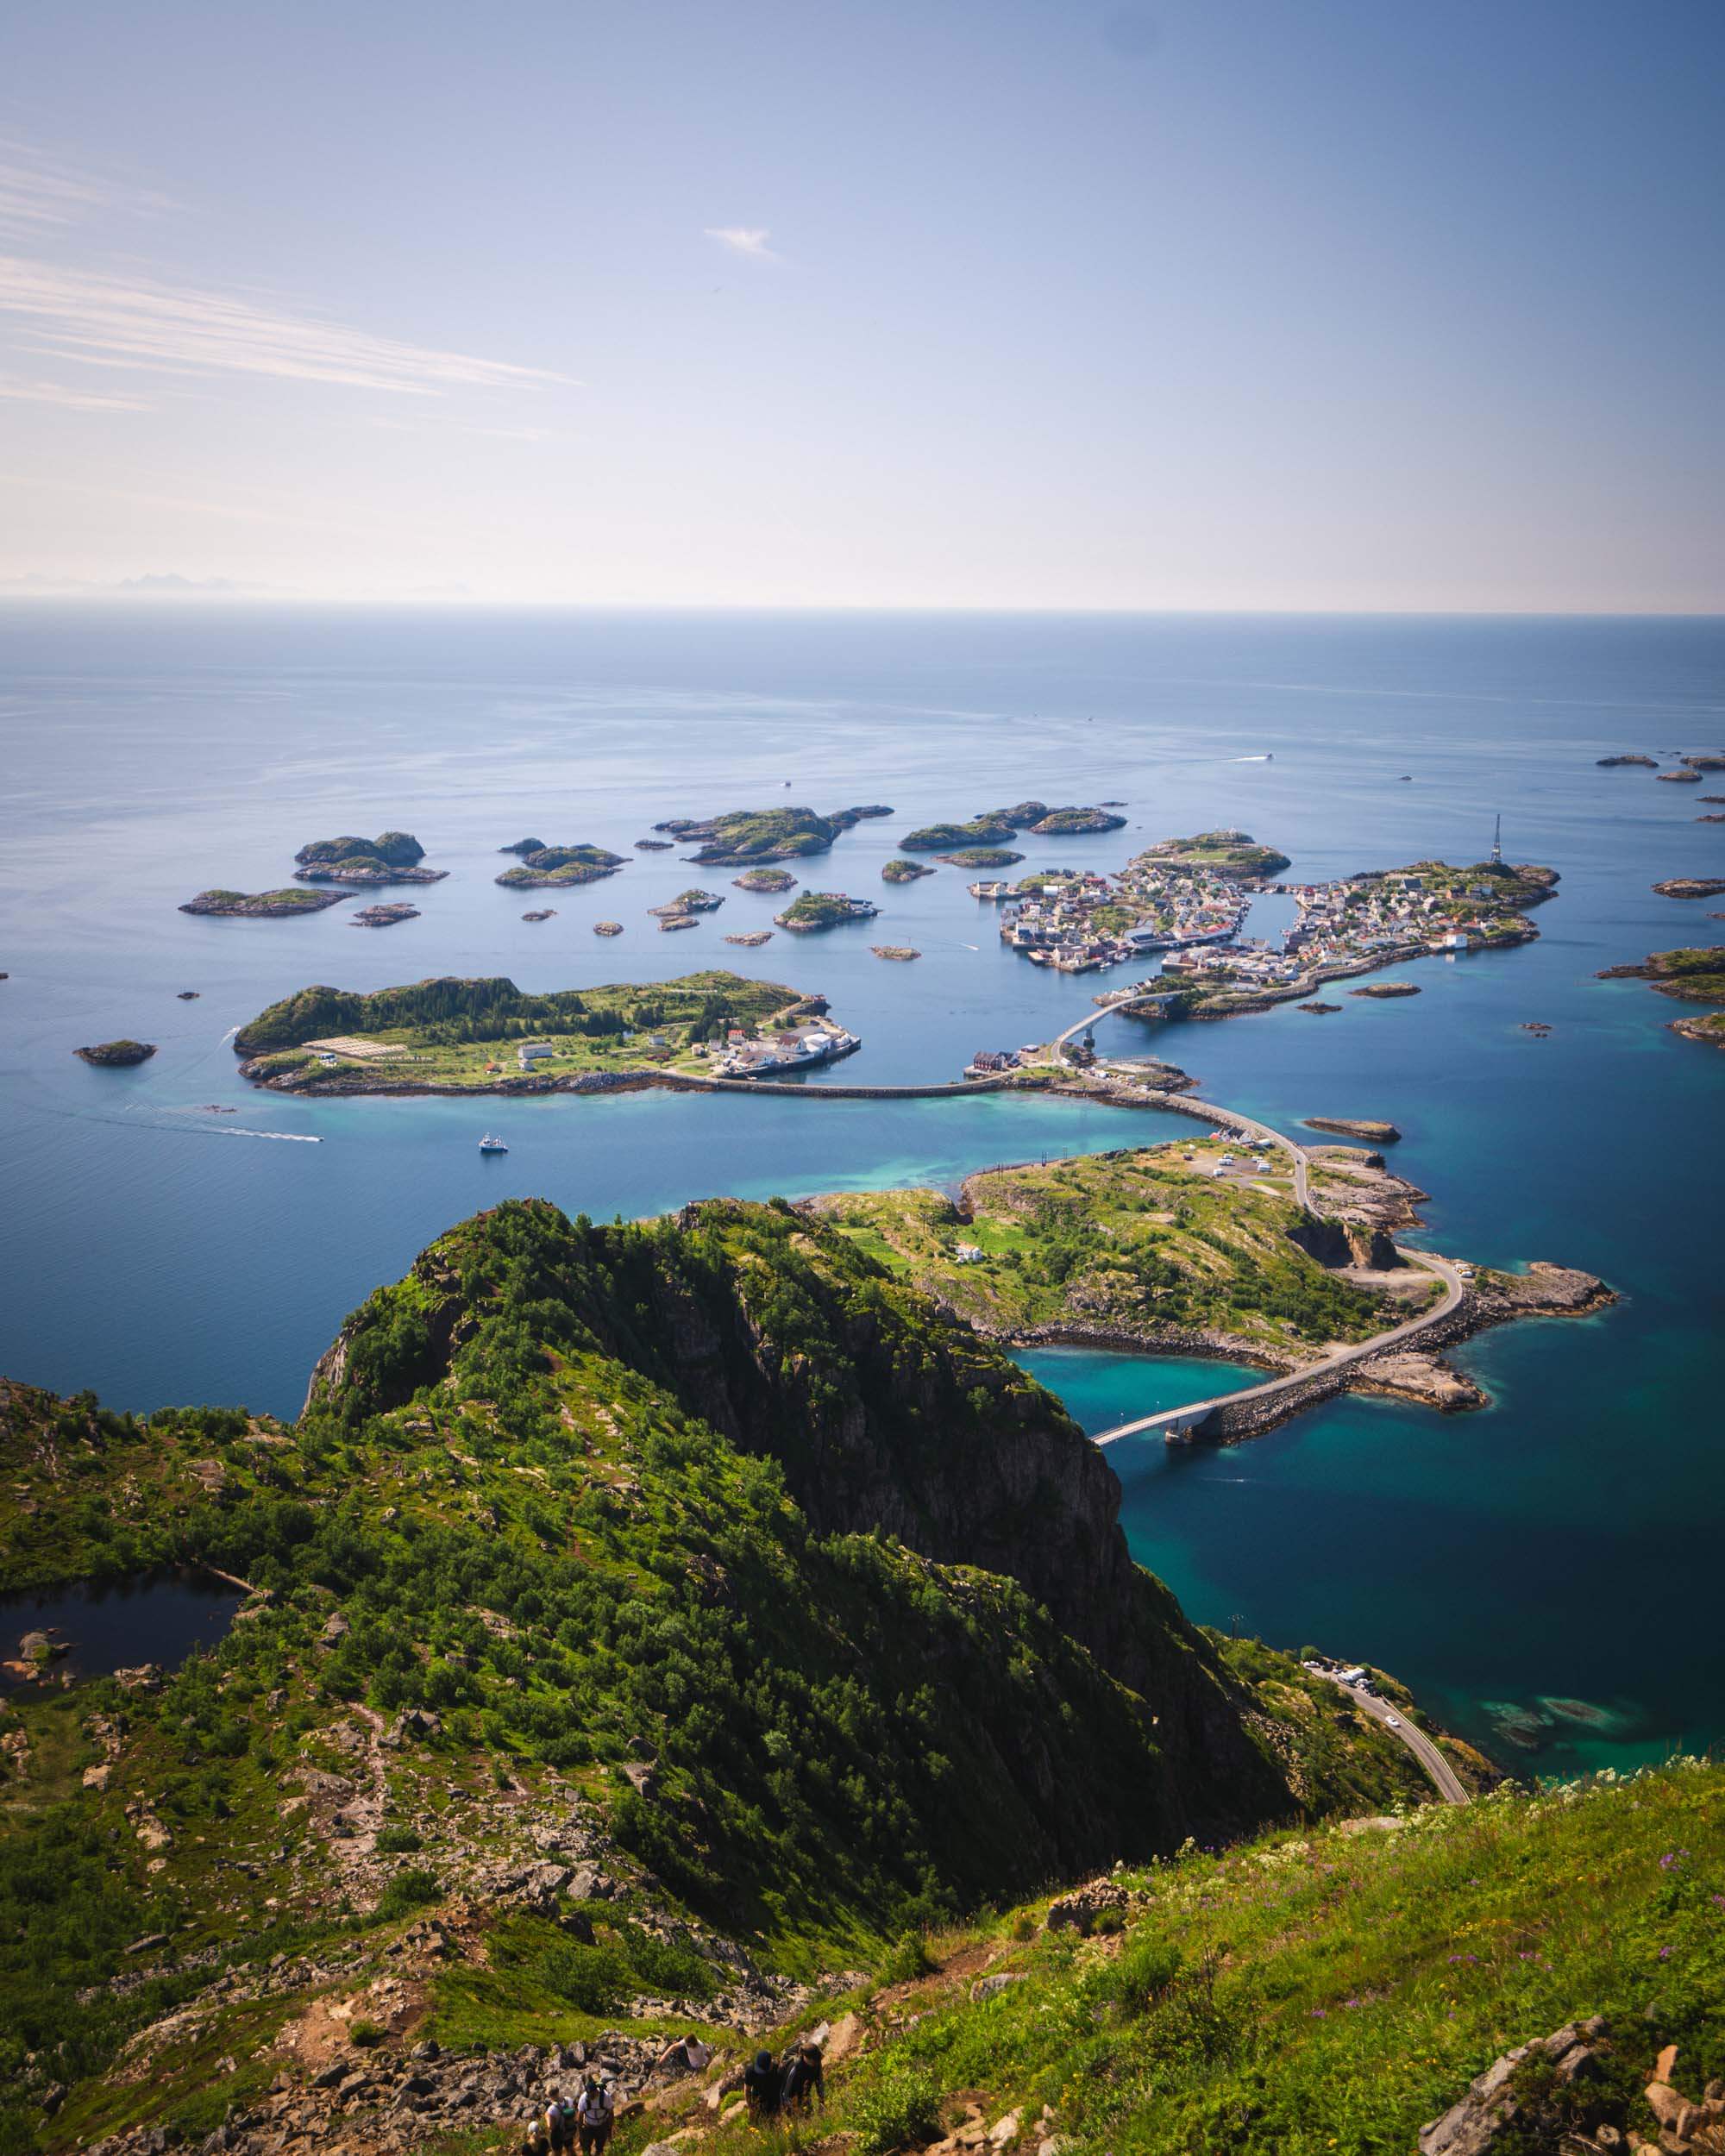
This is a short hike but the views did not disappoint. Once you reach the summit, you’re rewarded with 360-degree views of the archipelago and the chains of islands, connected by winding roads that look like ribbons. The water is marbled turquoise and deep blue, in contrast with the emerald green mountain slopes – we could easily have been in a tropical destination like Tahiti!
This hike is best done on clear days and with good weather, wet conditions or unsuitable shoe choices could make the hike up unnecessarily unsafe.
6. Torsketunga hike
Distance: 2.6km / 1.6 miles
Elevation Gain: 500m / 1670 ft
Difficulty: Moderate
Time: 2 hours
Starting Point: The trailhead is just off the main road about 10 minutes north of Henningsvaer (Same as Festvagtind)
The trek up to Torsketunga is essentially just a short extension from the top of the well-known Festvågtind hike. Nevertheless, it remains a lesser-known treasure with few visitors. This is likely because reaching the viewpoint requires some scrambling and is not for those with a fear of hights.
To reach Torsketunga, first hike up to the ridge of Festvågtind. At the ridge, you’ll find the Festvågtind viewpoint on your left and the trail to Torsketunga on your right. From this point, it’s less than a kilometer to reach Torsketunga. But over that distance, you will be required to downclimb and scramble across some large boulders with quite a bit of exposure.
We saw two different groups decide to turn around before the viewpoint. So I would suggest only attempting Torsketunga if you are comfortable with a bit of exposure and have some scrambling experience.
7. Offersøykammen hike
Distance: 3.4km / 2.1 miles
Elevation Gain: 440
Difficulty: Easy
Time: 2 hours
Starting Point: The car park and trailhead is just off the E10 road near Leknes
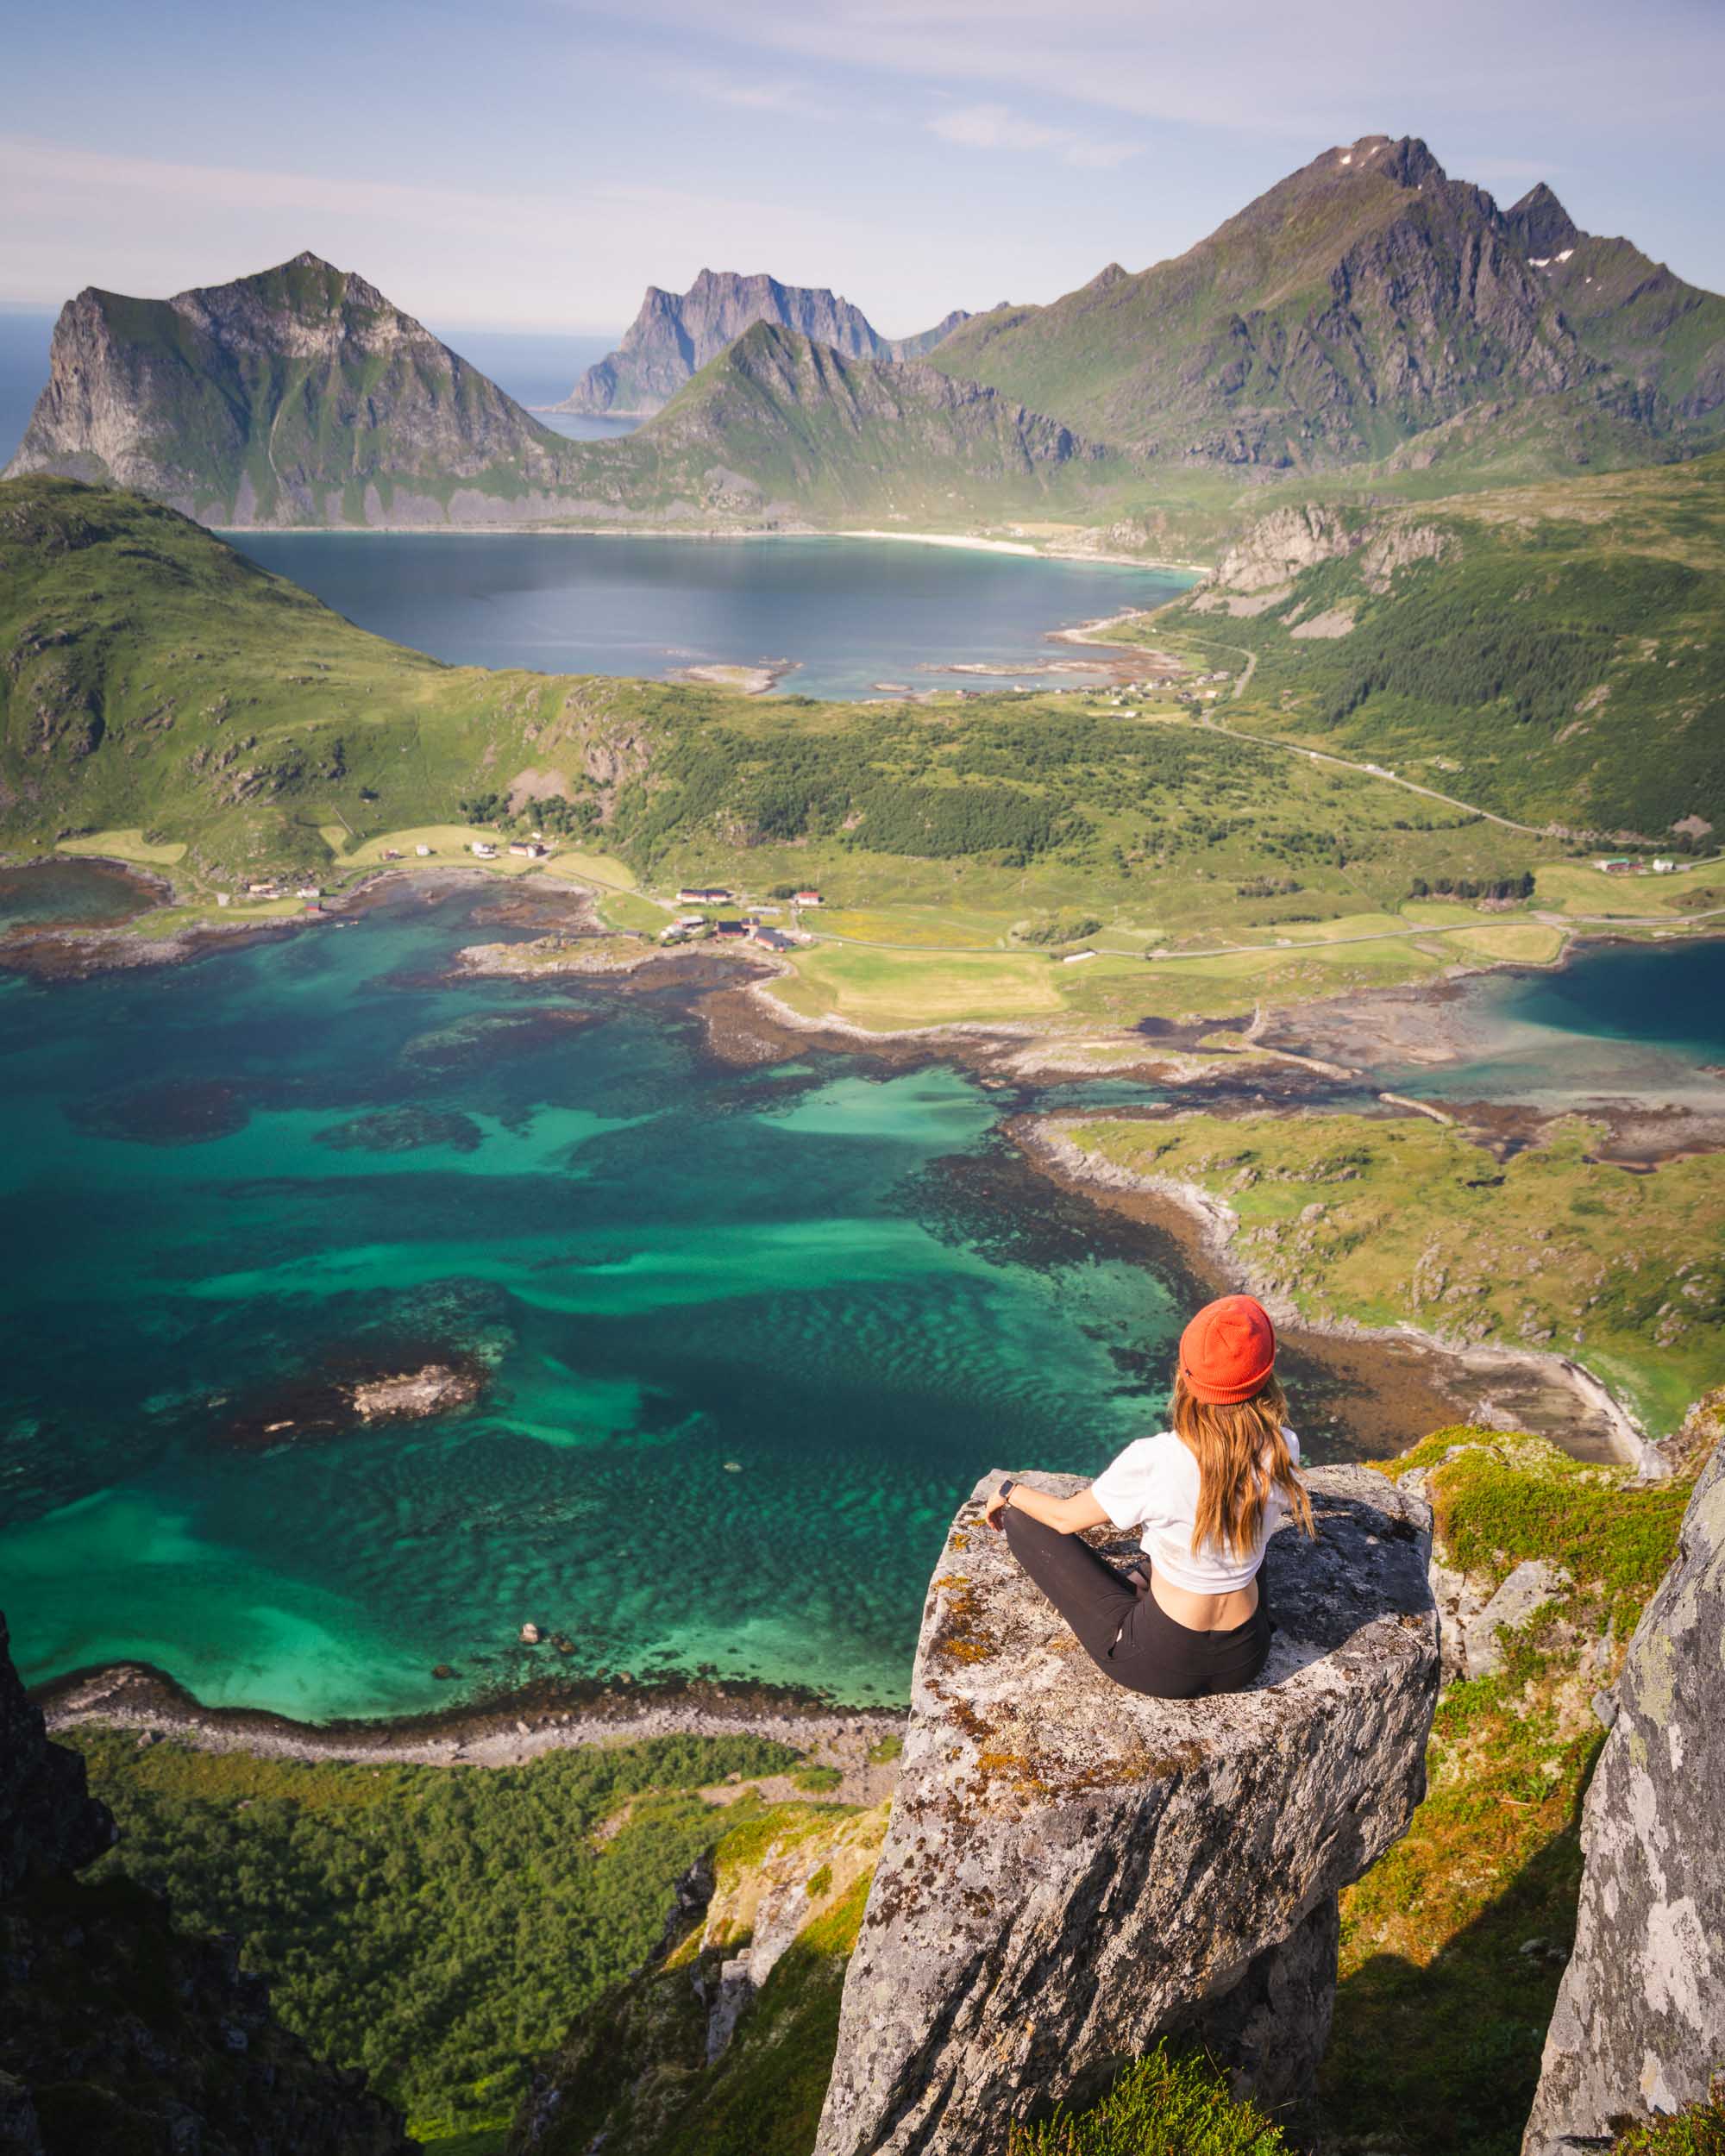
This is the second hike we did on our last day, together with the Festvagtind hike. This is another of the Lofoten hikes that is considered easy; however, it is steep and sturdy footwear is a good idea.
Although you do see plenty of people of differing abilities and even trail runners on this route – so it’s a great option for a short day hike in Lofoten with spectacular views as a reward.
Located on the western side of Vestvågøya, this trail is open all year round but a clear day in summer is the best conditions for hiking and epic views of the rugged mountains and shades of blue sea.
More hiking trails in Lofoten that I didn’t get to check out this time around:
- Munken and Munkebu hut
- Haukland Beach (Mannen Hike)
- Hermannsdalstinden
- Helvestestinden
Leave No Trace
Like many locations known for their natural beauty, the Lofoten Islands have experienced a surge in tourism over the past few years. While it’s not hard to understand the growing popularity, many of the small communities and outdoor recreational opportunities were not built to support the influx of people. For this reason, practicing the Leave No Trace principle is particularly important when exploring the pristine landscapes of Lofoten, Norway.
The desire to experience this remote and breathtaking corner of the world must be balanced with outdoor ethics that protect its fragile ecosystem for generations to come. I hope that by reading this Lofoten hiking guide and practicing Leave No Trace principles, we can all ensure that our impact on the environment is minimal, allowing us to enjoy the beauty of Lofoten without leaving a detrimental mark.
Some of the best ways to practice Leave No Trace in Lofoten include staying on marked trails to prevent trampling delicate vegetation, properly disposing of all waste, including biodegradable items like fruit peels, and packing out all garbage.
Norway was such a memorable trip for Quin and I, the views, landscapes and nature in every direction were breathtaking and the best part is that the best hiking in Lofoten doesn’t have to mean challenging, multi-day hikes. You can experience the amazing Norwegian landscape yourself with these day hikes around the islands.
Looking for more tips on the Lofoten Islands in Norway? Don’t miss my full 7-day Lofoten Islands itinerary.
Like this post? Pin it for later and share it with others!