


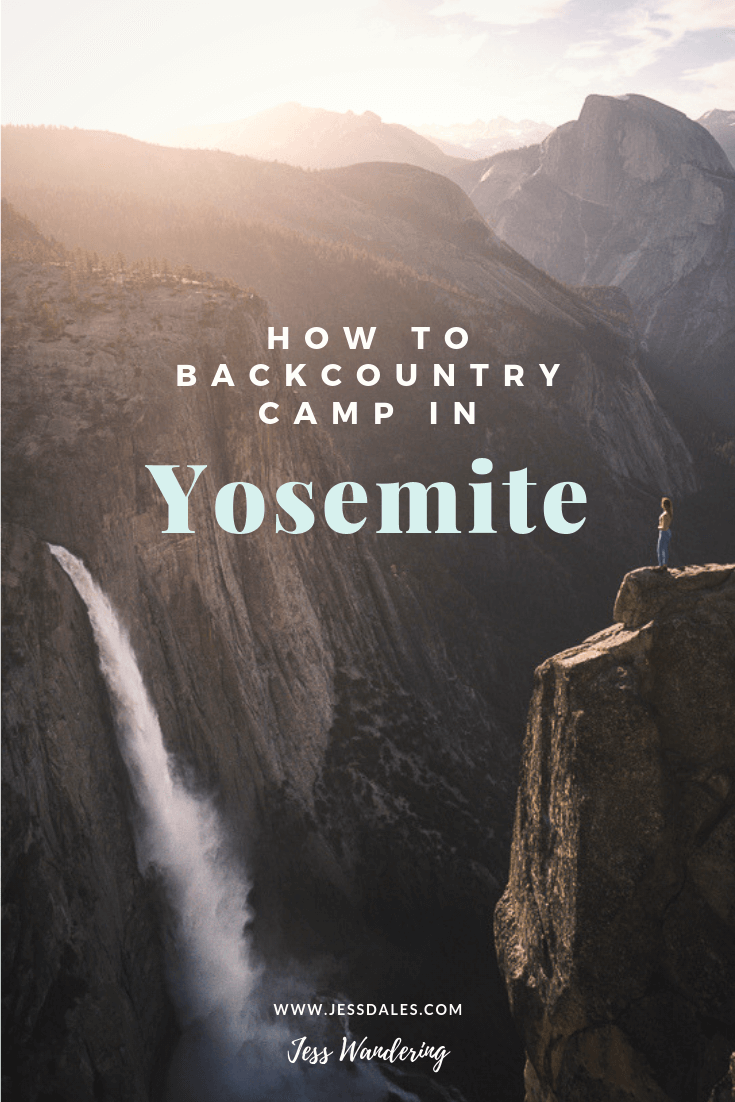
Photos in collaboration with Quin Schrock
Why You Should Consider Backpacking In Yosemite
Every time I post a camping photograph in Yosemite I inevitably get a handful of people letting me know—in no uncertain terms—that camping is illegal within the park. I’m not sure exactly where they got that idea from, but I sure am glad that they are wrong. Not only can you backpack in Yosemite, you should! Leaving the valley, escaping the masses, and sleeping under the stars, is the absolute best way experience the type of wilderness and solitude that the park was intended to provide.
Yosemite has some of the best backpacking and overnight backcountry camping opportunities in the world, and it’s actually relatively easy to take advantage of! All you have to do is get your hands on a Yosemite Wilderness Permit, and follow the Wilderness Regulations. A lot of resources make the permit process seem next to impossible, but it doesn’t have to be. Here’s my a straight forward guide on how to backcountry camp in Yosemite National Park!
How to get Backcountry Camping Permits In Yosemite
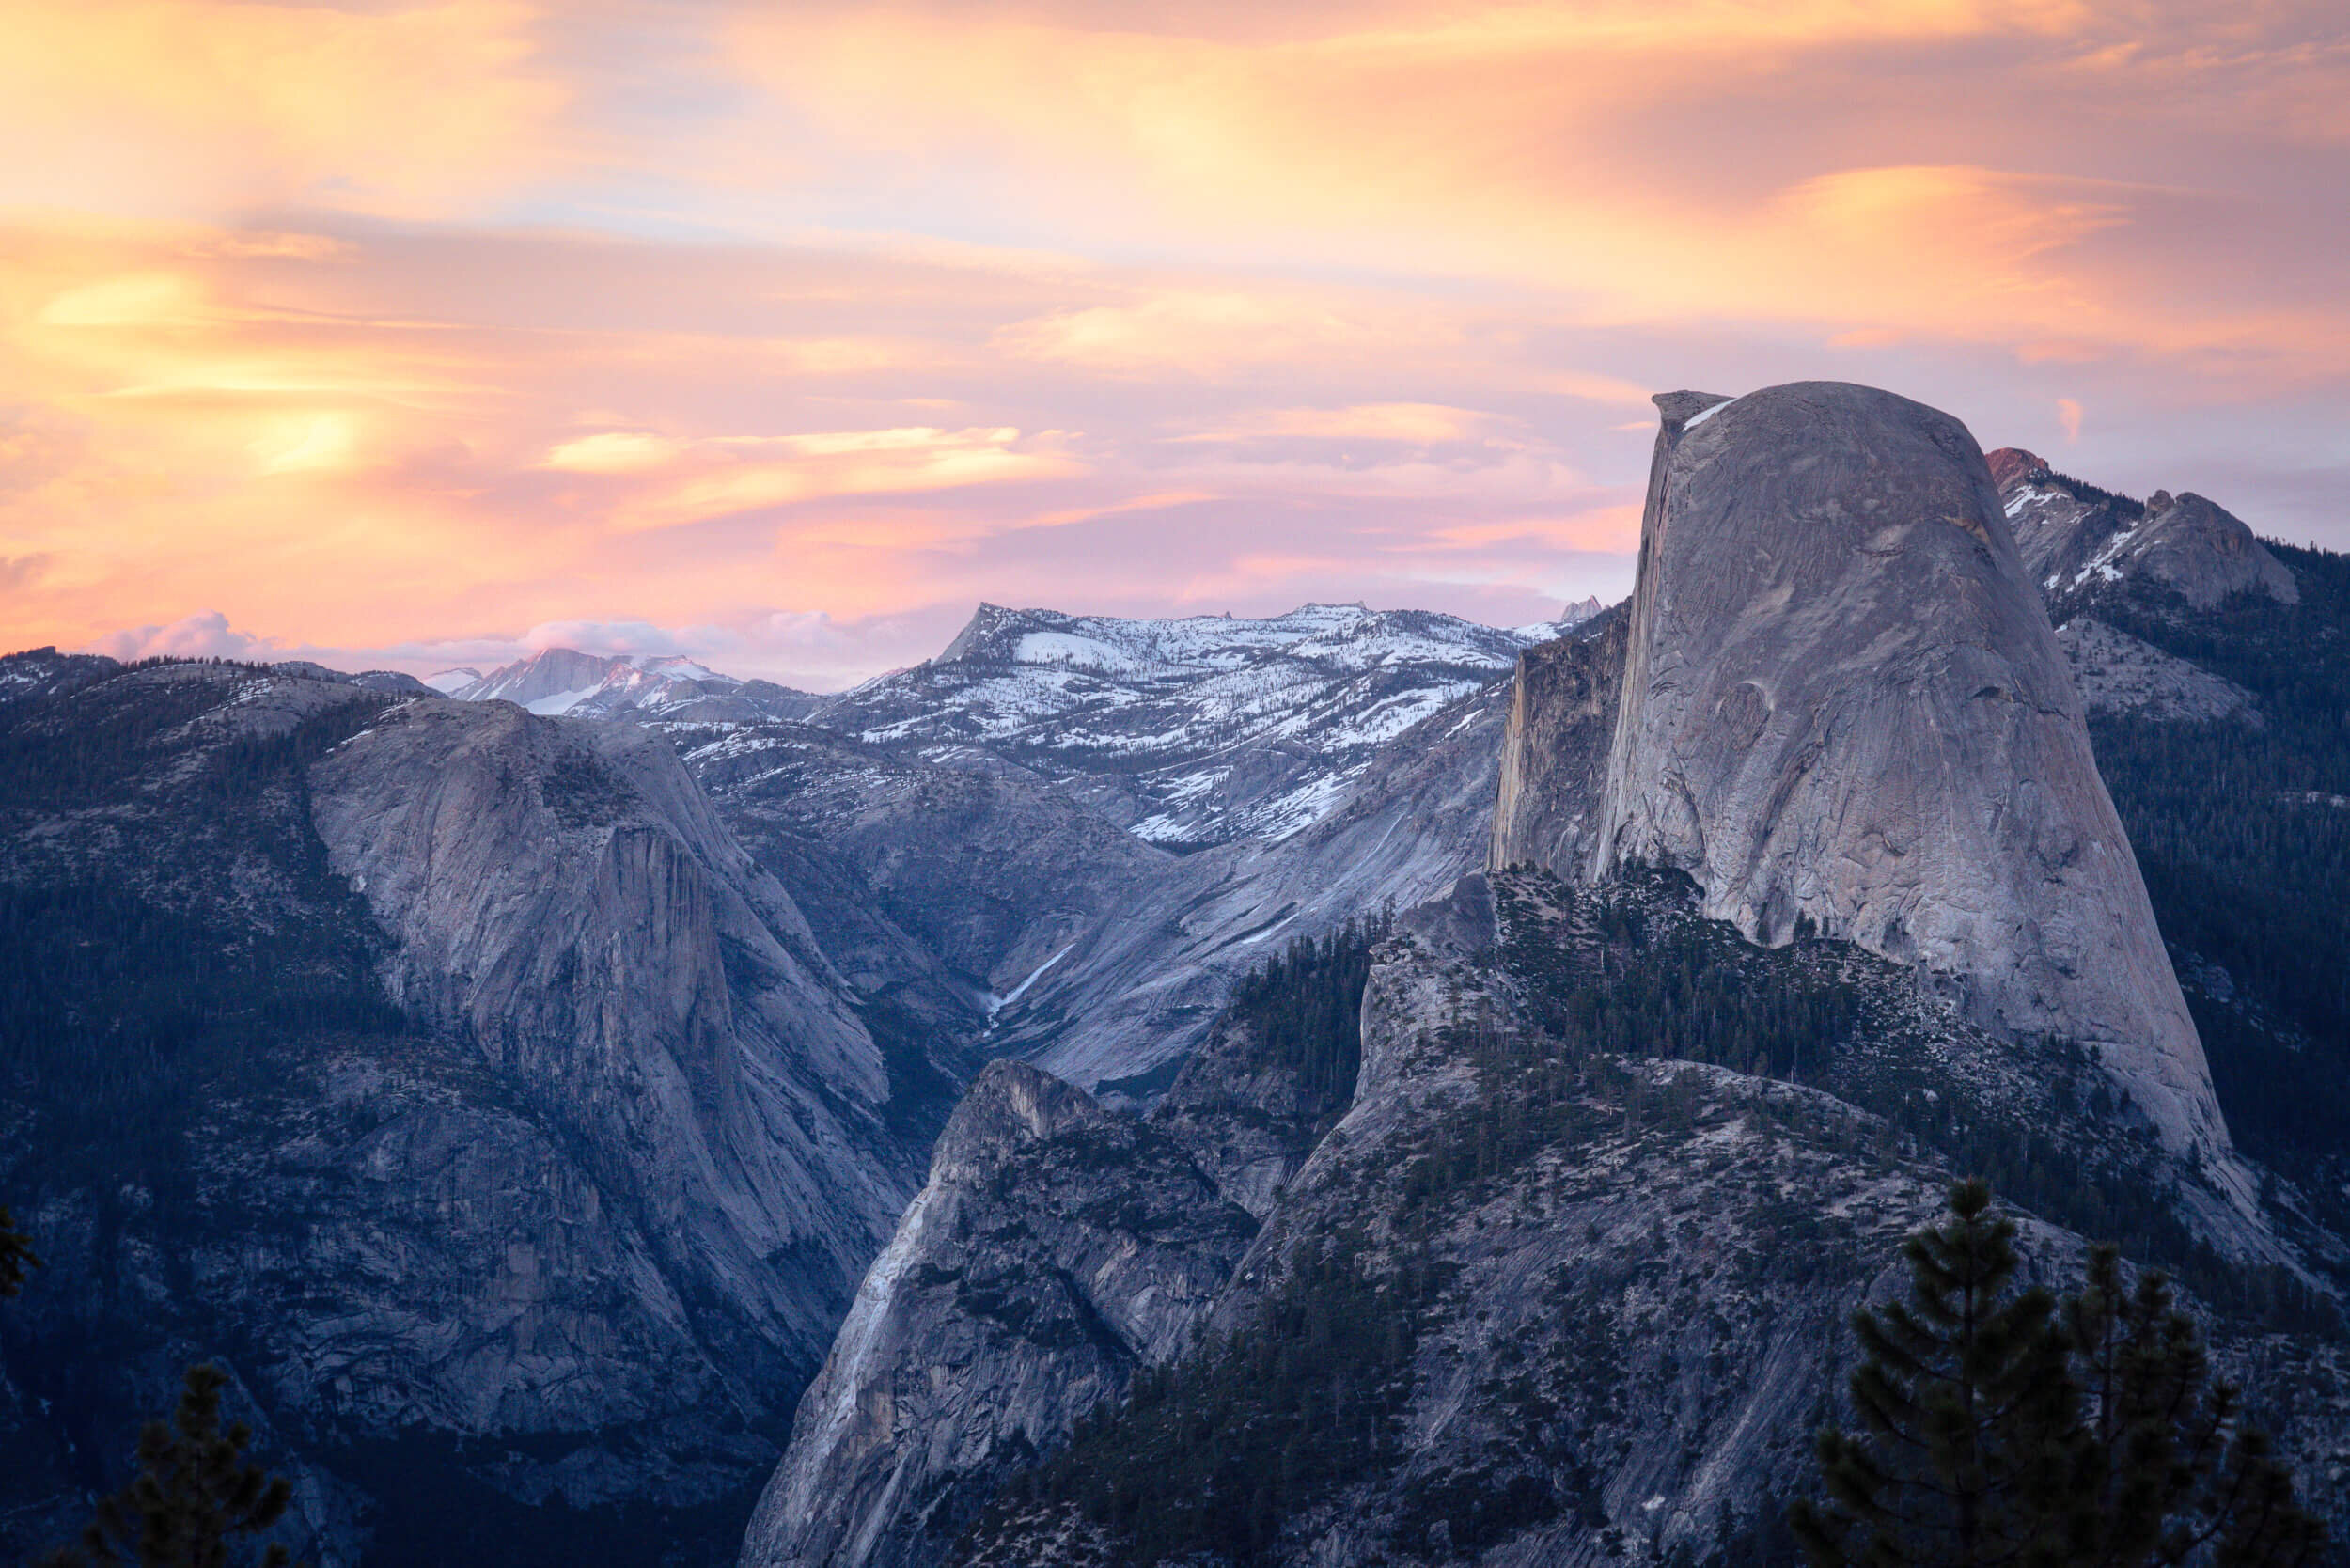
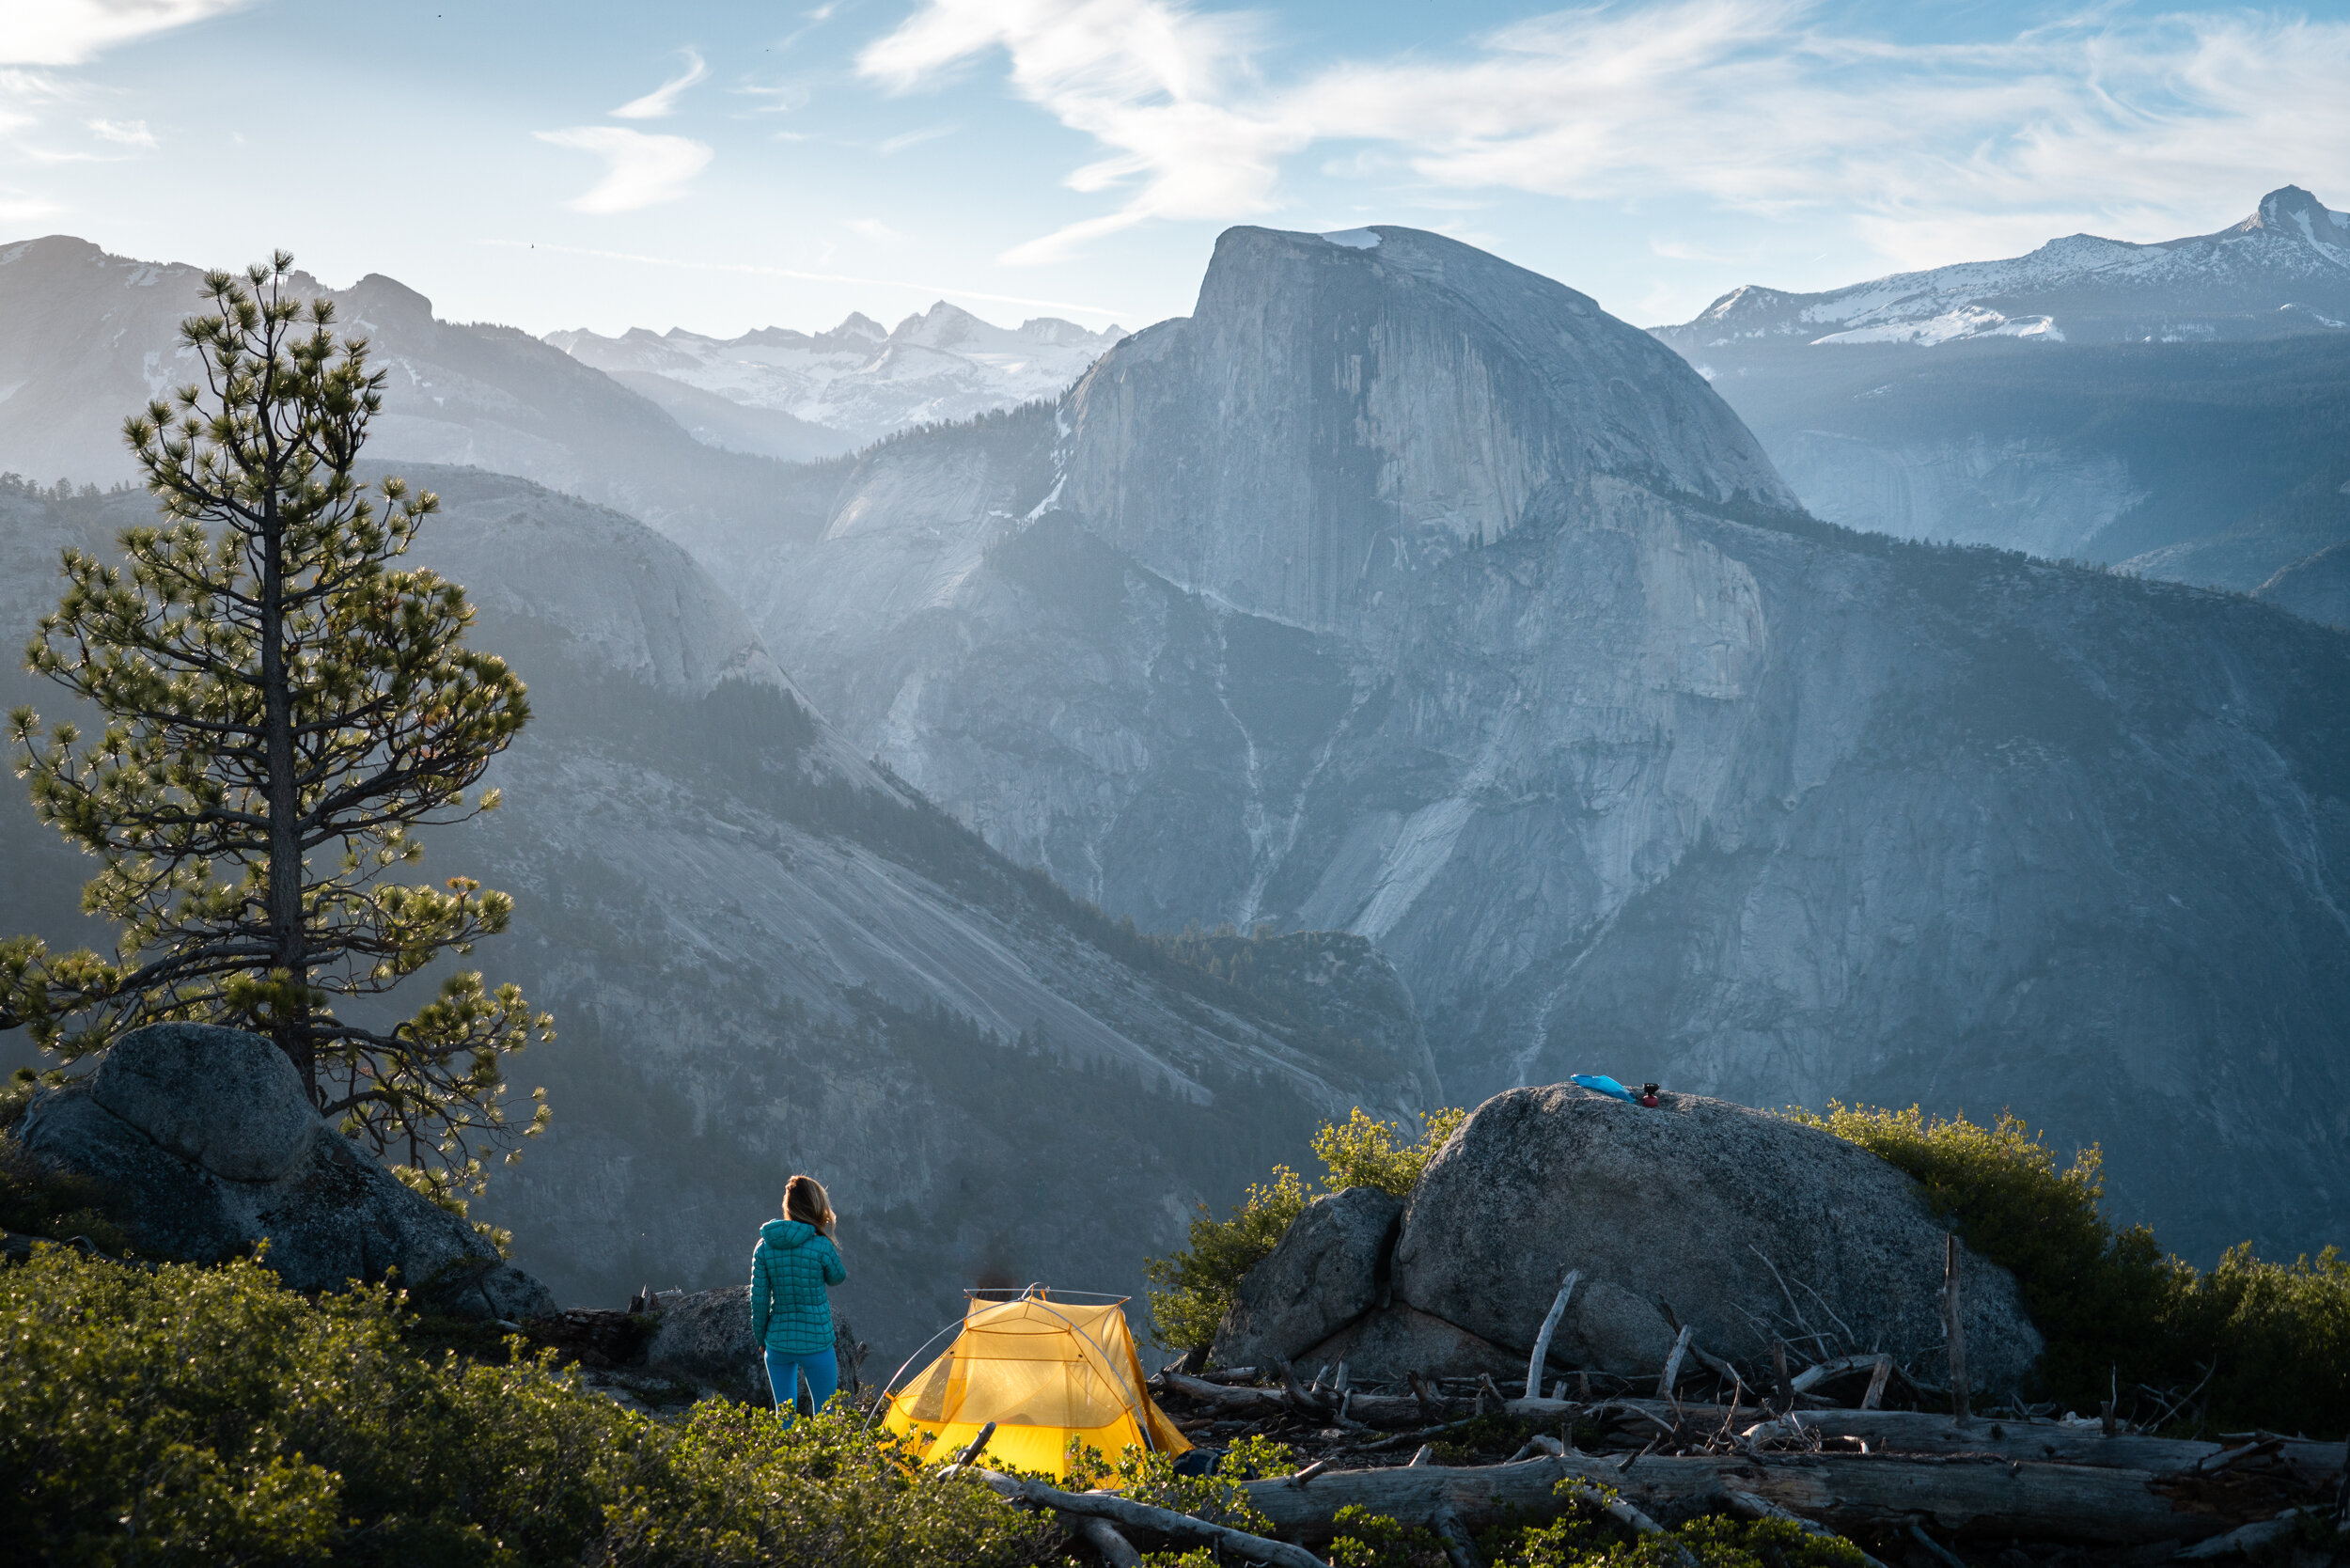
Sunset views of Half Dome in Yosemite National Park.
All the information in this section is taken from the National Park Services site, and are subject to change. Please make sure to check for updated policies and more detailed information before planing your trip.
Wilderness permits are required year-round for backcountry camping in the Yosemite Wilderness. Permits are issued to a limited number of people based on the trailhead that you wish to start your trip. The permit system insures that these wilderness areas are not overcrowded and offer opportunities for solitude, as required by the Wilderness Act.
There are essentially two ways to secure a permit for your desired trail: 1) you can reserve permits ahead of time, or 2) you can get get permits on a first-come first-served basis no earlier than 11 am the day before your hike begins. Note that for each daily trailhead quota, 60 percent can be reserved ahead of time, while the remaining 40 percent are available to walk-ins.
My personal schedule is not very conducive to making commitments far in advance. Jobs pop up last minute, and I rarely know where in the world I’m going to be more than a few weeks before hand. As a result I’ve never gone through the traditional Wilderness Permit reservation process. Instead, I’ve always gotten permits the day of. Flexibility is key here! My first choice hasn’t always been available, but I have ALWAYS been able to get permits. Sometimes that means hiking a little further than expected, or going to a completely different area of the park than I planned. But I’ve never been disappointed! The staff at the Yosemite Wilderness Centers are incredibly knowledgable about the park, and as long as you are not dead set on a specific location, they can almost always point you in the right direction.
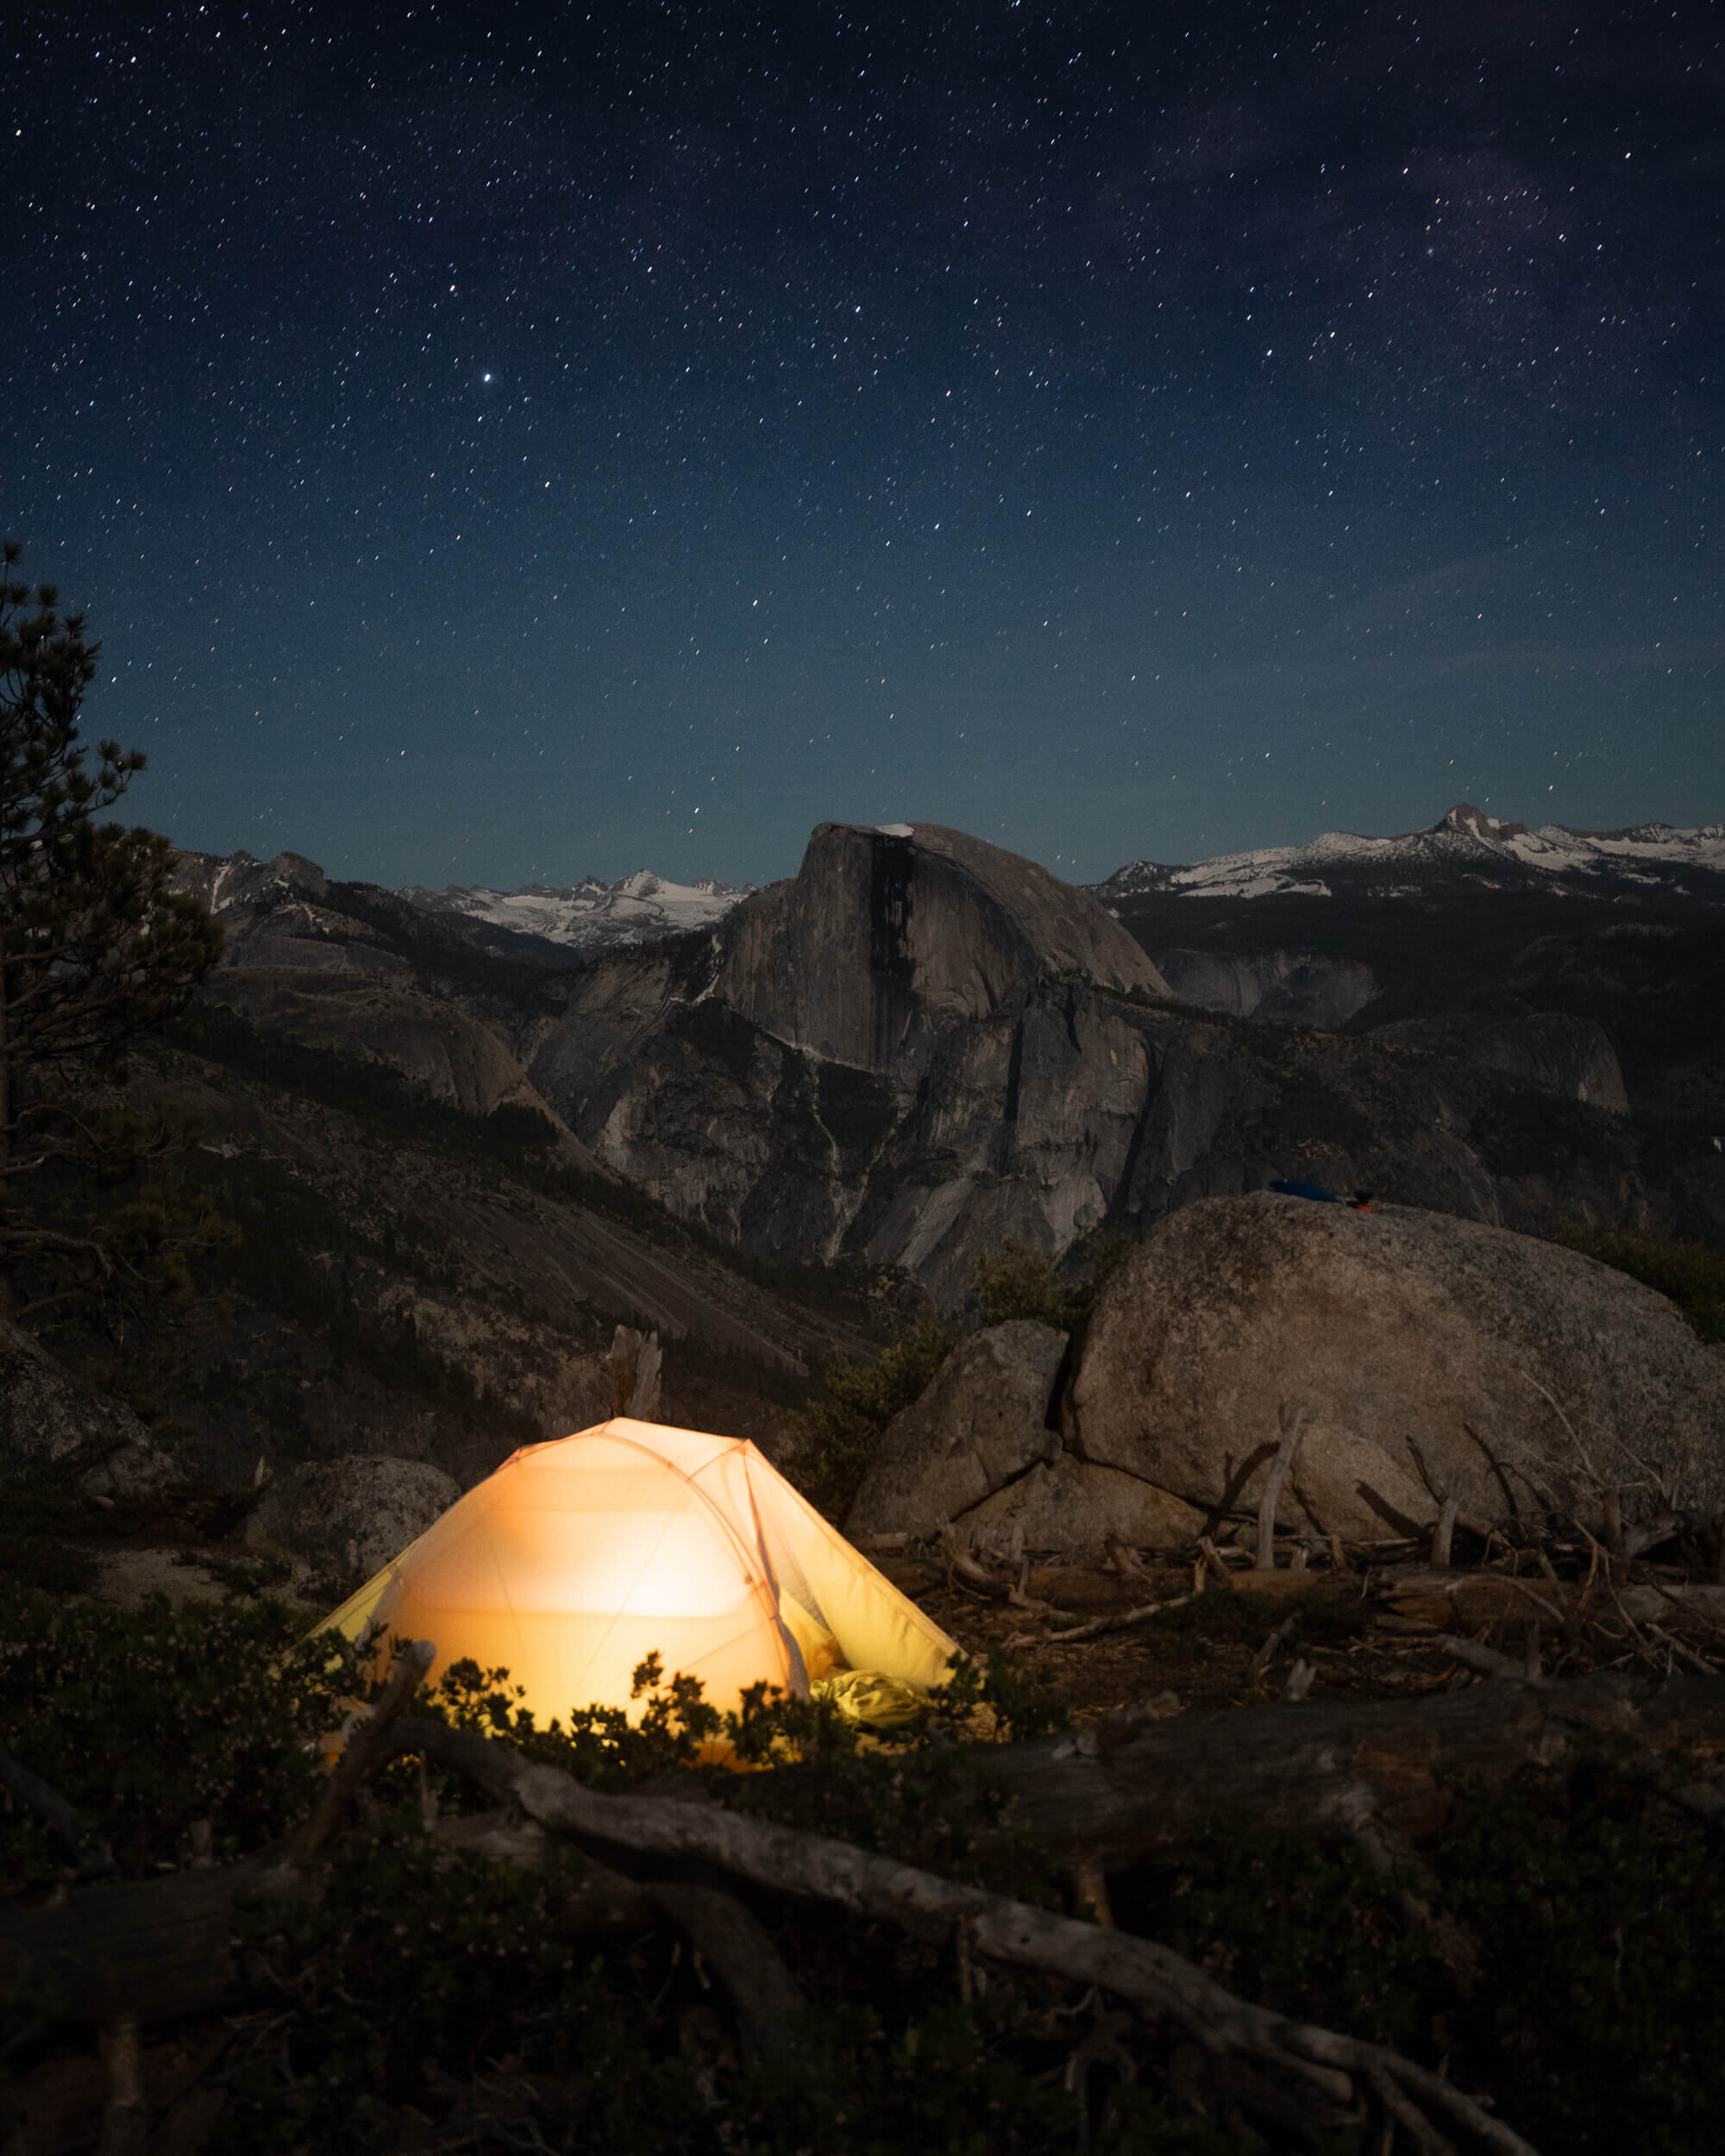
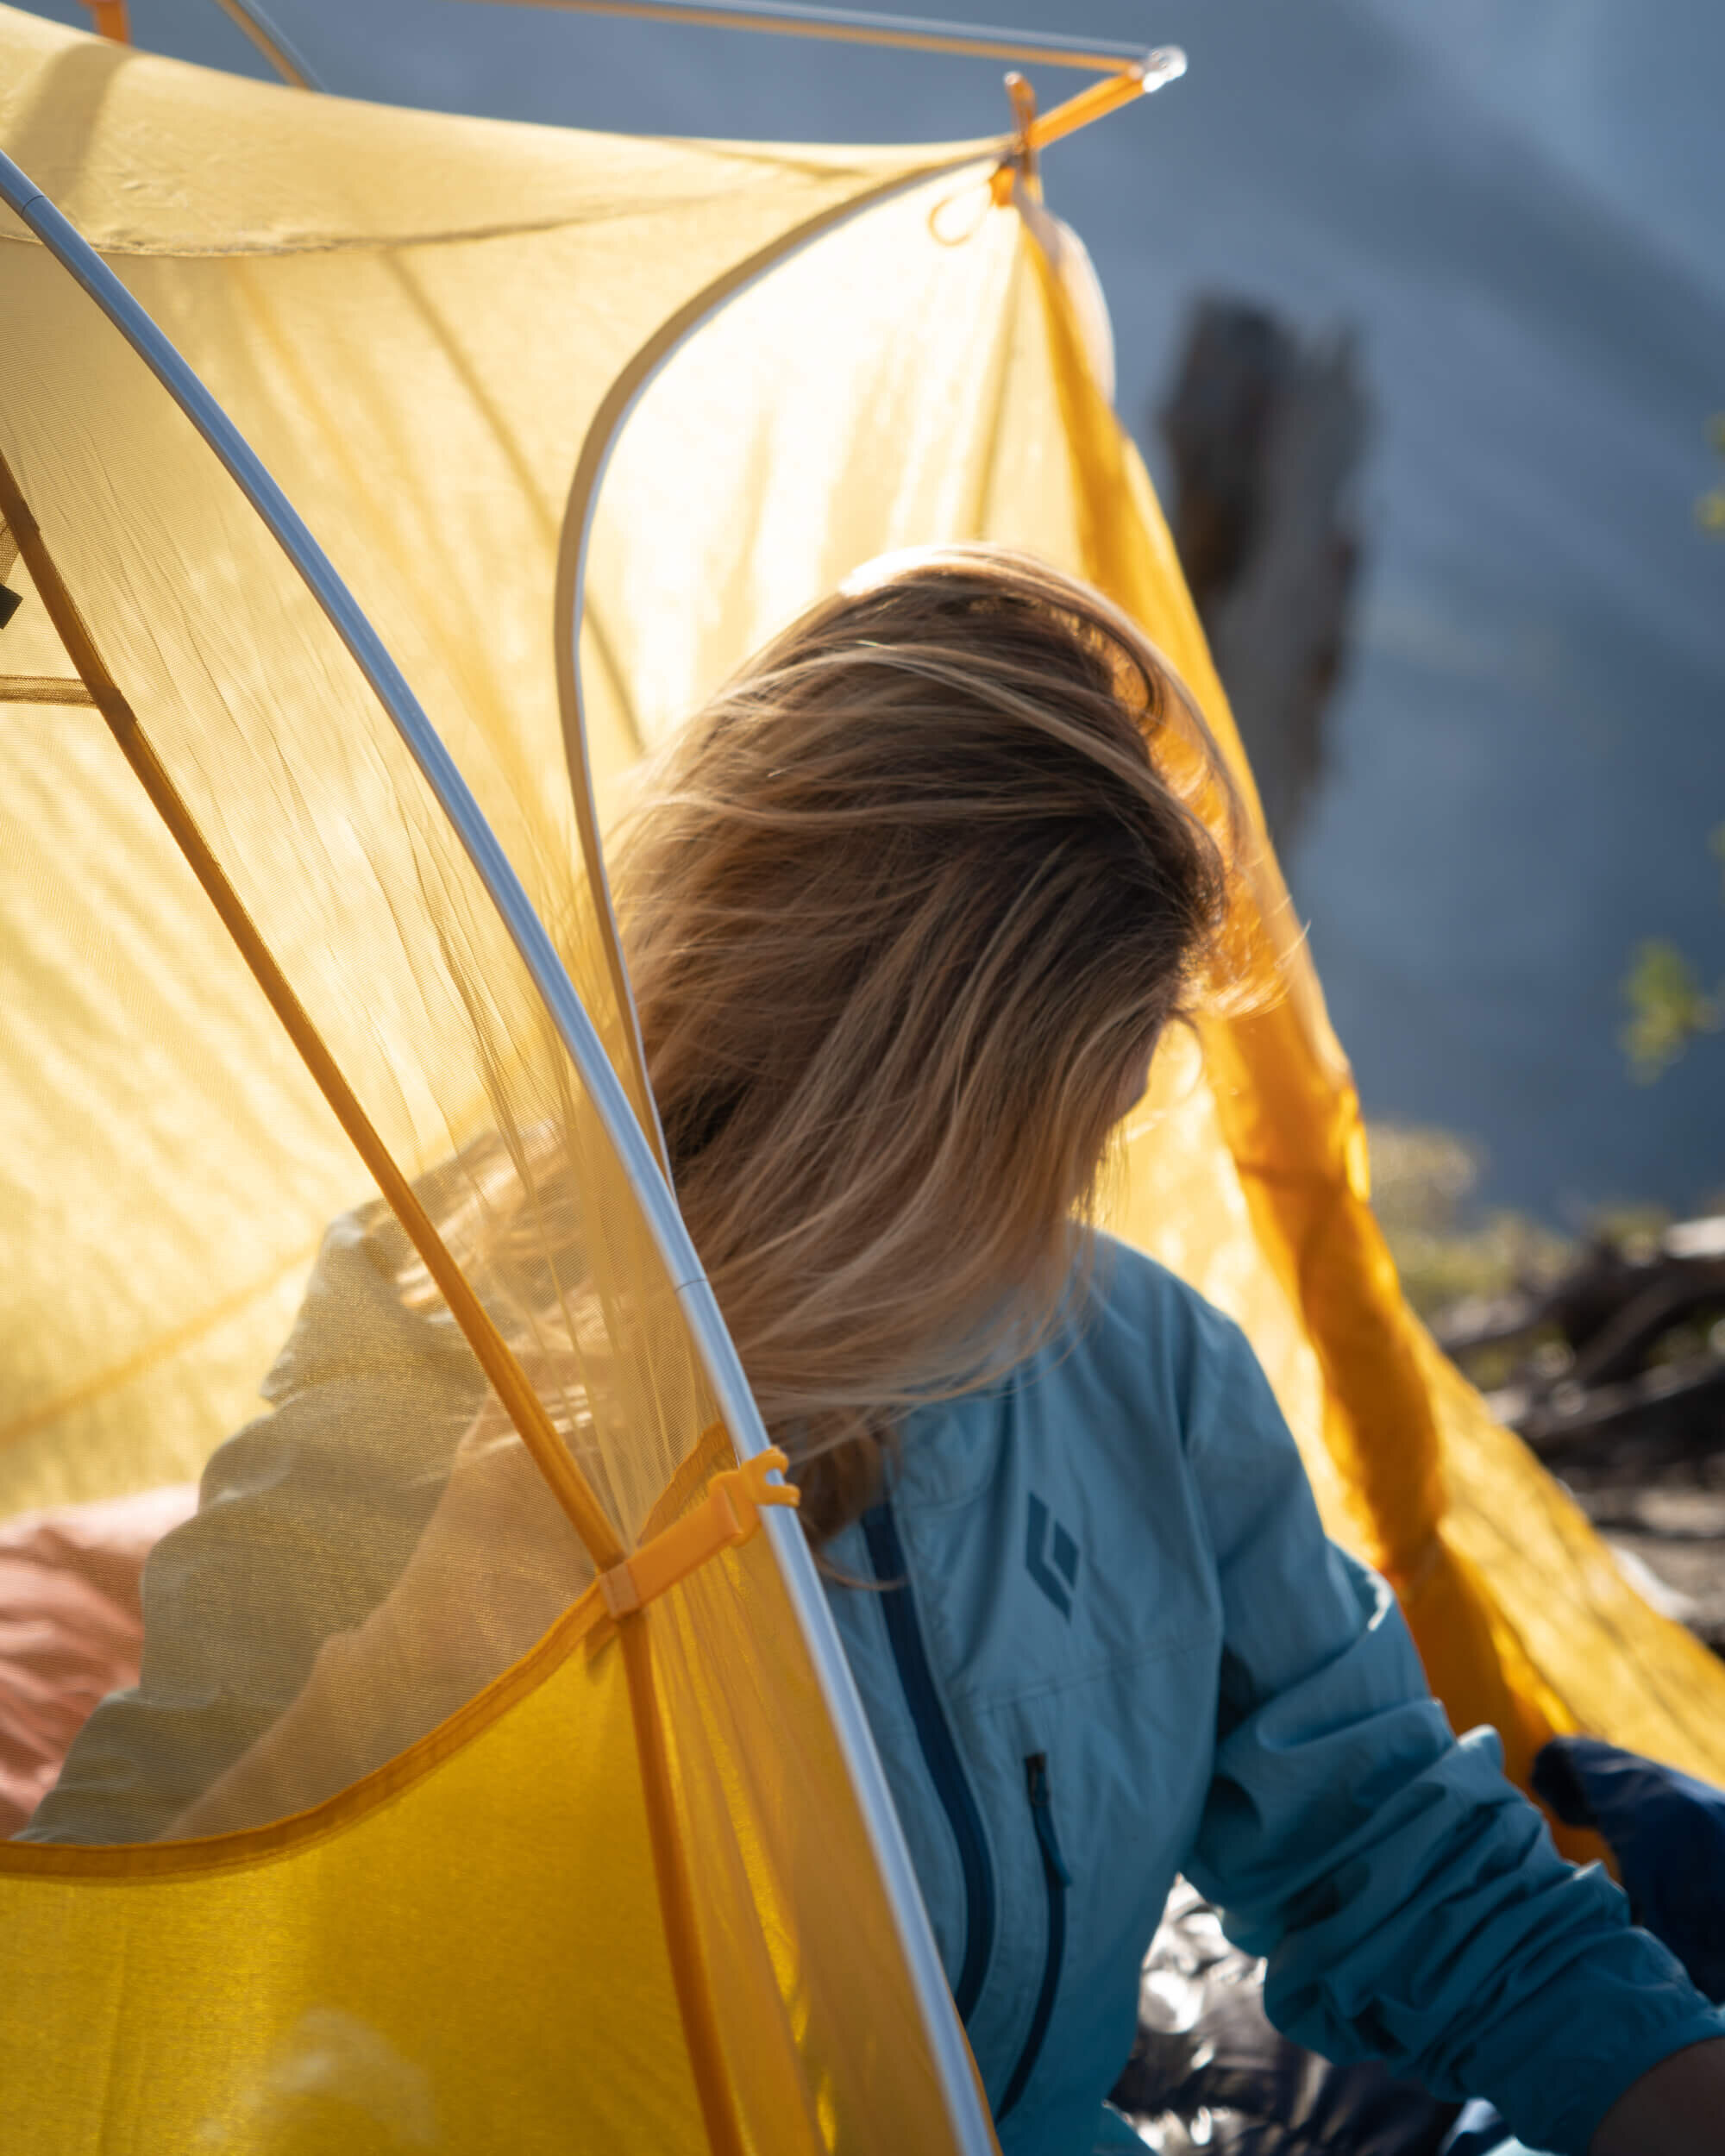
Sleeping under the stars in Yosemite National Park. Tent: Big Agnes Tiger Wall UL2 Tent
Follow These Steps To Get A Wilderness Permit For Backpacking In Yosemite
1. Decide where you will begin your overnight hike.
Once you know where you would like to camp, use the trailheads map to determine the name of the trailhead you’d like to start from. If you are going for first-come, first-served permits you may want to be ready with alternative trailheads that might work for your desired location.
2. Check if there are any reservations available for that trailhead.
Use the trailheads report to see which trailheads are available for specific dates.
3. Apply for a wilderness permit.
Wilderness permit reservations are processed by lottery 24 weeks (168 days) in advance of the hiking start date from mid-November through October. Popular trailheads generally fill up the day that permits become available, so if you have a very specific day and trail you are interested in, put a reminder in your calendar now!
4. If there are no permits available to reserve, consider a first-come, first-served permit.
Wilderness permits are available at any of the Yosemite National Park Wilderness Permit issuing stations on a first-come, first-served basis beginning at 11 am the day before the intended hiking date. I have only used this last minute method for getting permits, and it has never been an issue! While the most popular trailheads may fill up, there always seems to be space available on other trailheads in the park. And there is no such thing as a bad trailhead in Yosemite!
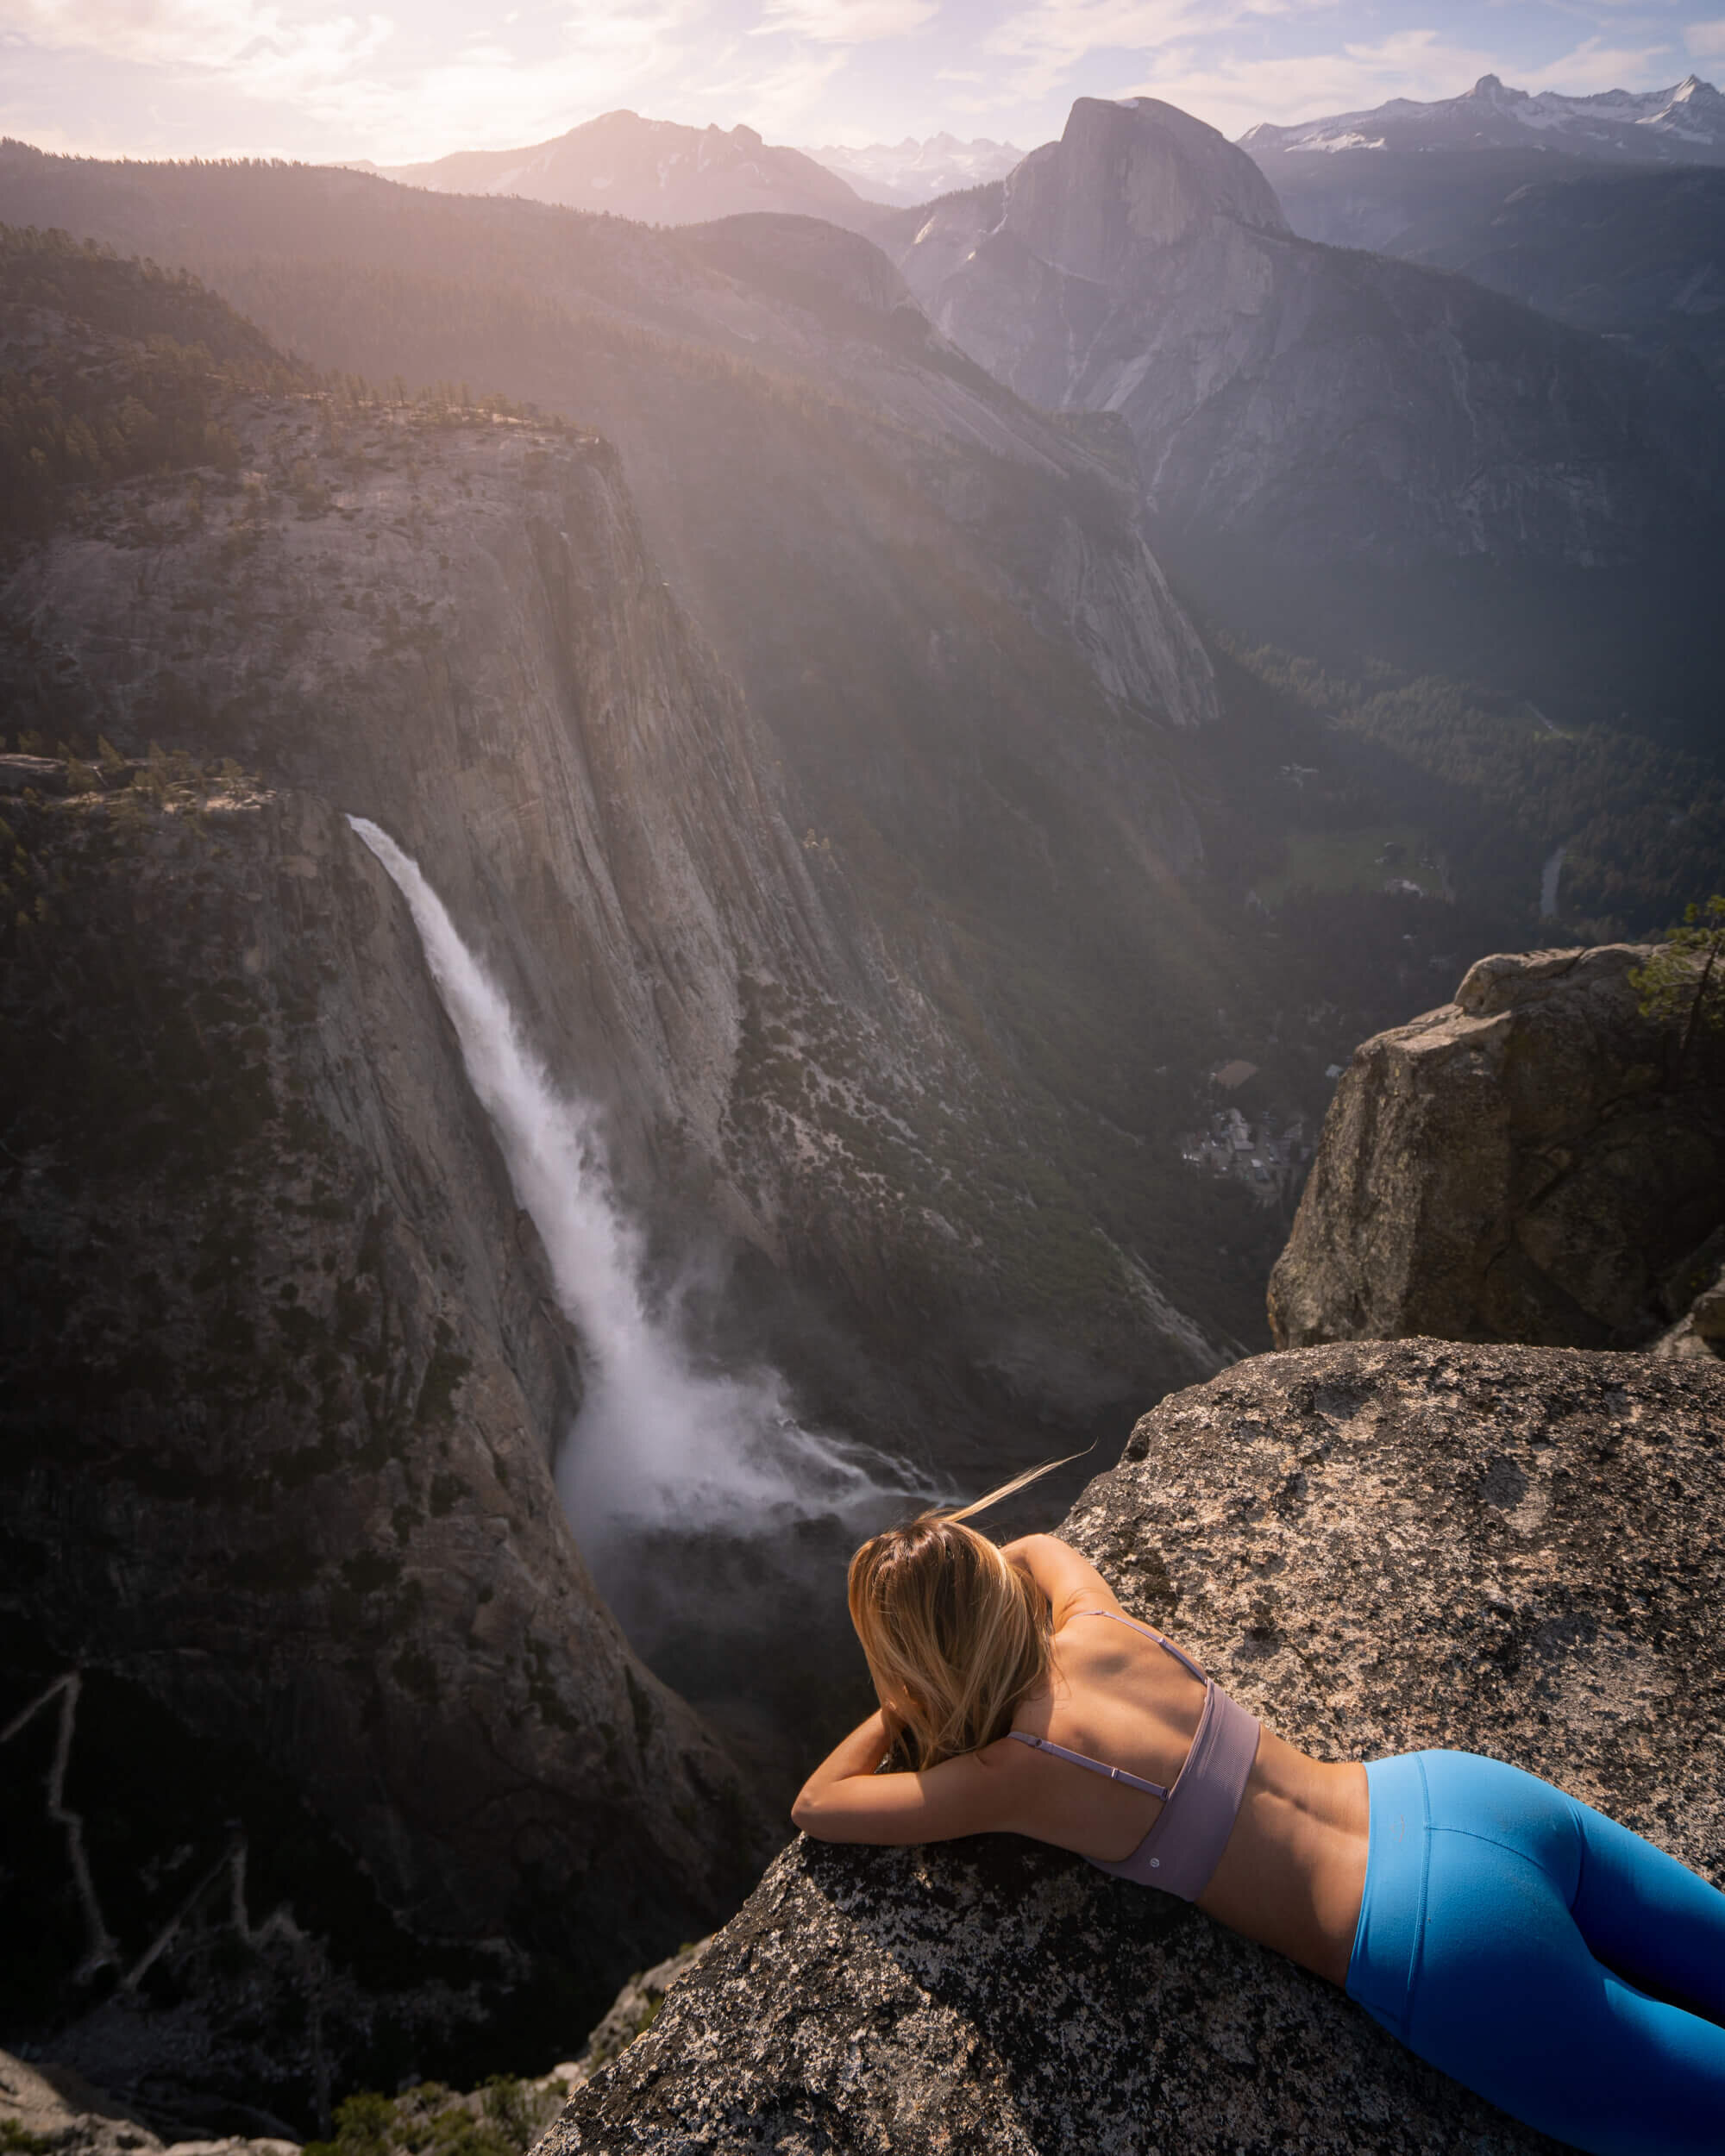
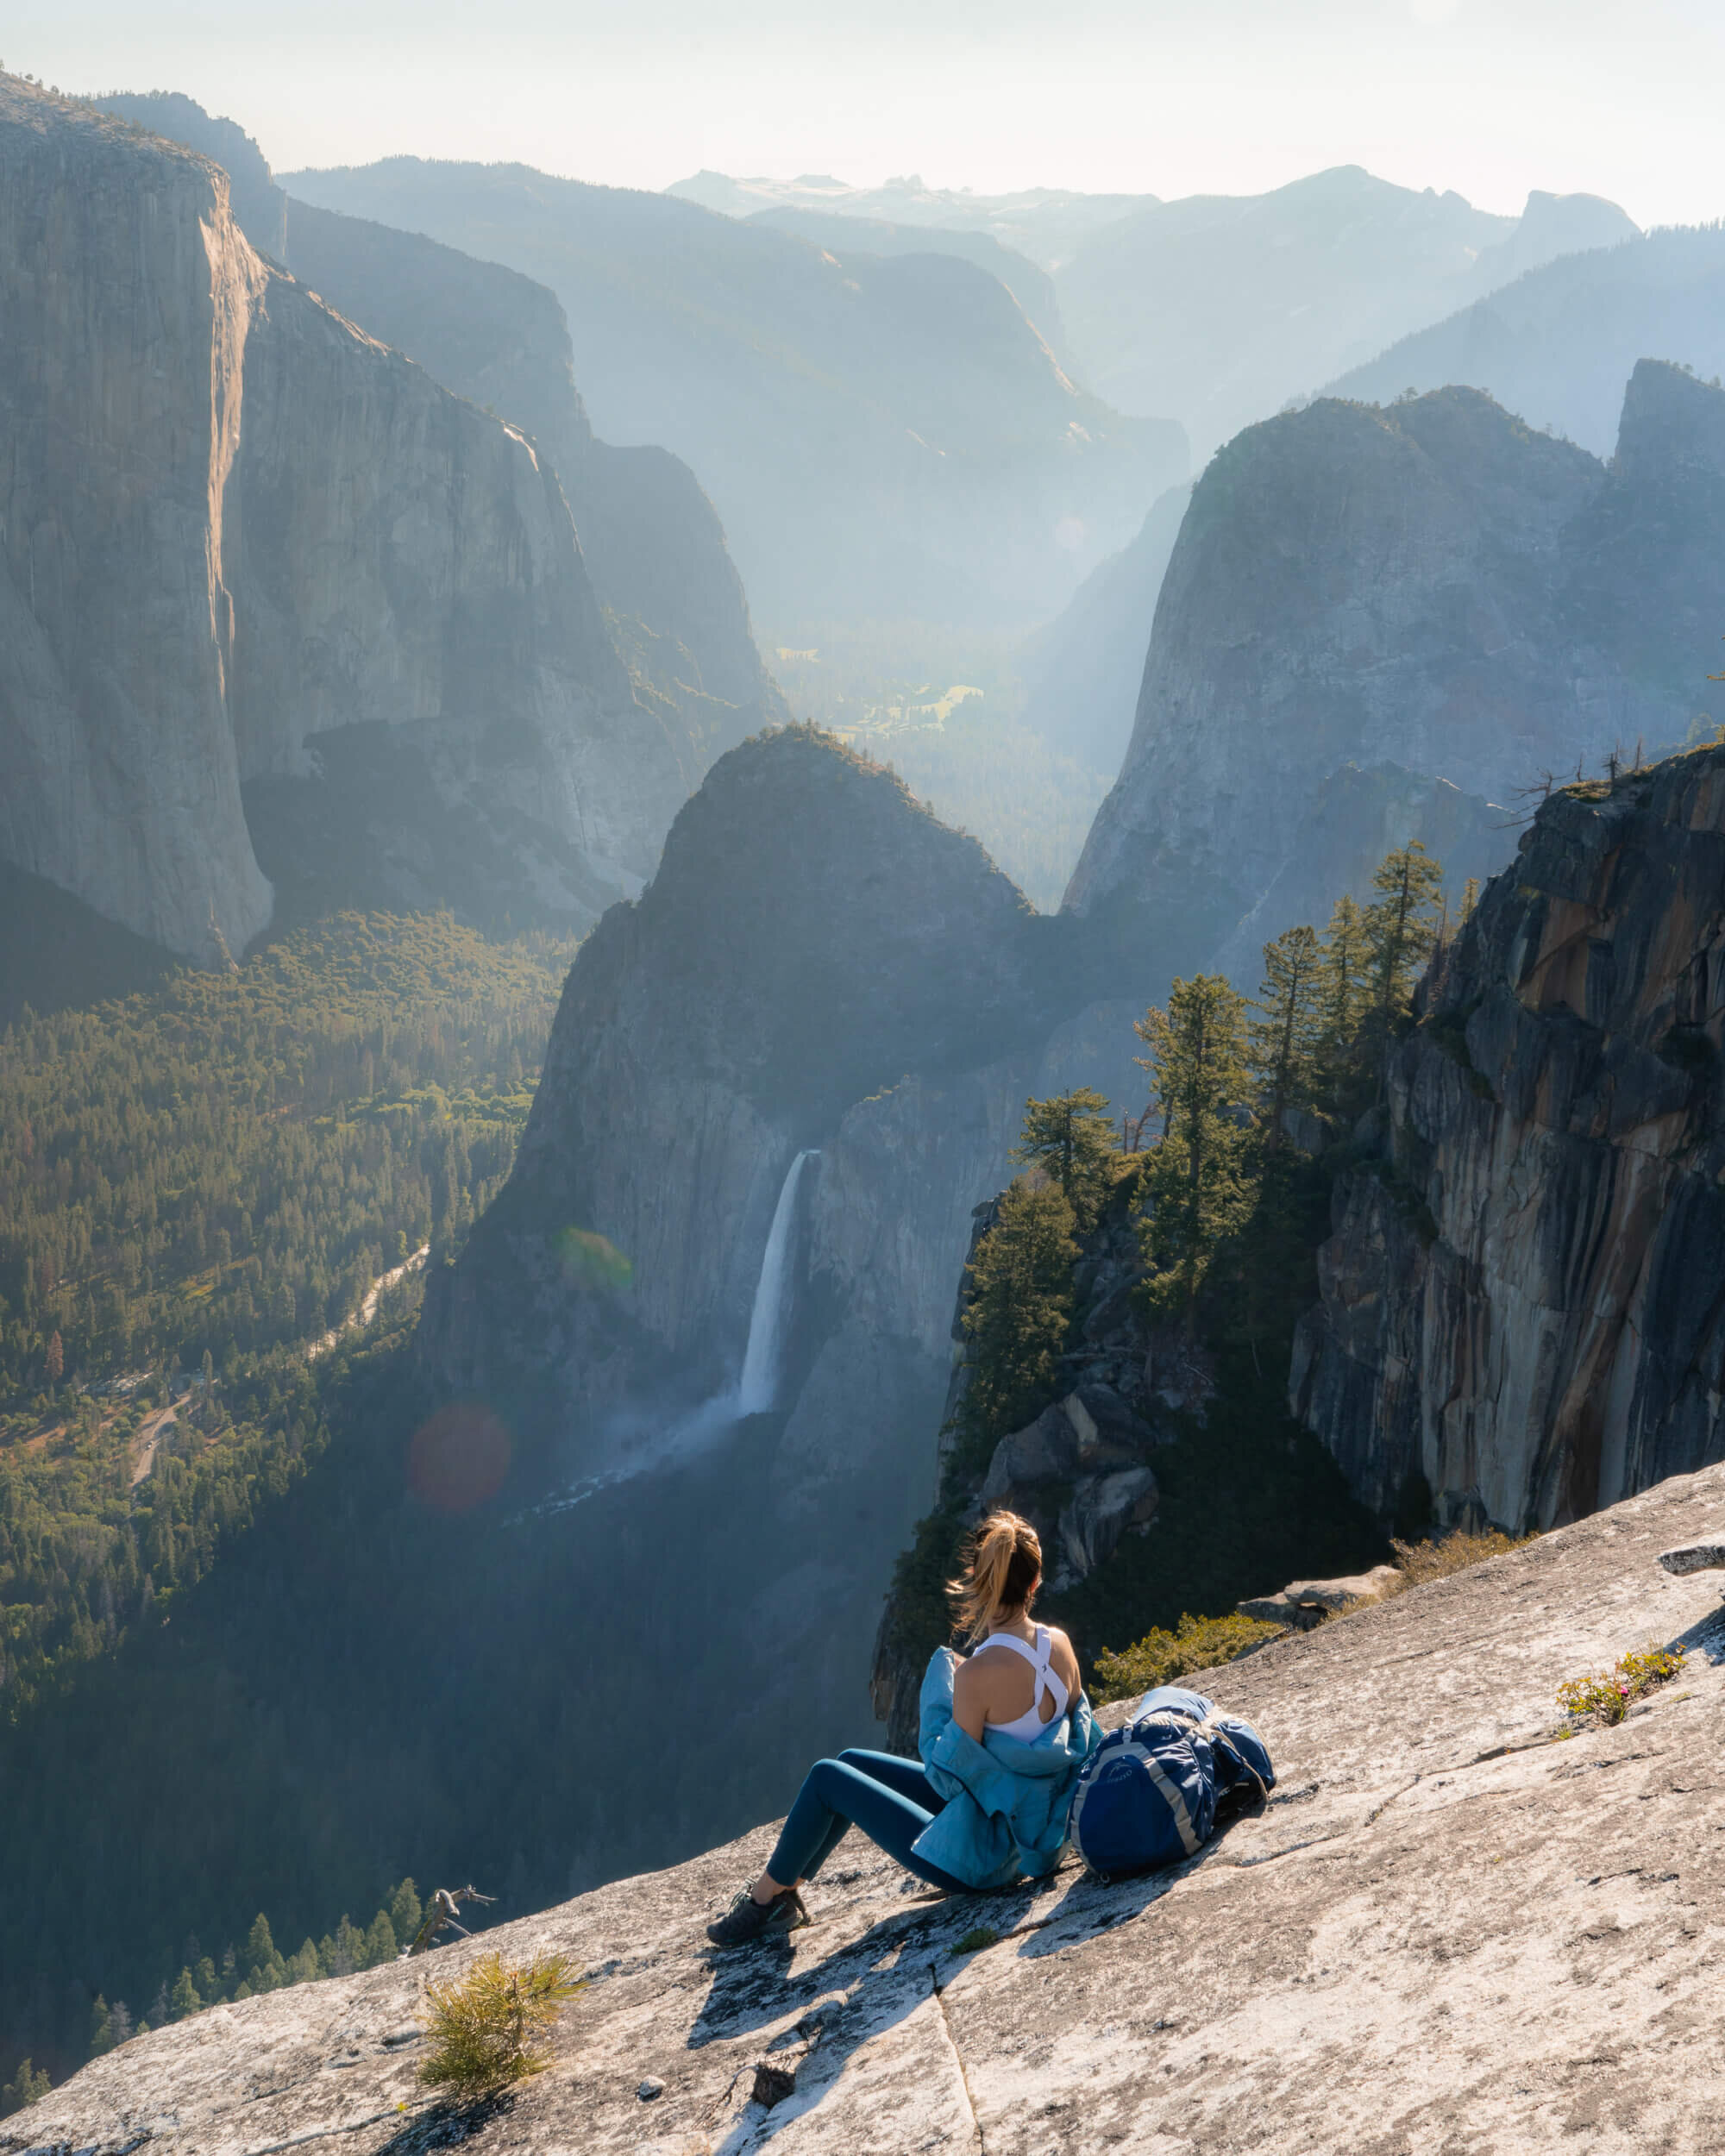
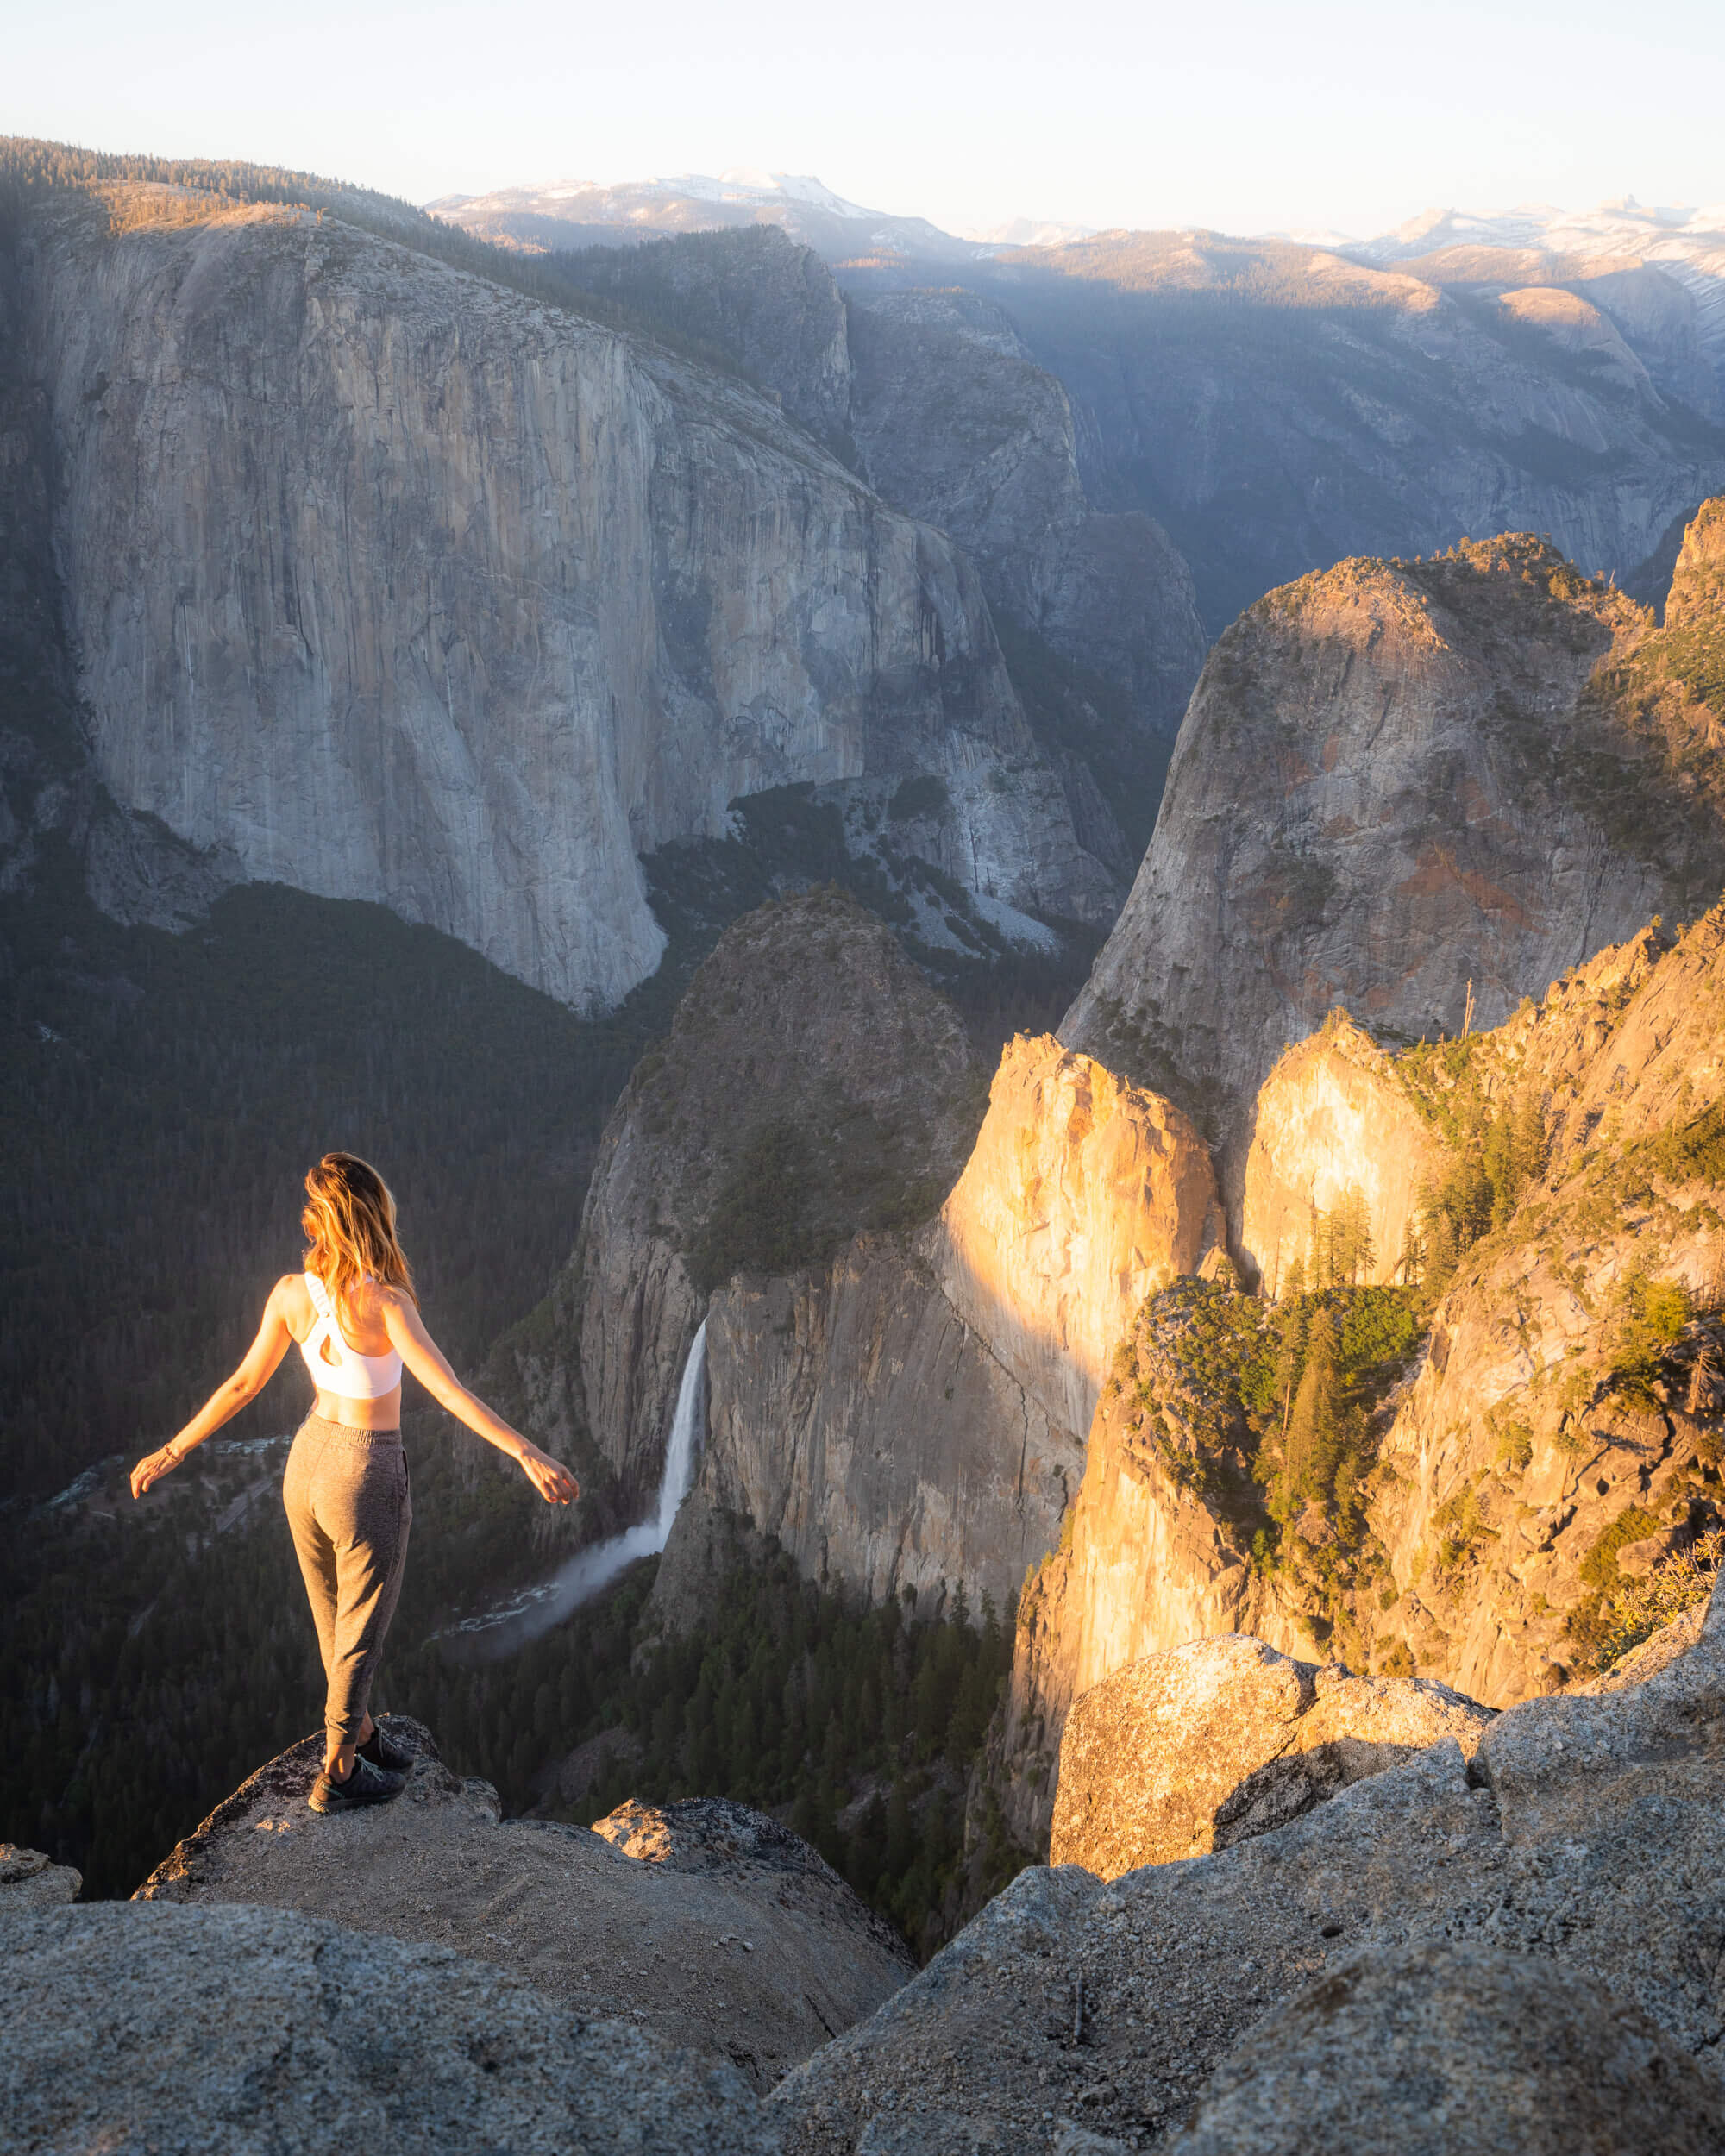
Looking down on Yosemite Falls.
Where To Camp In Yosemite National Park’s Wilderness
Once you have a wilderness permit you will have free rein over some of the most stunning backcountry wilderness you can imagine. Essentially the only thing holding you back from your dream camping spot, is the distance you can hike. As I previously mentioned, the trailhead quota system limits use based on where you begin your hike, and in some cases, on where you camp the first night of your trip. After that though, you can camp wherever you can hike to within the wilderness, provided you follow all the regulations. It still blows my mind every time I think about the possibilities!
NOTE: There are a few designated campgrounds, so make sure to research the specific trail you are interested in. Also, it’s always better to use an established backcountry camp sites – as opposed to setting up a new camp. Please always follow Leave No Trace Principles!
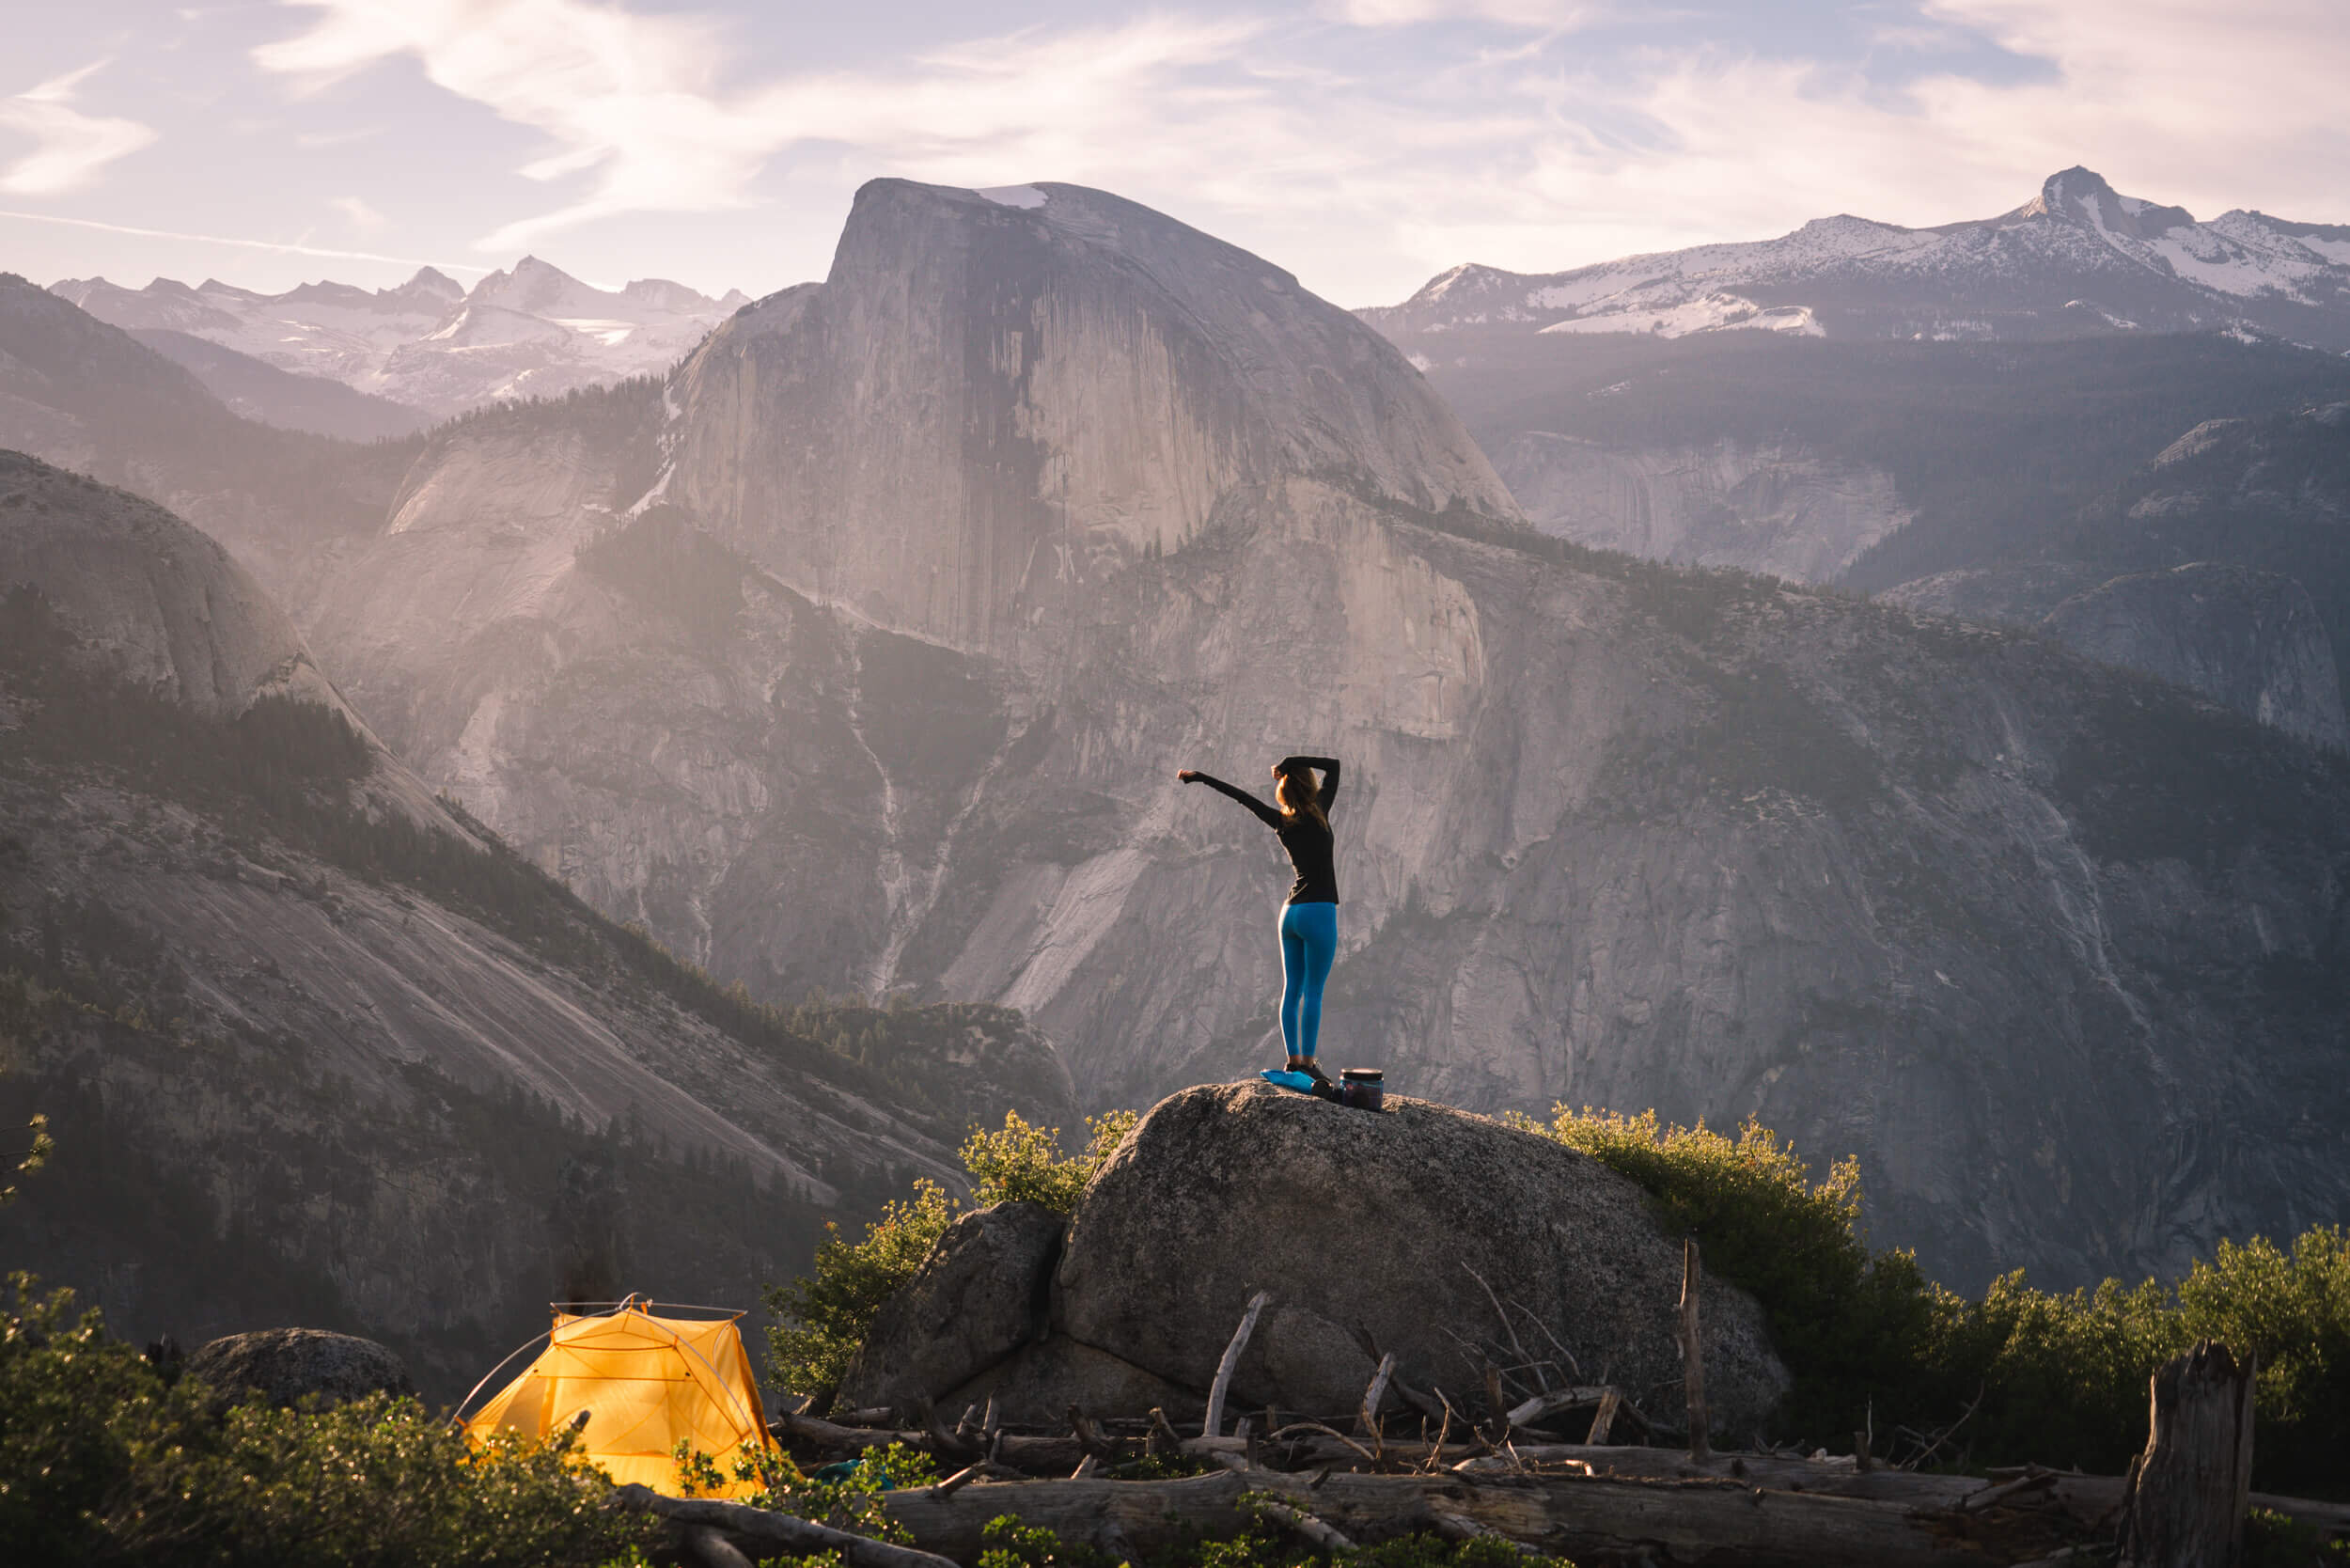
It’s not hard to find a camp spot with a view at Yosemite National Park. Tent: Big Agnes Tiger Wall UL2 Tent
Essential Gear For Backpacking In Yosemite
Backpack
The Osprey Exos 48 has been my go to backpacking pack for a few years now. Osprey recently came out with a women’s model of this pack – The Eja. I have not had the chance to try it out, but I hear good things. The Exos and Eja have a sturdier frames than most lightweight packs, carry heavier loads comfortably, and are also a pretty good value for the quality of backpack. If you don’t mind a heavier pack in exchange for a little more support and a larger carrying capacity, then I’d highly recommend looking into the Gregory Zulu 55L.
Bear Resistant Food Canister
Proper food storage is mandatory in all areas of Yosemite. Hanging or guarding your food items is not allowed. The Bear Vault is one of the approved bear-resistant food canisters in Yosemite National Park, and it’s also a lot less bulky than the bear canisters they provide.
Tent
I purchased the Big Agnes Tiger Wall UL2 Tent for this upcoming camping season. I’ve only had the opportunity to take it on a few backpacking trips so far – but I’m loving it! The Tiger Wall has two doors and two vestibules, double-wall construction, and a hassle-free pitch. For a completely freestanding option I own the Big Agnes Copper Spur HV UL3. Ultra-light two person tents are pretty small, and there’s not a lot of room to spread out, so I like to take the 3 person tent on trips when I want extra storage, I’m not super comfortable snuggling with my tent partner, or I’m going to be spending a lot of time in the tent. The Tiger Wall also comes in a 3 person option!
Sleeping Bag
I run exceptionally cold in general, but especially when I sleep. Growing up I associated camping with cold sleepless nights. As a result, if there is one piece of gear that I’m more than willing to splurge on in exchange for comfort in the backcountry it’s my sleeping bag. Warmth-to-weight ratio is key here. My favorite sleeping bag right now is the Western Mountaineering Alpinelite. The Kelty Cosmic Sleeping Bag is a more budget friendly option that still has exceptional quality for the price point.
Sleeping Pad
I have two sleeping pads that I use interchangeably, The NEMO Equipment Inc. Tensor Insulated Sleeping Pad, and the Therm-a-Rest NeoAir XLite Sleeping Pad. Comfortable and ultra-light, the Therm-a-Rest NeoAir XLight is a mainstay in the backpacking. I’ve read complaints about the pad making noise when you move around on it, but I’ve never noticed. Like the NeoAir, the Tensor is a lightweight sleeping pad for minimalist backpacking. Both pads reliably hold air all night, and fold down into a compact size that easily fits inside my backpack. Plus, the insulation means extra protection against the cold ground, which we already know is a priority for me!
Stove
Jetboil Flash Stove – Small, durable, and fast. The Jetboil’s all in one design makes it an easy choice for a convenient backcountry cook system. Jetboil’s are designed to do exactly what the name promises: boil water quickly. The Jetboil MiniMo Stove is another very popular option if all you need to do is boil water for tea, coffee, and dehydrated meals. But I use my Jetboil to cook things like Top Ramen and Annie’s Mac and Cheese, and the MiniMo isn’t big enough for that.
Hydration
I’ve probably used every water filtration system out there at this point. And to be honest, I think they all have a time and a place. I’ve been using Katadyn BeFree Water Filtration System on trips where I know there will be plenty of access to water, and I want to go super light weight. It was perfect for the Yosemite trip! That being said, I ALWAYS bring Purification Tablets with me as a backup. Doesn’t matter if I’m on a day hike or a backpacking trip. Sure, they might make the water taste a little funny, but I think they are hands down the lightest weight, most reliable method of purifying water, and critical if your primary method breaks down.
Pillow
The camping pillow is a game changer for quality of sleep. I used to just ball up my extra layers inside my stuff sack and call it good. And that totally works. But this is way better! The NEMO Equipment Inc. Fillo Elite has pretty much everything I look for in a pillow (minus feathers) – it is soft and provides a nice amount of support. It packs down into its own internal stuff sack, and weighs next to nothing.
For a more comprehensive gear list, check out my complete Hiking and Camping Gear Guide! In that guide you will find everything you need to get out into the mountains safely and comfortably. Please note that I do not buy new gear every year, so some of the gear you see photographed may be older versions of a product than is linked.
Make sure you don’t forget anything on your next backpacking trip with my comprehensive Backpacking Checklist! You can even download a printable version!
Favorite Backcountry Camping Spots in Yosemite
My happy place isn’t really a specific physical location, but rather an idea, or perhaps an ideal intrinsic to all those places that remain wild and untamed. There is no better way to experience the full force of Mother Nature’s power to heal and inspire than by throwing on a backpack and making her your home – even if for just one night. Here are a few backcountry camping spots in Yosemite that made me more than a little bit happy to wake up to!
Eagle Peak
Camping at Yosemite National Park.
Eagle Peak is the highest of the Three Brothers rock formation. The peak is located just east of El Capitan, and was described by John Muir has having the “most comprehensive of all the views” available from the north wall.
The most common way to reach Eagle Peak is by following the Upper Yosemite Falls and Eagle Peak trails. The hike is 6.0 miles (9.7 km) one way with a climb of over 3,500 feet (1,100 m). The trailhead is located at Camp 4 near Yosemite Village. It passes near Yosemite Falls and features beautiful views of the valley on the way up.
If you are unable to secure Wilderness Permits for the Upper Yosemite Falls trailhead, the peak can also be reached from the Tamarack Flat Campground located off the Tioga Pass Road. Another route starts at Yosemite Creek Campground.
Distance: 6.9 Miles / 11km
Elevation: 7,779ft / 2,371m
Difficulty: Difficult / Strenuous
Trailhead: Upper Yosemite Falls
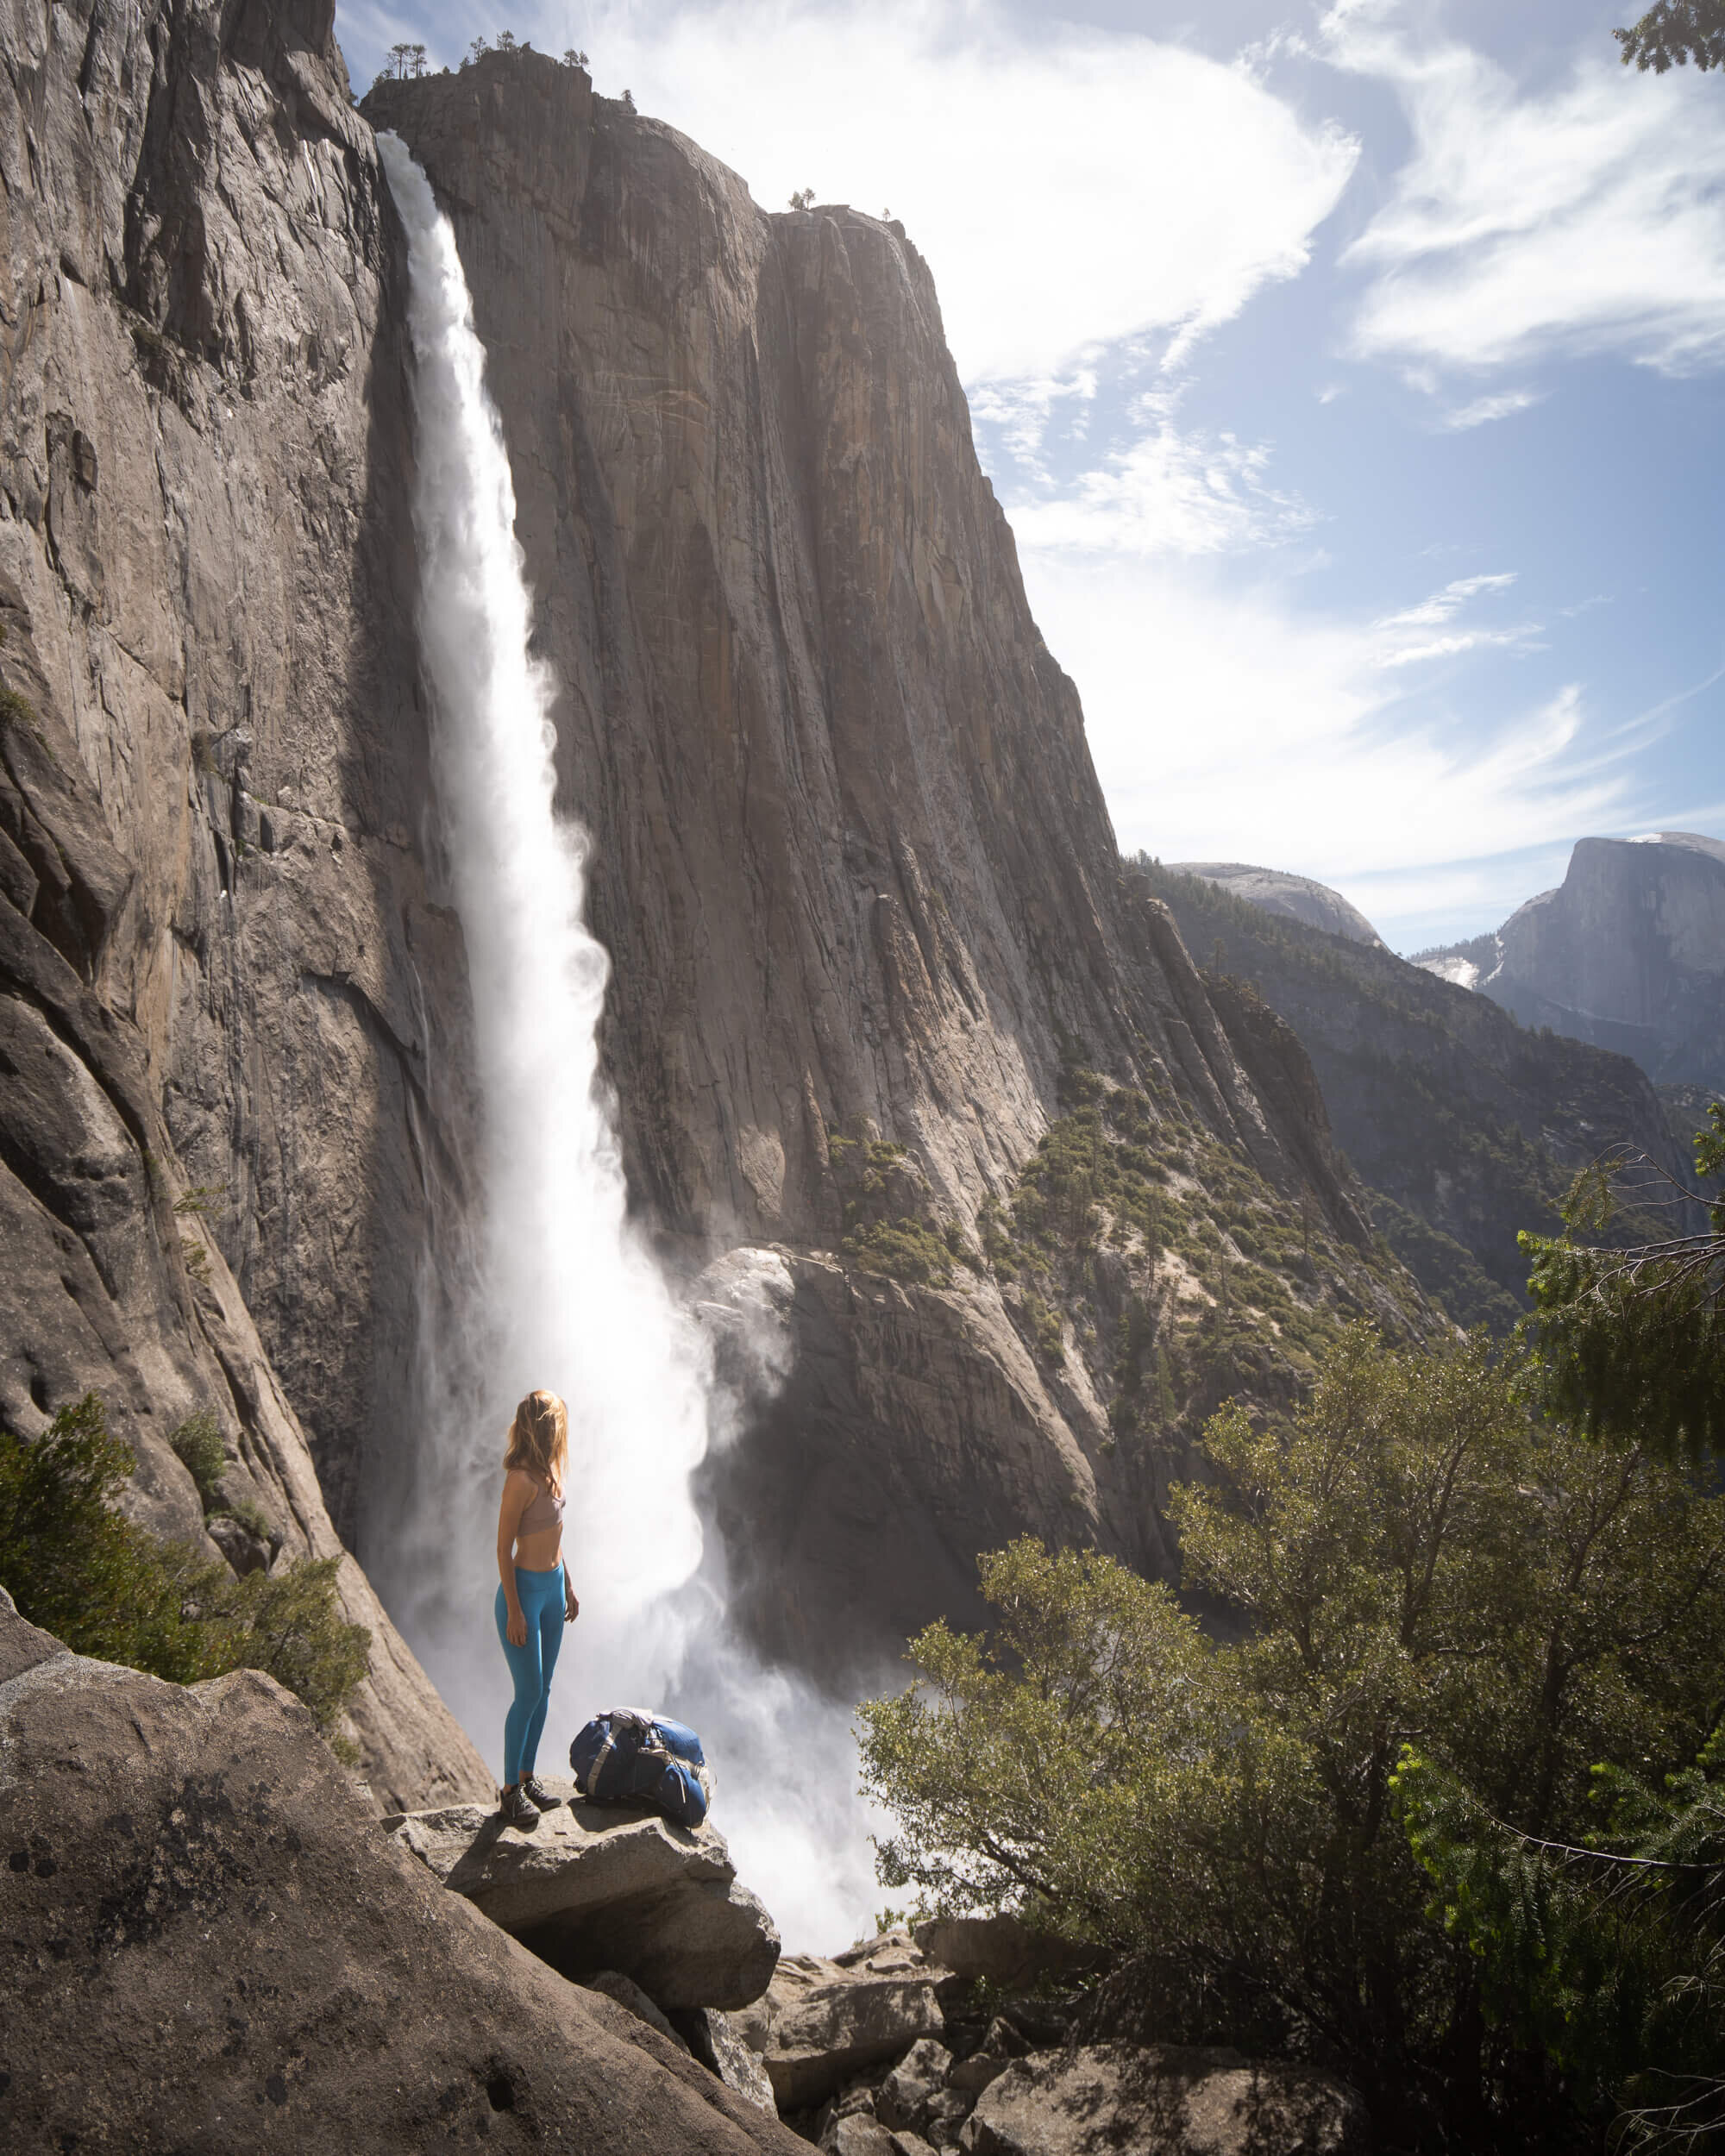
Upper Yosemite Falls Trial in Yosemite National Park.
Pohono Trail
The Pohono Trail rewards hikers with stunning viewpoints of Yosemite Valley from the south rim.
Most commonly hiked one-way (downhill) from Glacier Point to Tunnel View, the Pohono Trail rewards hikers with stunning viewpoints of Yosemite Valley from the south rim. In order, these views include Taft Point, Dewey Point, Crocker Point, Stanford Point, and Inspiration Point. An optional 0.5 mile (0.8 km) side trail will take you to the summit of Sentinel Dome. When we did this hike we camped at Crocker Point. If you are short on time, can’t get Wilderness Permits for the Glacier Point Trailhead, or have already experienced Glacier Point and Taft Point, a good alternative is to start at the McGurk Meadow Trailhead.
Distance: 12.9 miles (20.8 km) one way
Elevation: 2,800 ft (850 m) elevation change
Difficulty: Moderate
Trailhead: Glacier Point, McGerk Meadow, or Tunnel View
Logistics: During peak season parking is limited at both Glacier Point and Tunnel View. You may need to use some of the overflow parking areas near Glacier Point such as the Washburn Point or the Sentinel Dome parking lot. We parked at Tunnel View and then hitchhiked up to Glacier Point to begin our hike.
Pohono Trail in Yosemite National Park.
Mount Watkins
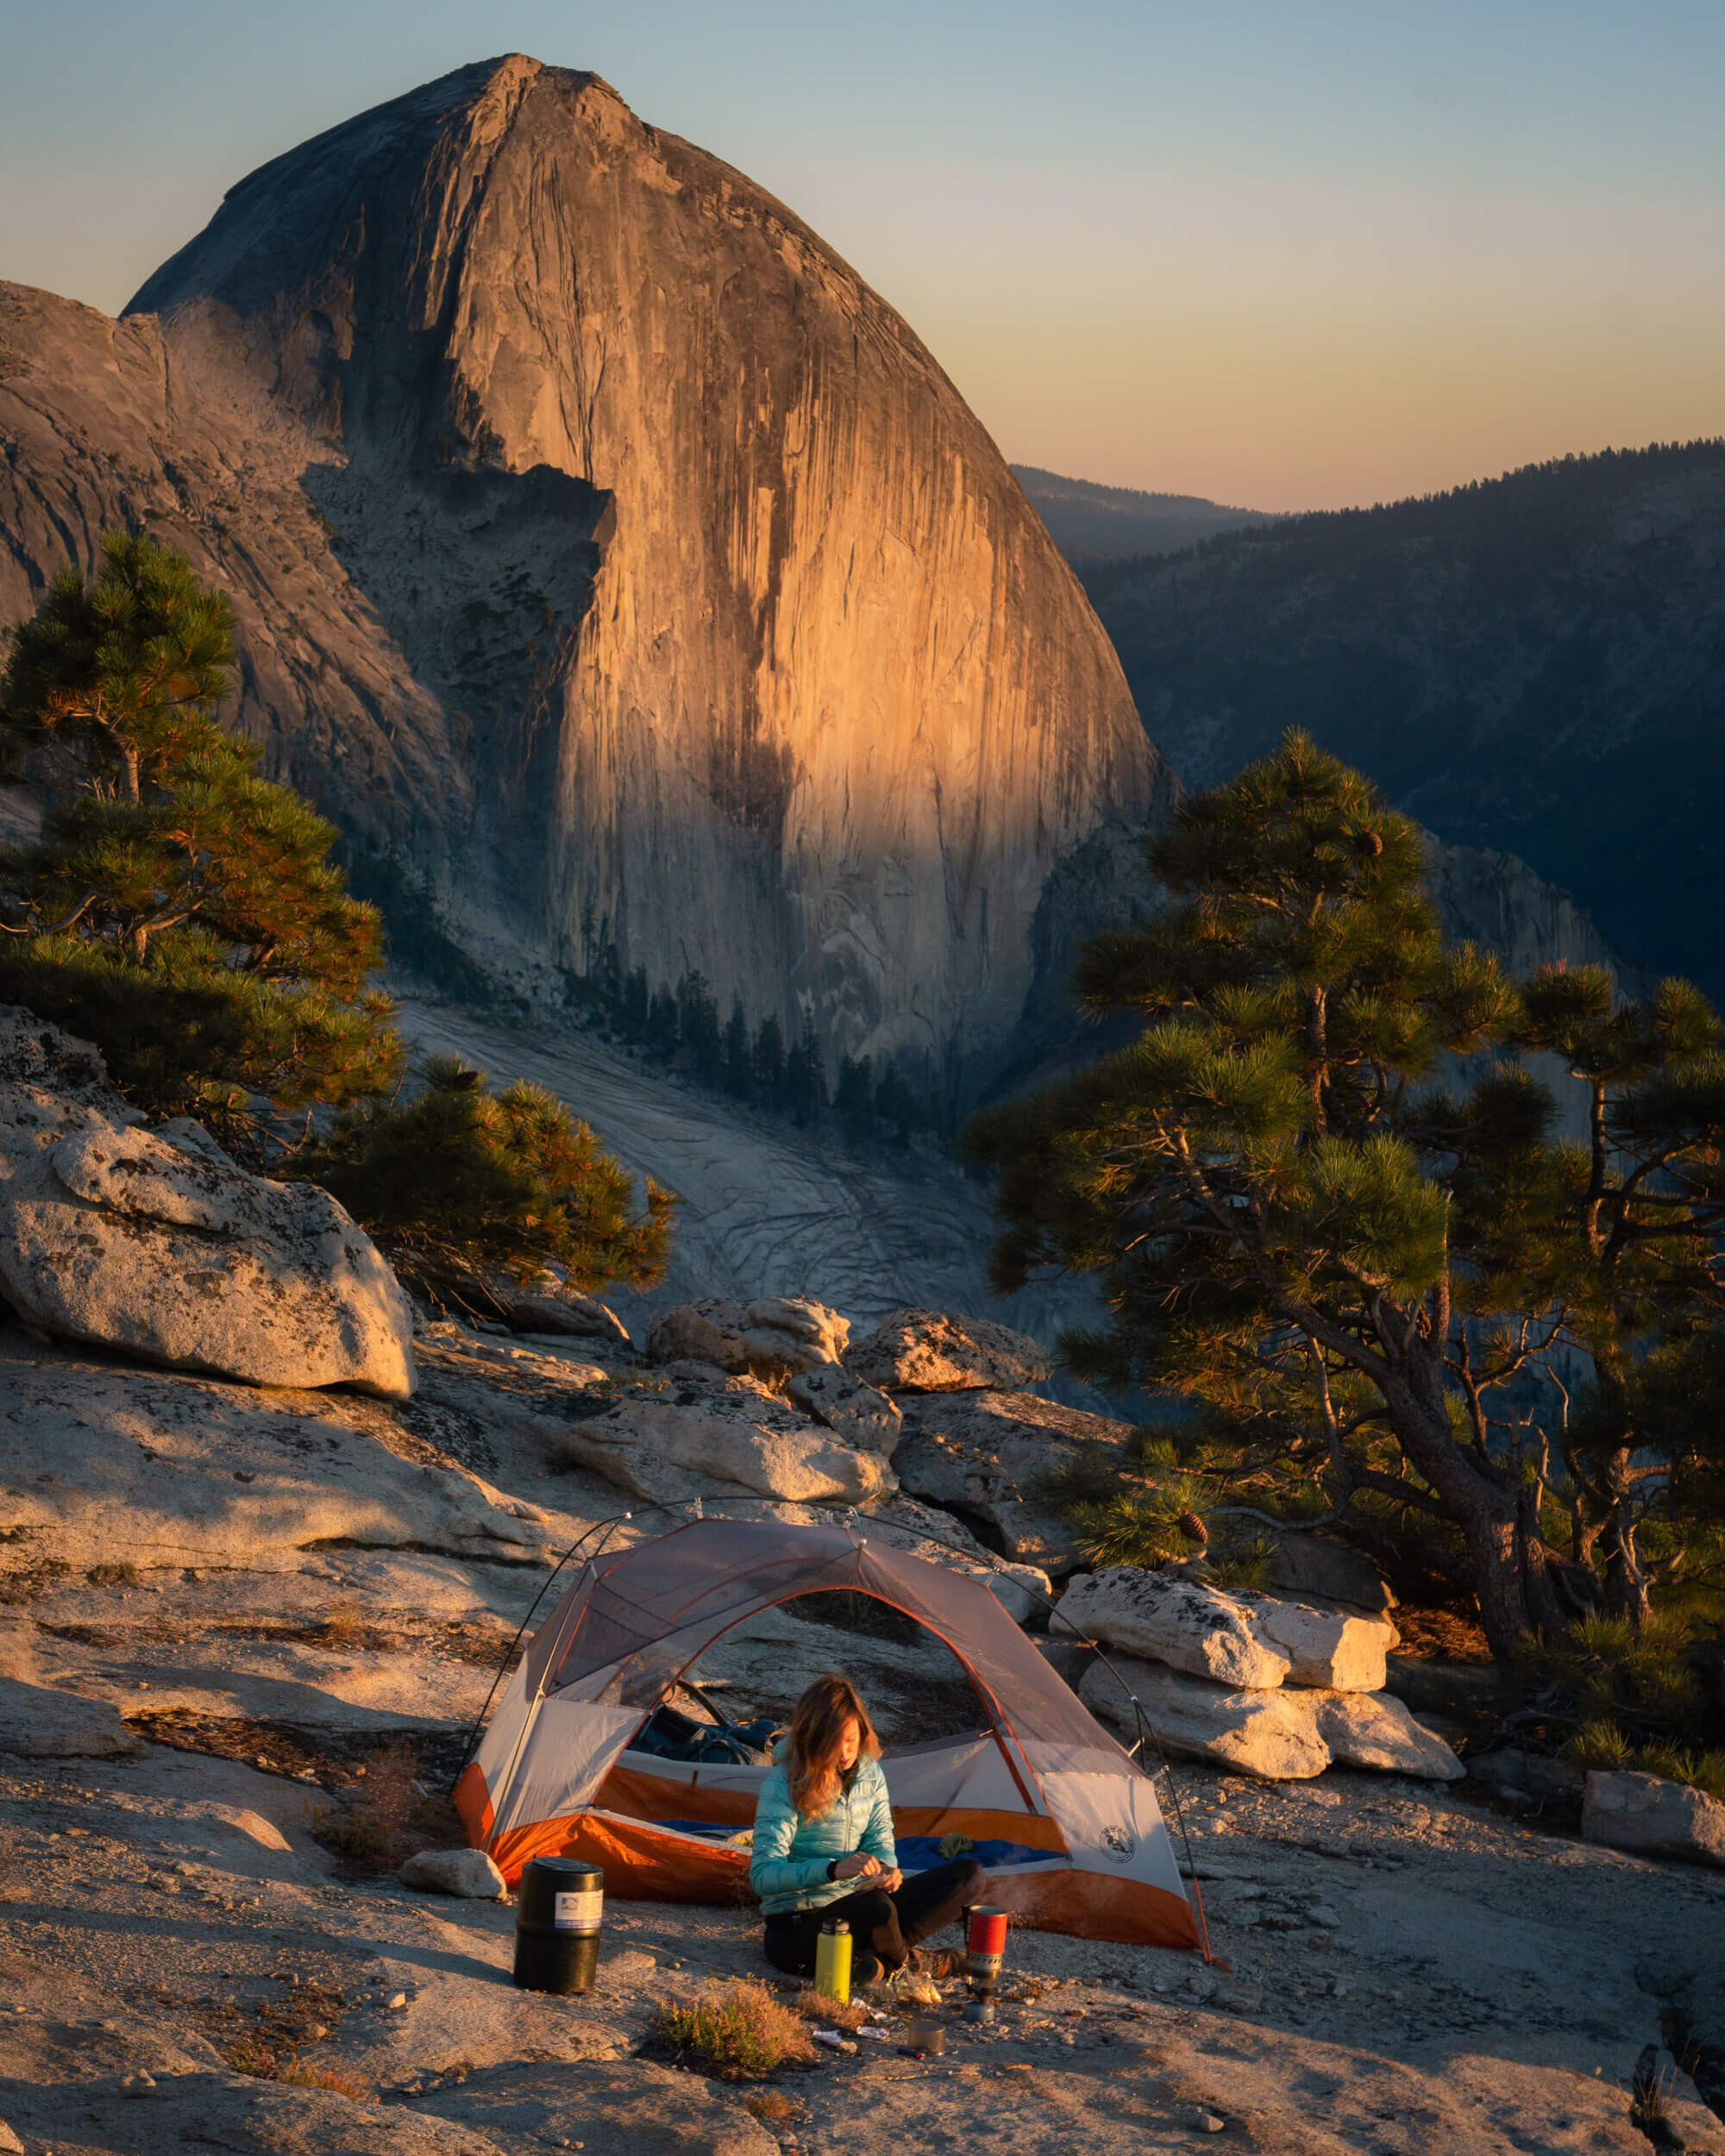
Camping at Mount Watkins in Yosemite National Park. Tent: Big Agnes Copper Spur HV UL3
The most difficult part of this hike is simply finding it. The trail is not always super clear, and you might have to reroute a couple times along the way. But hopefully not! The best parking area for this hike is at a pullout on the side of Tioga Road just before you reach Olmsted Point. You will see a path to an abandoned rock quarry, walk past the gate and follow the path up and around the left of the quarry. From there you should be able to follow the trail towards Mt. Watkins. About 2 miles in you will turn left down hill. If you keep your eyes peeled you will see the occasional cross country ski route markers up in the trees. Eventually the forest will begin to thin out as the trail heads up to the Peak of Mount Watkins.
You continue on the trail through the thick forest until you start going up hill towards the peak of Mt. Watkins. Before too long you will see the top of Half Dome come into view. Continue uphill until you reach the edge of Mt. Watkins. Set up camp and enjoy expansive views of Half Dome, Clouds Rest, North Dome and Basket Dome.
Distance: 3 miles (4.8 km) one way
Elevation: 500 ft (152 m) elevation change
Difficulty: Easy Moderate
Trailhead: Olmsted Point
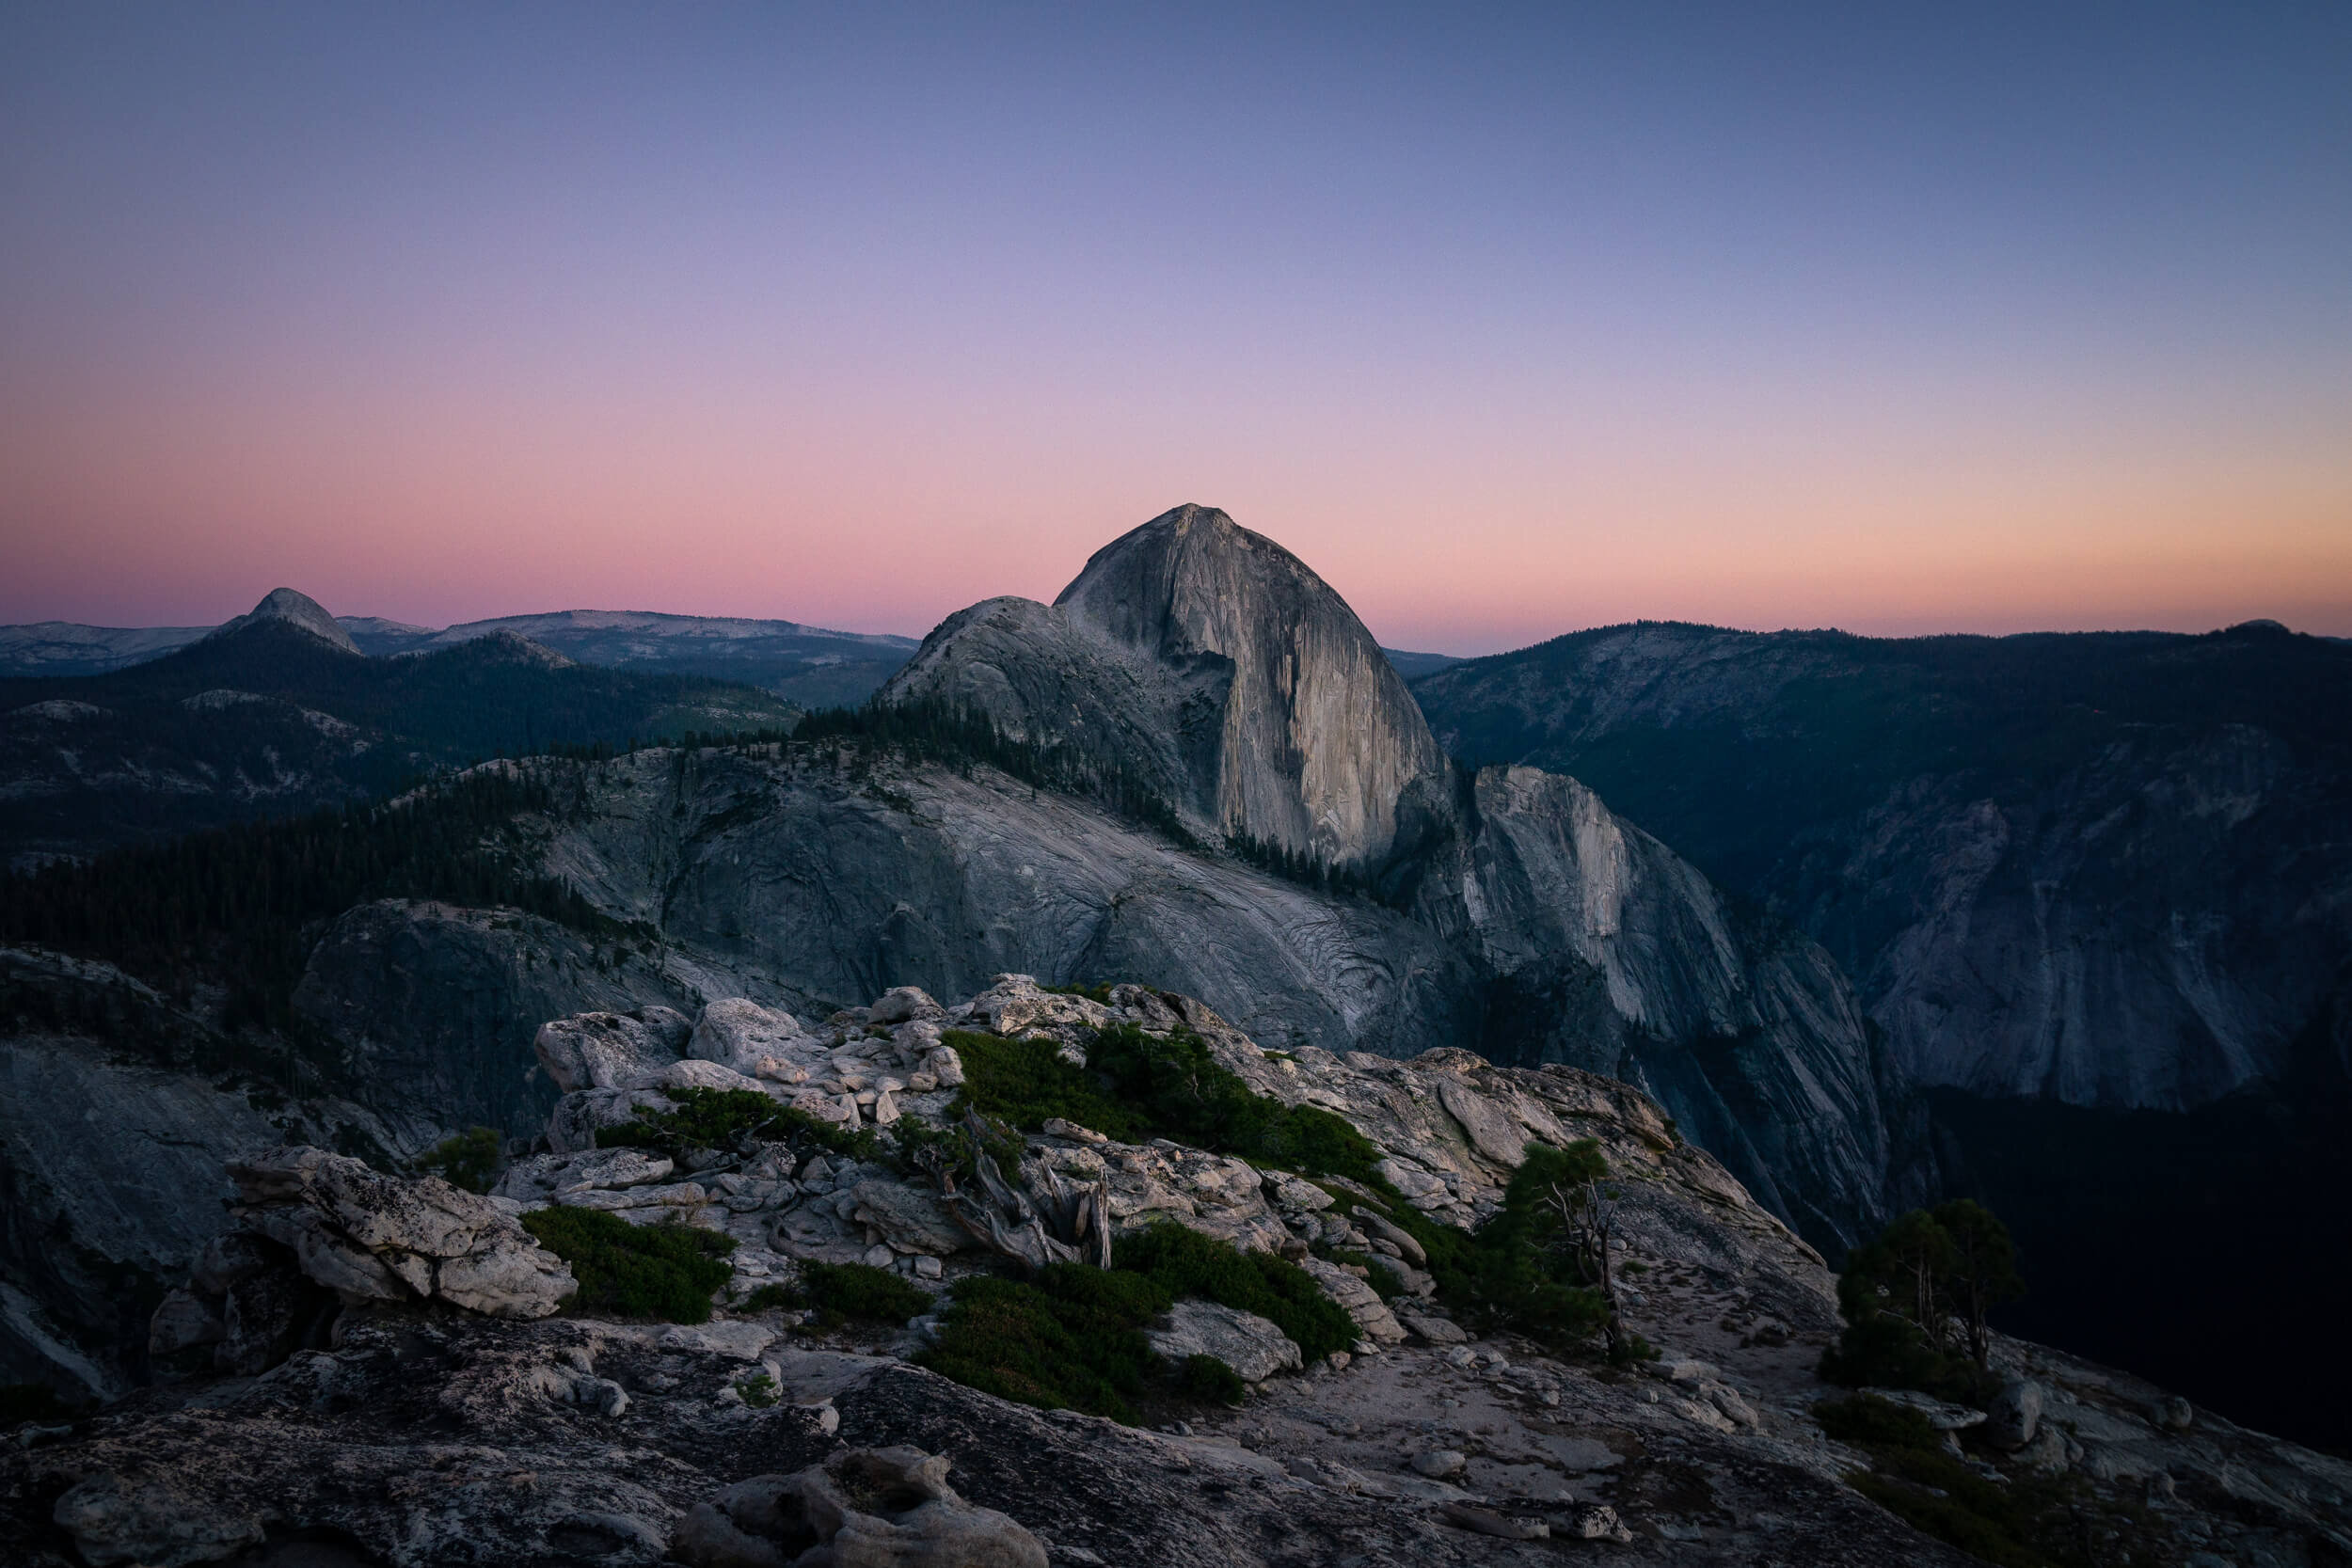
Sunset views of Half Dome from Mount Watkins.
Leave It Better Than You Found It
No one will protect what they don’t care about, and no one will care about what they have never experienced.
– David Attenborough
There is little question that social media plays a role in exposing various outdoor locations, and in some cases, this has led to significant resource and social impacts. That being said, I personally believe that without a connection to nature, people are much less likely to stand up for, and protect our world’s remaining natural spaces. For that reason, I have chosen to share some of my favorite backpacking locations in Yosemite National Park.
It is my deepest hope that by sharing these beautiful places, I can help engender a type of ownership and concern for our wild places. I believe that we all have the capacity to act as stewards for the environment now, and well into the future. Part of our responsibility as stewards is to always practice “Leave No Trace” principles. For more information please visit The Leave No Trace Center for Outdoor Ethics.
Please note that some of the links above are affiliate links, and I may earn a small commission on any purchase made – at no additional cost to you. As always, all ideas and opinions expressed in this post are entirely my own. Thanks for your support! – XO Jess
You Might Also Enjoy These posts!
Tips For Hiking The Tour Du Mont Blanc
Hiking & Backpacking Gear Guide
Trekking Peru’s Cordillera Wuayhuash
Know someone who loves to hike?
Share it!


The view of Yosemite has never been better. Thank you for the pictures
Thanks so much James! The best views are always the ones you enjoy away from the crowds. 🙂
Absolutely love this thanks for sharing
Thanks so much Ryan! So glad that you liked it. Enjoy the rest of your weekend!
Spectacular shots, Jess! The Pohono Trail shot is my favorite pic of yours in this blog! Thanks for sharing in so much detail; I will follow this to the tee in preparation for my next visit to Yosemite. Thanks, Jess!
Thanks Kirtan! I think that is actually my favorite photo as well. I really enjoyed the Pohono Trail. It’s rare to do a hike in Yosemite that is not entirely uphill, because usually you are climbing up out of the valley! I hope that you have a wonderful trip when you go. 🙂
Great blog. I agree entirely that the more people who have a chance to fall in love with a place, the more who will feel the personal connection that in turn leads to supporting the efforts to keep these areas protected. The slight blip of increased back country exposure is worth it. The pictures are great, but they mean so much more because I’ve been there.
I’m glad you agree. I think in places where there is already a permit system in place to reduce human impact on the environment the risk of overexposure is particularly low. I for one believe it’s more productive to educate people on responsible methods of experiencing nature, rather than just trying to keep them out.
Jess,
This is so informative and interesting. I don’t want to admit how long it’s been since I have been to Yosemite.. too long. You have definitely motivated me! Thank you as always for your great suggestions!
It’s one of my favorite places in the world. I really hope you are able to make it back someday soon. I have no doubt you’d love it.
Thanks for sharing! Do you think the Mt. Watkins hike can be a day hike?
Definitely! I think the vast majority of people do it as a day hike. That’s actually true for any of the hikes in this post.
Jess, all of this has been so helpful. We embark tomorrow for 2 weeks and are camping in our jeep! Any advice? We are planning on camping outside of the park due to having our Jeep!
Awesome! You’re going to have such a great time. I’m not sure if you own backpacking gear, but if you do I would highly suggest trying to get wilderness permits for at least a couple of the nights, just so that you can stay in the park. It actually can take quite a bit of time to drive in and out of the park everyday – especially with the traffic this time of year. Plus, there are Backpackers’ campgrounds available for wilderness permit holders to spend one night before and one night after a wilderness trip. So if you plan it right that can get you quite a few nights within the park. Reservations are neither necessary nor required. Other than that, I would just plan out what you want to do each day, so that you can camp at the closest posable entrance. The park is surprisingly big! Have a great trip. 🙂
You did it again, Jess! Seeing your photos make me want to immediately drive out to Yosemite an this is my second favorite blog next yo your Oregon post. The first photo with you across the giant falls – is that the Eagle Peak trial?
All the best! 🙂
Thanks Christian! So glad you like it. To get to Eagle Peak you hike up the Upper Yosemite Falls Trail, so there are lots of good views of the falls on the way up. That particular view is not technically on the Eagle Peak trail. We found that view when we were wandering around that area.
Hi Jess. Just got done with a trip in OR based on your OR Blog post and had a great time! Thanks for that!
I was looking on AllTrails at both the Upper Yosemite Falls and Eagle Peak Trails and and I see where they connect. Do your recommend hiking the whole Eagle Peak Trail? I’m assuming based on the name it actually takes you to the peak?
Hi Kris! That’s so cool that you did an Oregon trip based on my blog post. Always super fun to hear! I’ve done the Upper Yosemite Falls trail on it’s own, and it’s not a bad hike. There are lots of great views on the way up, and at the top. If you continue on to Eagle Peak you just get a different view of the valley and Half Dome. It’s a pretty long trek though (primarily because of the elevation gain), and I’ve never personally done it as a day hike. But I know people do! Also, unless you are planning on going to Eagle Peak, I probably wouldn’t bother with doing just part of the trail.
The photo under the Pohono Trail heading, is that time of day early morning? The lighting is absolutely stunning!!
Hi Jessica! Yes, the photos under the Pohono Trail heading were all taken within a couple hours of sunrise. Morning light is always so magical in Yosemite. 🙂
Hi Jess!
Thanks for posting. Regarding the Mt. Watkins backpacking… what trailhead wilderness permit did you require? It’s proving next to impossible to find any information on this trail for backpacking.
Appreciate any more information!
Thanks!
Hi Jillian, for Mt. Watkins we got permits for Olmsted Point Trailhead. The Outbound also has a pretty informative post on Mt. Watkins. Besides getting a permit, the information for backpacking there is really no different than information for hiking there. Have fun!
beautiful pics and nice info……and one more this the way you present it in your blog is also awesome. My best wishes for your next adventure journey……
Thanks so much! Best wishes to you as well. 🙂
Awesome blog post! Thinking about going out there tomorrow and your post answered a lot of questions especially about the permit process. Thanks for sharing!
Laura
That’s so awesome to hear Laura! I hope you have an awesome time if you do head out there. 🙂
Hi Jess,
thank you for this blog and the great pictures. I grew up camping and backpacking in Yosemite in the 70’s. It is truly a magical place to be. I don’t go as often anymore – last hiked to the top of Half Dome 10 years ago and last camped at Eagle Peak 6 years ago, so coming across your blog is quite inspirational and brings back many great memories of times with family and friends and even great moments of solitude.
There are two things I would suggest changing in your beautiful blog:
1. Your statement "you can camp anywhere you like"
2. State clearly to review and follow all regulations
While it is technically true that you can camp pretty much anywhere, many Yosemite back-country trails have campsite areas established and those should always be used when available. Please remind your readers that creating a new campsite does have a small environmental impact that compounded by the number of back country hikers could have a large impact if we all chose to make a new site.
One example of this – on an overnighter to Cathedral Lakes 2 years ago we came across 2 hikers who were setting up camp near Upper Cath Lake – clearing a new site, building a fire pit/ring, etc. We pointed out that there was an established campsite less than 1/4 mile away and that no fires were allowed in this area. They said they saw the other site but they chose to create a new campsite at this location "because it has a better view". Regarding the fire, they were adamant that the restriction was only at Lower Cath Lake – even though we were above the 9600 foot elevation fire restriction ( 2 wilderness regulation violations – building a new fire ring and fires above 9600 ft elevation).
Anyway, you have a great blog that opens many peoples eyes to the beauty of the world around them. When people truly love their environment will they strive to protect it.
Hi Jeff. Thank you so much for taking the time to share your experience with me. I made some edits that I hope will address your concerns. I tried to make it clear that everything is subject to the rules and regulations, and I have linked to them at multiple points so my readers can easily reference them.
I’m sorry to hear about the encounter you had at Cathedral Lakes. I personally wish they would just do away with fires all together in wilderness areas. I think people get confused about when they are allowed, and it would be clearer if they didn’t permit them at all. But that’s just me!
great place to visit with your family
These are some of my favorite photos you’ve ever shared! Yosemite is such a special place to myself and so many others. Thanks for sharing these!
Totally agree! There’s just something about Yosemite. I always leave feeling a little bit lighter and happier.
Hi Jess! Thank you so much for sharing these details. After reading this, my husband and I were able to secure a wilderness permit for the Pohono Trail for this week. I wanted to ask you, if you had to bring just one camera lens while backpacking along this trail, which would it be? I really want to take my camera without adding too much weight. Any advice would be really appreciated! Thanks so much!
That is awesome!! If I were going to bring just one lens it would probably be my 24-70mm. In general, we were shooting pretty wide, but it’s always nice to be able to have a little bit of compression with the zoom as well. Have so much fun!
Your blog is amazing! Gives me the opportunity to visit places I never thought of before.
I live in North Carolina and would love to hike at Yosemite, and swim if possible. If I fly to Fresno CA, what would be the best place/trail to drive to in order to get to Yosemite? TIA ❤️
Hi Luz, I would suggest google mapping directions. You can just drive right into the park. Google will give you the quickest directions from Fresno to Yosemite. Hope you have a wonderful trip!
Hi, have the rules/guidelines changed since the pandemic?
Somewhat. They are constantly changing now. . . but last I checked you need to have a permit to visit the park now. That being said, if you have a backcountry permit, then you are allowed in. You can still find all the relevant information on the links I’ve provided in the post.
Wow I just wanted to say how much I enjoyed this post of yours. It’s my first time finding your blog and reading about your adventures and I’m hooked. I live near Yosemite so this was super helpful for me as a landscape photographer who wants to learn how to do backpacking. The photography, modeling, and posing in these shots are just out of this world!
Thanks so much Daniel! That means a lot to hear. I really believe that backpacking is the best way to experience Yosemite, so I hope that you are able to spend more time getting into the backcountry this summer!
Hi there,
This is a great blog.
We are flying from UK/Singapore and plan to camp in one of the above, in mid October. Wondering if its too cold and wanted to get in touch on some tips as the info on where to access yosemite from is a bit overwhelming. Appreciate if can drop you an email if possible! Thanks
Hi. So glad you like the post! Mid October is shoulder season and therefore it’s pretty difficult to predict what the weather will be like. It could be snowing. . . it could be uncomfortably warm. Likely it will be somewhere in between, but I’d plan on it being pretty chilly at night regardless.
It’s probable that whatever questions you have, other readers have as well, so if you want to ask them here it might be the most helpful. Thanks!
how is parking for trailheads in Yosemite? How can you find out which trailheads have parking that you can leave your car at while you are doing a multi-day backpacking trip?
thanks
Hi Rob. The national park website is extremely useful for this sort of logistical information. Most of the trailheads in Yosemite, particularly down in the valley, do not have parking. You need to park in one of the larger parking lots and then take the bus to the trailhead. The buses run frequently and in general it’s a very user friendly system.
Amazing information. What trail takes you to the two photos you have looking over yosemite falls from above?
I love yosemite so much
Hi Luciano, there is no trail that goes directly to that point. After hiking up the Yosemite Falls trail you keep going for a while and then you have to hike off trial to reach that point.