


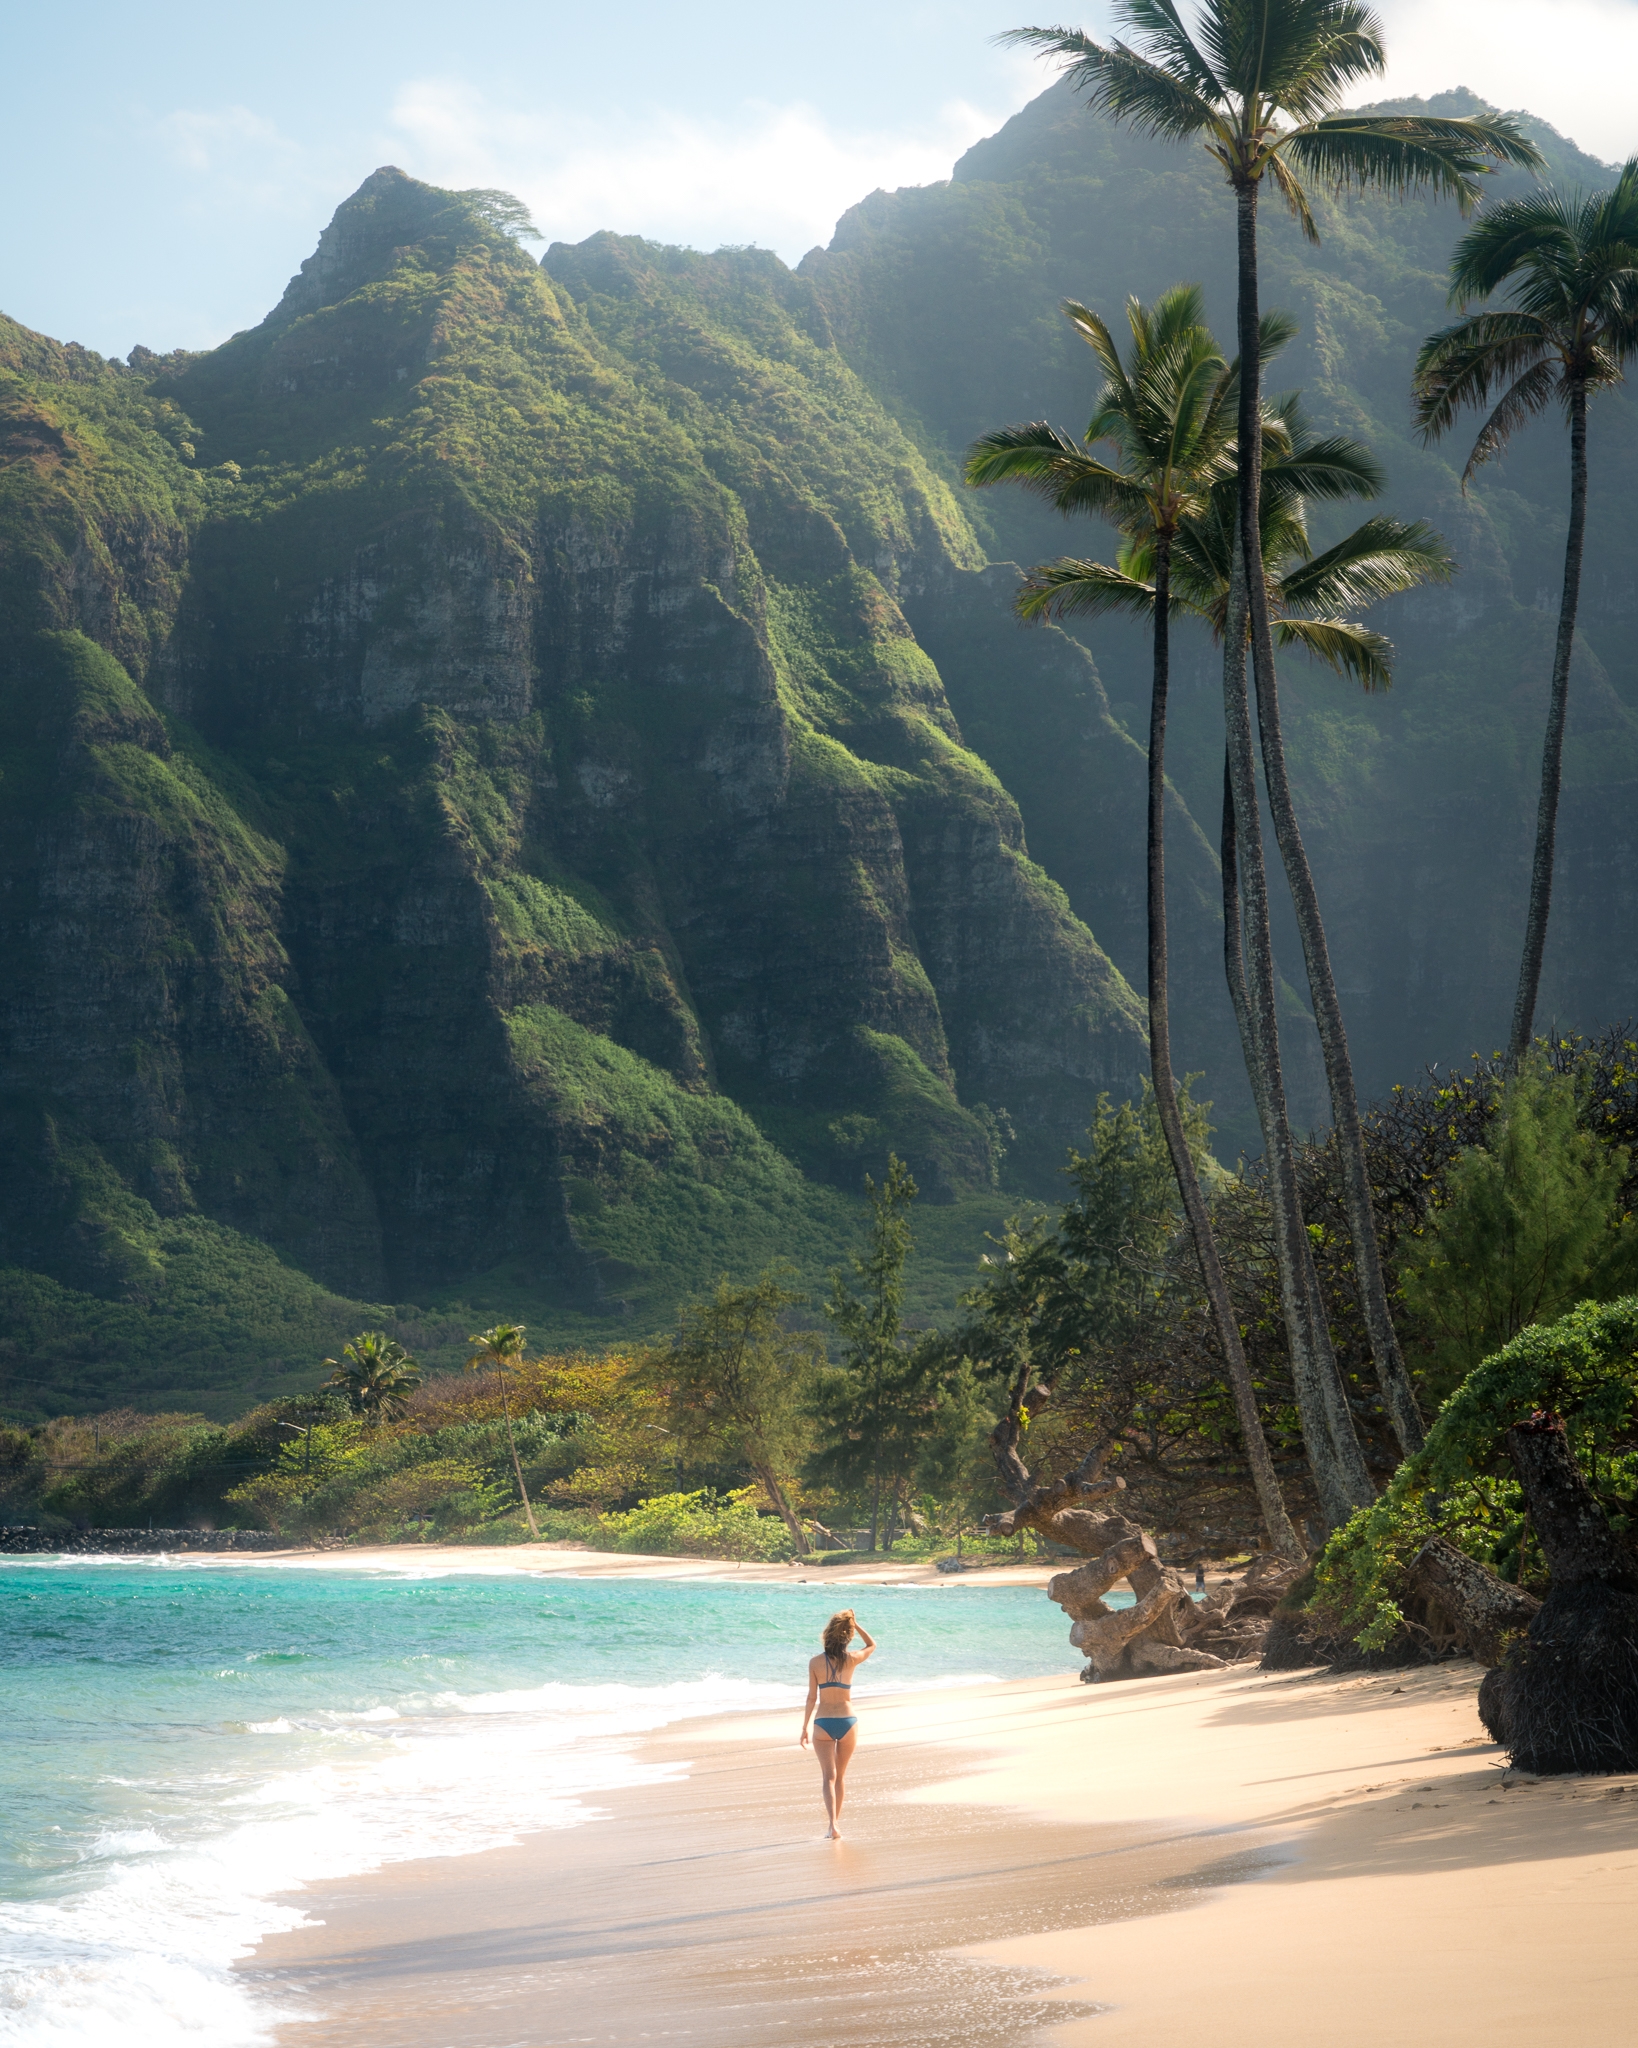
I might be aging myself here, but I was all about The Goonies when I was little. Particularly that last scene. You know, the one where after narrowly escaping from a series of booby traps, the kids find themselves on a beautiful Pacific Northwest beach lined with sea stacks, and a heavy dose of magic. Well, that beach isn’t Shi Shi Beach (pronounced shy shy), but it might as well be! Shi Shi is nothing short of spectacular, and camping at Shi Shi Beach sure to spark your childhood wonder.
Shi Shi Beach is tucked away on the uppermost corner of Washington State’s Olympic Peninsula. After a relatively short hike through dense forest, the trail spits you out on a seemingly endless stretch of beach that runs for miles down the coast. From there you have two and a half miles of prime Washington State beachfront real estate to set up camp. Stay for a night, or a week, but definitely put camping at Shi Shi is on your Pacific Northwest bucket list. It has quickly become one of my favorite hikes in Washington.
Shi Shi Beach Camping Permits and Fees
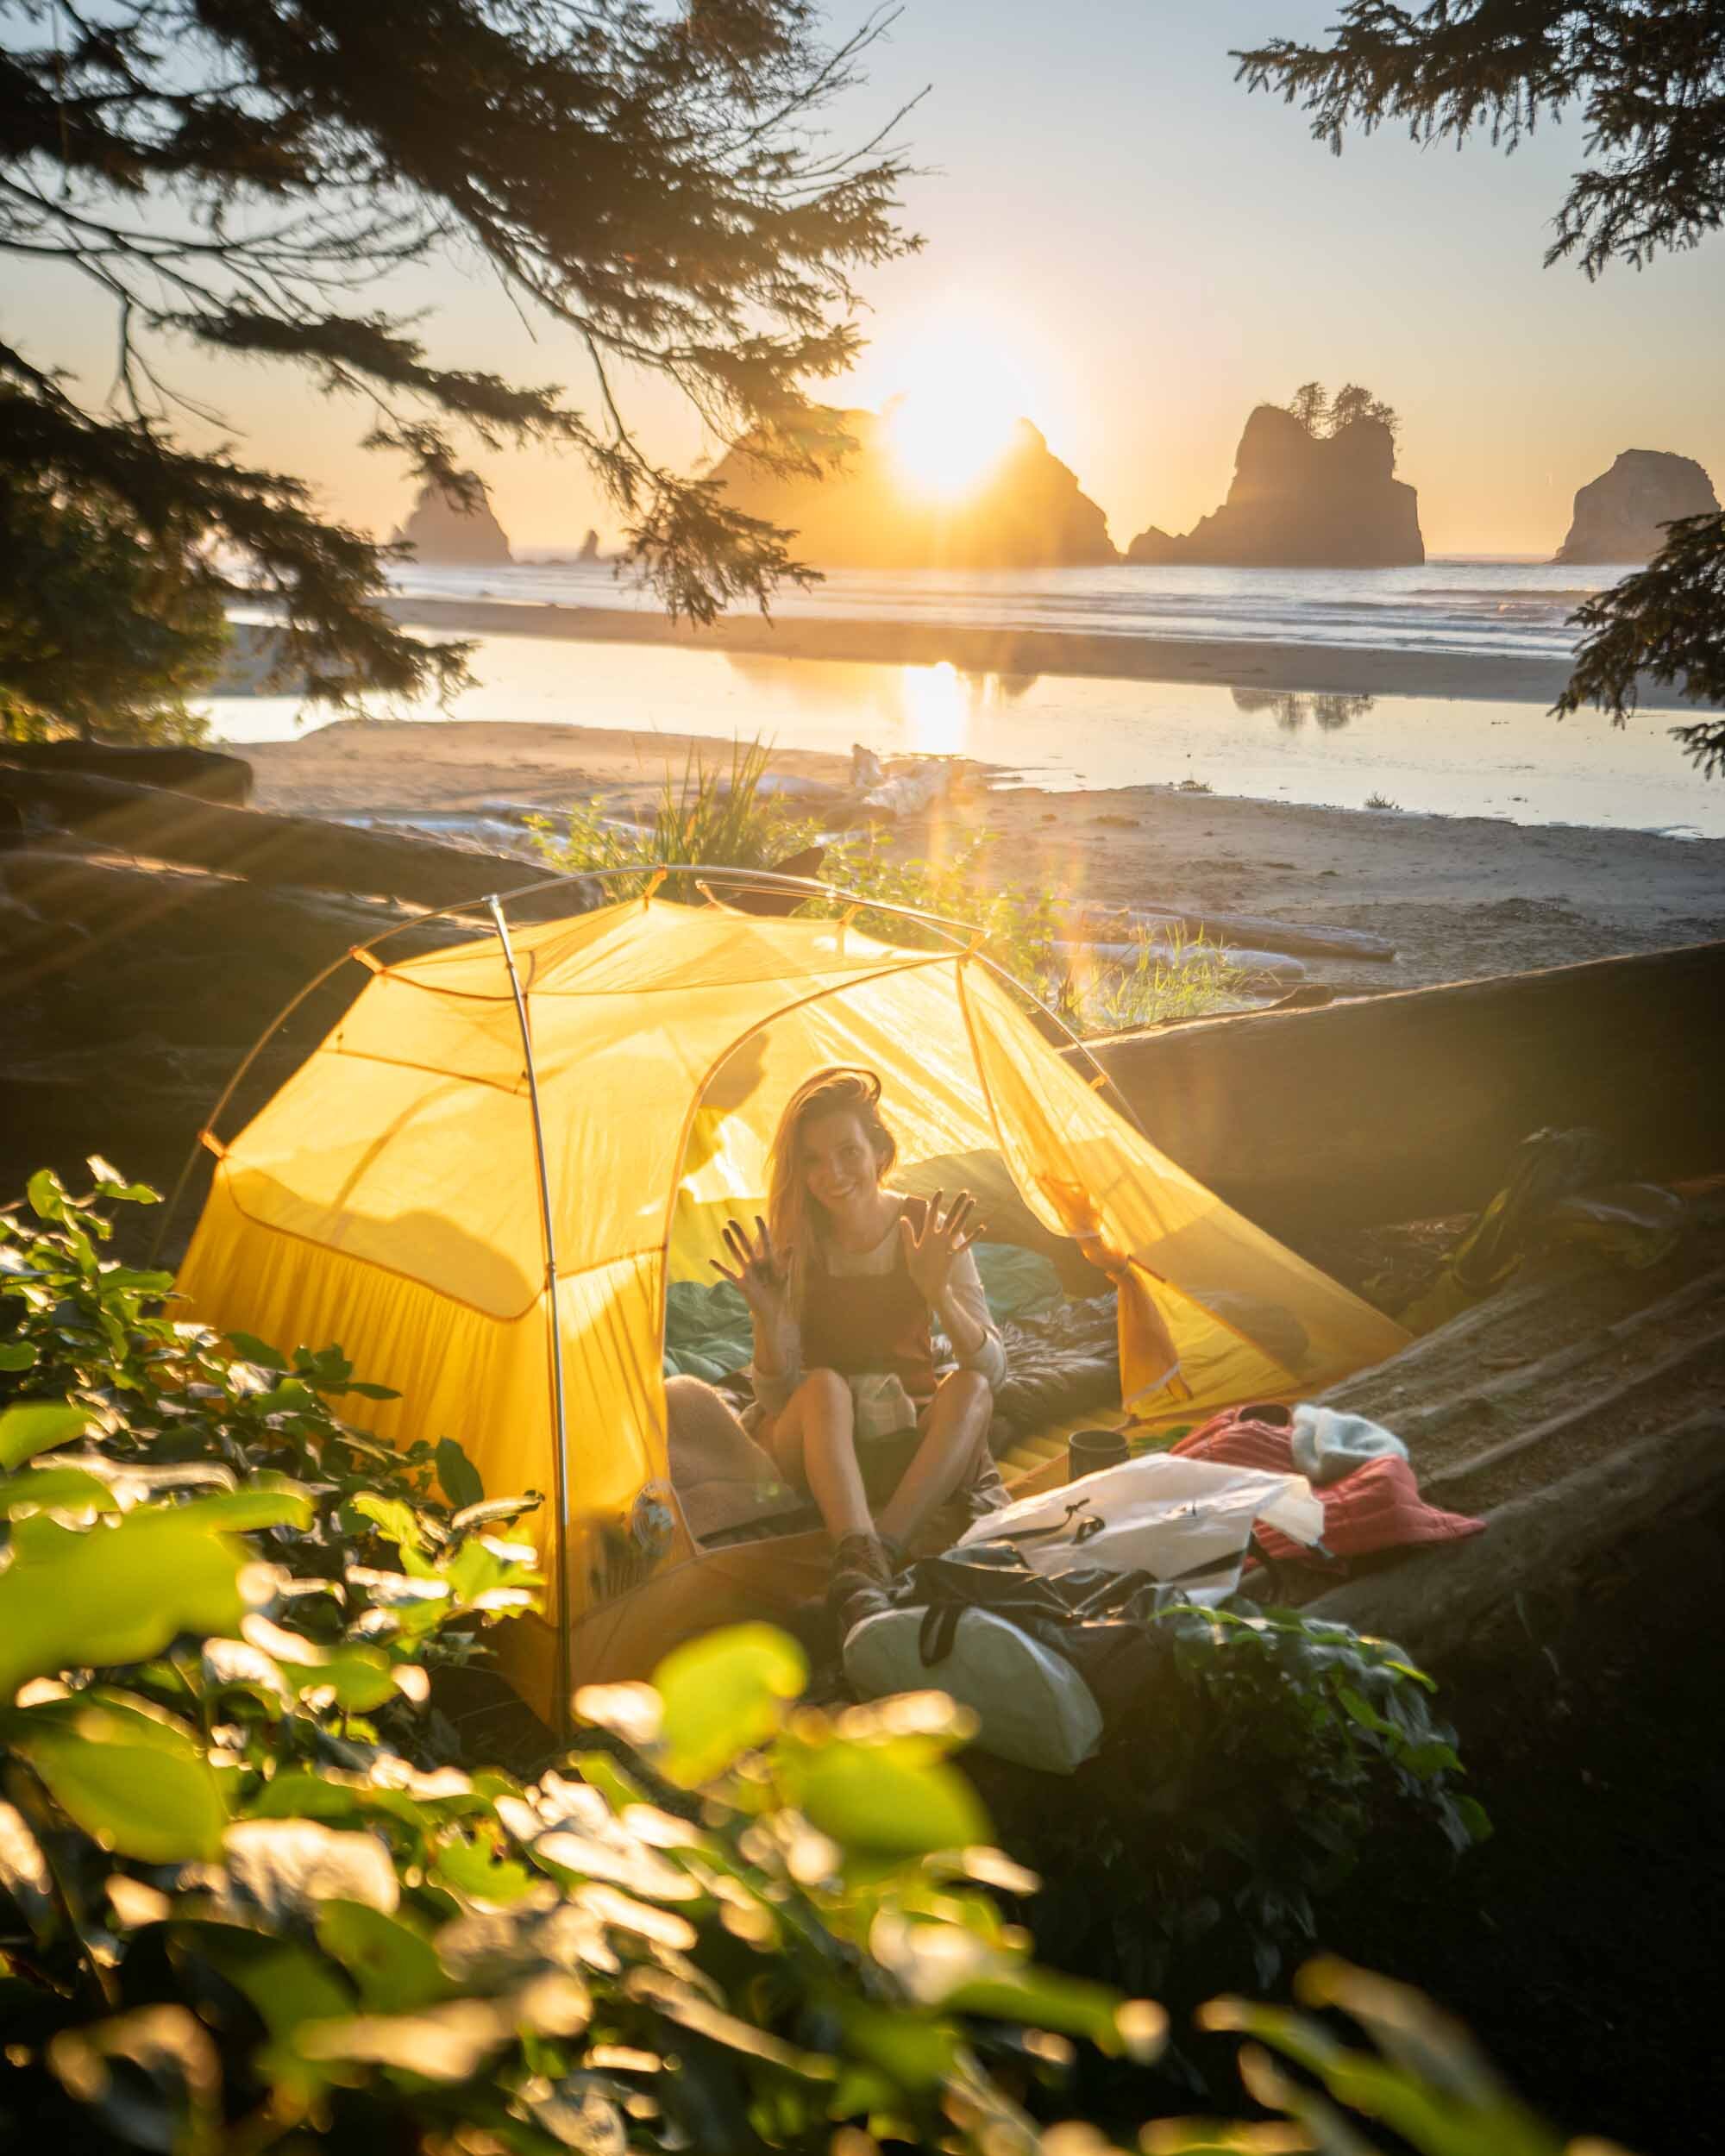
Camping on Shi Shi Beach in Washington State. Wearing: Toad&Co Jumper and The North Face Long Sleeve Shirt. Also Shown: Big Agnes 2 Person Tent.
Permitting for Shi Shi Beach is a little more involved than most other backcountry camping spots in Washington. This is because the beach is part of the Olympic National Park, while a large portion of the trail is owned by the Makah Tribe. As a result, you will need both a Makah Recreation Pass and a Wilderness Permit for the National Park to camp at Shi Shi Beach.
Permits are required for all overnight stays in Olympic National Park. You can pick up your wilderness permit in person at the Wilderness Information Center (WIC) in Port Angeles or at the Lake Quinault Ranger Station. While permits are not currently limited for camping at Shi Shi Beach, group size is limited to 12 people per site. Parties larger than 12 must split up and camp at least 1 mile apart. Camping fees are $8 per person per night, plus a flat $6 permit fee. Before you pick up your permit, it’s a good idea to call the WIC (360-565-3100) to check on hours and trail conditions before heading out to the Olympic Peninsula.
Once you have your wilderness permit for the National Park, it’s time to head out to the coast and pick up a Makah Reservation Permit in Neah Bay. The Makah permit is required for every car using the trailheads located on Makah tribal land. It can be purchased for $10 at several locations including, the museum & cultural center, Makah Mini Mart, and Washburn’s General Store. The permit is valid for one calendar year, so if you’re planning to hike Cape Flattery or any of the other beautiful trails in the area hold on to it.
Parking at the Shi Shi Beach trailhead is day-use only. So if you’re camping at Shi Shi Beach, you’ll need to park in one of the nearby private parking lots (basically just someone’s yard). The closest lot is 0.6 miles before you reach the trailhead, and the price is $10 a day. You will see other parking lots claiming to be for Shi Shi Beach a couple miles out – ignore those.
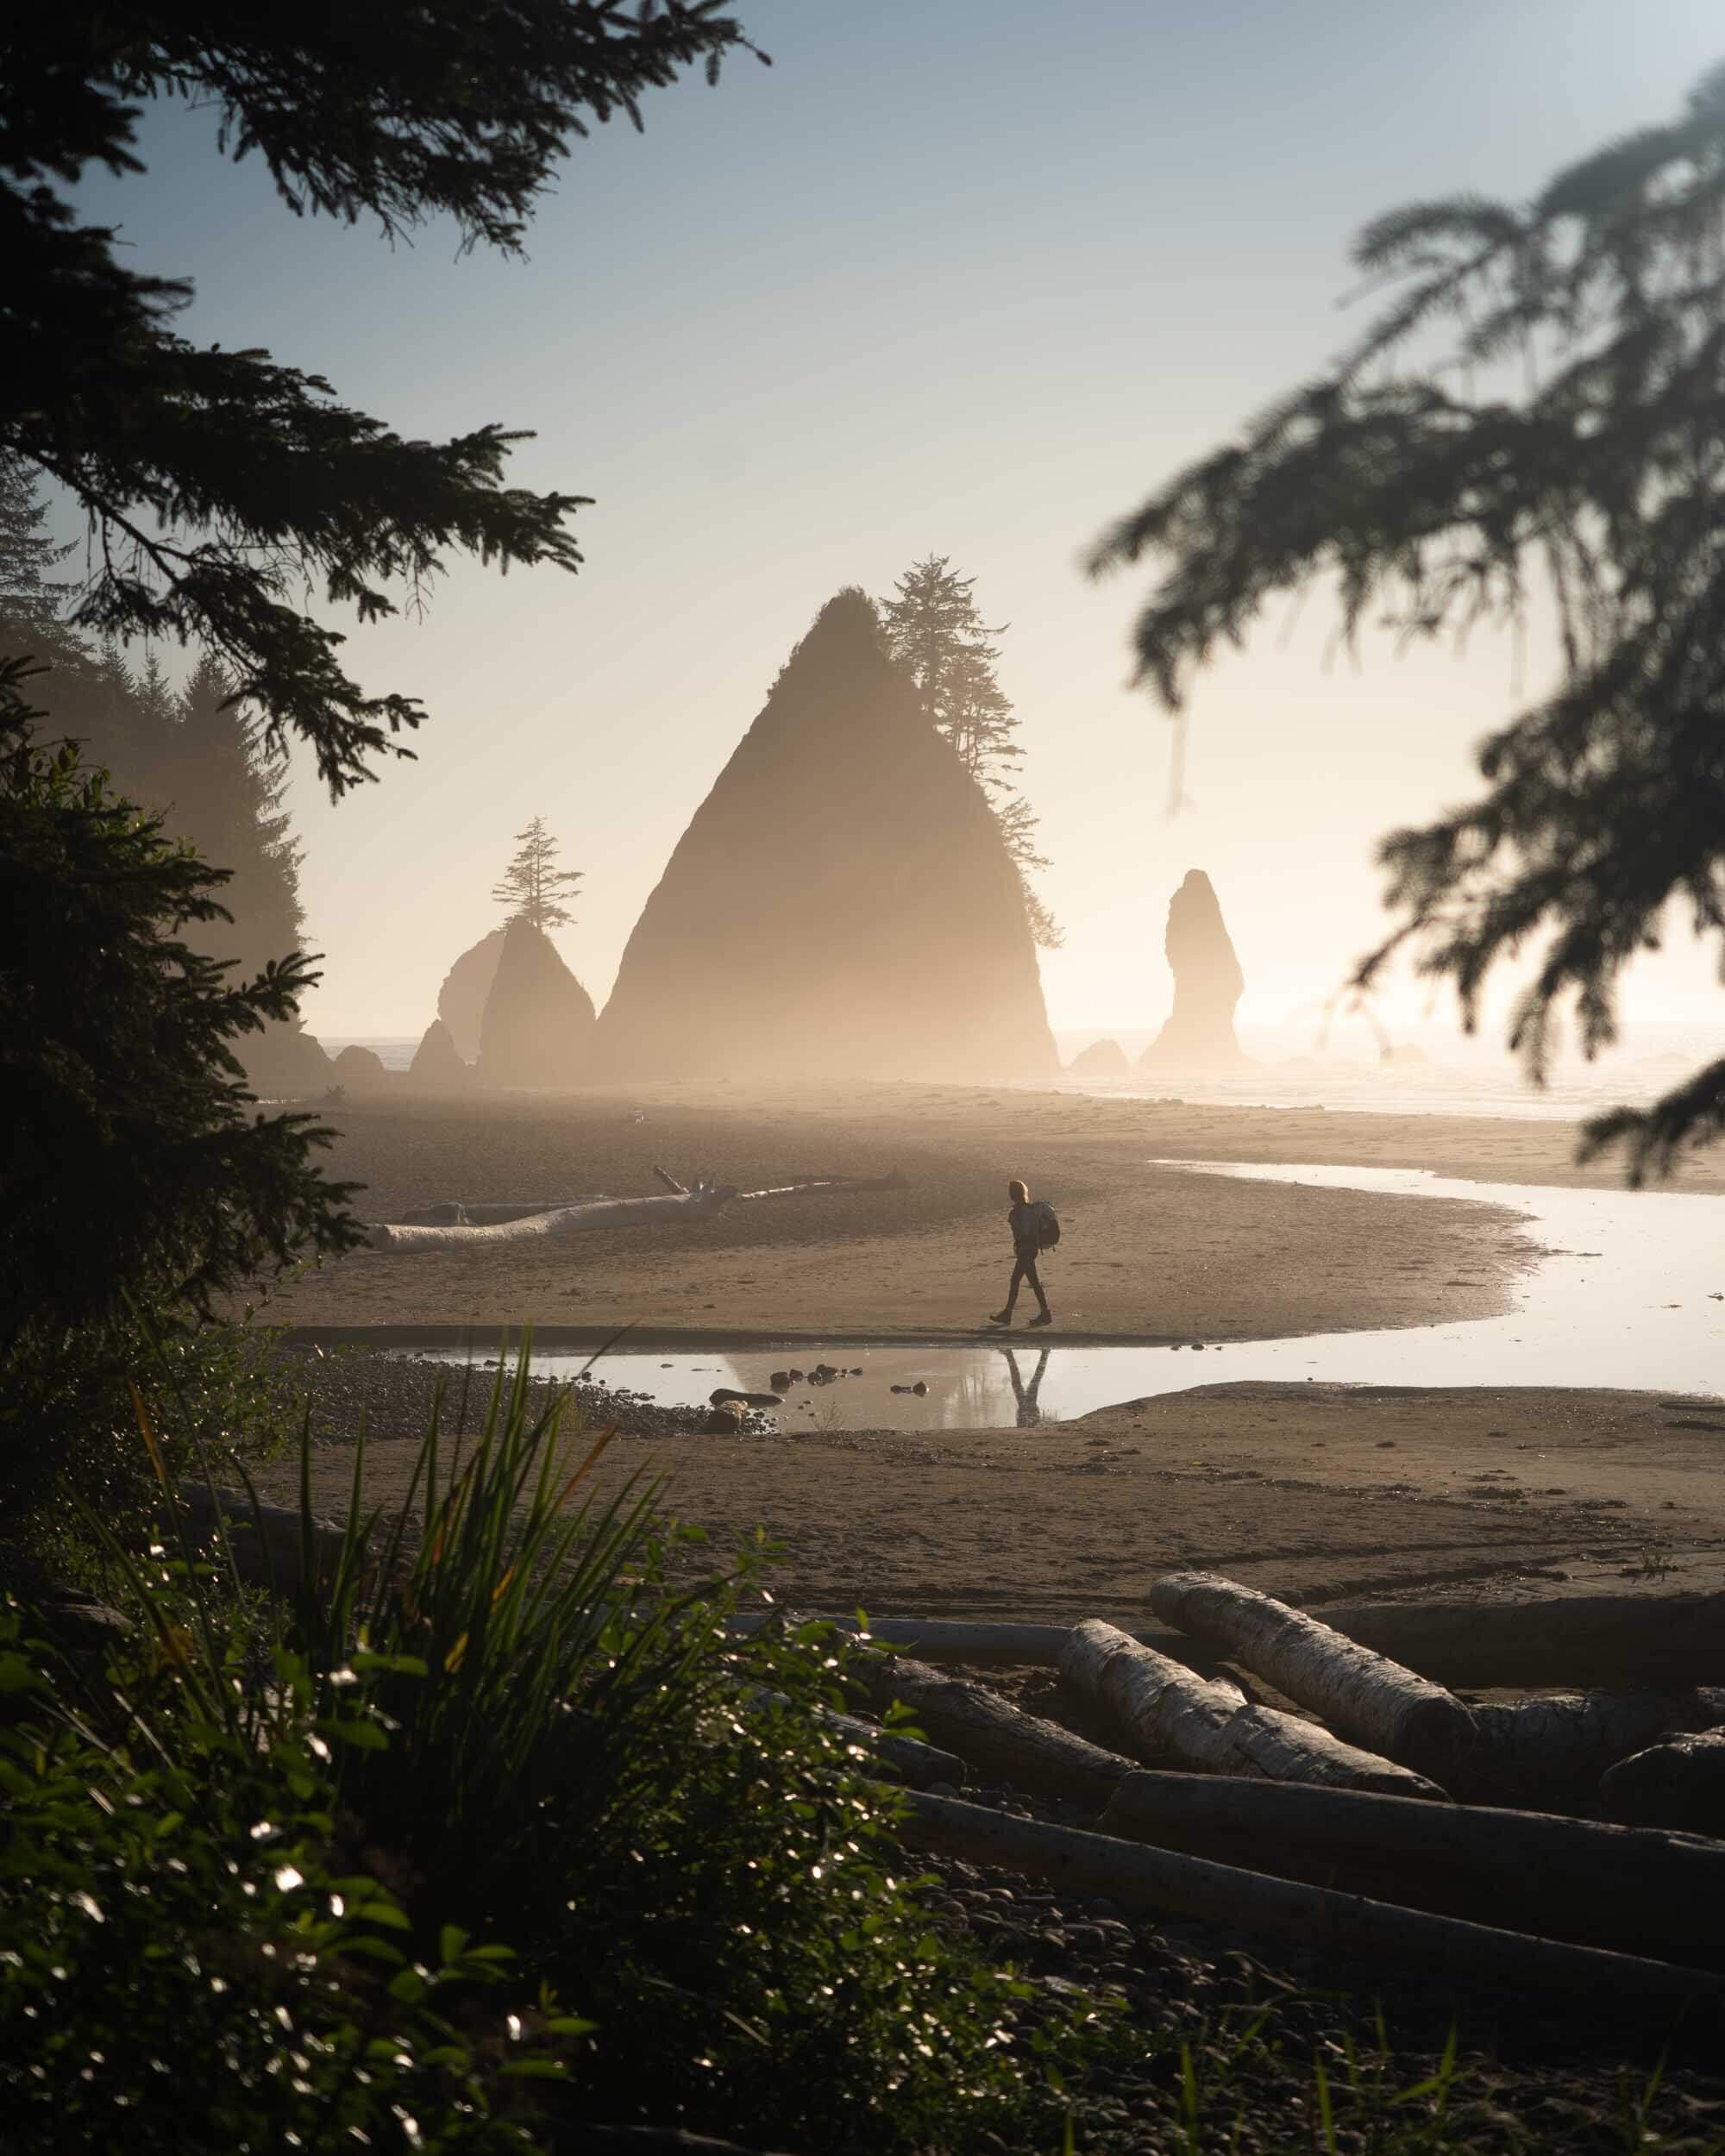
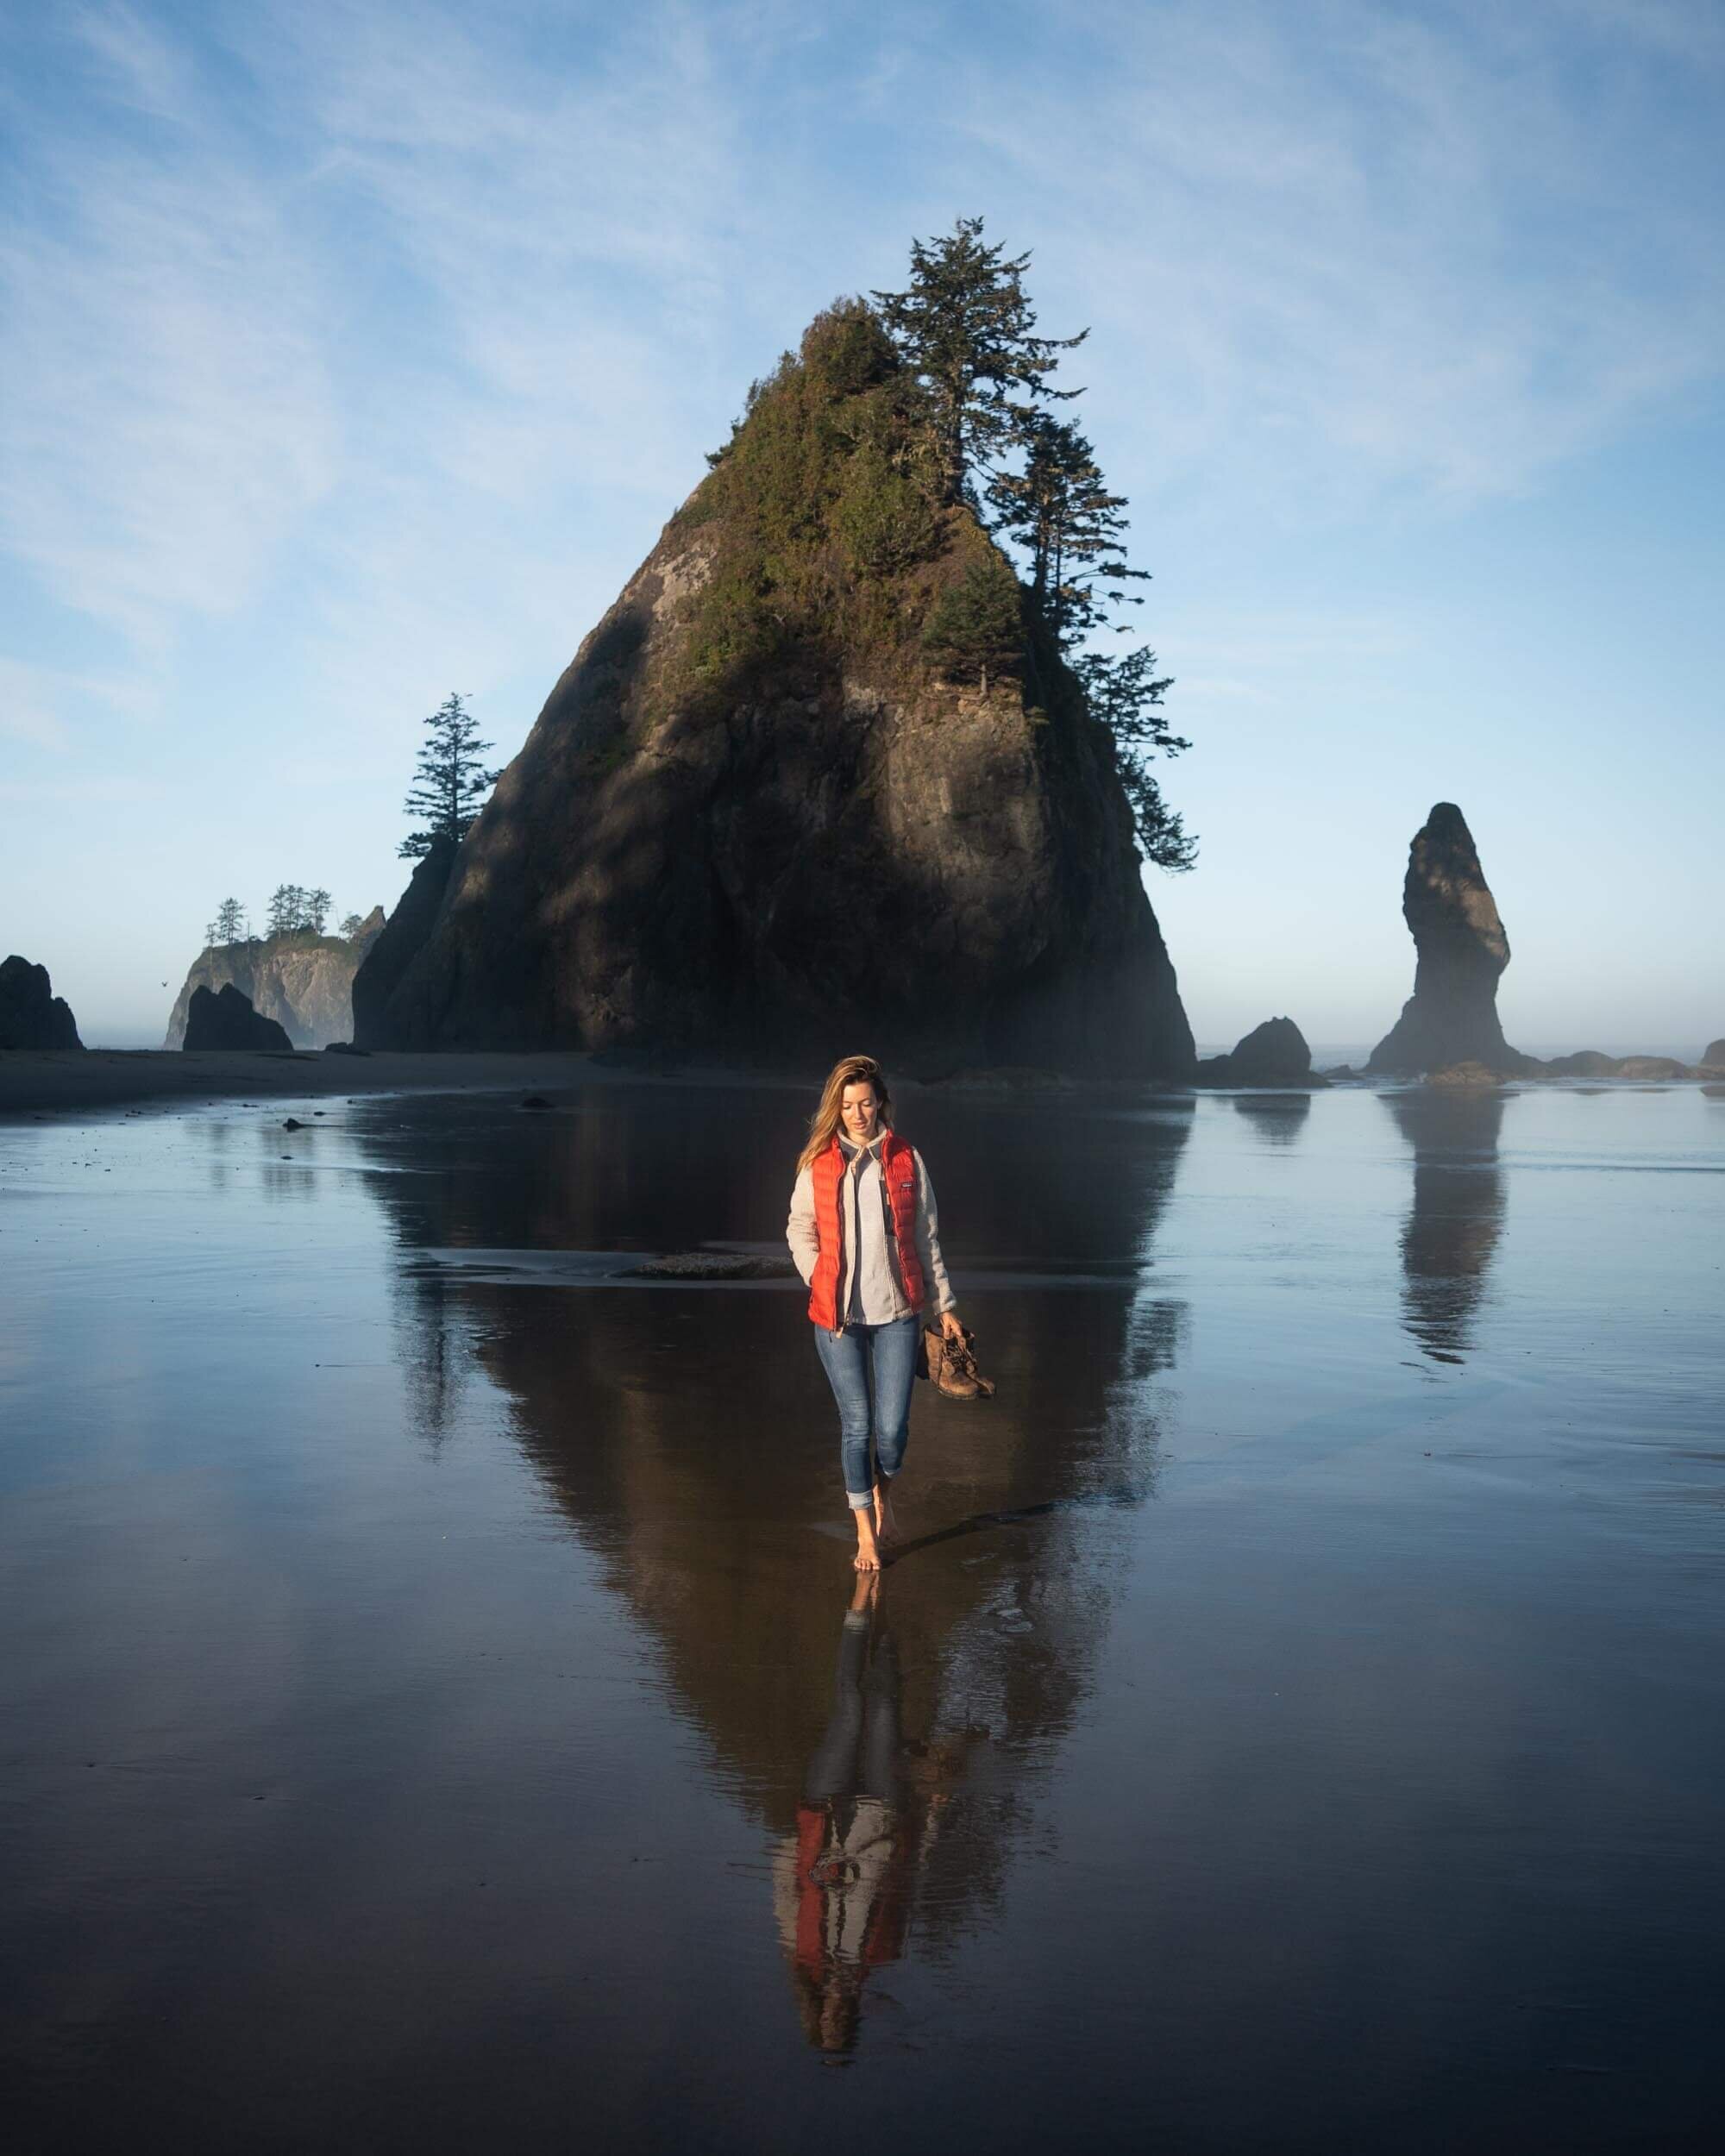
Hiking on Shi Shi Beach on the Olympic Peninsula in Washington.
Everything You Need to Backpack On The Olympic Peninsula
Packing for a backpacking trip on the Olympic Peninsula means getting ready for a place where the weather and terrain shift constantly. One moment you might be walking through quiet rainforest, and the next you are climbing into open high country or navigating a windy stretch near the coast. The right gear makes a huge difference. It keeps you comfortable, prepared, and able to enjoy the trail without worrying about what the day might bring. Below is everything you’ll want to bring so you can head out with confidence.Packing & Organization
BACKPACK – The Osprey Eja (women’s) and Exos (men’s) are great packs for hikers who want to lighten their load but aren’t ready to give up comfort and support. They’re heavier than cottage ultralight packs, but that extra weight gives you a sturdy frame, excellent ventilation, and a suspension system that keeps heavy loads feeling comfortable over long days. And it’s still much lighter than a more traditional pack with all the bells and whistles.
Shelter and Sleep Gear
SLEEPING BAG – The Feathered Friends Egret UL 20 has been my go-to sleeping bag for the last two seasons because it’s lightweight, insanely warm for its weight, and compresses small enough to save space in my pack.
SLEEPING PAD – As a side sleeper, I’m picky about sleeping pads, and the NEMO Tensor Trail Ultralight Insulated Sleeping Pad is one of the only ultralight pads I’ve found that’s genuinely comfortable (for a sleeping pad). After years of use, it’s proven reliable and worth every ounce.
BACKPACKING PILLOW – The Sea to Summit Aeros Premium Pillow is the best ultralight pillow I’ve found. Does it feel like your pillow on your bed at home? NO. But, it’s still one of those little luxuries I never regret packing.
TENT (TWO PERSON) – The Big Agnes Copper Spur UL2 has been my go-to backpacking tent for years because it’s roomy, ultralight, and incredibly reliable. It’s also a true freestanding tent, which means it can stand on its own without stakes — a huge advantage when camping on rocky terrain or spots where staking isn’t easy.
Food, Water, & Kitchen Gear
ULTRALIGHT STOVE – I recently swapped my Jetboil Flash for the Soto WindMaster with 4Flex pot supports because it’s lighter and more versatile. You can use different pots, not just the Jetboil mug.
COOK POT – The TOAKS Titanium 750 ml Pot, perfectly fits a 110g Fuel Canister (the smaller standard size that you see), WindMaster Stove, and a mini BIC Lighter.
EATING UTENSIL – The Snow Peak Titanium Spork (Long)
WATER PURIFIER – The Katadyn BeFree is my favorite filter for speed and simplicity. It’s ultralight, easy to squeeze, and perfect for quickly filling bottles on the go.
The Grayl Water Filter is much heavier but unbeatable for international travel or areas with questionable water sources because it removes viruses as well as bacteria and protozoa. It works like a French press—fill, press, and drink—with no need for extra bottles or gear.
FOOD STORAGE (BEAR SAFE) – The BearVault BV450 Jaunt Bear Canister. This size is generally considered good for 4 nights, or 2 night trips with 2 people.
The Ursack is a lightweight alternative to a bear canister. It’s made from bulletproof-grade fabric that resists chewing and clawing, and it’s much easier to pack in your bag. You’ll still need to tie it to a sturdy tree, and it doesn’t protect your food from getting crushed, but for trips where bear canisters aren’t required but you still want to protect your food from bears and other critters.
Other Backpacking Gear
HEADLAMP – Nitecore NU25 400 Lumen Rechargeable Headlamp
GPS COMMUNICATION – I carry the Garmin InReach Messenger Plus for peace of mind on backcountry trips — it lets me send texts and share my location even when there’s no service. The battery lasts for days, and it’s a small, reliable way to stay connected and safe when I’m off the grid. AND you can send photos and voice notes! Watch the video I made about the Garmin Messenger Plus!
SMART WATCH – I’ve been wearing the Garmin Fenix Watch to track my activity for years. Plus it’s so fun reviewing and sharing hike details after!
TREKKING POLES – Durston Iceline Trekking Poles. I just picked up the Durston Iceline trekking poles because I wanted something ultralight but sturdy to take pressure off my knees on big hikes. They’re incredibly light (under 10 oz per pair) and designed for strength.
MULTI-TOOL – Swiss Army Classic Knife
FIRST AID – Band-Aids, Leukotape, pain killers, anti-bacterial cream.
REPAIR KIT – Repair Spool by Igneous, Tenacious Tape.
POWER BANK – Nitecore Power Bank
Clothing Essentials
SUN SHIRT – The Crater Lake Hoody is my favorite sun shirt because it’s so light and soft it almost feels like air. It offers full UPF 50+ protection for long days in exposed terrain, so I don’t have to carry buckets of sunscreen.
SHORTS – You don’t need to reinvent the wheel here. Whatever works for you! This summer I’ve been really enjoying the Lululemon Pace Rival High Rise Shorts and Outdoor Voices Warmup 5” Shorts.
HIKING PANTS – To be honest I’ve never been a big hiking pants person. I generally just wear one of my favorite pairs of leggings, because that’s what I’m most comfortable in. But this summer I picked up a pair of REI Trailmade Pants and they were nice! The Trailmade Pants are affordable, durable, and surprisingly versatile for hiking and backpacking. And I have to admit it was nice to have pants that felt a bit more airy than leggings.
INSULATED LAYER (Down Jacket ) – The Patagonia Fitz Roy Down Jacket is a cold-weather essential I bring on alpine or winter trips when serious warmth is non-negotiable. It’s stuffed with premium 800-fill down, so it’s incredibly warm for its weight. I’d recommend sizing down.
When I’m really trying to go lighter without sacrificing warmth it’s hard to beat Rab’s Mythic G Down Jacket. Best to pick this one up on sale if you can!
RAIN JACKET: The Rab Phantom Jacket is an ultralight, fully waterproof shell that packs down small and disappears in your bag until you need it. I’m a fair weather hiker, but in the mountains weather can change fast, so it’s great to have rain protection that doesn’t weigh me down.
For more inclement whether, when I want something a little more substantial, I use the Arc’Teryx Beta SL Jacket.
Shoes
TRAIL RUNNERS – The Hoka Challenger Trail Running Shoes are my go-to shoe for warm weather hiking. I prefer trail runners over hiking boots because they’re lighter, more breathable, and dry quickly. I’ve worn mine on everything from day hikes to multi-day trips like the John Muir Trail, and they’ve been incredibly durable for how lightweight they are.
BOOTS – The Danner Inquire Chukka Mid is my all-time favorite hiking boot! I wear it when I want more ankle support than a trail runner but still need something light and flexible.
Camera
SONY RX100 VII – The Sony RX100 VII is my favorite compact camera for backpacking because it’s small enough to slip in a pocket but still delivers professional-quality photos. The 24–200mm zoom range makes it incredibly versatile, and it’s the perfect option when I don’t want to carry one of my heavier cameras but still care about image quality.
| Just a quick heads up. Some of the links in this post are affiliate links, which means I might earn a tiny commission if you decide to make a purchase. It does not cost you anything, but it’s one of the simplest and most supportive ways to help me keep creating these guides. I’m not paid to recommend anything, and every opinion here comes from real experience with gear I actually use and love. If you’re planning on picking something up, using my link truly makes a difference and I appreciate it more than you know. |
The Hike to Shi Shi Beach
The hike to Shi Shi Beach begins with an easy 2 miles through a verdant rainforest. The trail is relatively flat until the very end when you drop steeply down to the beach. Other than that, the only obstacle you’re likely to run into is lots and lots of mud. There are quite a few social trails that have been forged through the forest in an attempt to avoid the mud obstacles. It’s 2.5 miles from the end of the trail along the beach to the Point of Arches, so the total length of your hike will depend on how far you decide to walk along the beach. It’s much easier to hike along the dense sand by the water’s edge rather than meandering through the much softer sand closer to the forest.
A Note About Safety: On the coast, high surf storms and extreme high tide events can be dangerous. Always check weather forecasts, current conditions, and consult with a park ranger at one of the WICs when planning your trips. It’s also important to hike with a tidal chart. Parts of the beach and many of the headlands are impassable or difficult to travel on during high tides.
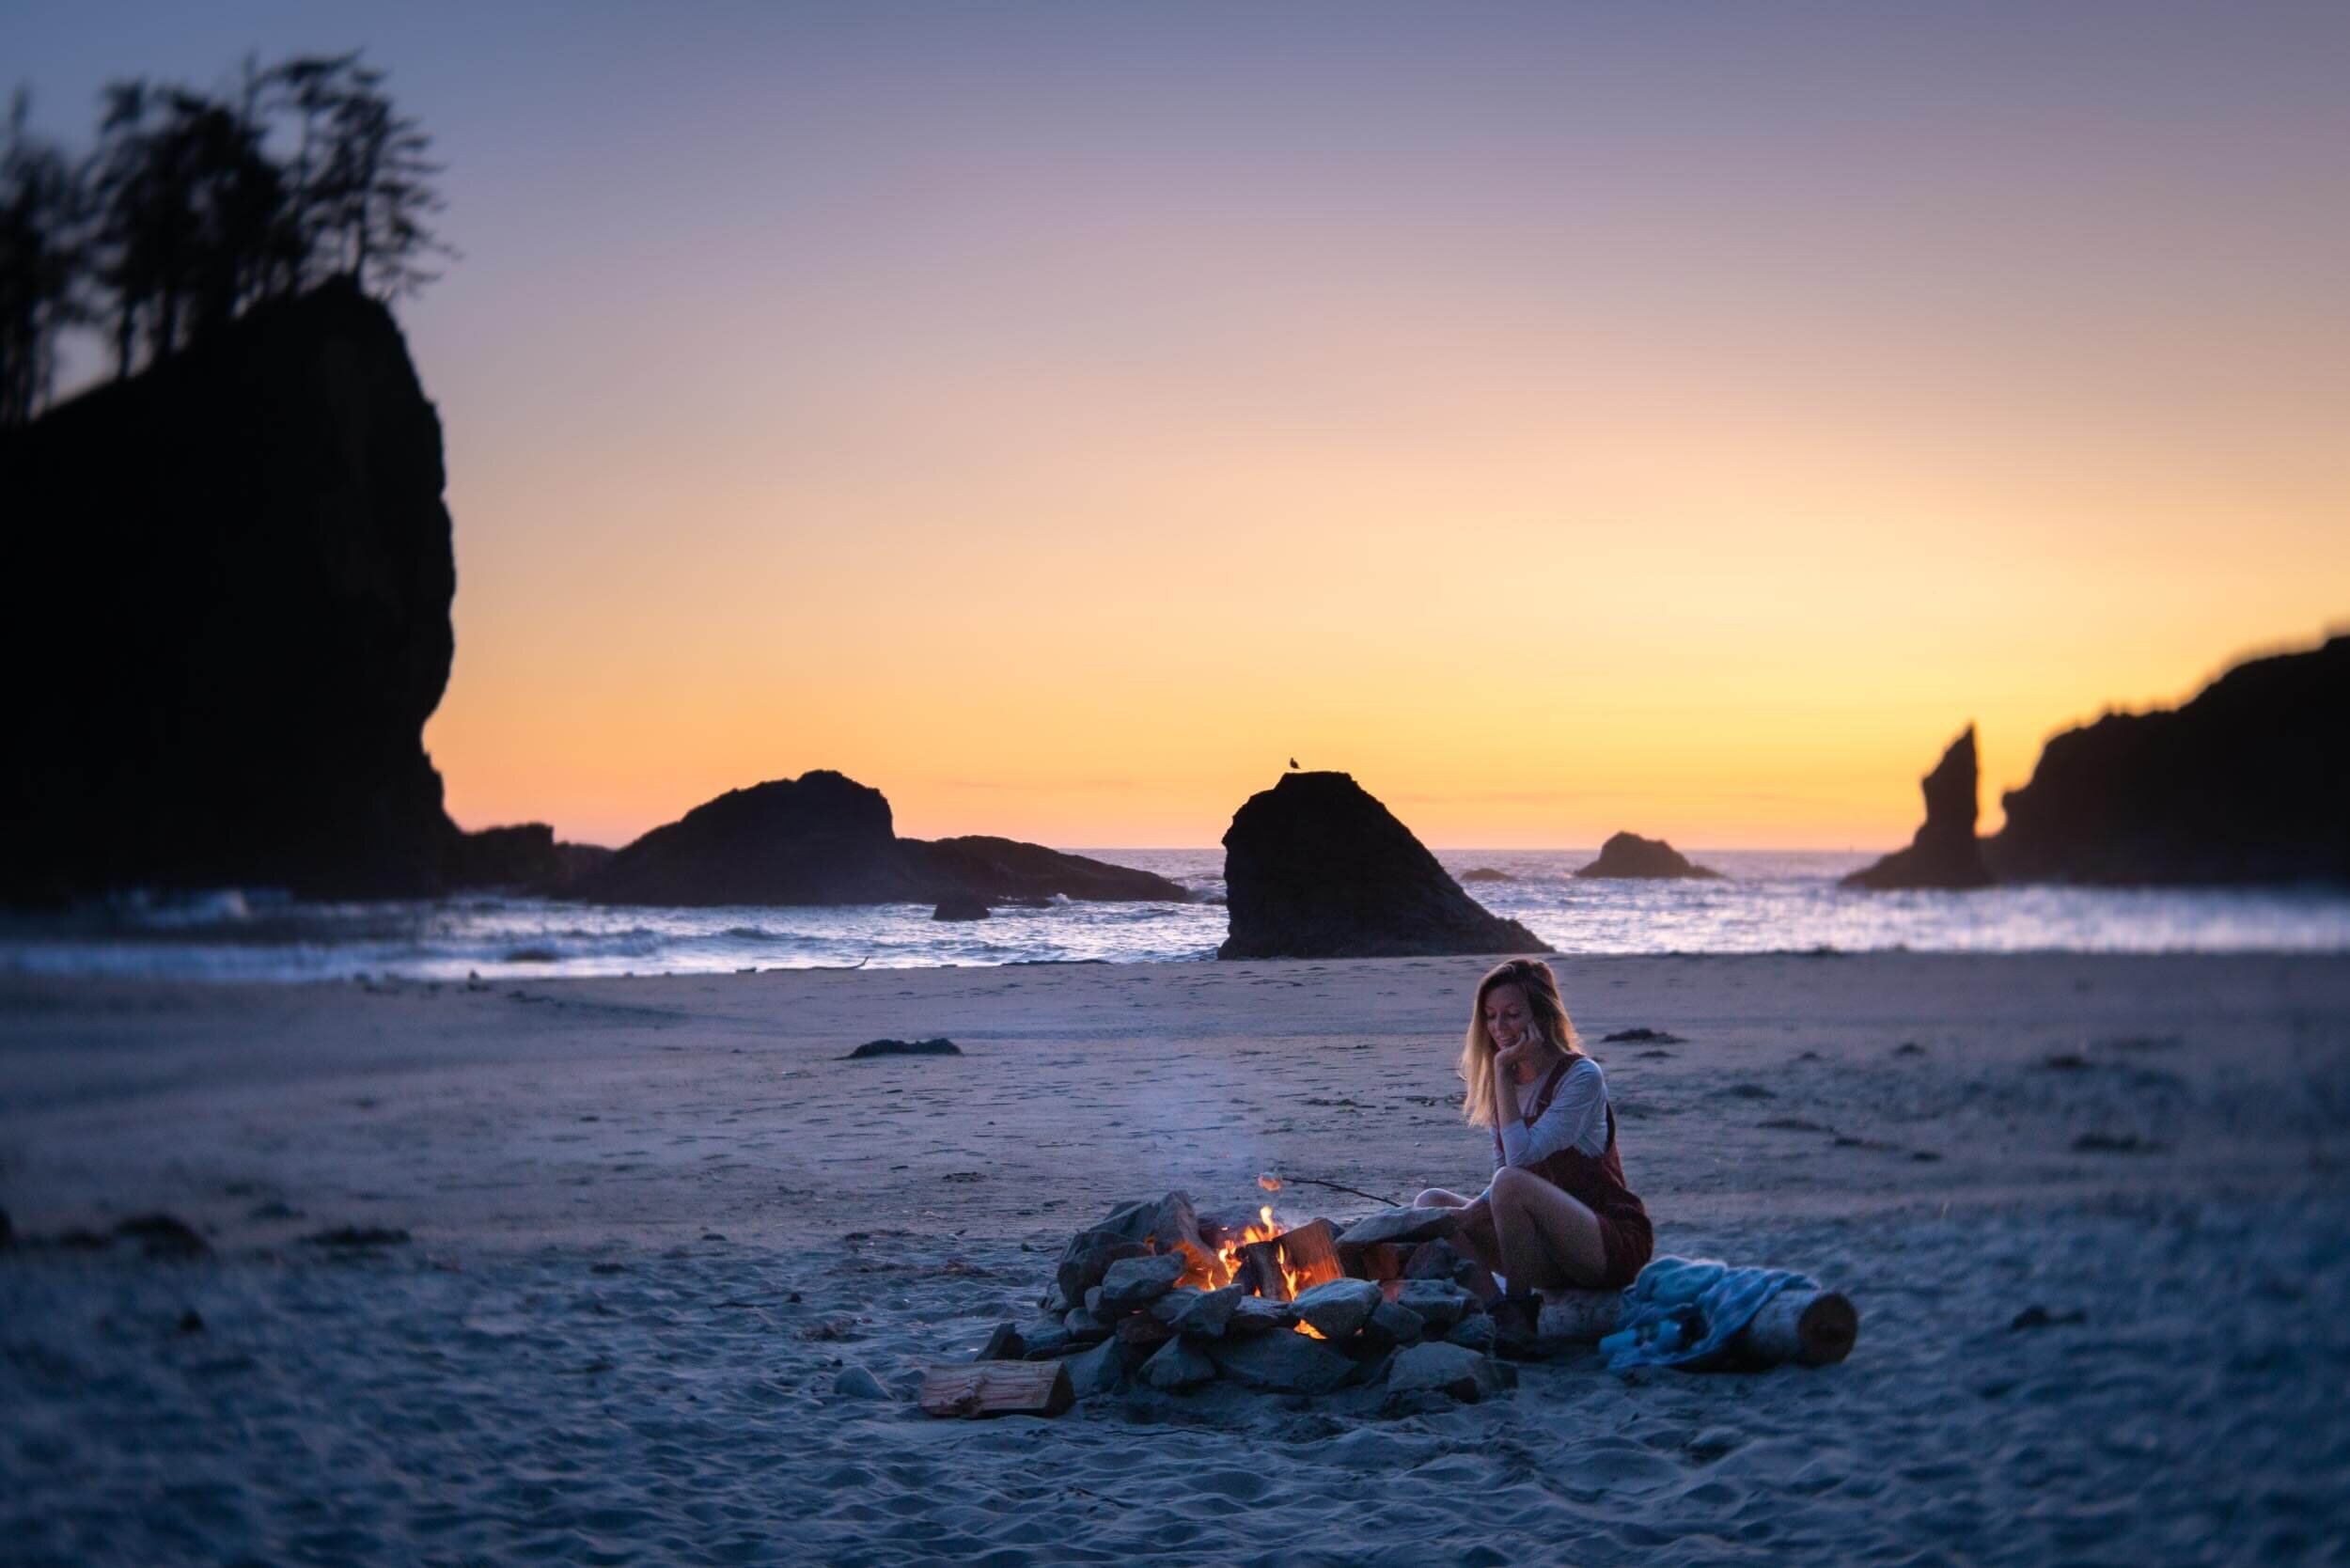
Shi Shi Beach Camping
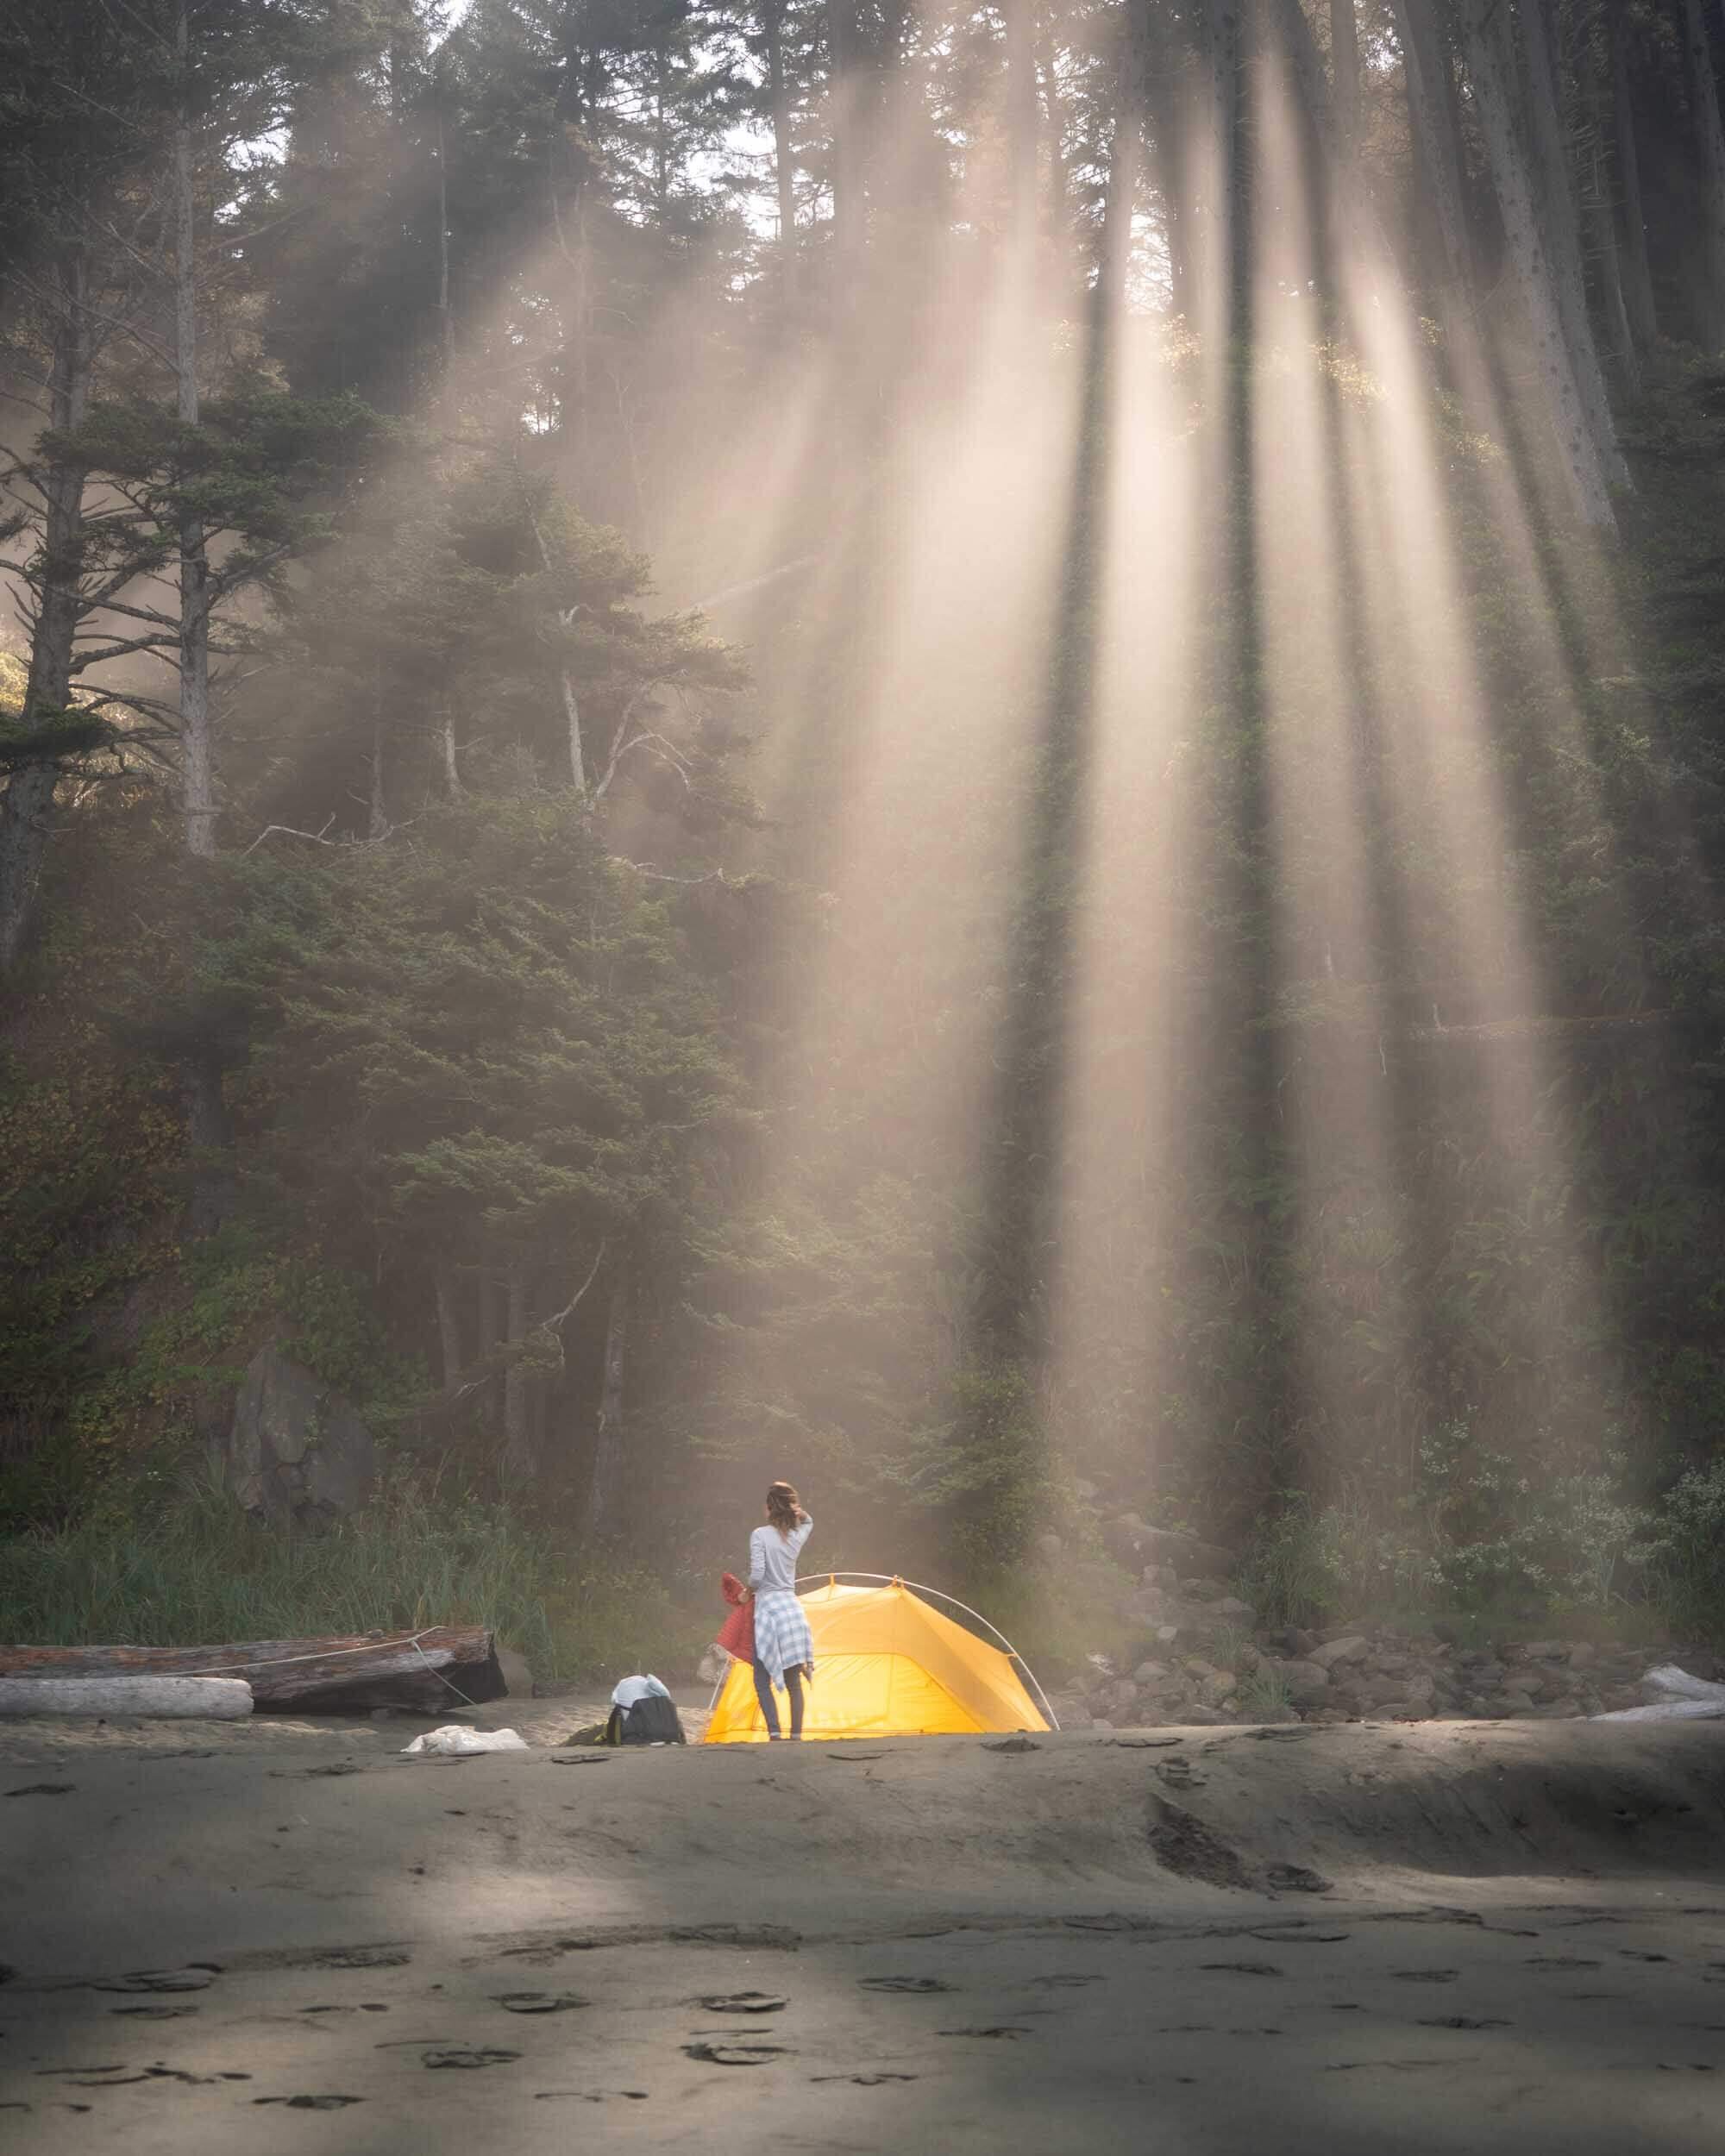
Amazing sun rays coming through the forest onto Shi Shi Beach in Washington. Wearing: The North Face Long Sleeve Shirt and Patagonia Flannel Shirt. Also Shown: Big Agnes 2 Person Tent.
Camping at Shi Shi Beach is available along the 2.5 mile stretch from the end of the trail along the beach to the Point of Arches. To camp beyond this point requires a reservation. You are allowed to camp anywhere along the beach, and many people choose to sleep right on the sand. Obviously, if you decide to sleep on the beach, make sure you pitch your tent above the high tide mark! Alternatively, there are a ton of established sites overlooking the beach from up in the forest. These sites are generally marked by old buoys hanging in the trees. While technically you can camp anywhere, if you set up camp in the woods, please use one of the established sites, rather than clearing a new area… Which brings me to my next topic – reducing your impact on the coastal wilderness while camping at Shi Shi Beach!
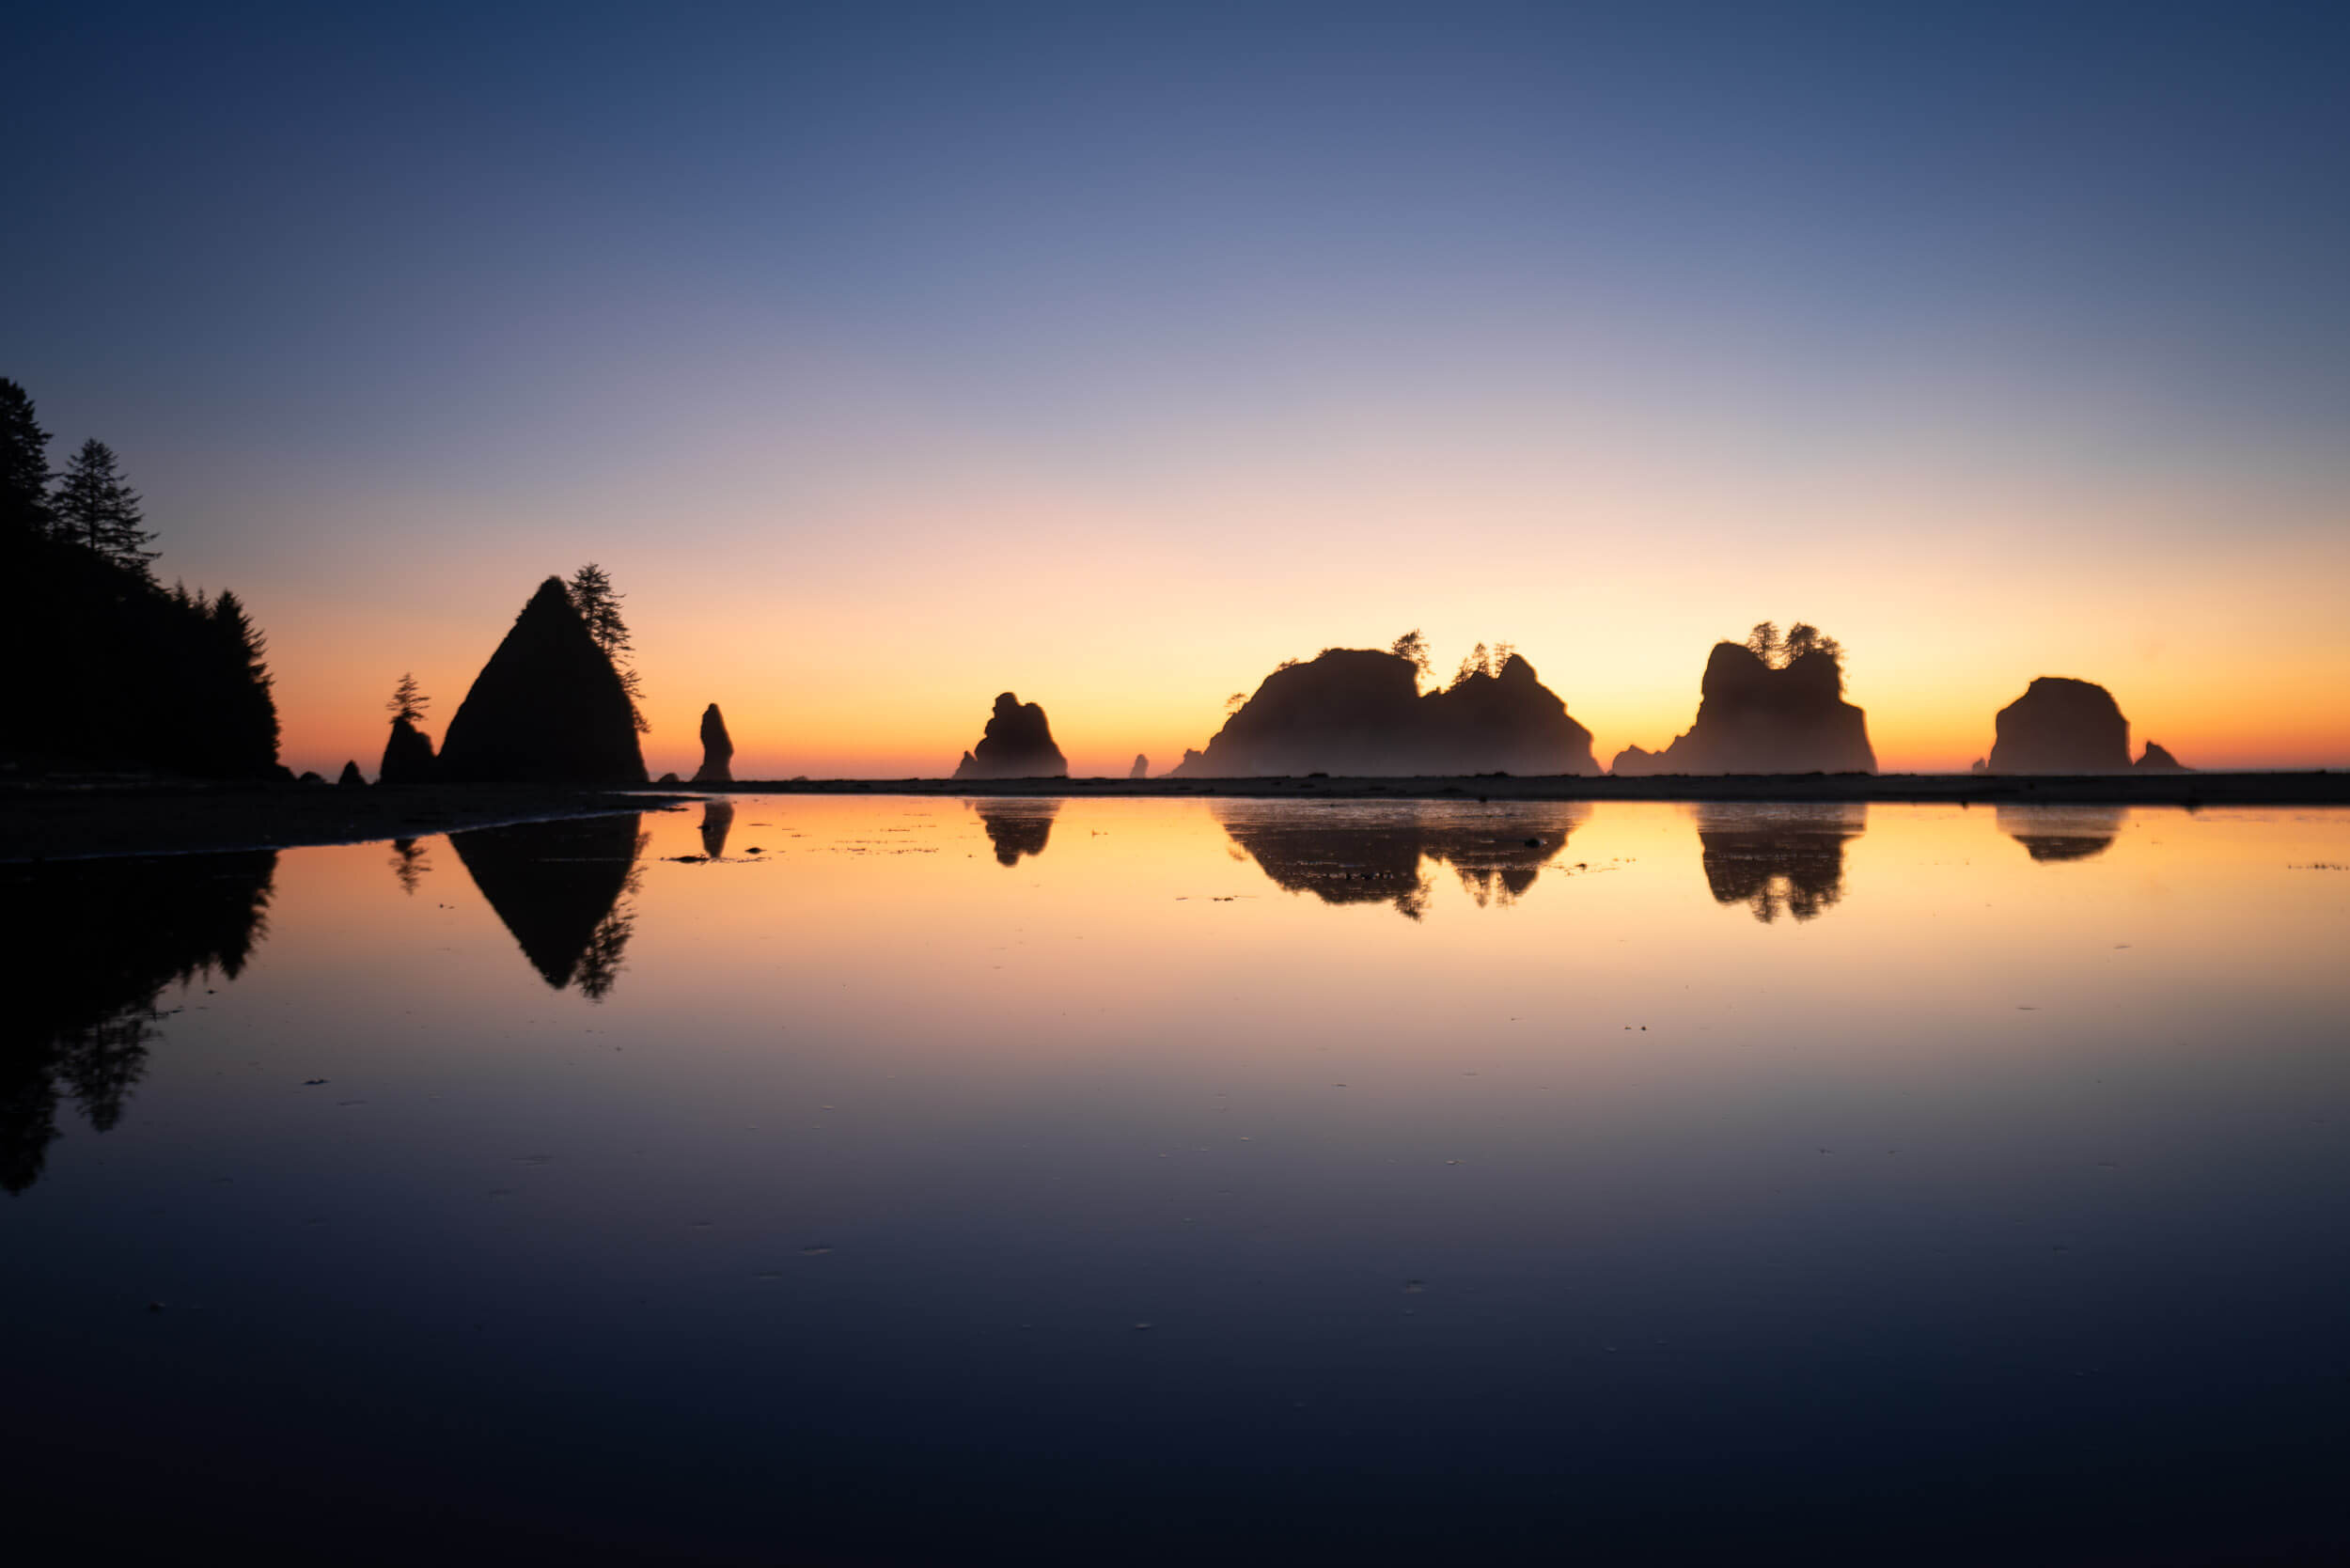
Sun set on Shi Shi beach in Washington State.
Leave No Trace
I personally believe that without a connection to nature, people are much less likely to stand up for it and protect our world’s diminishing natural spaces. Part of our responsibility as stewards is always to practice “Leave No Trace” principles. Leave No Trace is built on seven core principles that outline the best available minimum impact guidance for enjoying the outdoors responsibly. I’m going to touch on a couple regulations specific to Shi Shi Beach below. For more general information about how we can all reduce our impact on these beautiful wilderness destinations, please visit The Leave No Trace Center for Outdoor Ethics.
Food Storage At Shi Shi Beach
All food, garbage, and scented items must be stored in park-approved bear canisters along the entire Olympic National Park Wilderness Coast. When wild animals become accustomed to human food, they can get habituated to camping areas and may act aggressively toward campers and other park visitors. To protect park wildlife, never leave your food unattended, and always store it in an approved canister. Bear canisters are available for loan at the Port Angeles WIC. However, on busy summer weekends they can run out, so it’s better to rent or purchase your own beforehand if possible.
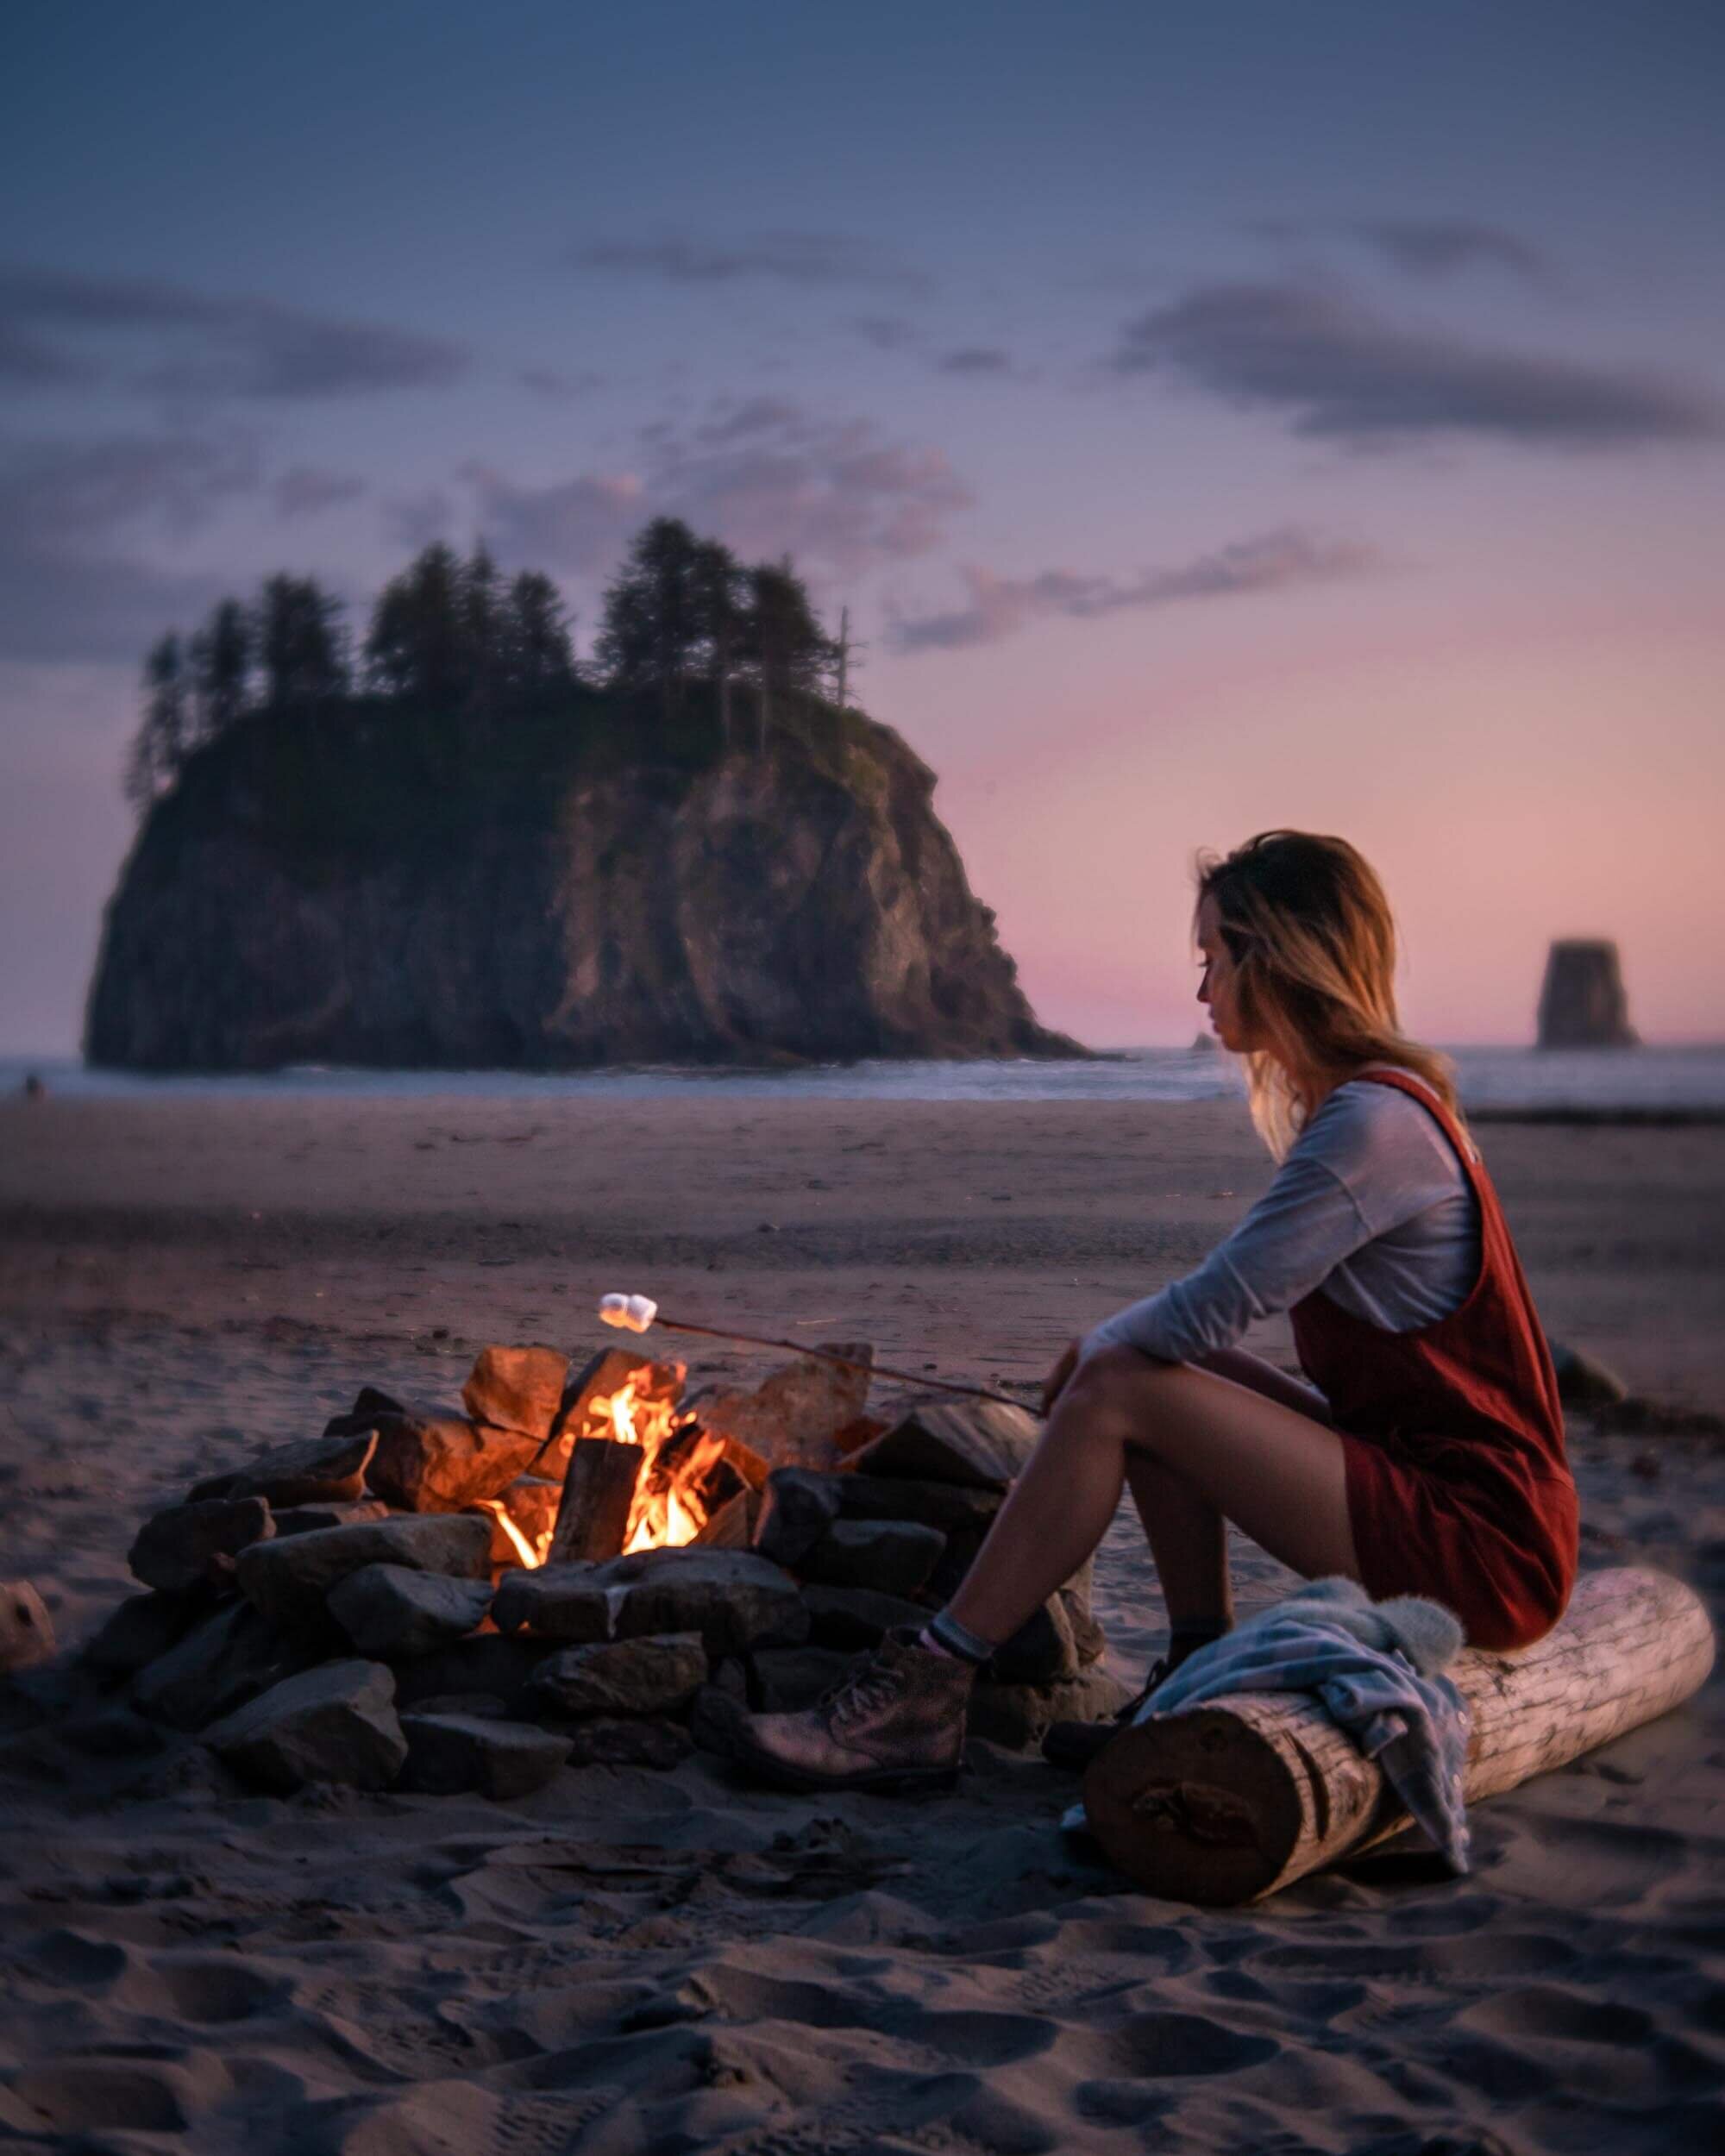
Wearing: Patagonia Flannel Shirt, The North Face Beanie, and Blundstone Lace-Up Boots.
Campfires At Shi Shi Beach
Campfires are permitted on Shi Shi Beach. Yay! But as the saying goes: With great power, comes great responsibility. If you choose to build a fire at Shi Shi Beach, use existing fire rings, build them below the high tide line, and burn driftwood only. You can also pack in your own firewood. Bringing your own wood is a great option later in the camping season because the driftwood can become scarce. Collecting wood from the adjacent forest areas tramples vegetation and is an impediment to healthy growth. Basically, when it comes to campfires, DO use common sense, and DON’T use wood from the rainforest.
Toilets At Shi Shi Beach
Everyday hundreds of people visit Shi Shi Beach. While the vast majority of them don’t stay, many will need to pee pee or shi shi (excuse my pun) at some point. That’s a lot of potential grossness to stumble upon. Three “wilderness” toilets (basically holes in the ground) have been established to help mitigate this issue: one in the woods at the south end of the campsites; one behind the wooded campsites on the south side of Petroleum Creek; and one near Willoughby Creek. They are generally marked by orange buoys. If for some reason you absolutely can’t make it to one of the pit toilets, dig a deep cathole (6-8 inches) in the forest at least 70 steps away from water sources, and campsites.
Water & Water Treatment At Shi Shi Beach
If possible I would suggest packing in your water. That being said, there is generally fresh water available at Petroleum Creek and Willoughby Creek. Any water sourced from the creeks will need to be filtered or boiled. Because coastal streams and rivers contain cryptosporidium and giardia, iodine tablets won’t cut it.
Wearing: Patagonia Fleece Jacket, Patagonia Down Vest, and Blundstone Lace-Up Boots.
Olympic Peninsula Camping: Shi Shi Beach vs. Second Beach
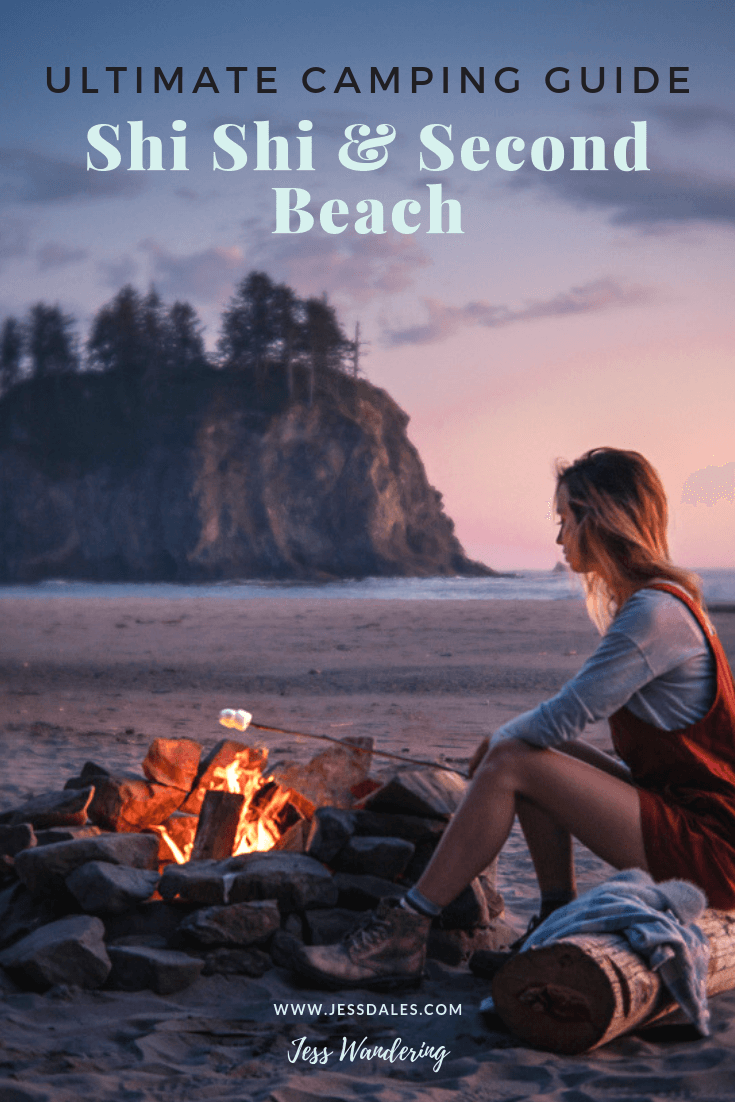
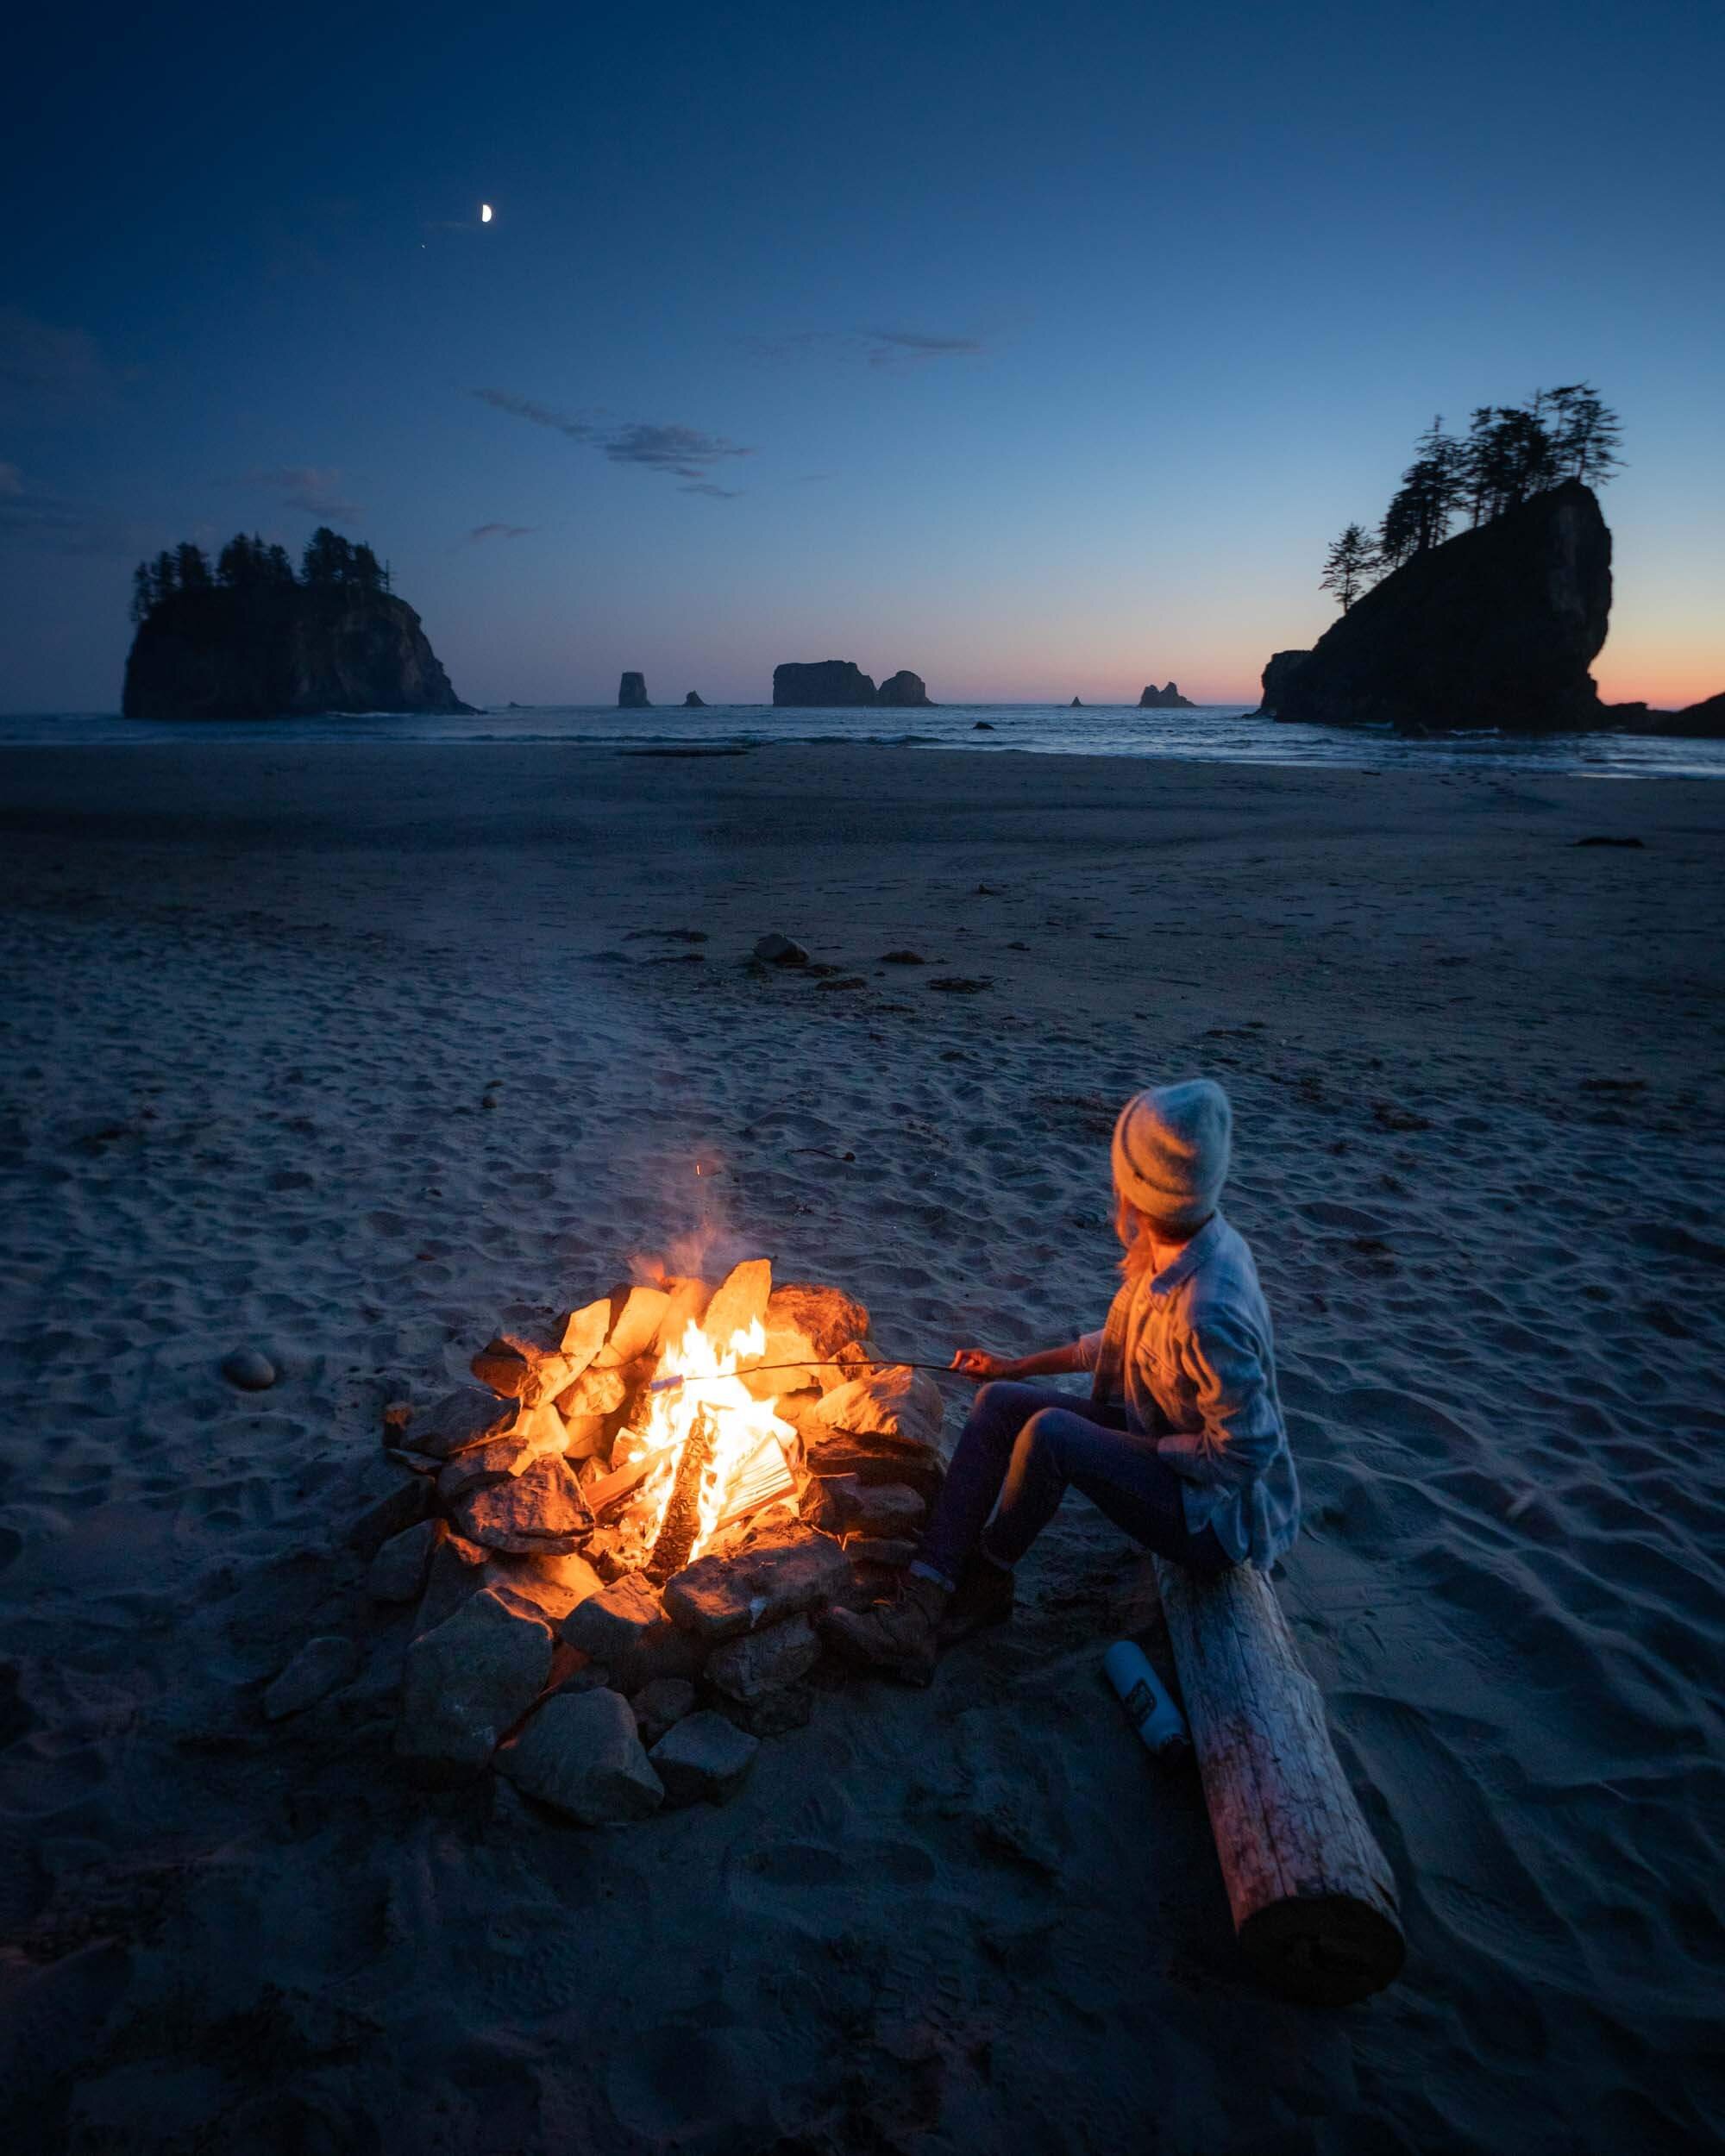
Roasting marshmallows over the camp fire at Second Beach on the Olympic Peninsula in Washington. Wearing: Toad&Co Jumper ,The North Face Long Sleeve Shirt, and Blundstone Lace-Up Boots.
If you’re planning a beach camping trip out on the Washington coast, chances are you will come across Second Beach. This extremely popular beach is located farther south than Shi Shi Beach near the heart of the Twilight Saga. While you’re unlikely to find any vampires or werewolves, like Shi Shi Beach, there is an undeniable touch of magic. Which begs the question: Shi Shi Beach or Second Beach? And of course, the answer to that question, like the answer to many others is, it depends.
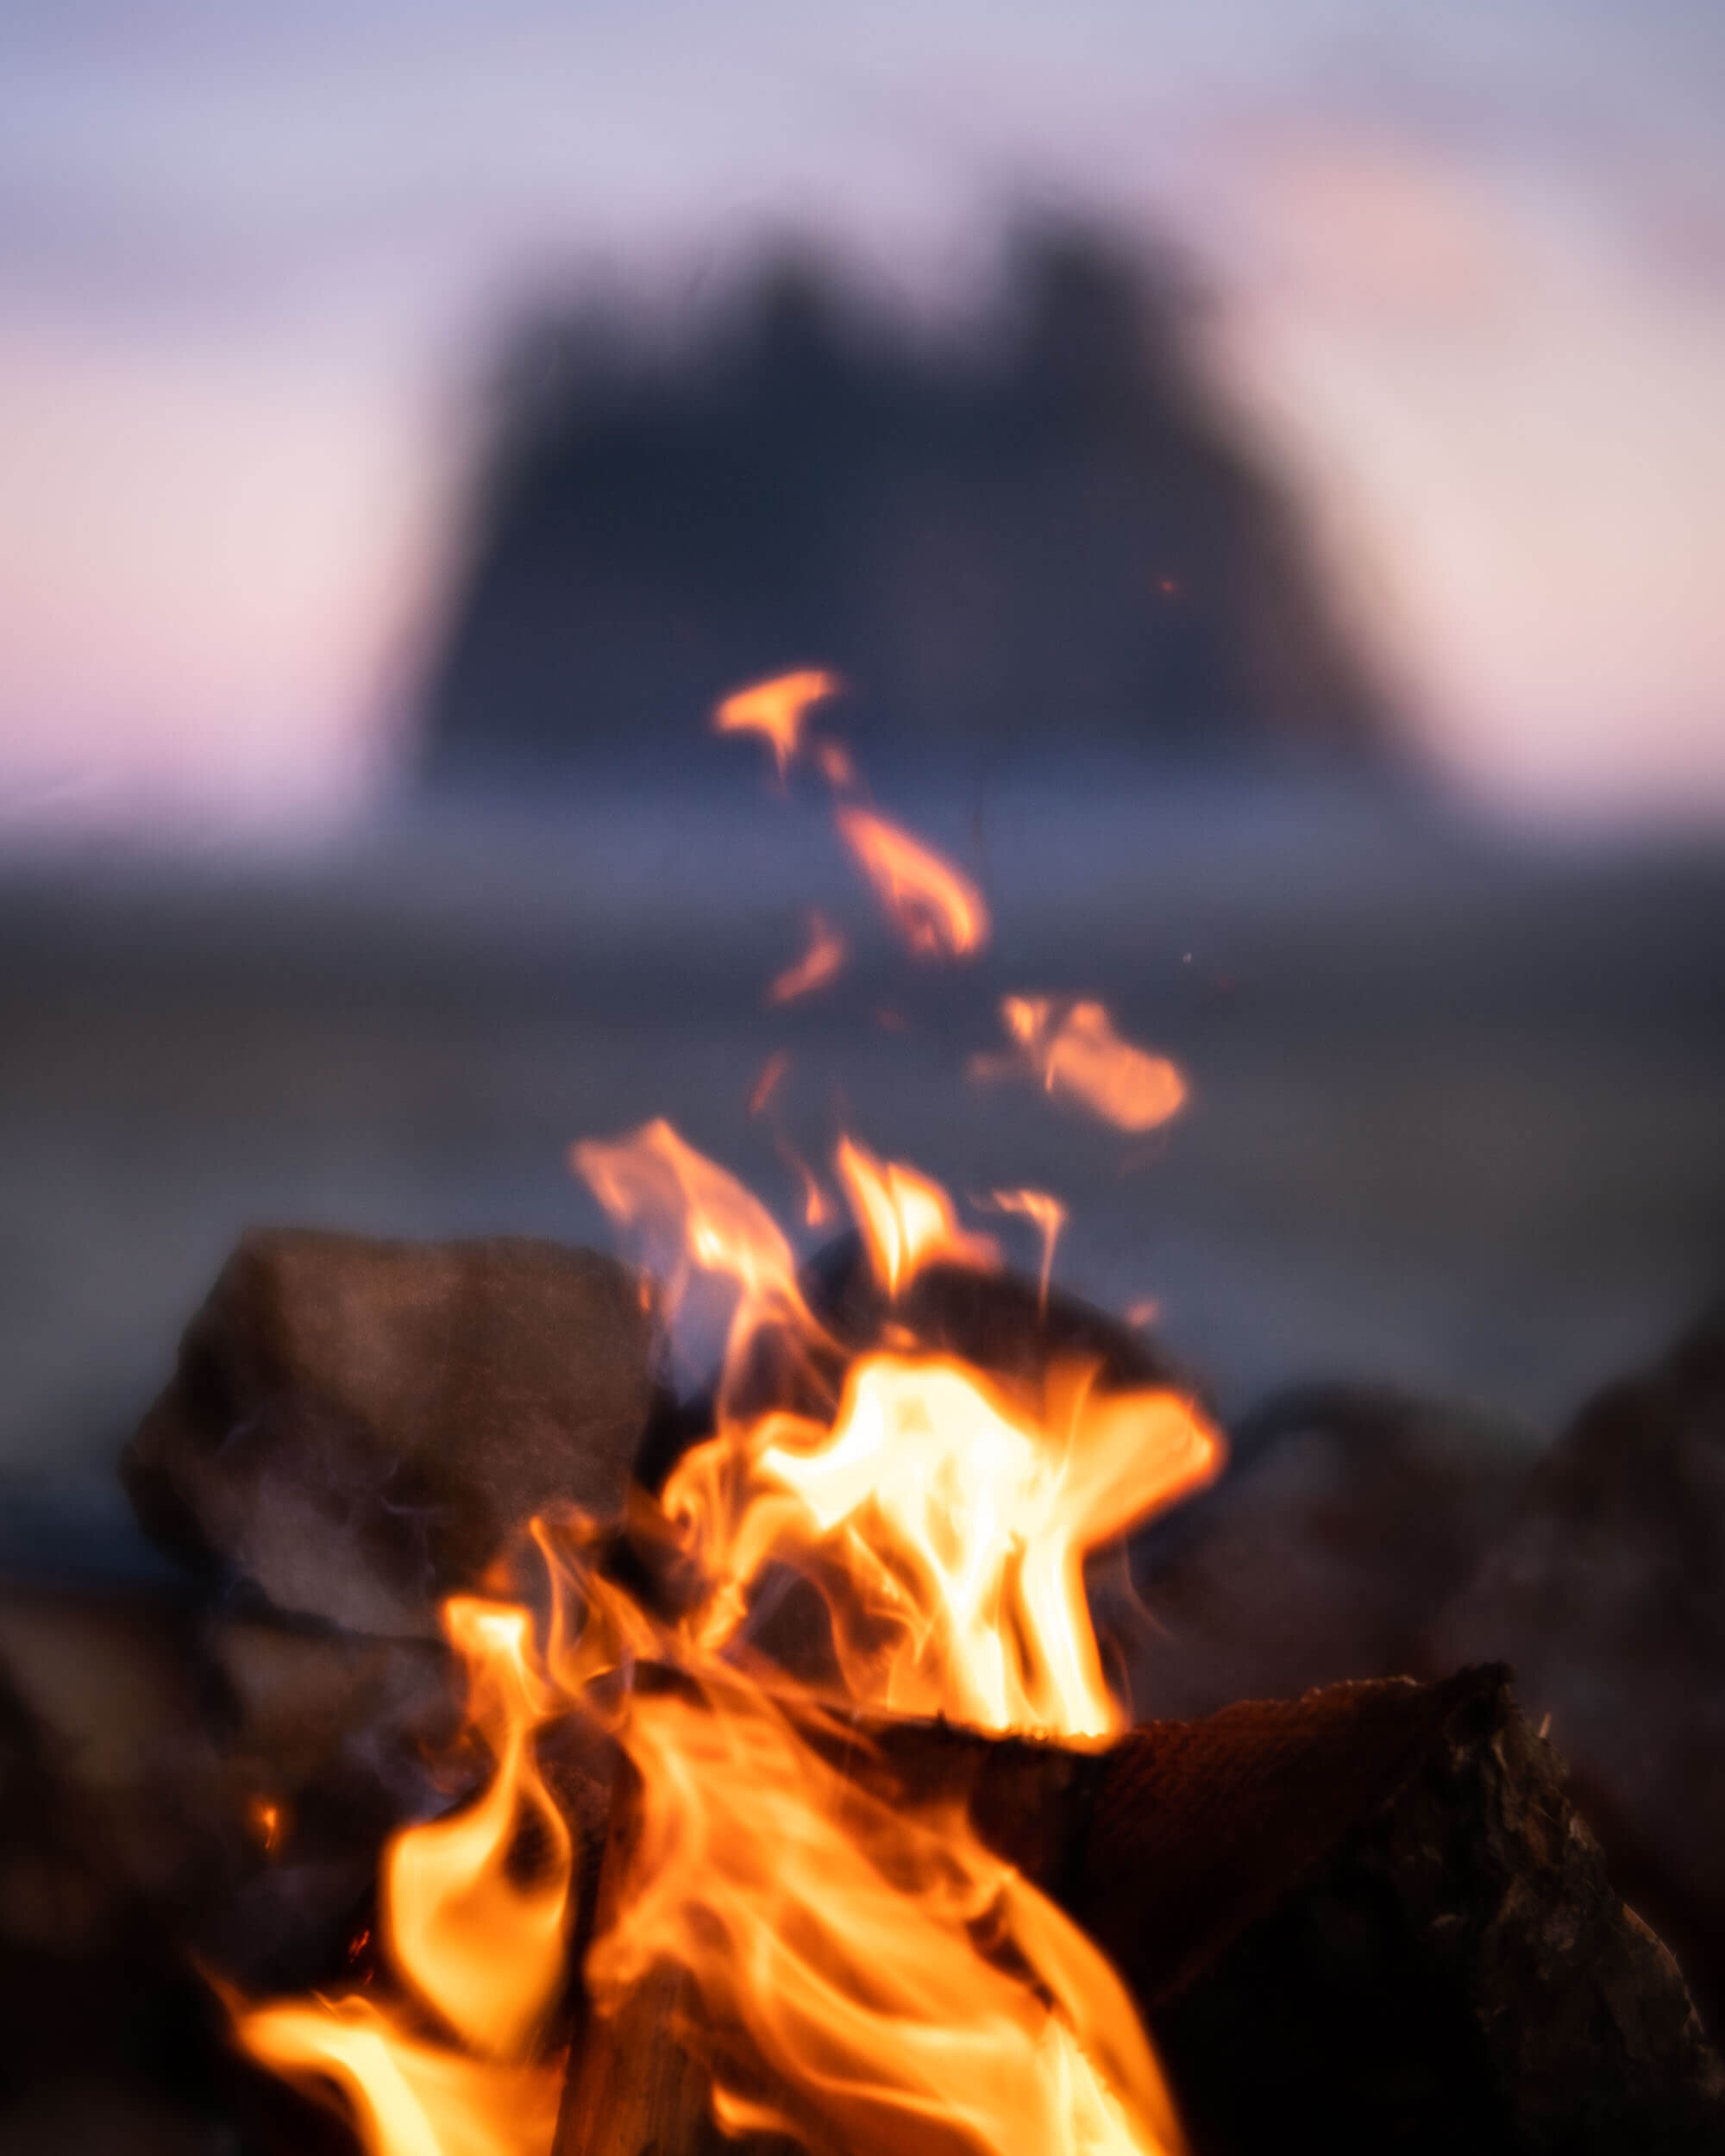
Camp fire on the Olympic Peninsula at Second Beach.
Where Is Second Beach
Second Beach is located on the Washington Coast, just south of the small coastal town of La Push.
The Hike to Second Beach
The trail to Second Beach is short and sweet. After a little less than a mile, the well-defined forest path spits you out on the beach where you will have to navigate some large driftwood logs before reaching the sand. But that’s about it!
Like Shi Shi Beach, Second Beach it is part of the Olympic National Park. Therefore, to camp at the beach, you‘ll need to pick up a permit in person at either the Port Angeles Wilderness Information Center or the Lake Quinault Ranger Station. Because there are no reservations, Second Beach can quickly fill up during the summer. Unlike Shi Shi Beach you won’t need a Makah Reservation Permit. Other than that, rules regarding camping, food storage, group size, campfires, toilets, leave no trace, etc. are the same as those listed above for Shi Shi Beach.
Pro Tip: Stop in at the Three Rivers Resort to pick up firewood, the makings for s’mores, or even a surfboard before you head out to the beach! They also have immaculate coin-operated showers if you want to spruce up after your camping trip.
Shi Shi Beach or Second Beach?
Both Shi Shi Beach and Second Beach are beautiful destinations for a coastal camping trip. Which one you chose depends on the vibe you’re looking for. In general, Shi Shi Beach feels more secluded, and you are more likely to find a quiet wilderness experience there. Second Beach, on the other hand, is more of a scene. The beach is easier to get to, smaller, and more people camp out in the open on the sand. As a result, I’ve heard it described as a “party beach” – at least in comparison to Shi Shi Beach. I’ve personally never had that experience at Second Beach, but I’ve also never been there on a weekend.
So I guess I would say that if you are looking for solitude, head to Shi Shi Beach. Hike all the way down toward Point of Arches, set up camp, and enjoy. Second Beach is an excellent option if you’re new to backpacking or are looking for a quick, accessible beach camping experience. Sure, you might have to share the experience with other people, but that doesn’t need to be a negative. Who knows, you might even make some new friends! Whichever beach you chose, leave it better than you found it, and respect your fellow campers’ right to enjoy a quiet night under the stars. That way everyone can have a good time!
Please note that some of the links above are affiliate links, and I may earn a small commission on any purchase made – at no additional cost to you. As always, all ideas and opinions expressed in this post are entirely my own. I appreciate your support! – XO Jess
YOU MIGHT ALSO ENJOY THESE POSTS!
10 Must Do Hikes In Washington State
Best Spring Hikes In Washington State
Hiking & Backpacking Gear Guide


Hey Jess.
This is such an innovating and inspiring blog! The development of your knowledge from your very first post until now is very soul witnessing and that is beautiful so congratulations on the level of skill you have developed from new beginning blogger to experienced advanced blogger 🙂
Your blog is very informative as well as creative and magical, it really paints a beautiful picture of a fantasy lust as well as factual information to know and consider.
You balance the detailed instructions of the site itself with the fantasy imagination that we all create in our minds.
Your photography is absolutely amazing that sometimes I can’t believe it exists! It’s like a poster for a movie, its so unique and captivating.
You keep me very engaged I love it!
Keep blogging
Love from your email pal; Tj Lotay (the one doing the fundraising)
Thanks so much TJ! Really appreciate the support. The blog has been a real labor of love, and I get a lot of joy out of it, so it’s always nice to hear that someone finds it inspiring. Best of luck out there!
Awesome post and pictures, Jess! I really enjoyed the read and appreciate you’re always promoting the "Leave No Trace" principles.
I’m always trying to figure out a good way to make the outdoors a welcoming place for everyone, while also acknowledging the role that I play in potentially driving more people to certain wilderness areas. I’m not sure there is a good answer, but I really do think education can make a huge difference. I know it has for me.
I hate to admit this but I have never been camping on the Olympic Peninsula. In fact I’ve only been to the Olympic Peninsula once! But, I must say watching you roast marshmallows brought back a lot of childhood memories. Every summer I went to Campfire Girl camp at Galena Creek which is off the Mount Rose highway between Reno and Lake Tahoe. My most vivid memory of roasting marshmallows was the summer that one of my tent mates’ marshmallows caught on fire and an attempt to put it out she started waiving it wildly back and forth until it landed on my leg! This traumatic event didn’t discourage me from roasting marshmallows though. To this day I strive to get that perfectly brown marshmallow!
Well I guess now I know why I had never camped out on the Olympic Peninsula before this year! 😉 That marshmallow incident does sound pretty traumatic. Glad it didn’t ruin s’mores for you!
Thanks for making this Jess, you’re the best. Appreciate the clear breakdown and for all the tips!
Thanks Andrew! I’t so beautiful out there, hope you have (or had) a great time. And really appreciate the comment letting me know you found it useful. 🙂