


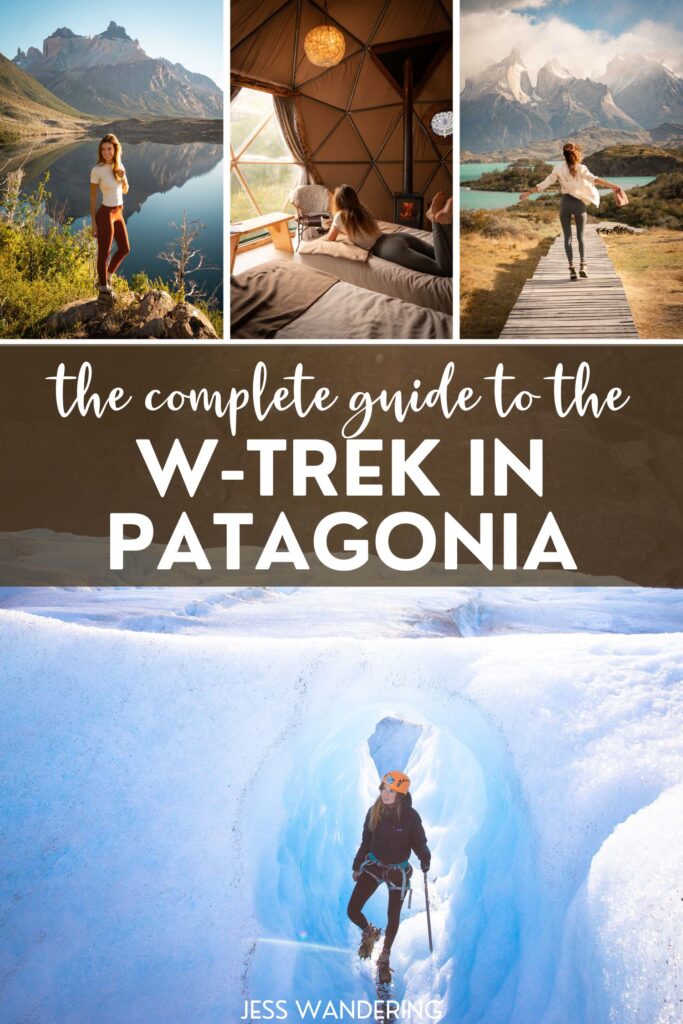
There are some views that are so iconic that they’re instantly recognizable – the Mona Lisa or Starry Nights of the natural world. They’re places that, even though you’ve seen hundreds of photos, feel surreal as you’re standing there, gazing, happily letting time slip away as you soak in their remarkable spirit.
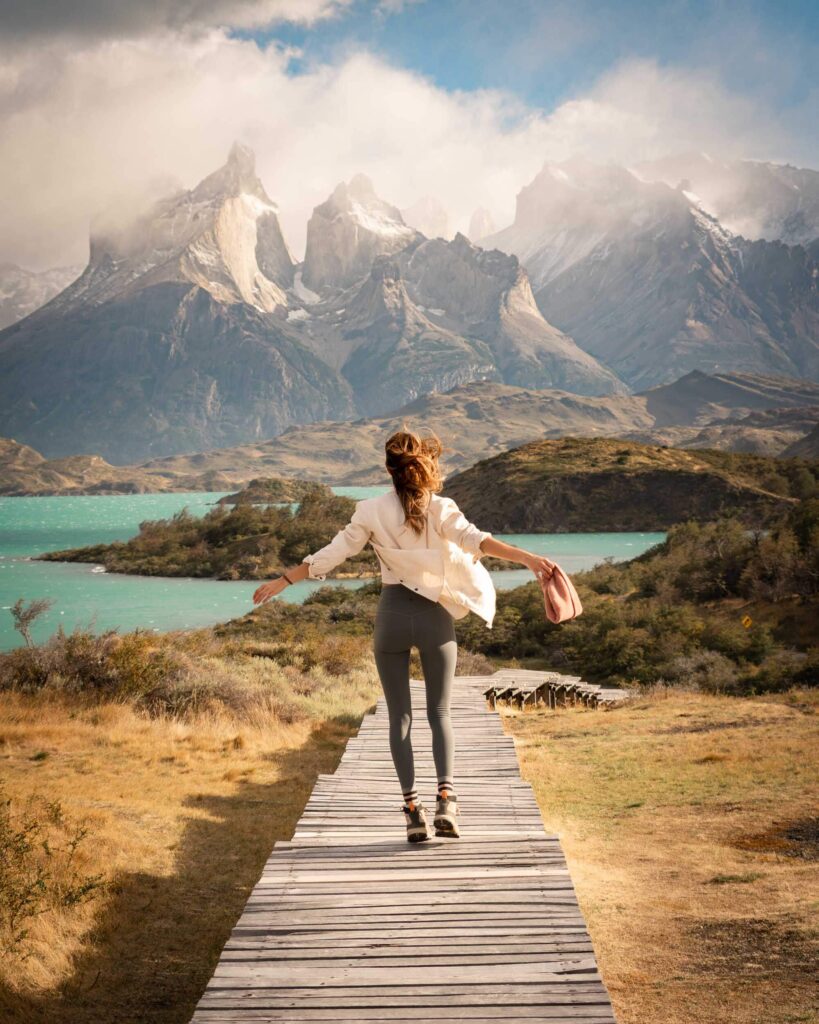
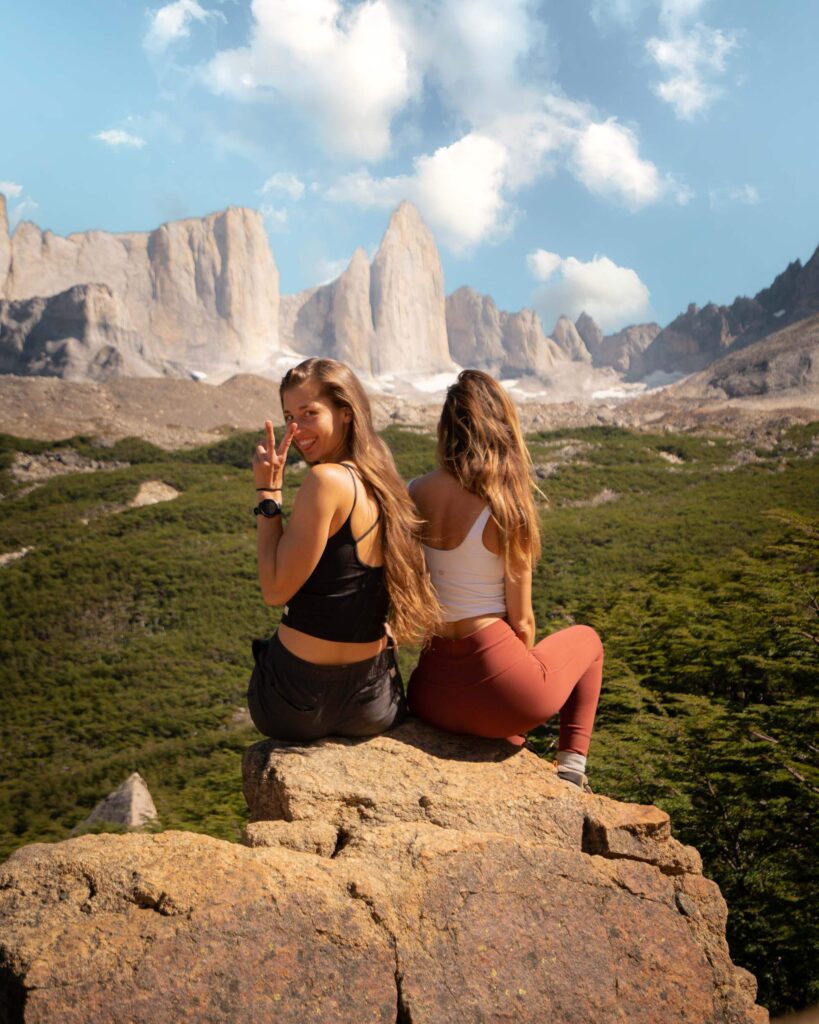
The Base of the Towers in Chilean Patagonia is one of those spots. I’ve browsed through dozens, maybe hundreds of photos, hoping that I’d get the chance to see it myself. When that chance came last February, I grabbed it – even though I only had a couple of days to plan for a whirlwind trip. Luckily I had my friend Carrie from Venture Patagonia to plan the entire thing!
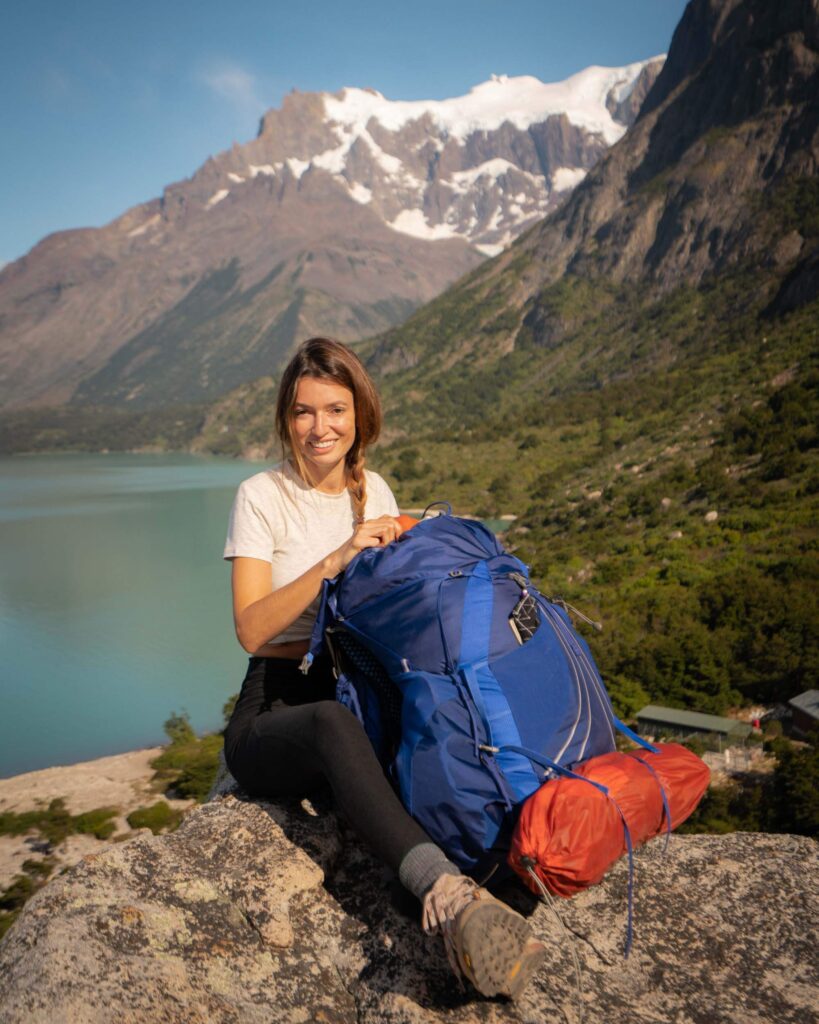
I would be joining my friend Andrea along the W-Trek through Torres Del Paine National Park, one of the most famous trails in a land famous for its natural beauty.
What is the W-Trek?
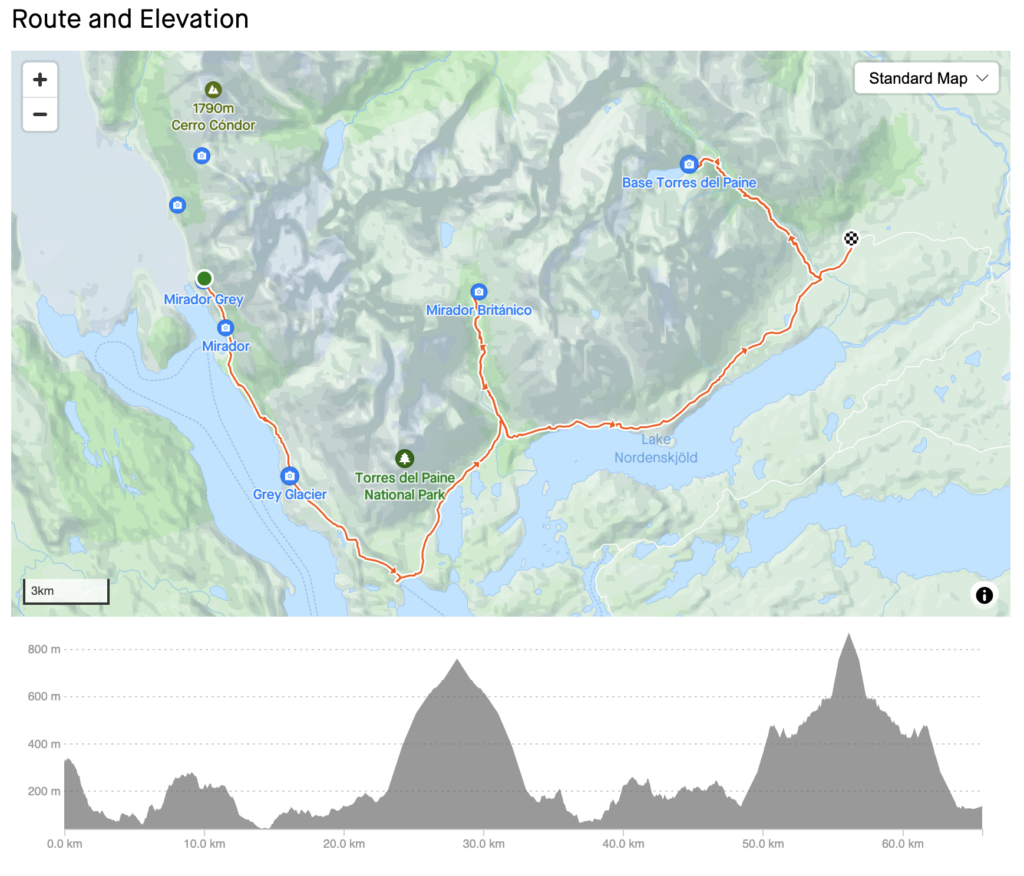
The mileage and elevation gain of the W-Trek is no joke – almost 50 miles and 9,000 feet of climbing through Torres Del Paine National Park. But that walking can be spread out between three and seven days, making it a manageable trip for those new to trekking. We decided to take four days but needed another day of travel to reach the hike’s launch point at Glacier Grey.
The W-Trek is normally walked east to west, starting at Refugio Las Torres and ending at Refugio Paine Grande. It runs up three valleys, creating the W shape that gives it its name. Instead of traveling east to west, we actually started on the west and at Glacier Grey.
There were two reasons for this: First, Andrea was actually backpacking the entire “O-Circuit” which, unlike the W-Trek, can only be completed in one direction. Second, we wanted to end our trek at its most famous viewpoint – the Base of the Towers.
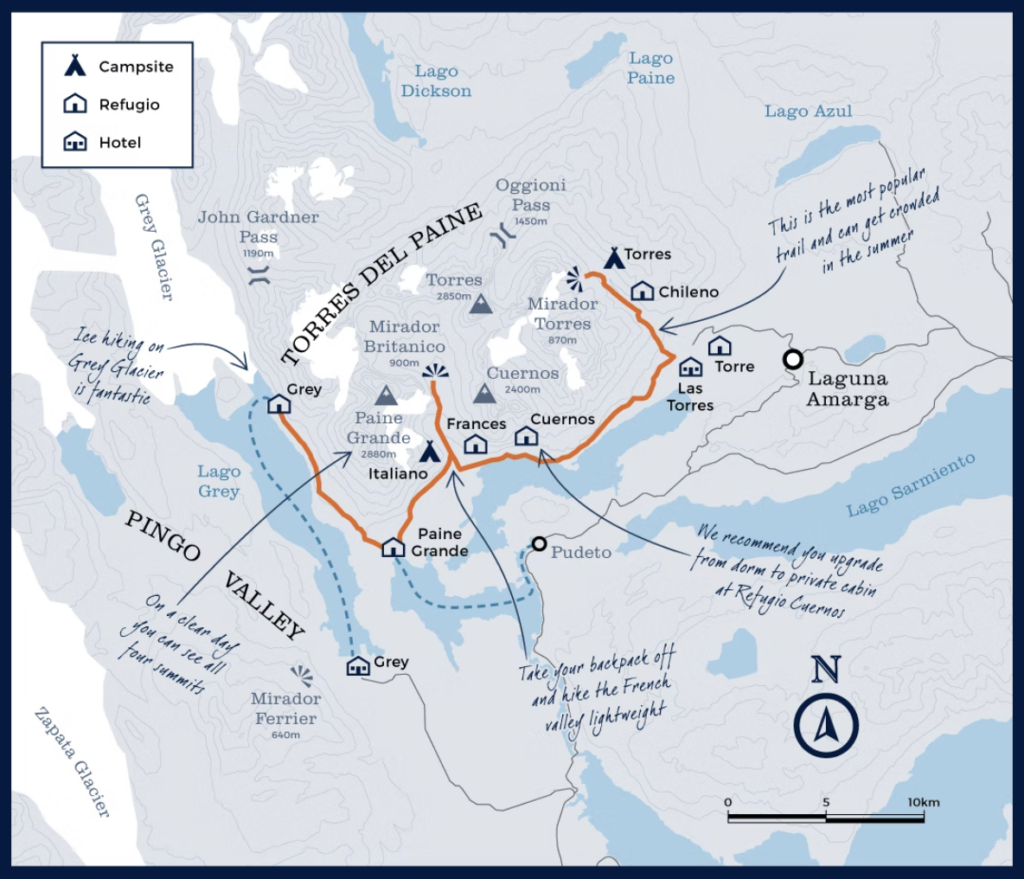
The W-Trek in five days
Day One: Lago Grey
Torres Del Paine is a huge national park, covering about 700 square miles, and the larger Patagonia region encompasses 400,000 square miles. Not unlike its largest American cousins, just traveling through the park can take some time.
To reach our launch point, we took The Grey III Ferry across Lago Grey, a lake at the base of the Grey Glacier. We stayed at the campground at Glacier Grey but had time for some fun before calling it a night. There are two great options that can both be completed in a few hours.
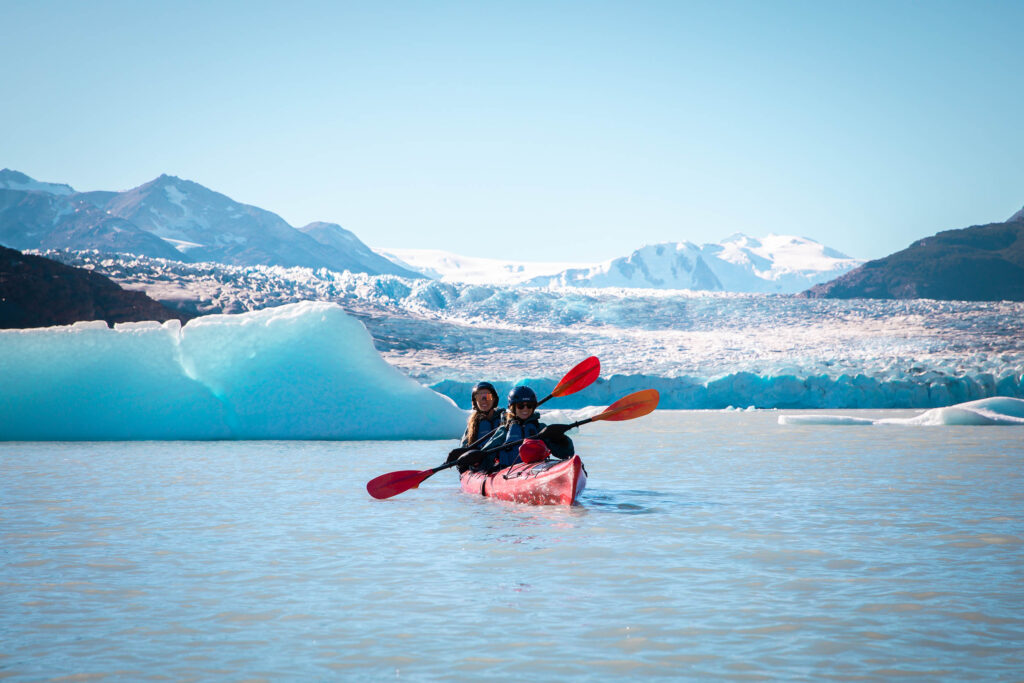
Activity One: Kayak Lago Grey
That first afternoon, after meeting up with Andrea, we kayaked Lago Grey, soaking in views of the glacier cascading into the lagoon, with more ice dotting the surrounding peaks. Talk about a cold lake – it was literally chilled by icebergs that had broken off the glacier!
Our 2.5 hour beginner-friendly expedition service outfitted us with kayaking gear, including a neoprene suit, additional drysuit and booties, and other safety gear. At the time (2022), kayaking Lago Grey cost: $66.000 CLP per person.
Andrea and I shared a double kayak, slowly weaving through icebergs as the sun glinted off the water. It was the sort of unexpected joy that can be hard to capture on a meticulously planned backpacking trip!
Activity Two: Suspension Bridge Hike
A great second option is to hike to a pair of suspension bridges that span the lagoon and glaciers, offering stunning views of the massive, shifting ice. The 2.3 mile hike gains about 950 feet of elevation, making it manageable for the day before embarking on a major trek.
Day 2. Glacial exploration and Paine Grande: 11 km/6.8 miles
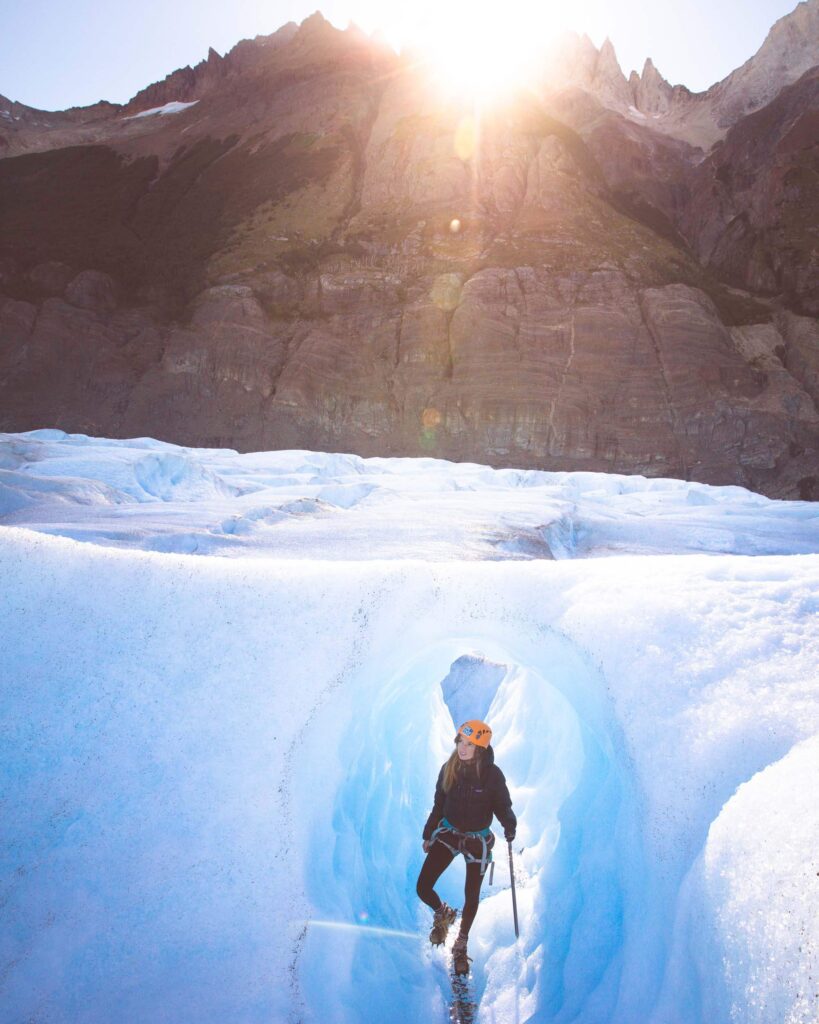
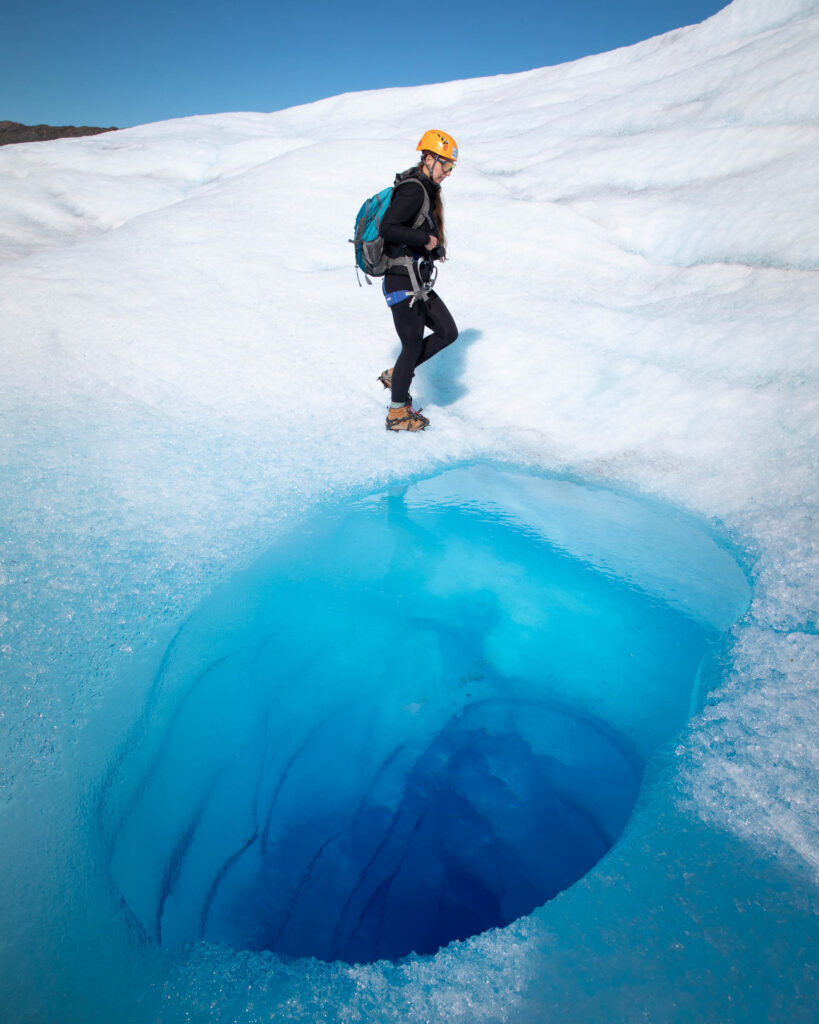
It’s hard to comprehend the scope of glaciers in Torres Del Paine. That’s what makes a hike on a glacier so incredible; there’s really no other way to feel so dwarfed by these amazing structures.
Before hitting the trail on our second day, Venture Patagonia arranged for us to go on a five-hour walk across the Grey Glacier. Our guide did a wonderful job of pointing out pools of stunning blue melt water, navigating safely around crevasses, and finding great photo spots. We were outfitted with crampons, an ice axe, and helmets.
After the glacier walk, it was time to actually begin our path on the W-trek. Our first leg was the easiest, an 11km/6.8 mile walk. We set up our tent at Paine Grande and indulged in some luxuries like wifi, a shower, and a why-is-this-so-good ramen noodle dinner.
Day 3: Paine Grande to Los Cuernos: 25 km/15.8 miles
The realities of trekking set in quickly on day three. Sometimes, you just need to cover some miles. And sometimes, those days are hot – hot enough to make you wonder if hiking an extra section is worth it.
I’ve run into this question in a lot of different conditions. Making the safe choice matters most, but I’m almost always happy when I push forward… and we were thrilled that we pushed on to Mirador Britanico. After all, if you don’t do the French Valley to Mirador Britanico, did you even really hike the “W”?
This series of lookouts covers the middle swoop of the W, where the French Valley slices from Lake Nordenskjold into jagged highlands. We weren’t sure exactly what views would greet us as we hiked through the forested valley.
But the scenery was spectacular. Hanging glaciers lined sweeping rock walls, and sharp peaks gave us a taste of the famous towers to come. It’s amazing to think about how the same glaciers we walked across a few days ago helped to shape these gigantic peaks.
These were the sort of views that end up on Instagram feeds – the greatest hits of a hike. And that’s great! They’re hits for a reason!
But for me, the hot, wooded trek there, the decisions we made along the way, and even the extensive travel to just get to our trailhead all help build into a crescendo that peaks at these kinds of beautiful spots. Without the journey there, they don’t have the same power.
We stayed at Refugio Los Cuernos, which is named after “the horns,” a pair of massive granite peaks in the area. If you’re looking for a shorter day, Frances also has lodging options.
At Refugio Los Cuernos we opted to upgrade to our own private hut. Such a fun luxury! It was at this point that we also started enjoying breakfast and dinners at the refugios.
Day 4: Los Cuernos to Chileno: 12.8 km/8 miles
In some ways, this felt like a wrong way day. We hiked away from some of the most spectacular views at Los Cueros, traveling back along the middle swoop of the W, downhill past the towering granite and hanging glaciers.
At multiple points, Andrea and I mentioned how cool it would be to hike the W-Trek in the opposite direction – into the views. But we were soon back on the right track, continuing on the westward route that would eventually lead us to Los Torres.
We climbed into the Ascension Valley gaining about 500 feet in a little more than a mile, reaching our camp at Refugio Chileno. Tomorrow would be our big day at the Base of the Towers… or at least we hoped so.
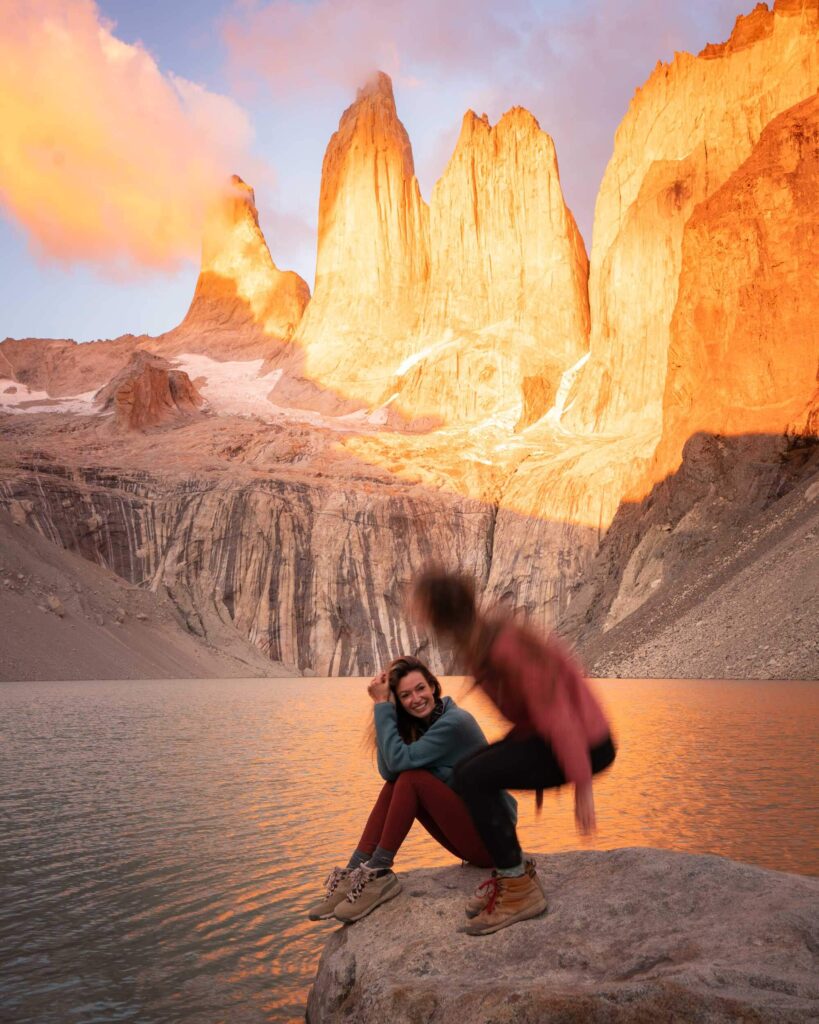
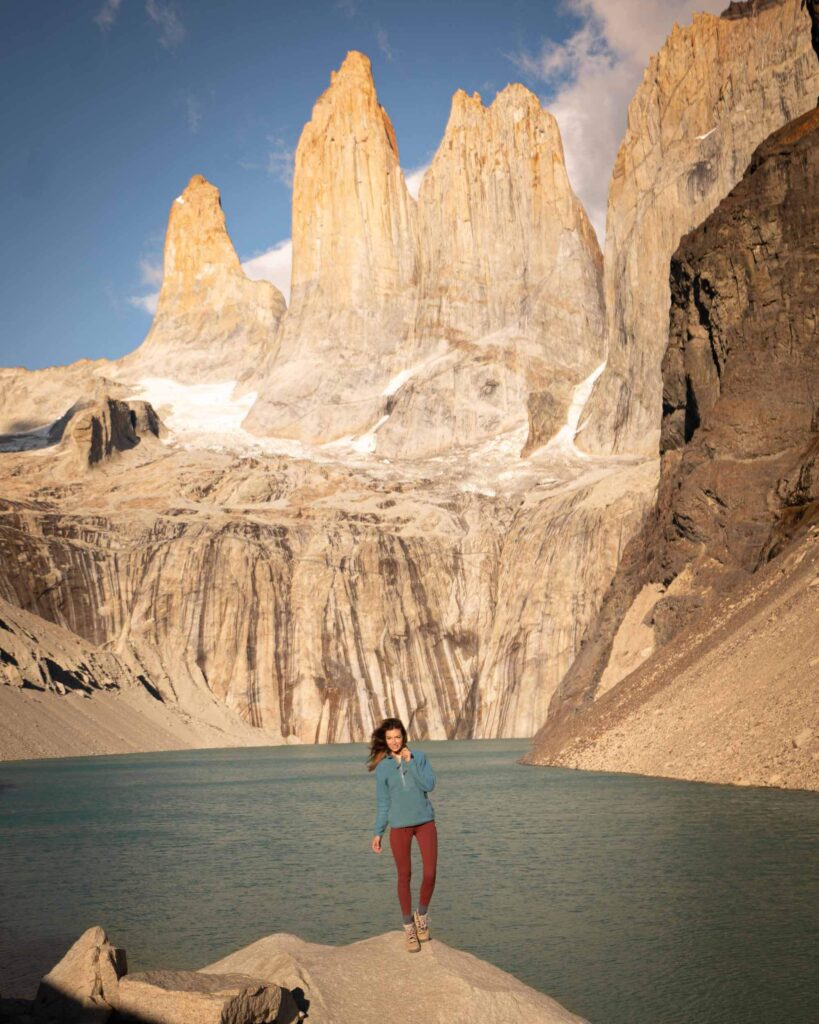
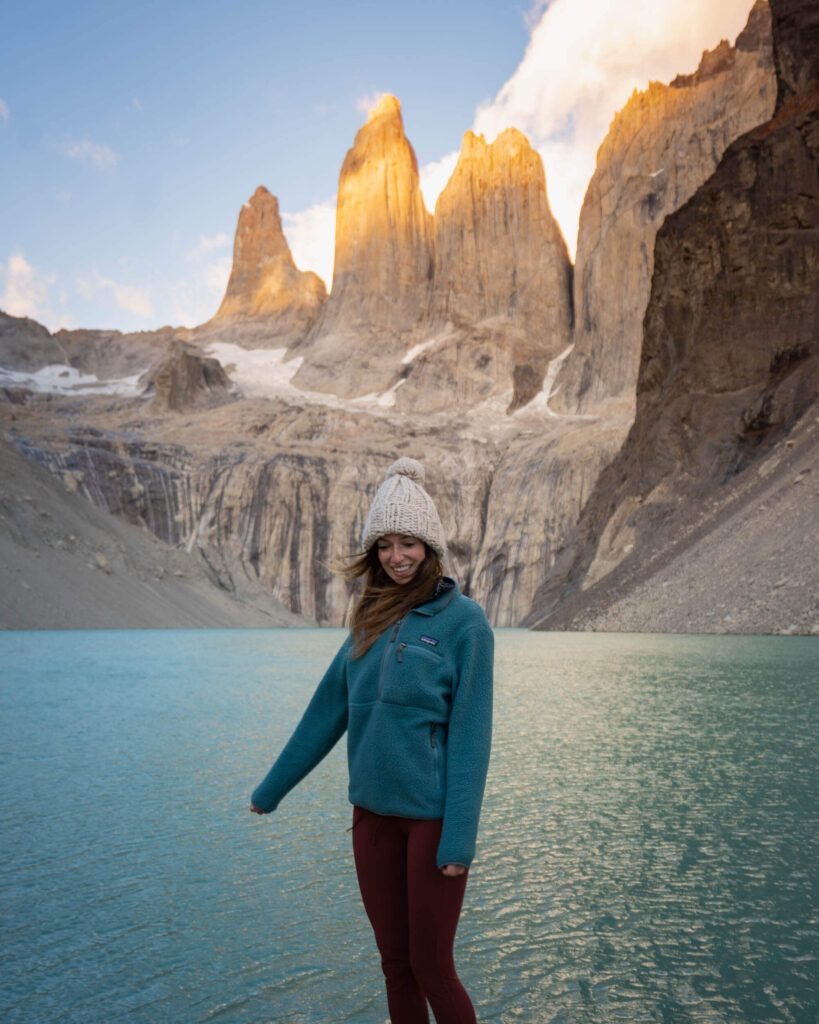
Day 5: Sunrise at Los Torres: 14 km/8.7 miles
This wasn’t a necessary sunrise hike. It’s only about 3 miles from Refugio Chileno to Los Mirador del Torres – The Base of the Towers – and we had enough time for a leisurely morning. Our beautiful weather was also running out.
A ranger at our refugio warned that ripping winds and rain were likely this morning. Those iconic towers would probably be swathed in clouds. But I’d seen too many photos of the stunning alpenglow that stains the towers bright pink at sunrise to give up that easily.
In hindsight, maybe it’s fitting that we decided to go anyway. It was a trip that I joined at the last second, that depended on so many little things going right. We put our faith in this one last thing breaking our way.
There’s no better way to soak in a beautiful view than in the early, changing light, as it shifts from a pale, even haze to a soft glow with hues of orange and pink.
We hiked up about 1,600 feet from Refugio Chileno, taking on the second major climb of the route. When we arrived at the base of the towers, it was still dark. We waited to see if we would get a weather window as the sun rose.
Did. We. Ever.
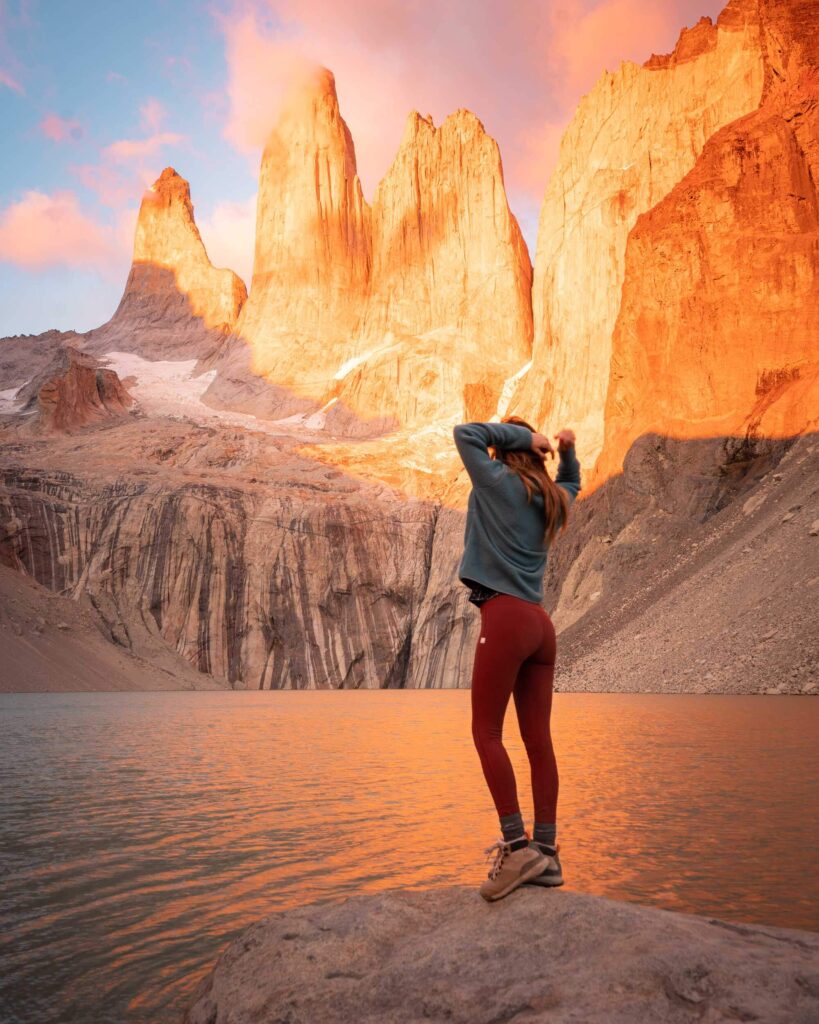
Orange light bathed the towers and washed into the lake below. It was a fitting way to cap a trip that I had already spent so much time thinking about.
Ironically, I botched the camera settings for my own photos. Maybe it was the 4 a.m. wake-up call. Maybe it was cold fingers. I’d like to think that I was just lost in a surreal moment.
After the light show was over up at The Towers, we headed back down to Refugio Chileno to eat some lunch and pick up all the gear we had left behind for our quick assent that morning. Once we had packed up it was time for the final push. We ended our W-Trek at Hotel Las Torres with celebratory pisco sours.
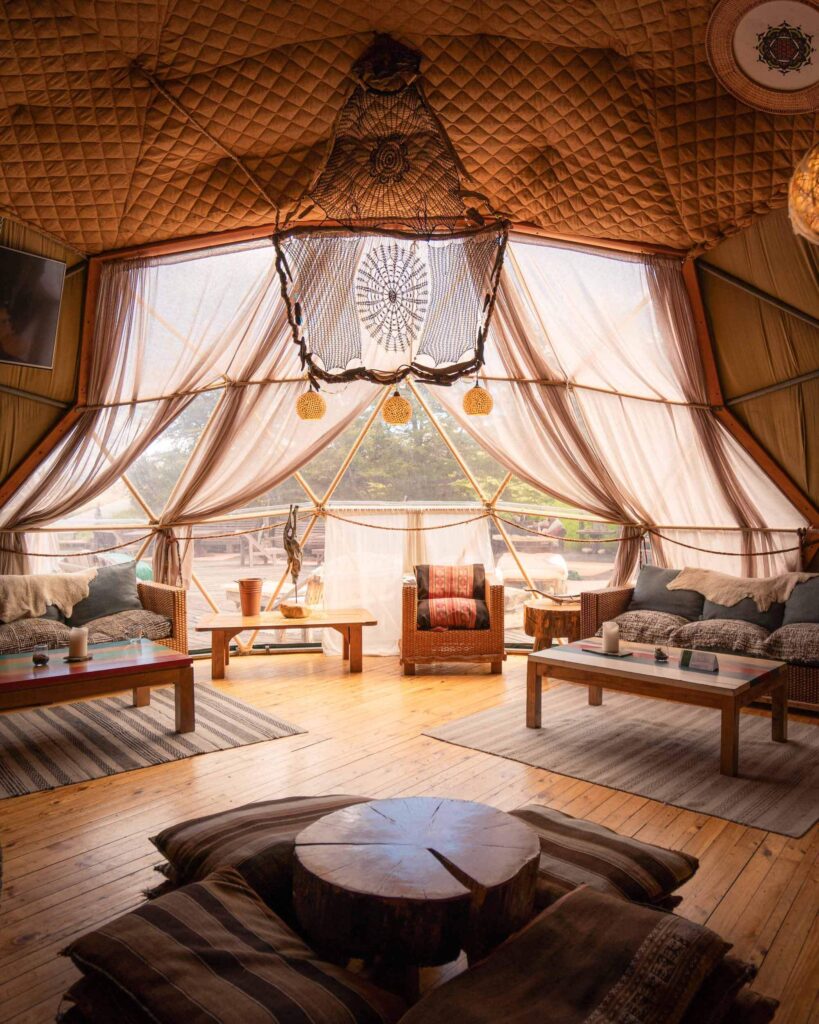
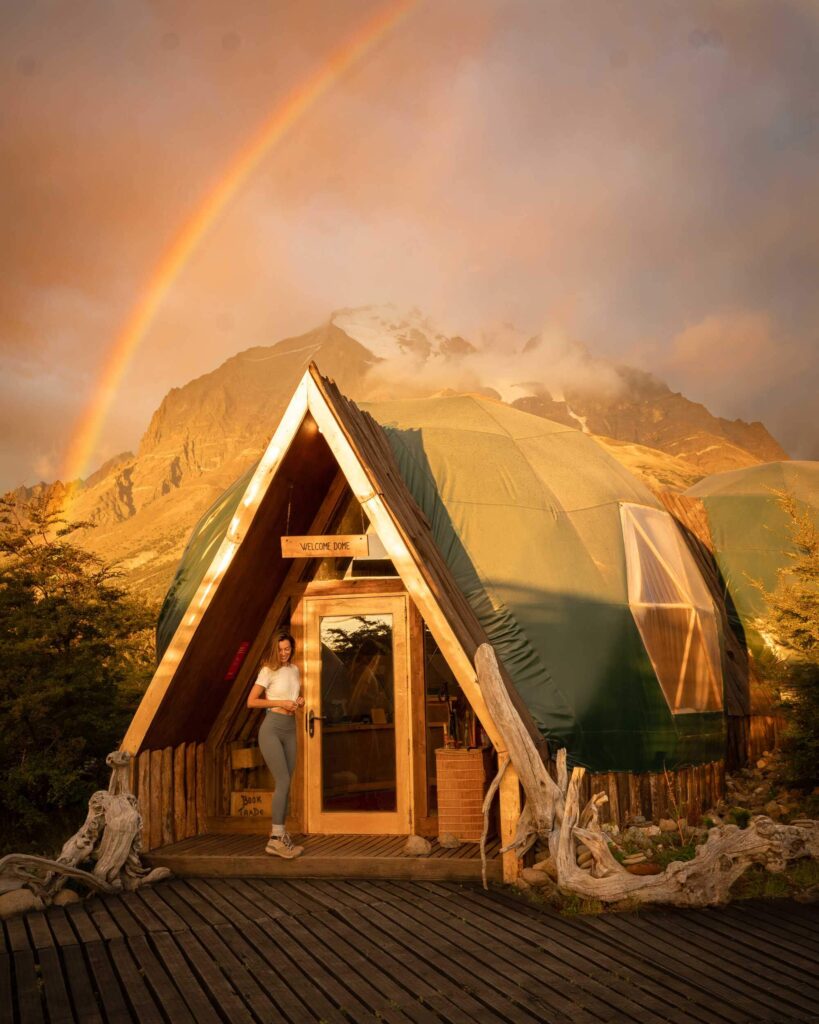
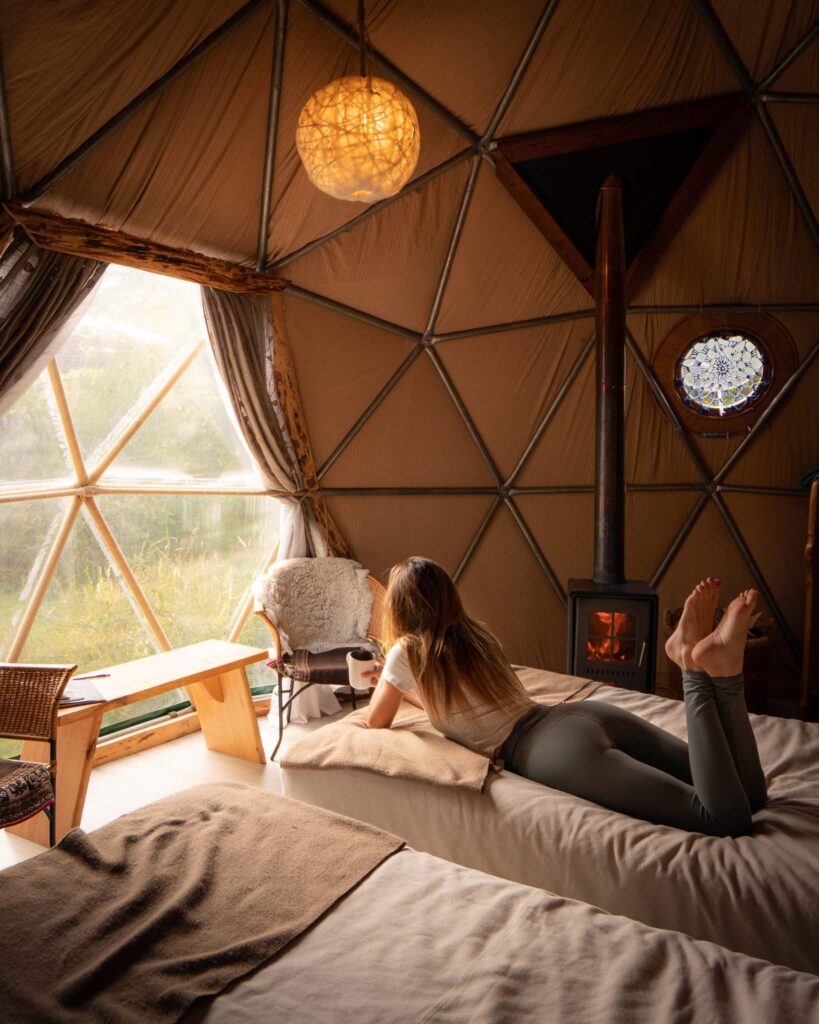
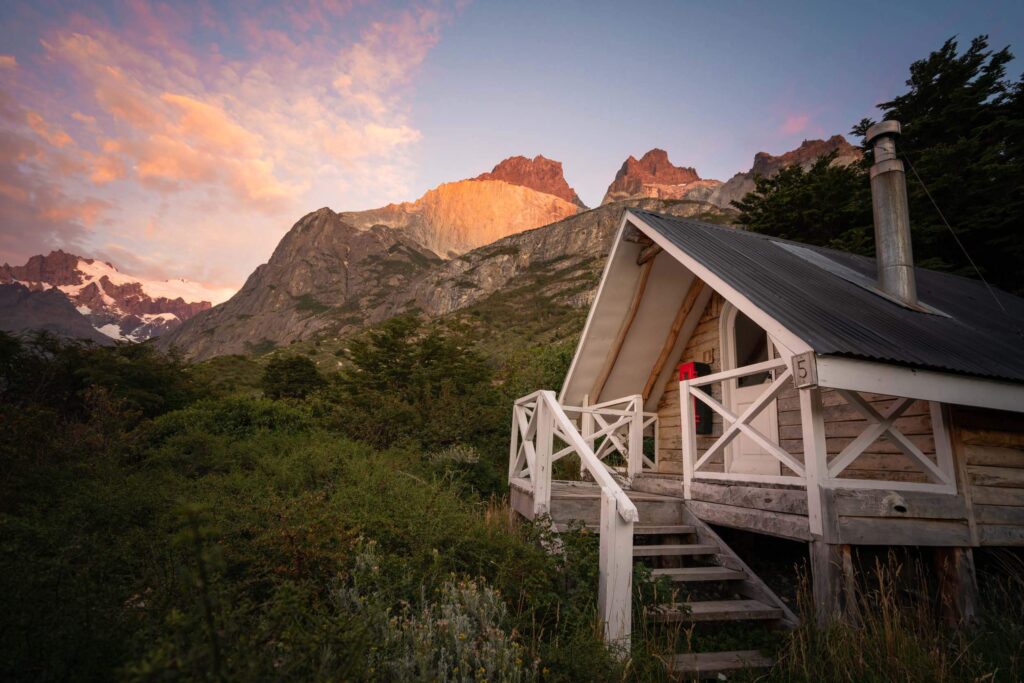
We spent our final night with a surprise stay at EcoCamp Patagonia, a domed refugio that sits at the western edge of the trail. There’s nothing like a hot shower at the end of a trek, and a picturesque rainbow gave us one last shot of Patagonia beauty.
Final Thoughts About My Experience On The W-Trek
The towers are among the most spectacular scenery that I’ve seen. It’s truly a privilege to be able to explore natural beauty far beyond my backyard, with logistics taken care of by Venture Patagonia to ease our path.
It’s also a fundamentally different experience than taking friends to places I’ve long visited in Washington, where I’m the one who can teach them about what we pass by on the trail.
Travel can be a pain (Paine? Too much?). There’s cost, planning, time off work, logistical hurdles, and simply the anxiety of putting yourself in an unfamiliar place.
But it can be so rewarding, and not just for the spectacular views that show up in an Instagram post. I got to spend time with my friend Andrea, an amazing writer and photographer in her own right. I met wonderful people from Venture Patagonia, who graciously shared their wisdom about Torres Del Paine.
And, as it gets increasingly difficult to take time off for outdoor adventures, I got to spend five days on the trail filled with appreciation for natural beauty and personal reflection.
Camping vs. Refugios
It’s important to understand how lodging and backpacking operate in Torres Del Paine. There’s no dispersed camping like in some National Forests in the U.S. You can’t pitch a tent wherever you please.
Instead, camping occurs only at designated campgrounds. These are operated by different companies, have different costs, and are booked through different services.
CONCAF (Chile’s version of the NPS) runs the Paso and Italiano campgrounds. Both are currently closed but might reopen for the 23-24 season. When open, they are free to stay at but need to be booked in advance at this Spanish-language website.
Fantastico Sur runs the Chileno, Frances, Los Cuernos, Seron, and Los Torres campgrounds. Each costs $21 USD for two people per night with an extra $11 USD per person. Book here.
Vertice Patagonia runs the Dickson, Los Perros, Glacier Grey, and Paine Grande campgrounds. Each campsite costs $9 USD per person. Book here.
We were lucky enough to get to experience a bit of everything. Our first two nights we camped in a 2-person tent I brought from home. Our third night we had a private hut at Los Cuernos, and our last night was spent in a dorm-style refugio room at Chileno.
There’s one huge advantage of spending every night at a refugio – you can carry way less stuff! There are also luxuries like wifi, showers, soft beds, and the comfort of enclosed sleeping quarters.
The flip side? Refugios are significantly more expensive than campgrounds. They aren’t available at all campgrounds in the park, including Italiano about halfway through the W-trek. Plus, you might end up in a dorm with a noisy sleeper.
Whether staying in a tent or refugios, you’ll share amenities like stores, restaurants, and bars. Some are great; others are a mixed bag. Most stores aren’t well stocked, campground bars can be a little noisy, and lodging whether by tent or refugio can seem a little cozy for those used to backpacking in solitude.
There’s also a middle ground. Many campsites rent tents, sleeping bags, and sleeping pads, helping you save on pack weight but avoid spending on a refugio. You can also bring some gear and rent some.
Does this seem like a lot to navigate? If so, you may want to work with a guide service like Venture Patagonia as we did!
Full Board vs. Self Supported – The Best Way to Eat on the W-trek
The availability of restaurants and stores at campgrounds along the W-trek opens up a variety of possibilities for staying fueled. You can select options ranging from full board, with meals prepared for you to get through the entire day, to self-supported, which is more like a solo backpacking trip where you carry all your food.
Most campgrounds have a restaurant that can provide dinner and breakfast on site, plus lunch to go. They can accommodate vegetarian and gluten-intolerant diets. You can order full board whether you stay in refugios or campsites.
If you prefer to prepare your own food, options are much like backpacking that many of us are used to in the U.S. You carry what you can eat and what you need to cook with. This includes dried meals, snacks like bars and gels, and larger cooked meals if you like a larger spread and can carry a bit more.
Campgrounds also have stores that focus on calorie-heavy staples like pasta, beans, candy, soda, chips, and ramen. They also have hygiene products, and if you like to unwind, beer and wine.
You can also pick and choose from available options. Do you want to eat breakfast and dinner on full-board but prefer your own snacks for lunch? That works. Do you want to prepare your own meals but enjoy an evening beer? That works. At our first campsite, we feasted on ramen noodles. You do you!
The Value of a Guide
A self supported hike along the W-Trek is not only possible, it’s an amazing experience! There are few things as rewarding as a successful solo backpacking trip. BUT given the extensive time and travel cost required to even get to Patagonia, you might consider going on a guided trip. Especially if you don’t have any previous trekking experience.
Reasons to Do a Guided Trek:
You don’t just hike the route, you learn about it. Guides are a wealth of information about the history, plants and animals, and hidden gems along the route. Hiking is so much more than trodding a path; guides help you immerse yourself in a place.
Lodging is a breeze. Guide companies take care of the sleeping arrangements, letting guests relax and enjoy the hike. A guide can also help secure any additional permits and fees you need.
No giant packs! I know I mentioned this already, but it’s a real treat to be able to embark on a multi-day hike without hoisting on a full pack.
Guides support local jobs. Outdoor recreation can be a critical resource for local economies, and services like guiding help local residents steward amazing natural places while providing for their families. Venture Patagonia’s owners Carrie and Kevin, live in Patagonia where Kevin grew up in a 5th-generation ranching family.
Self Supported W-Trek
If you are an experienced backpacker, self-supported can be a great option. The trail is in good shape and easy to follow, especially if you use a mapping application. You frequently see other hikers, who are usually happy to help with questions.
In many ways, the biggest challenge is booking campgrounds and refugios, arranging transportation into Torres Del Paine, and navigating the wider scope of international travel.
Self-Guided – An In-Between option!
You can also select a mix of services – which is what Andrea and I did. We felt confident that we could hike self-supported, but didn’t want to deal with the logistics of booking campgrounds, ordering meals, planning activities along the route, or arranging transportation before and after the trek.
That’s where Venture Patagonia came in! Many services let you customize the level of support you need.
When to Visit Torres Del Paine
Torres Del Paine is best visited during the Southern Hemisphere’s summer months of December-February, though spring (September-November) and fall (March-May) also have their charms.
Winter (June-August) is more challenging and usually requires a guide but can be an amazing experience. Even during the summer months, be prepared for all types of weather!
What to Pack for The W-Trek in Torres Del Paine
Packing layers is a crucial aspect of preparing for any trekking trip as it helps you stay comfortable and safe in changing weather conditions. The weather can be unpredictable in Torres del Paine, and temperatures can vary significantly at different elevations and times of day.
Packing appropriate layers for the W-Trek allows you to adjust your clothing to match the changing conditions, keeping you warm, dry, and protected. I have an entire blog post dedicated to the gear you will need for the W-Trek, but here’s a packing list to help you get started:
Clothing:
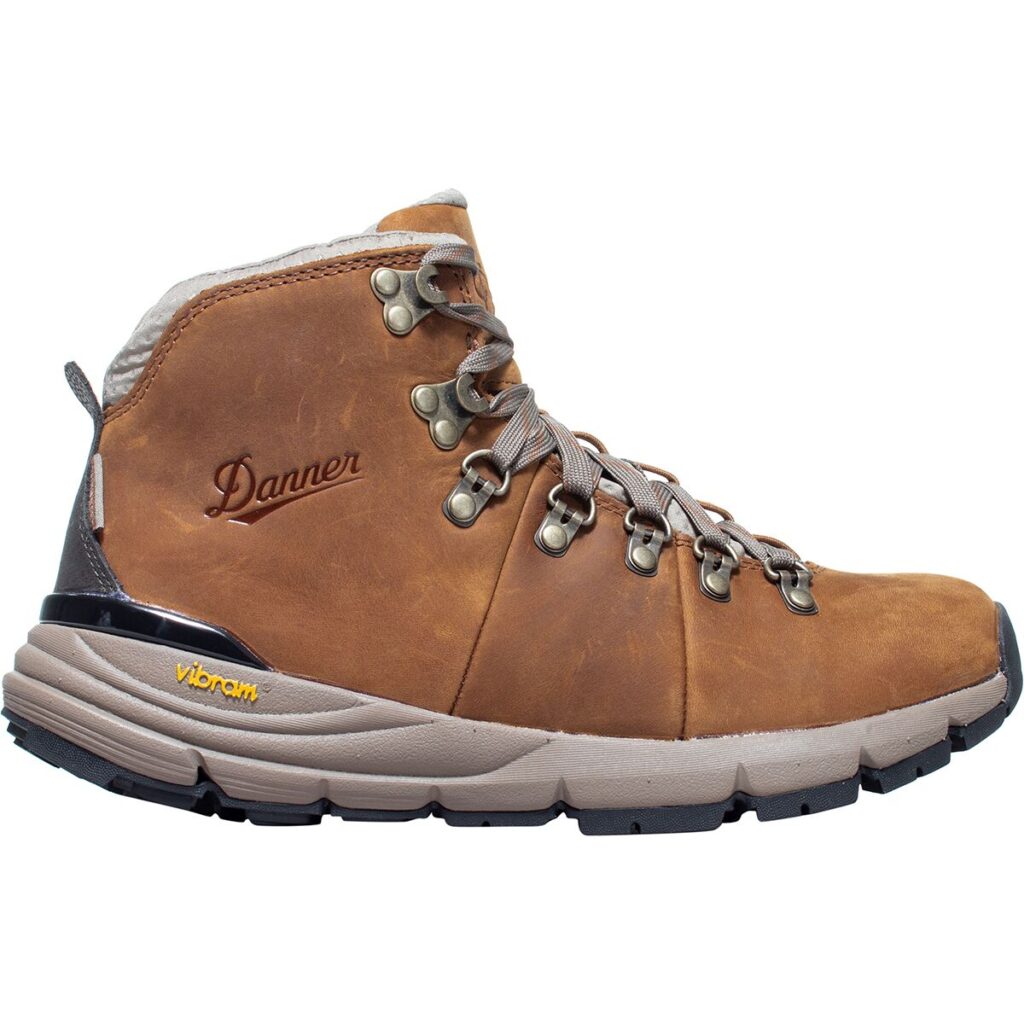


- Hiking boots: Choose sturdy, waterproof hiking boots that provide ankle support.
- Waterproof and breathable rain jacket: The weather in Torres del Paine can be unpredictable, so a waterproof and breathable rain jacket is essential.
- Insulated jacket: Nights can get chilly, so bring a warm, insulated jacket.
- Quick-dry hiking pants: Opt for lightweight and quick-dry hiking pants that are comfortable for long hikes.
- Moisture-wicking base layers: Bring moisture-wicking base layers, including shirts and underwear, to stay dry and comfortable during the trek.
- Hiking socks: Pack several pairs of moisture-wicking hiking socks to keep your feet dry and prevent blisters.
- Sun hat: A wide-brimmed sun hat will protect you from the sun during the trek.
- Gloves and beanie: Bring gloves and a beanie for warmth, especially if you plan to hike during the colder months.
Camping gear (For Self Supported Trips):
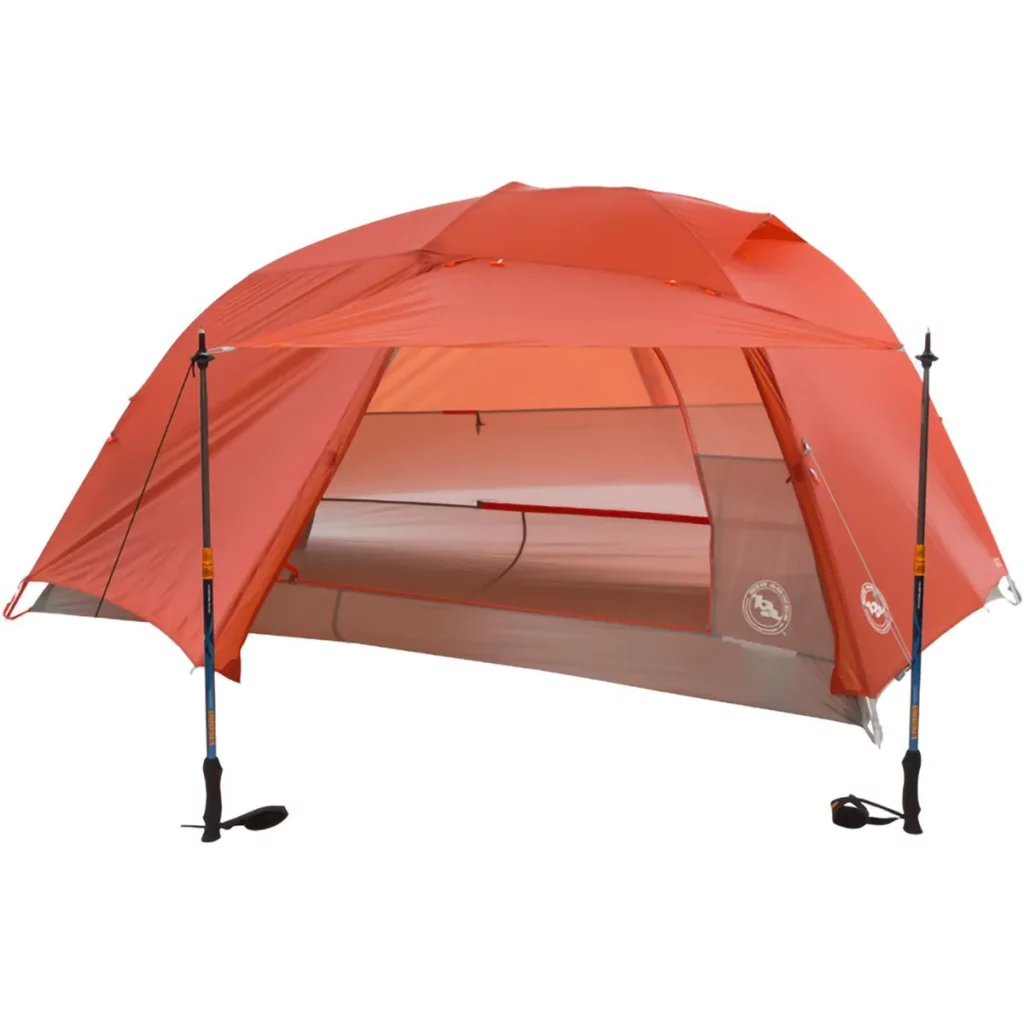
- Tent: If you plan to camp along the trail, bring a lightweight and waterproof tent.
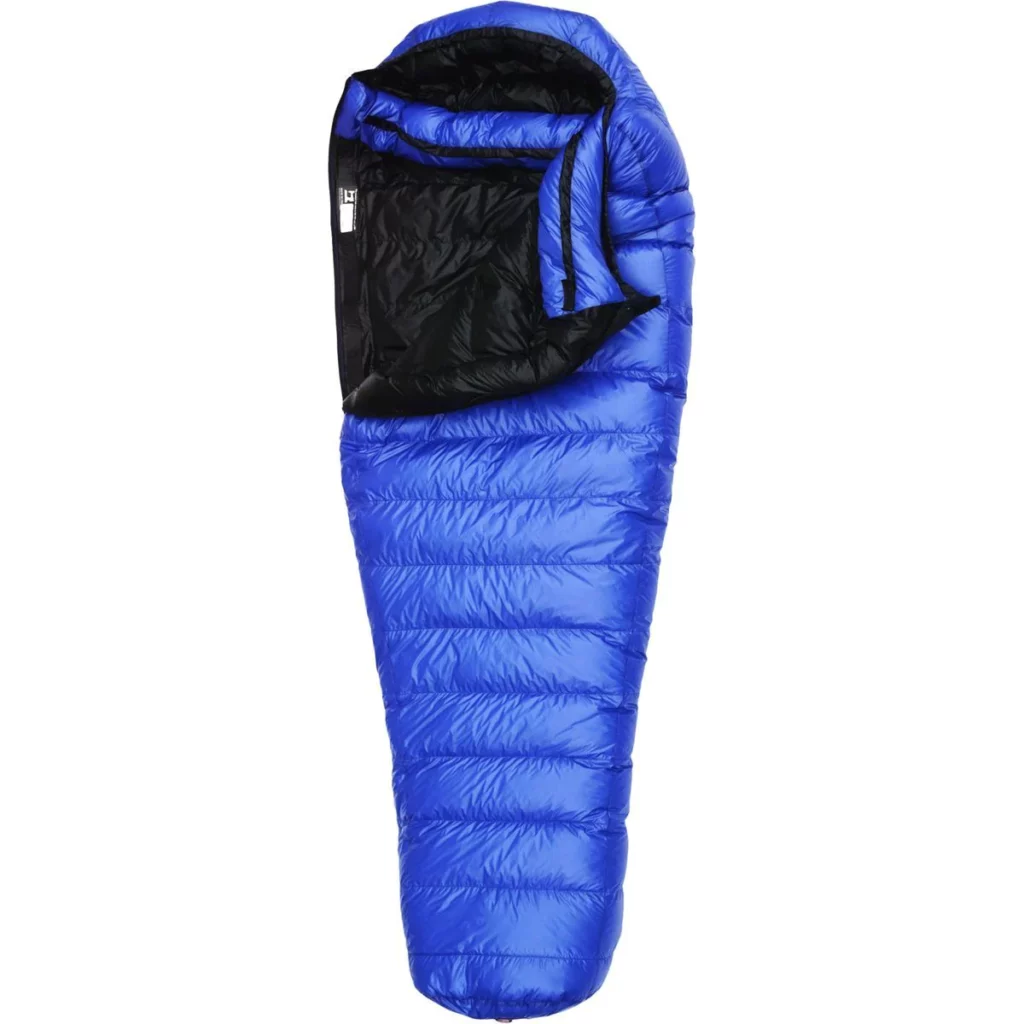
- Sleeping bag: Choose a sleeping bag suitable for the weather conditions, preferably rated for cold temperatures.
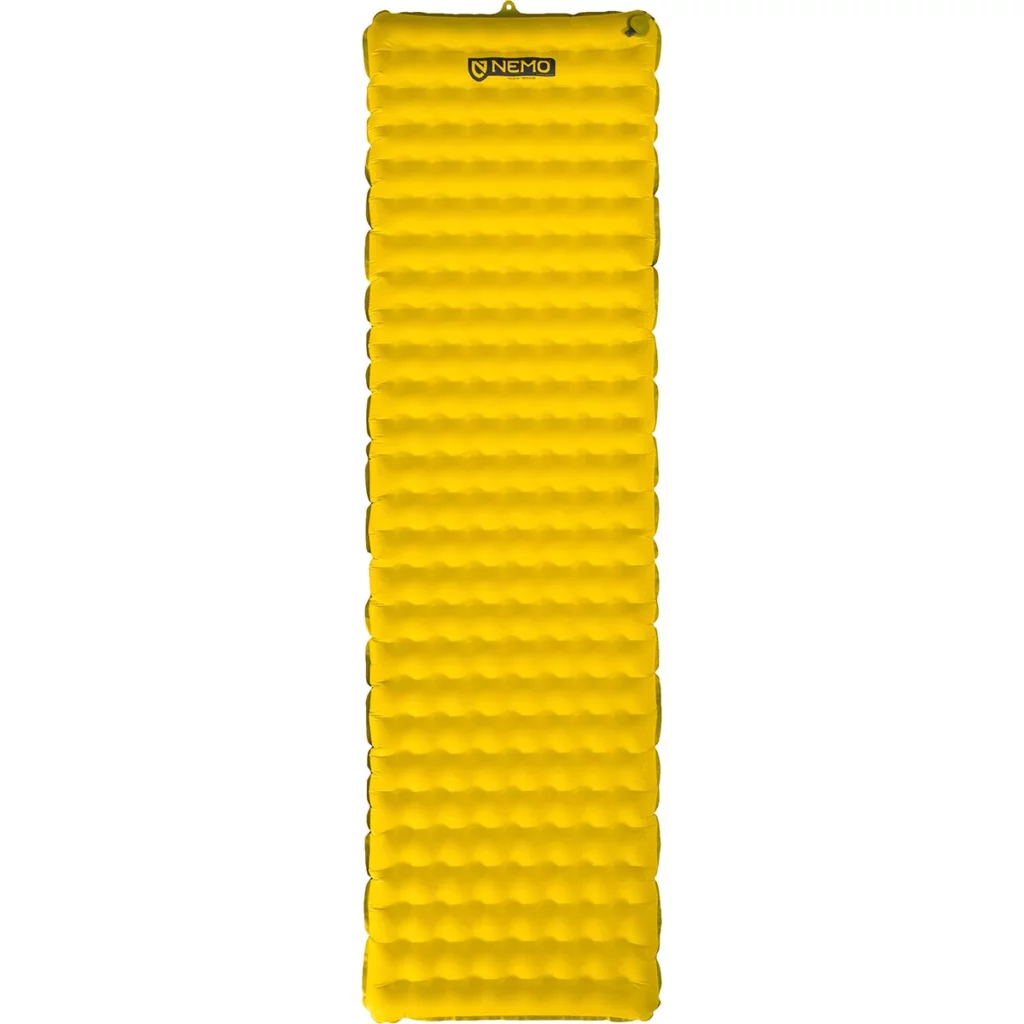
- Sleeping pad: A sleeping pad provides insulation and comfort while camping.
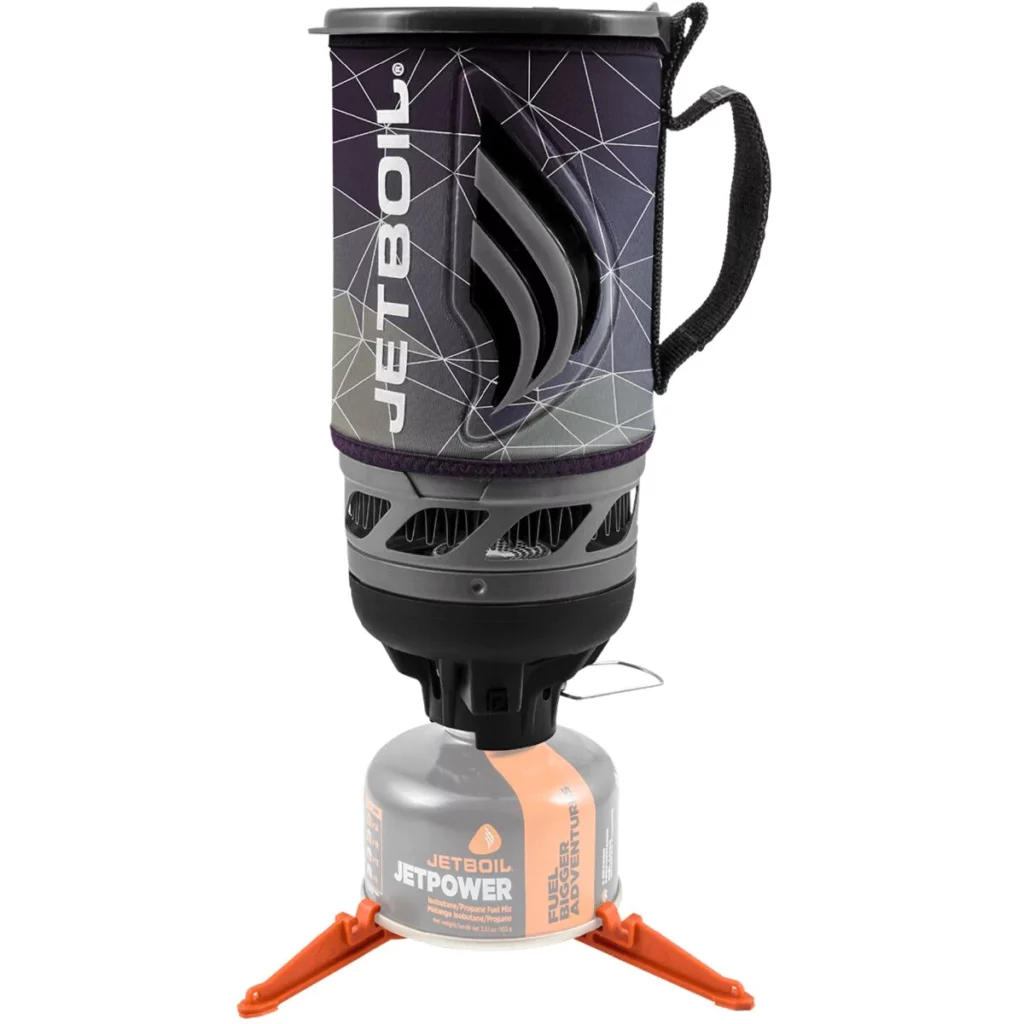
- Cooking equipment: If you plan to cook your meals, bring a lightweight camping stove, cooking utensils, and a fuel canister (wait until you get to Patagonia to purchase).
Food and water:
- High-energy snacks: Bring lightweight, high-energy snacks like nuts, trail mix, and energy bars to keep you fueled during the hike.
- Water bottles or hydration bladder: Carry enough water bottles or a hydration bladder to stay hydrated along the trail, as water sources may be limited.
Other essentials:
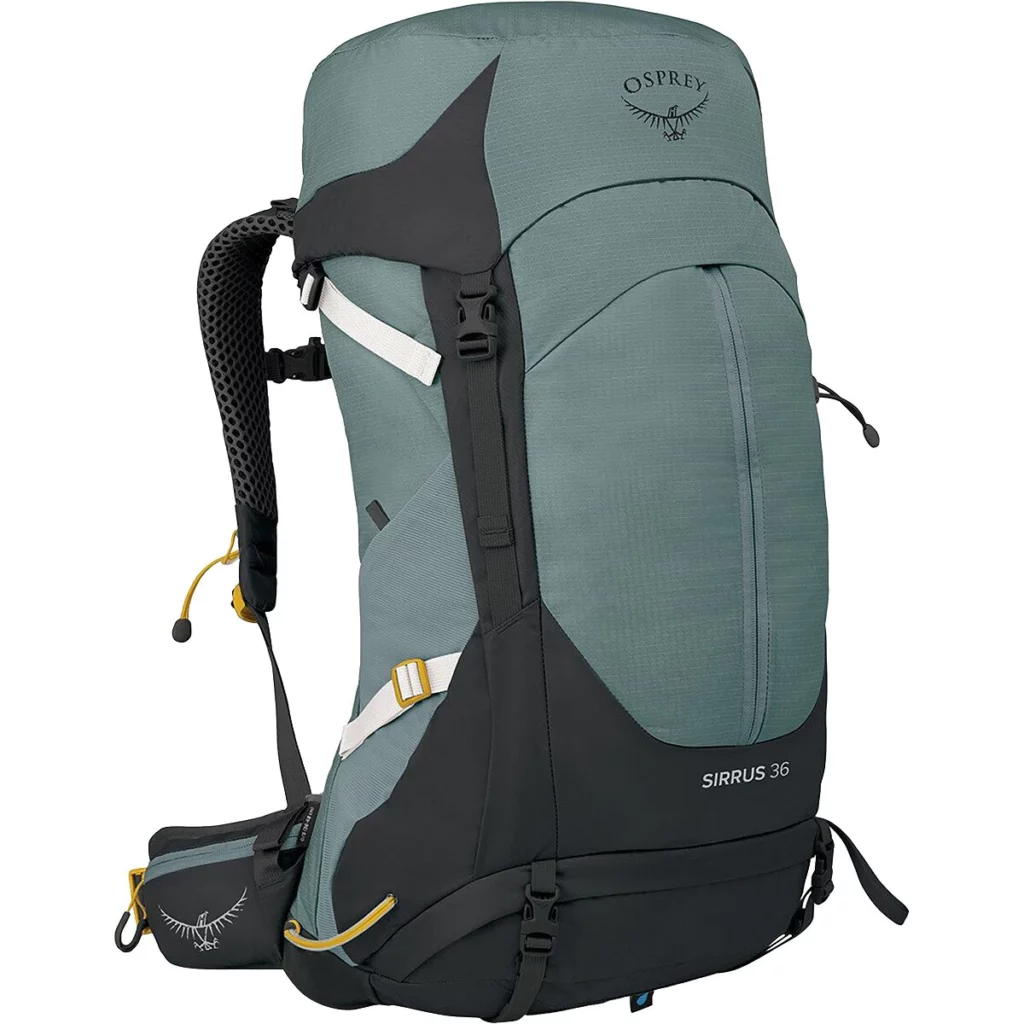
- Backpack: A sturdy and comfortable backpack with a hip belt is necessary to carry all your gear during the trek.
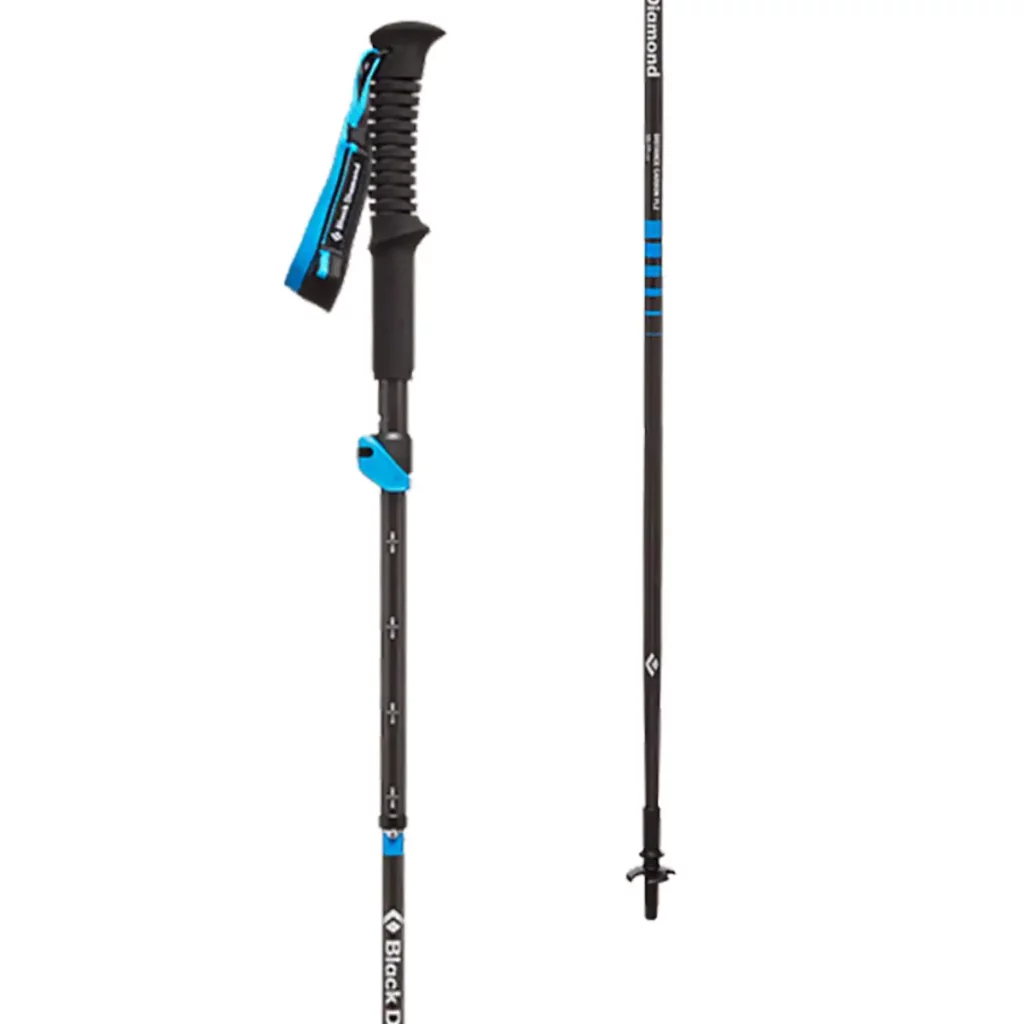
- Trekking poles (optional): Trekking poles provide stability and reduce strain on your knees during steep ascents and descents.
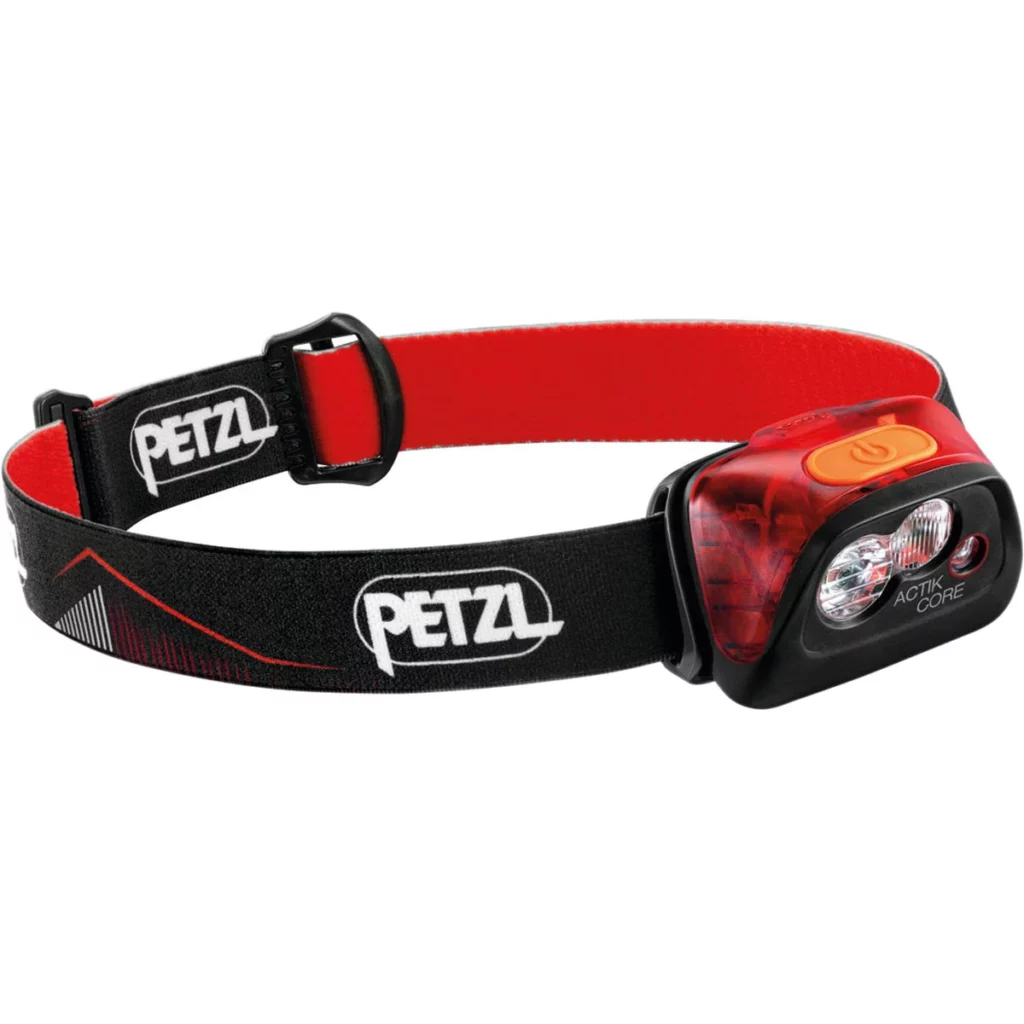
- Headlamp: A headlamp is essential for navigating in the dark, especially if you plan to camp.
- Sunscreen and sunglasses: Protect your skin and eyes from the sun’s harsh rays with sunscreen and sunglasses.
- Insect repellent: Torres del Paine has mosquitoes and other insects, so bring insect repellent to protect yourself.
- First aid kit: Carry a basic first aid kit with essentials like bandages, blister pads, and any necessary medications.
Remember to check the weather forecast and trail conditions before your trip, and pack accordingly. It’s also advisable to pack light and only bring what you absolutely need to keep your backpack manageable during the trek. Happy hiking!
Just a quick heads up! Some of the links on this blog may be affiliate links, which means that if you click on them and make a purchase, I may earn a commission. Don’t worry, though – it won’t cost you anything extra, and it’s a way for me to keep this blog up and running. Thanks for your support!
Leave No Trace
Don’t be that tourist! It can be tough to remember that areas of Patagonia are a fragile wilderness when your campground has a bar. But continue to keep a clean camp and embrace zero-impact principles when on the trail and in the backcountry to ensure that future generations have the chance to enjoy this amazing place!
Other Treks You Might Enjoy
Complete Packing List For The W-Trek In Patagonia
Tips For Hiking The Tour Du Mont Blanc
Complete Guide To Backpacking The Mineral King Loop
Thru-Hike The Enchantments In One Day
4-Day Ausangate & Rainbow Mountain Trek
Like this post? Pin it for later and share it with others!


WoW! Always inspiring and so hard to choose which views are my favorite when all are fantastic. I love living my life vicariously through your treks!
Thanks so much for the kind feedback John! the W-Trek was definitely one of my favorite adventures. Thanks for taking the time to stop by the blog and leave a comment – always very appreciated.
Amazing W-trik. I go through your blog post and it’s Wounderfull and very attractive. For a short time I feel like I was with you on your five day trip. Enjoy your day
Hi Jess, thanks a lot for the very detailed itinerary. Wondering what did you do on the final day after the trek before returning to Puerto Natales ? Did you have some private transportation to get you back while stopping at view points along the way ?
Yes! That’s exactly what we did. After the trek we spent the night at EcoCamp Patagonia, then the next day Venture Patagonia picked us up and drove us on a scenic tour through the park back to Puerto Natales.
Excellent blog Jess !
Thanks so much Isabelle!