


Yosemite National Park Overview
Nestled between the Sierra Nevada mountain range and San Joaquin Valley, Yosemite provides a remarkable opportunity to explore nature. Established in 1890, Yosemite boasts over 1,200 square miles of pristine valleys, towering waterfalls, and epic granite monoliths—providing explorers with spectacular views every step of the way!
And there’s no better way to experience this iconic National Park than by spending the night at one of Yosemite’s best backcountry camping spots.
This guide will walk you through the backcountry permitting process, to tips for packing before your trek, ensuring you have all you need to make your backpacking trip to Yosemite National Park a safe and rewarding adventure.
How To Get To Yosemite
The first thing you’ll need to do before spending the night at one of the best camping spots in Yosemite is get there! The best way to arrive at Yosemite depends on where you’re coming from, but most visitors fly into San Francisco and rent a car for the journey.
From San Francisco International Airport, it takes about 3 hours to get to Yosemite, while flying into Oakland International will shorten that time to just 2.5 hours — with plenty of beautiful views along the way.
Although generally more expensive, if time is a priority, flying into Fresno-Yosemite International Airport will make your trip even shorter — only 1 hour!
The Best Time Of Year To Visit Yosemite
Visiting Yosemite National Park is an incredible experience no matter when you go, but the best time to visit depends on what you’re trying to do. For backcountry camping, the best time to visit is between April and October for road accessibility and permitting reasons.
Outside of this timeframe, periodic road closures are common, and snow may make accessing some of the best camping spots in Yosemite difficult, if not impossible. Always check weather conditions before heading into the park!
Where To Stay At Yosemite National Park Before And After Your Backpacking Trip
For the majority of your backpacking trip to Yosemite, you’ll be spending the night in our tent! But you may want to extend your trip before or after to enjoy other areas of the park.
Yosemite has hotels, lodges, and camping options that are perfect for any traveler. The hotels near the Park entrance offer comfortable accommodations and excellent service, while the lodges provide a more intimate experience with their cozy cabins.
For a more immersive experience, you can camp at one of Yosemite’s many campsites – don’t forget to use the bear boxes!
- Hotels & Lodges – There are multiple hotels and lodges within Yosemite National Park. While these accommodations are the most convenient, they are on the pricier side and tend to book out quickly – especially during the high season. Alternatively, you can book a room in a nearby town outside the park. The closest gateway towns include El Portal, Oakhurst, and Lee Vining if you’re coming from the east.
- Camp & RV Sites – There are great camp and RV site options both inside Yosemite National Park and outside the park boundaries. During peak season, sites book out well in advance. Upper Pines Campground is my favorite campground in the valley.
- Backpackers Campsite – Backpacker campgrounds are available seasonally for wilderness permit holders to spend one night before and one night after a wilderness trip. You don’t need a reservation, but a valid wilderness permit is required. The fee is $8 per person (2023).
Yosemite Backpacking Expenses
Yosemite National Park Entrance Fee: $35 Automobile Pass
Backcountry Permit Fee: $10 per group (permit) and $5 per person during the reservation season
Bear Box Rental: $5 per week with a $95 deposit
Pro Tip:
The America the Beautiful National Parks and Federal Recreational Lands Pass is typically priced at $80 for an annual pass. With this pass, you gain access to a multitude of federal recreation sites, making it a cost-effective choice if you plan to visit multiple national parks within a year. Considering that individual park passes can range from $25 to $35 per park, purchasing the annual pass can lead to substantial savings, especially if you are exploring various national parks and recreational areas during your travels.

Reserving Permits For The Best Backcountry Camping Spots In Yosemite
Planning a trip to Yosemite National Park? There are three different ways to secure your Wilderness Permit.
- Use recreation.gov to enter the permit lottery 24 weeks ahead of the date you want to start your backpacking trip.
- Use recreation.gov to apply for a permit seven days before your intended start date.
- You can apply for any remaining permits in-person at one of the Yosemite National Park Wilderness Centers on the trip’s start date.
Regardless of how you secure your permits, the trip leader will need to pick up the permit in person the day before your reservation or before 10 am the day of your trip. At this time, a National Park ranger will ensure that you know the applicable rules and regulations for the area you’ll be hiking in.
For even more details on how to reserve your backpacking permits for Yosemite Park, check out my complete guide on How To Backcountry Camp In Yosemite National Park.
The Best Backcountry Camping Spots in Yosemite
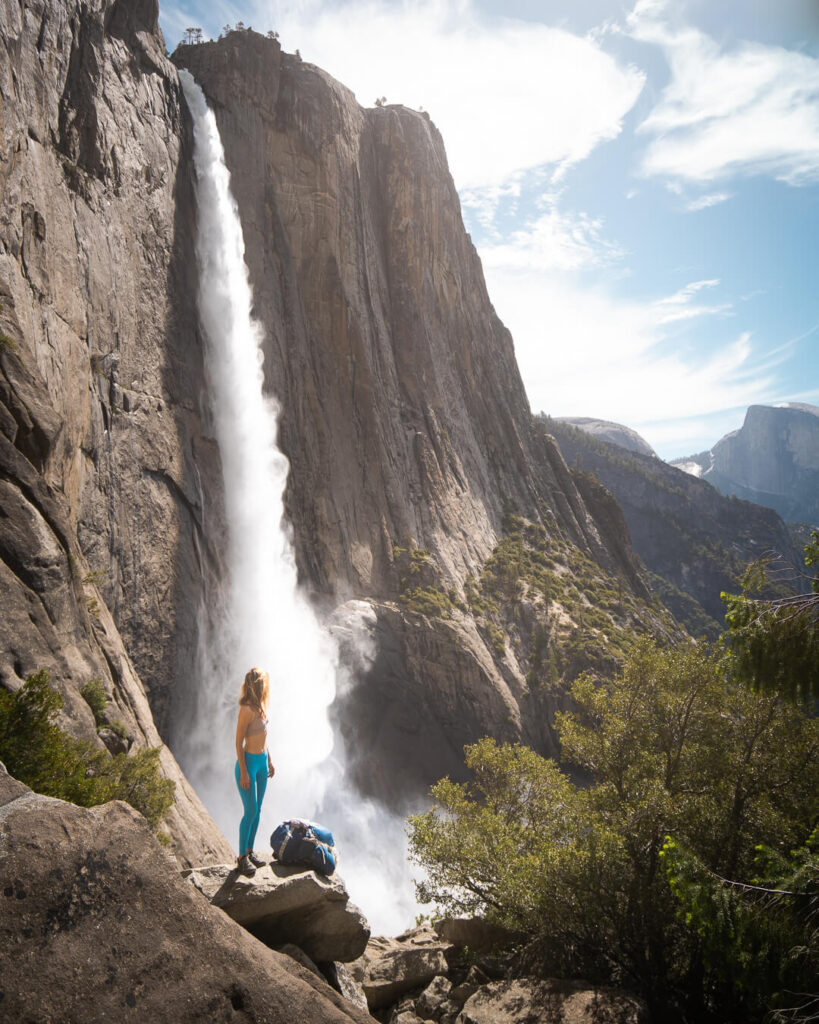
1. Eagle Tower Yosemite
Eagle Tower is a relatively little known backcountry area located almost directly above Yosemite Falls. As a result the views from this area are extensive, and sure to take your breath away! That being said if you don’t enjoy off trail bush whacking, picking your way along cliff edges, or lot’s of exposure, this might not be the trail for you.
The most common way to reach Eagle Tower is by following the Upper Yosemite Falls and Eagle Peak trails. The hike is approximately 6-7.0 miles one way, with a climb of over 3,500 feet (1,100 m). It’s difficult to give exact distances for this backcountry campting spot in Yosemite, because of the off-trial portion. In the end the distance will depend on when and where you leave the Yosemite Falls or Eagle Peak trails. I personally went up the Yosemite Falls Trail. The trailhead is located at Camp 4 near Yosemite Village. It passes near Yosemite Falls and features beautiful views of the valley on the way up.
- Length: 12-15 miles out and back
- Elevation Gain: 4,320 feet
- Trail difficulty: Very Hard
- Backcountry Permit Trailhead: Upper Yosemite Falls
- Trail: Upper Yosemite Falls To Eagle Peak
- Starting point: Camp 4 in Yosemite Valley
- Camp Spot: Eagle Tower Viewpoint
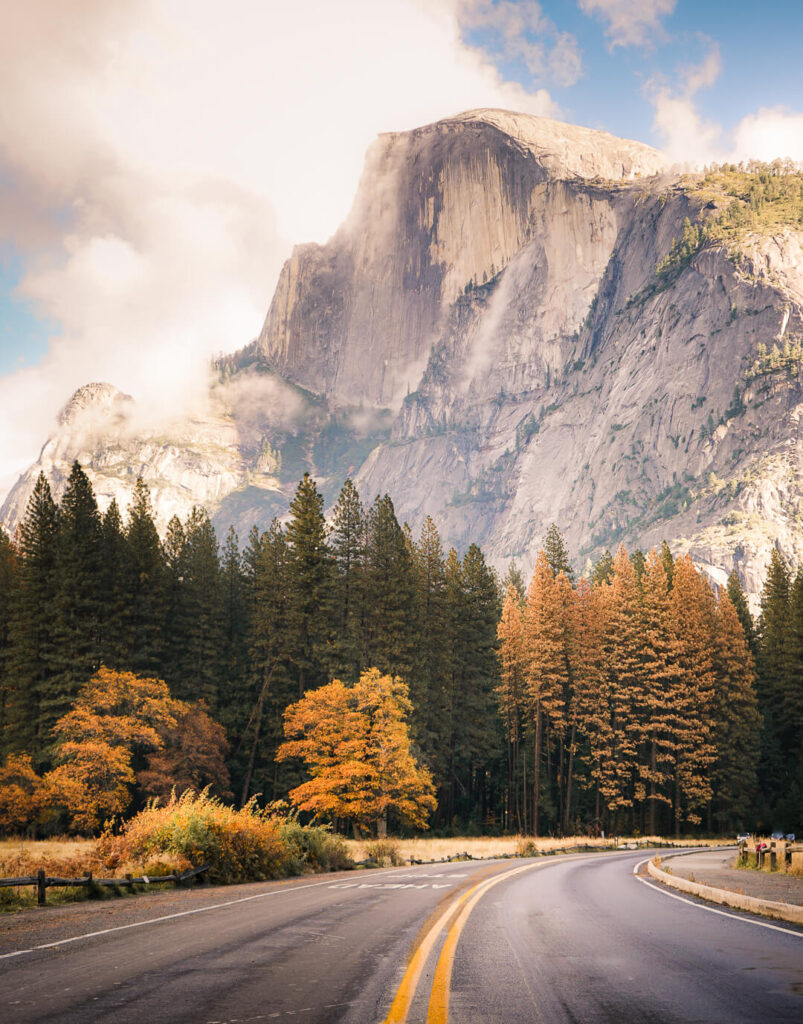
2. Clouds Rest
You can’t actually camp on Clouds Rest itself – sorry for the misnomer. But you can get close!
As with all backcountry trails in Yosemite, you must pitch your tent 100 feet off the trail – which isn’t possible on Clouds Rest because it is too narrow.
You’ll need to choose a site before climbing up the narrow ridge, or you can continue past the peak and camp down in the forest on the far side of Clouds Rest. You can travel the short distance from camp up to the peak for jaw-dropping views of Tanya Canyon and Half Dome below.
- Length: 13 miles out and back
- Elevation Gain: 2,000 feet
- Trail difficulty: Moderate
- Backcountry Permit Trailhead: Sunrise Lakes
- Trail: The Clouds Rest Trail
- Starting point: Sunrise Trailhead off of Tioga Road, just south of Tenaya Lake
- Camp Spot: About a quarter mile before or after Clouds Rest (100 feet off the trial)
3. Mount Watkins

The view from Mount Watkins provides a spectacular closeup of Clouds Rest and Half Dome from across Tenaya Canyon. The most challenging part of this hike is simply finding it. The trail is not always clear, and you might have to reroute a couple of times along the way. Due to the unmaintained nature of this trail, I recommend that you bring a GPS device or download an offline map to help with navigation.
- Length: 6.5 miles round trip
- Elevation Gain: 1,250 feet
- Trail difficulty: Easy Moderate
- Backcountry Permit Trailhead: Olmsted Point
- Starting point: The hike to Mount Watkins begins off Tioga Highway, just past the Porcupine Creek Trail Head, before you reach Olmstead Point.
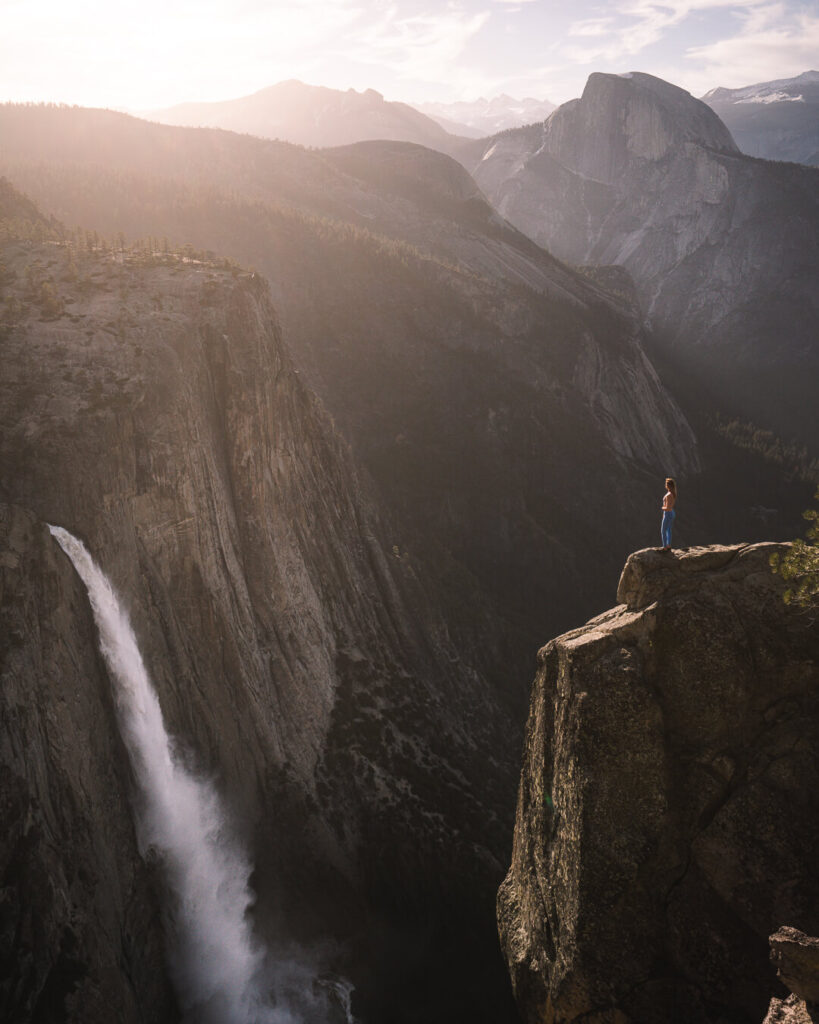
4. Pohono Trail & Crocker Point
It’s not hard to see why Pohono Trail is home to some of Yosemite’s best backcountry camping. Most commonly hiked one-way (downhill) from Glacier Point to Tunnel View, the Pohono Trail rewards hikers with stunning viewpoints of Yosemite Valley from the south rim.
You can backcountry camp anywhere along the rim as long as you are 100 feet off the trail. I found the area around Crocker Point to be particularly picturesque.
- Length: 12.9 miles (20.8 km) From Glacier Point to Tunnel View
- Elevation Gain: – 2,800 feet
- Trail difficulty: Moderate
- Backcountry Permit Trailhead: Glacier Point or McGurk Meadow
- Trail: Pohono Trail
- Starting point: Glacier Point, McGurk Meadow
- End Point: Tunnel View
- Camp Spot: Crocker Point
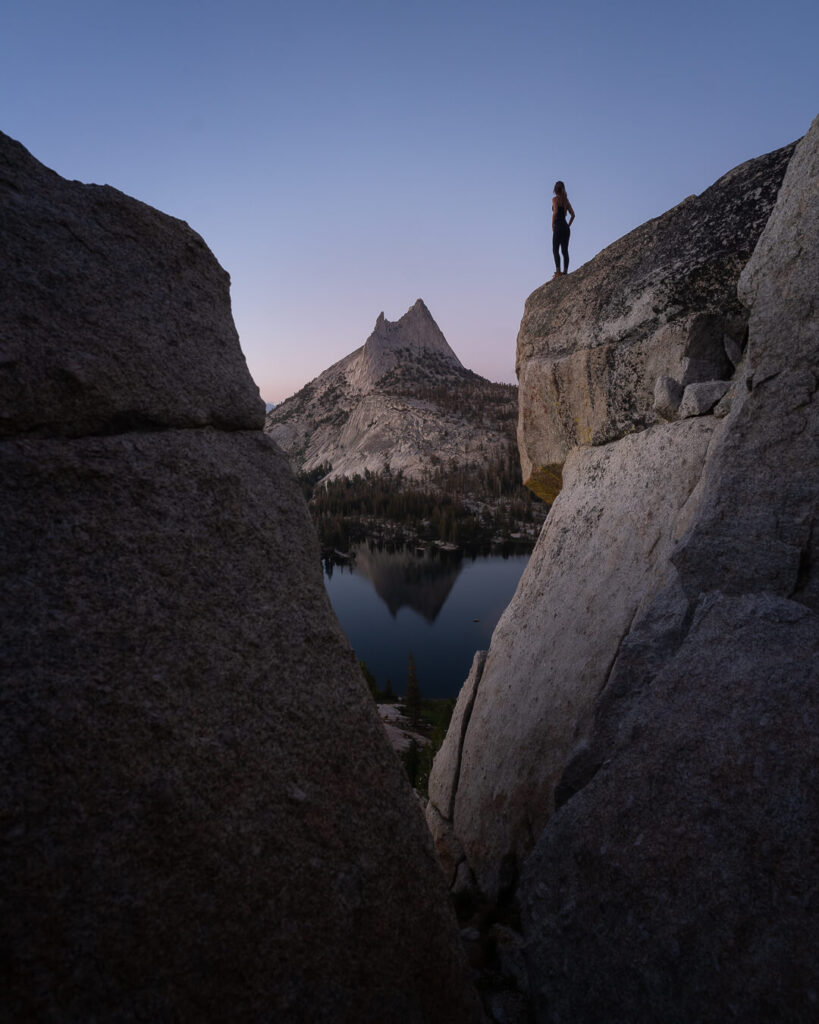
5. Upper Cathedral Lakes
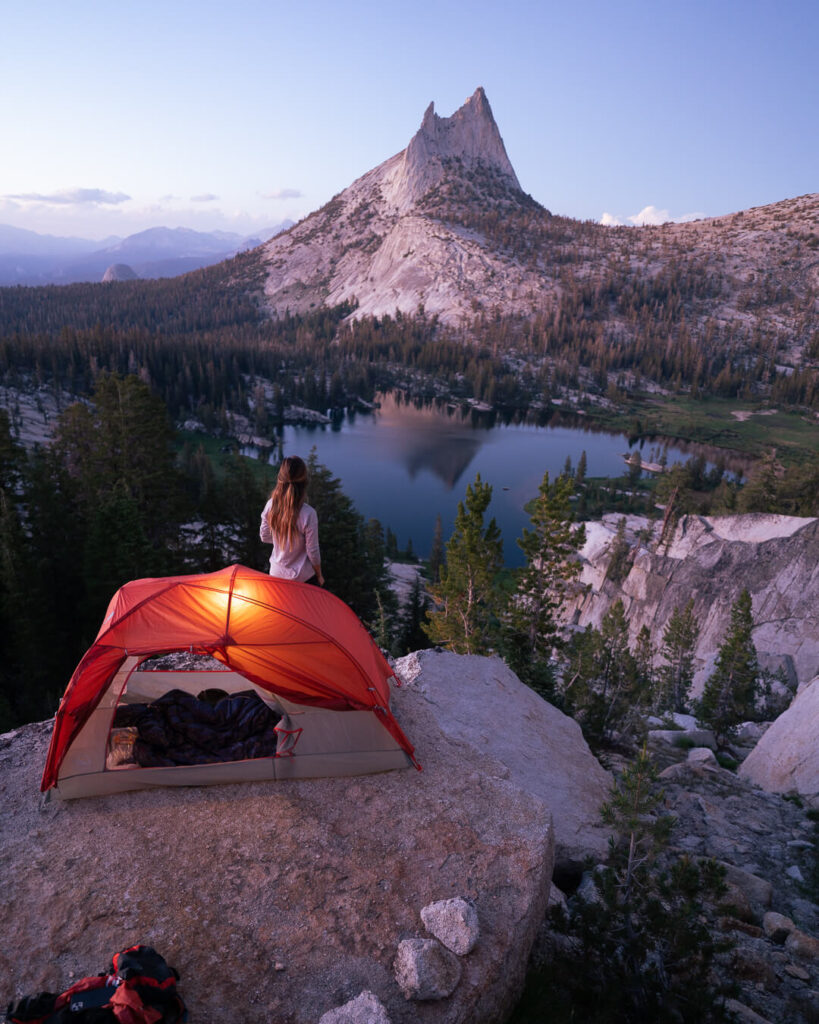
Are you looking for a peaceful hiking experience away from the hustle and bustle of Yosemite Valley? Take in the breathtaking scenery Cathedral Lakes offers on this relatively easy 7-mile hike along John Muir Trail!
My favorite thing about camping at Cathedral Lakes is the unique views – unlike anything else you’ll experience in Yosemite. You won’t see Half Dome, El Cap, or any other famous monoliths on this hike, but I can guarantee you won’t be disappointed.
- Length: 7 miles out and back (8 miles for Upper & Lower Lakes)
- Elevation Gain: 1,500 feet
- Trail difficulty: Easy
- Backcountry Permit Trailhead:
- Trail: Cathedral Lakes Trail
- Starting point: Cathedral Lakes Trailhead off Tioga Road.
- Camp Spot: Upper Cathedral Lake
Additional Consideration For Your Trip To Yosemite
Leave No Trace In Yosemite National Park
Knowing and practicing Leave No Trace principles is vital when you spend time in nature. But it is also essential to recognize that each wilderness area is unique and has its own set of minimum impact restrictions. You can read more about the Wilderness Regulations for Yosemite National Park here.
Be Bear Aware In Yosemite National Park
Bears are common in Yosemite National Park, and keeping them wild is our responsibility. The best way to do this is to store your food properly. While backpacking, you must use an approved portable animal-resistant food storage container.
You will need to pack your food, garbage, toiletries, and other scented items in a bear box. If you don’t own a bear box, you can rent one when you pick up your backcountry permit.
Pro Tip:
Pack your bear box toward the top of your backpack! I have been stopped on more than one occasion by a park ranger asking to see my bear box while backpacking. Unless you want to unpack your entire bag, make sure your food storage container is easily accessible.
Book Accommodations In Advance
Luckily, with backpacking permits, you will have access to the backpacking campsites one night before and one night after your trip. However, if you prefer to stay longer in the park or want to treat yourself to some creature comforts, I recommend booking your accommodations in advance – especially during the summer.
Don’t Sleep In Your Car/Van In Yosemite
I learned this one the hard way, so that you don’t have to! Camping in your car or sleeping in your vehicle overnight is not permitted in Yosemite National Park. Yosemite has strict regulations regarding camping, and visitors are required to use designated campgrounds for overnight stays.
What To Pack For Your Camping Trip In Yosemite
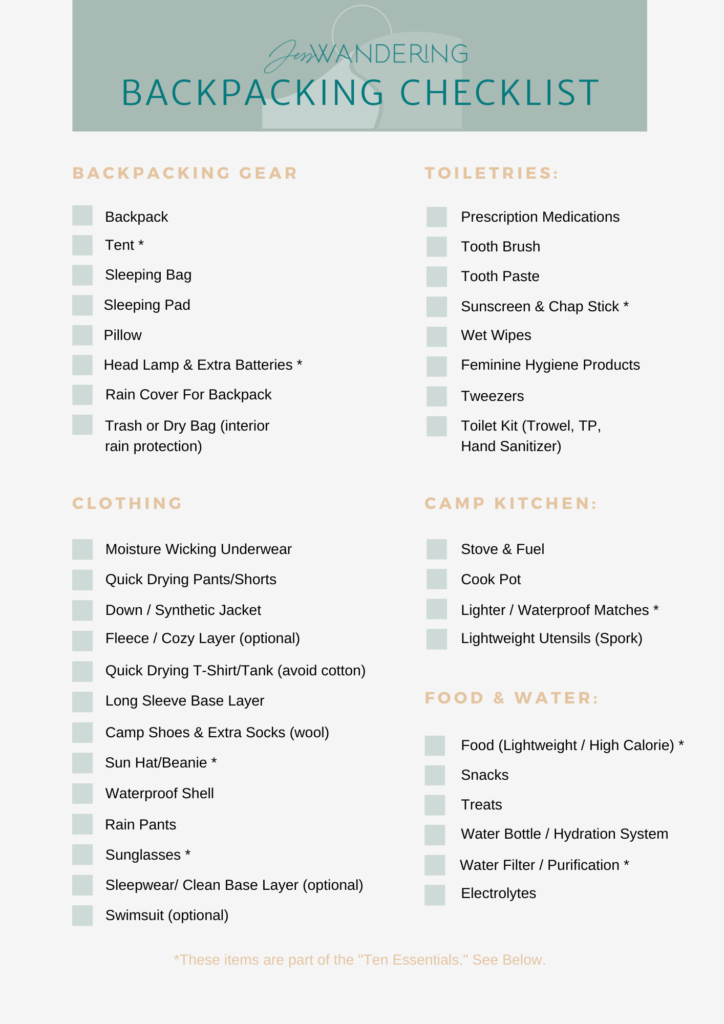
Nothing can ruin a backpacking trip quicker than forgetting a key piece of gear. And with all the little things you have to remember when preparing for a camping trip, that can be all too easy to do. But never fear!
With my Backpacking Gear Checklist, you’ll never find yourself out in the backcountry without the essentials again.
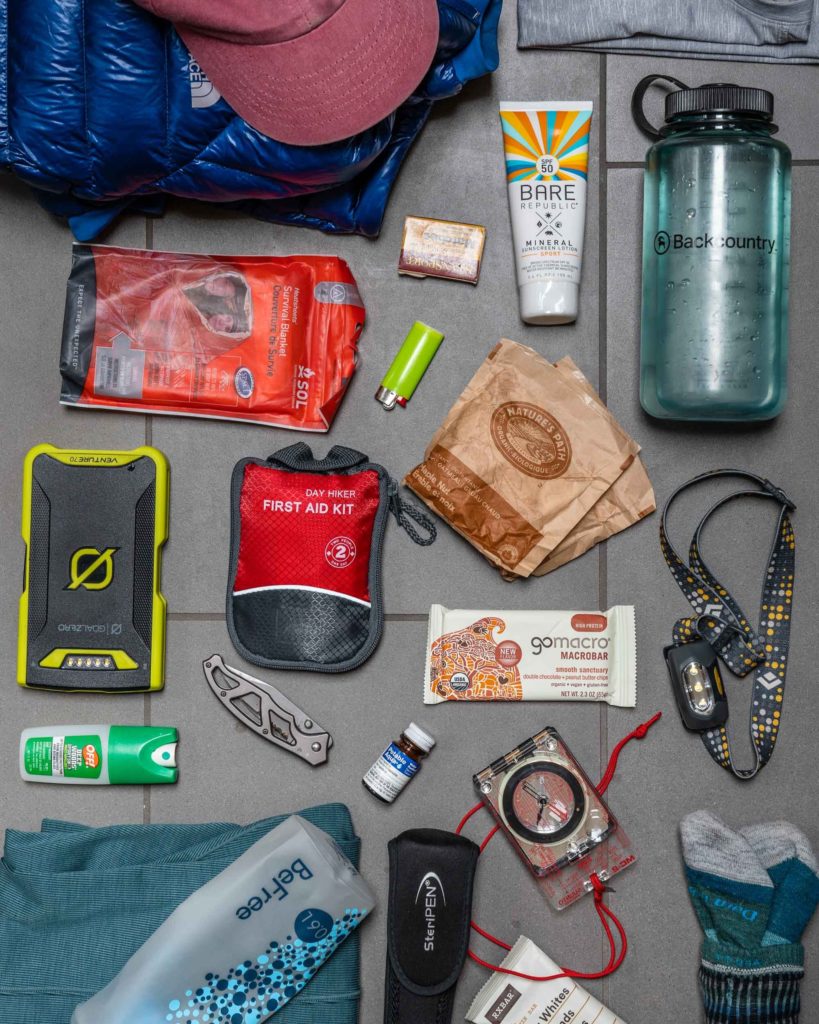
Whether you are heading out for a quick day hike or something a little more ambitious, the right gear can make the whole experience smoother and way more enjoyable. This is the setup I’ve been using lately out on the trail, including the pieces I reach for again and again because they actually work in real conditions.
DON’T FORGET! You should always carry The TEN ESSENTIALS for outdoor adventure with you. They might just save your life!
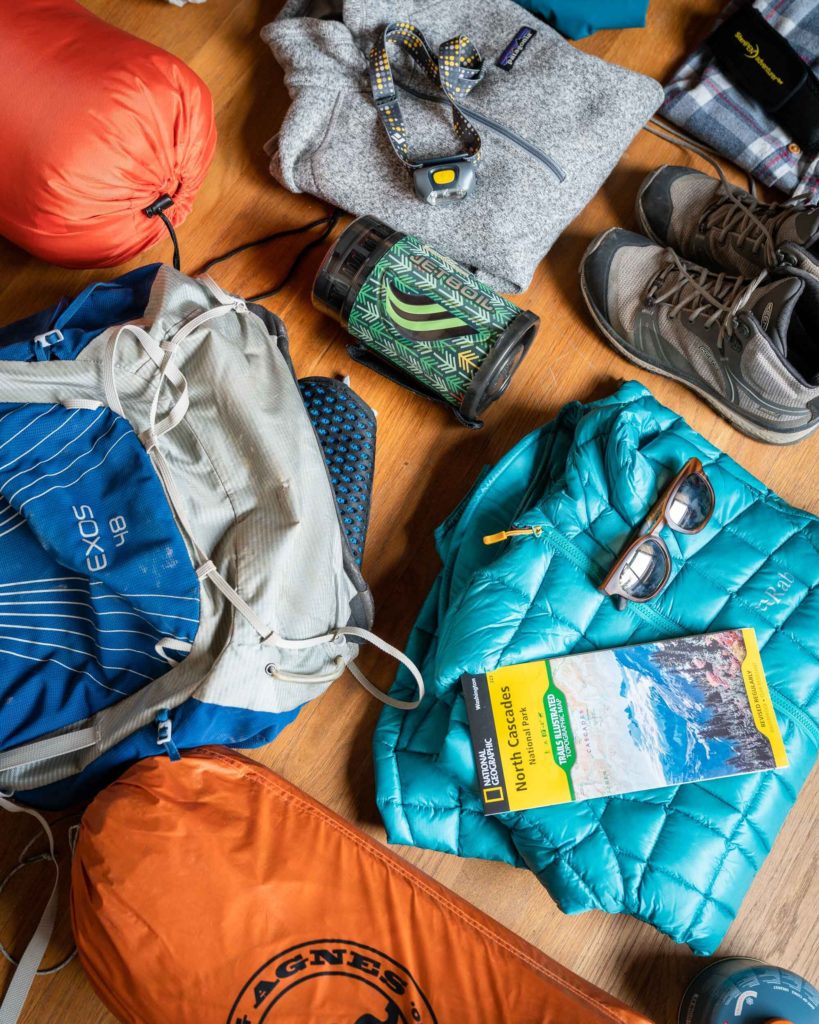
Packing & Organization
BACKPACK – The Osprey Eja (women’s) and Exos (men’s) are great packs for hikers who want to lighten their load but aren’t ready to give up comfort and support. They’re heavier than cottage ultralight packs, but that extra weight gives you a sturdy frame, excellent ventilation, and a suspension system that keeps heavy loads feeling comfortable over long days. And it’s still much lighter than a more traditional pack with all the bells and whistles.
Shelter and Sleep Gear
SLEEPING BAG – The Feathered Friends Egret UL 20 has been my go-to sleeping bag for the last two seasons because it’s lightweight, insanely warm for its weight, and compresses small enough to save space in my pack.
SLEEPING PAD – As a side sleeper, I’m picky about sleeping pads, and the NEMO Tensor Trail Ultralight Insulated Sleeping Pad is one of the only ultralight pads I’ve found that’s genuinely comfortable (for a sleeping pad). After years of use, it’s proven reliable and worth every ounce.
BACKPACKING PILLOW – The Sea to Summit Aeros Premium Pillow is the best ultralight pillow I’ve found. Does it feel like your pillow on your bed at home? NO. But, it’s still one of those little luxuries I never regret packing.
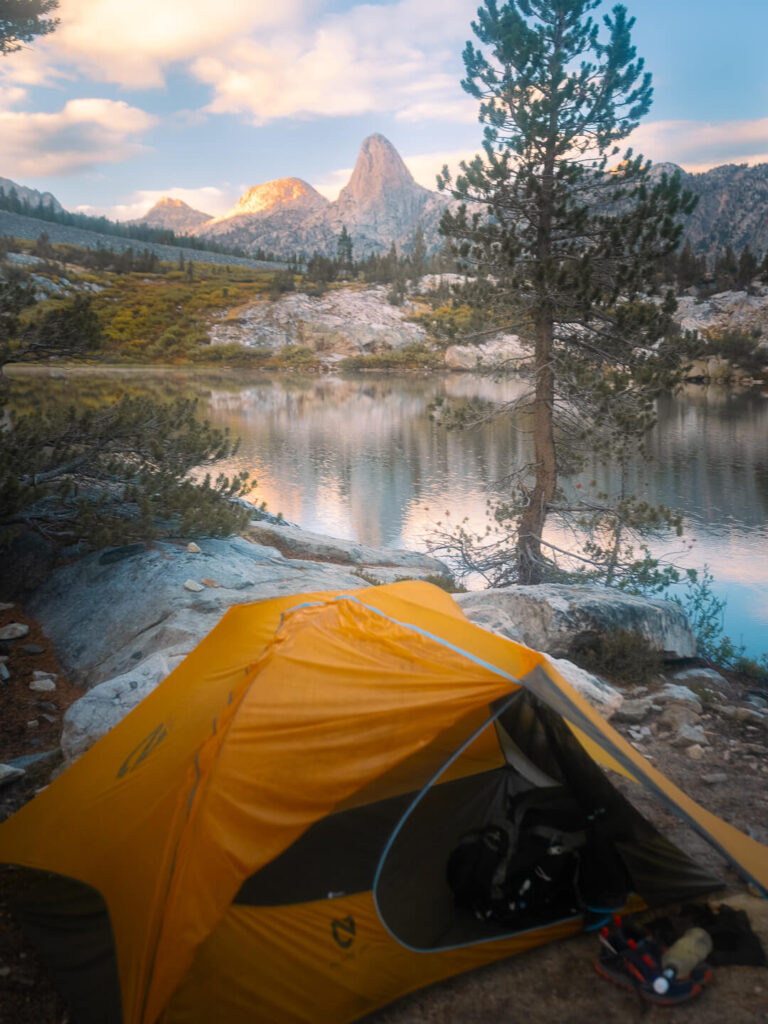
TENT (TWO PERSON) – The Big Agnes Copper Spur UL2 has been my go-to backpacking tent for years because it’s roomy, ultralight, and incredibly reliable. It’s also a true freestanding tent, which means it can stand on its own without stakes — a huge advantage when camping on rocky terrain or spots where staking isn’t easy.
Food, Water, & Kitchen Gear
ULTRALIGHT STOVE – I recently swapped my Jetboil Flash for the Soto WindMaster with 4Flex pot supports because it’s lighter and more versatile. You can use different pots, not just the Jetboil mug.
COOK POT – The TOAKS Titanium 750 ml Pot, perfectly fits a 110g Fuel Canister (the smaller standard size that you see), WindMaster Stove, and a mini BIC Lighter.
EATING UTENSIL – The Snow Peak Titanium Spork (Long)
WATER PURIFIER – The Katadyn BeFree is my favorite filter for speed and simplicity. It’s ultralight, easy to squeeze, and perfect for quickly filling bottles on the go.
The Grayl Water Filter is much heavier but unbeatable for international travel or areas with questionable water sources because it removes viruses as well as bacteria and protozoa. It works like a French press—fill, press, and drink—with no need for extra bottles or gear.
FOOD STORAGE (BEAR SAFE) – The BearVault BV450 Jaunt Bear Canister. This size is generally considered good for 4 nights, or 2 night trips with 2 people.
The Ursack is a lightweight alternative to a bear canister. It’s made from bulletproof-grade fabric that resists chewing and clawing, and it’s much easier to pack in your bag. You’ll still need to tie it to a sturdy tree, and it doesn’t protect your food from getting crushed, but for trips where bear canisters aren’t required but you still want to protect your food from bears and other critters.
Other Backpacking Gear
HEADLAMP – Nitecore NU25 400 Lumen Rechargeable Headlamp
GPS COMMUNICATION – I carry the Garmin InReach Messenger Plus for peace of mind on backcountry trips — it lets me send texts and share my location even when there’s no service. The battery lasts for days, and it’s a small, reliable way to stay connected and safe when I’m off the grid. AND you can send photos and voice notes! Watch the video I made about the Garmin Messenger Plus!
SMART WATCH – I’ve been wearing the Garmin Fenix Watch to track my activity for years. Plus it’s so fun reviewing and sharing hike details after!
TREKKING POLES – Durston Iceline Trekking Poles. I just picked up the Durston Iceline trekking poles because I wanted something ultralight but sturdy to take pressure off my knees on big hikes. They’re incredibly light (under 10 oz per pair) and designed for strength.
MULTI-TOOL – Swiss Army Classic Knife
FIRST AID – Band-Aids, Leukotape, pain killers, anti-bacterial cream.
REPAIR KIT – Repair Spool by Igneous, Tenacious Tape.
POWER BANK – Nitecore Power Bank
Clothing Essentials
SUN SHIRT – The Crater Lake Hoody is my favorite sun shirt because it’s so light and soft it almost feels like air. It offers full UPF 50+ protection for long days in exposed terrain, so I don’t have to carry buckets of sunscreen.
SHORTS – You don’t need to reinvent the wheel here. Whatever works for you! This summer I’ve been really enjoying the Lululemon Pace Rival High Rise Shorts and Outdoor Voices Warmup 5” Shorts.
HIKING PANTS – To be honest I’ve never been a big hiking pants person. I generally just wear one of my favorite pairs of leggings, because that’s what I’m most comfortable in. But this summer I picked up a pair of REI Trailmade Pants and they were nice! The Trailmade Pants are affordable, durable, and surprisingly versatile for hiking and backpacking. And I have to admit it was nice to have pants that felt a bit more airy than leggings.
INSULATED LAYER (Down Jacket ) – The Patagonia Fitz Roy Down Jacket is a cold-weather essential I bring on alpine or winter trips when serious warmth is non-negotiable. It’s stuffed with premium 800-fill down, so it’s incredibly warm for its weight. I’d recommend sizing down.
When I’m really trying to go lighter without sacrificing warmth it’s hard to beat Rab’s Mythic G Down Jacket. Best to pick this one up on sale if you can!
RAIN JACKET: The Rab Phantom Jacket is an ultralight, fully waterproof shell that packs down small and disappears in your bag until you need it. I’m a fair weather hiker, but in the mountains weather can change fast, so it’s great to have rain protection that doesn’t weigh me down.
For more inclement whether, when I want something a little more substantial, I use the Arc’Teryx Beta SL Jacket.
Shoes
TRAIL RUNNERS – The Hoka Challenger Trail Running Shoes are my go-to shoe for warm weather hiking. I prefer trail runners over hiking boots because they’re lighter, more breathable, and dry quickly. I’ve worn mine on everything from day hikes to multi-day trips like the John Muir Trail, and they’ve been incredibly durable for how lightweight they are.
BOOTS – The Danner Inquire Chukka Mid is my all-time favorite hiking boot! I wear it when I want more ankle support than a trail runner but still need something light and flexible.
Camera
SONY RX100 VII – The Sony RX100 VII is my favorite compact camera for backpacking because it’s small enough to slip in a pocket but still delivers professional-quality photos. The 24–200mm zoom range makes it incredibly versatile, and it’s the perfect option when I don’t want to carry one of my heavier cameras but still care about image quality.
| Just a quick heads up. Some of the links in this post are affiliate links, which means I might earn a tiny commission if you decide to make a purchase. It does not cost you anything, but it’s one of the simplest and most supportive ways to help me keep creating these guides. I’m not paid to recommend anything, and every opinion here comes from real experience with gear I actually use and love. If you’re planning on picking something up, using my link truly makes a difference and I appreciate it more than you know. |
Final Thought On Backpacking In Yosemite National Park
Yosemite National Park is one of the most spectacular places on Earth. There are many different ways to experience Yosemite, but backcountry camping is one of the best.
Whenever you stay overnight in Yosemite’s backcountry, you can immerse yourself in some of the park’s most wild and remote areas. If you’re planning a trip to Yosemite, research and follow all the necessary steps to plan a safe and enjoyable trip. With a bit of preparation and the tips I’ve shared in this guide, you’ll be able to create memories that will last a lifetime.
Quick heads up! Some of the links on this blog may be affiliate links, which means that if you click on them and make a purchase, I may earn a small commission. Don’t worry, though – it won’t cost you anything extra, and it’s a way for me to keep this blog up and running. Thanks for your support!
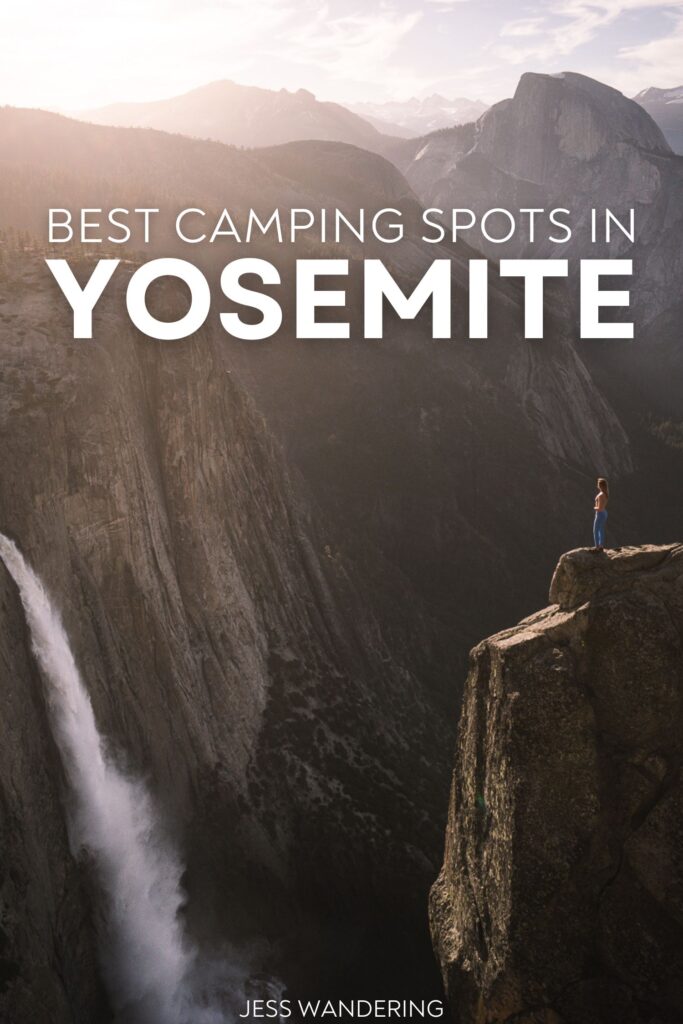
Like this post? Pin it for later and share it with others!
More Backpacking Posts
Complete Guide To Backpacking The Mineral King Loop
Everything You Need To Pack To Backpack The W-Trek In Patagonia


These are amazing photos! Just gorgeous! If coming into Yosemite from the south entrance, I recommend staying at Fish Camp rather than Oakhurst. Oakhurst is a great place to stop for groceries (that’s what we always do- there’s a supermarket and gas station right off the highway) but Fish Camp is right outside the Yosemite entrance and has a huge lodge that we love staying at. We’ve also rented cabins in Fish Camp and had a great time as well. We’ve had to stay overnight once in Oakhurst because of snow road closures- we made the most of it but we moved on in to Fish Camp as soon as we could!
Hi Beth. I know you left this comment a long time ago. I really appreciate the recommendation and I hope you get to go back at some point!