


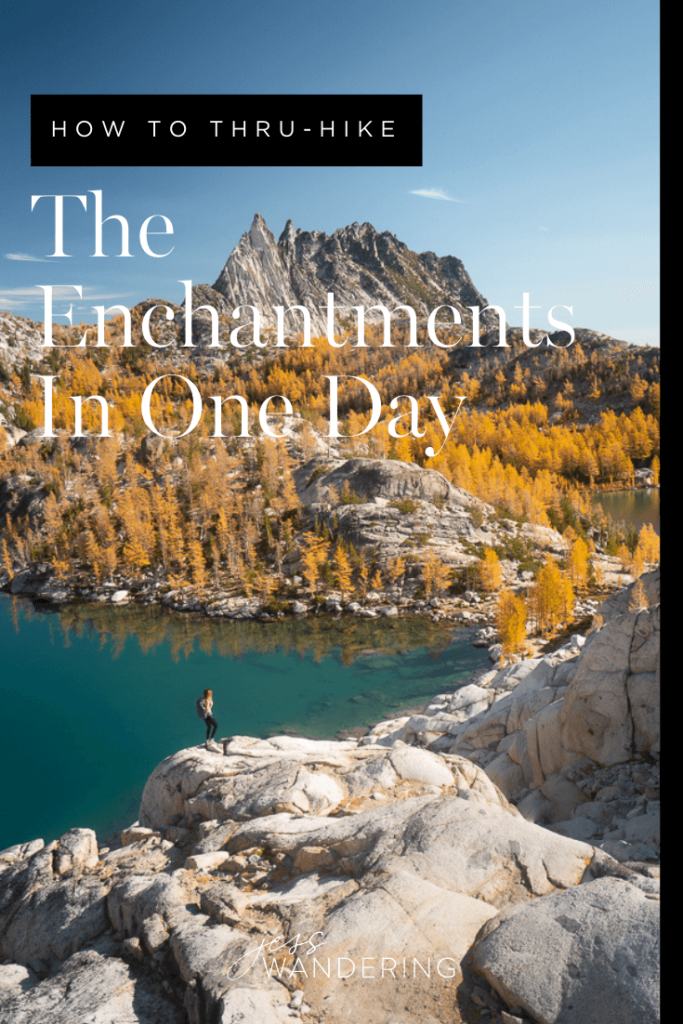
So You Want To Thru-Hike The Enchantments; Here’s Everything You Need to Know
Larch madness. Or the Larch March. That’s what we call the small window of time in early October when the Larch trees in the Pacific Northwest—disguised as evergreens for most of the year—drop their ruse and turn a brilliant color of gold. It doesn’t happen every year. Whether it be rain, snow, apocalyptic smoke, or early winter winds, several factors can, and often do, conspire to ruin a good Larch season. But when the conditions align, there’s nothing quite like it. And there’s no place quite like The Enchantments to experience it. So when the forecast called for clear, calm weather during the second week of October, Quin and I took it as a sign, packed our day packs, and drove the van out to the Alpine Lakes Wilderness.
Growing up in Washington, hiking The Enchantments feels a bit like a rite of passage. Even more so if you happen to be in the outdoor community. And yet, somehow, it alluded me until this year. To be fair, I have technically been to The Enchantments before. One of the first photos I ever posted on Instagram was a black and white portrait of me at Stuart Lake. And I’ve lost track of the number of times I’ve hiked up to Colchuck. I’ve even huffed it up Aasgard Pass a time or two just to turn around and head back to my car.
I’ve never been one of the lucky few to win an overnight permit into the “Core Enchantments.” And I’ve always convinced myself that I wasn’t up for doing the thru-hike in one day. It was rubbish, really.
Yes, it’s a strenuous hike. Yes, it’s a very long day. And yes, my feet felt like complete and utter mush by the end.
But I honestly think that anyone in reasonably good shape can complete The Enchantments in one day. Like most long-distance endeavors, it’s more of a mental challenge than anything else. But when the views live up to their name, as they do in The Enchantments, even the mental challenge is easily surmountable.
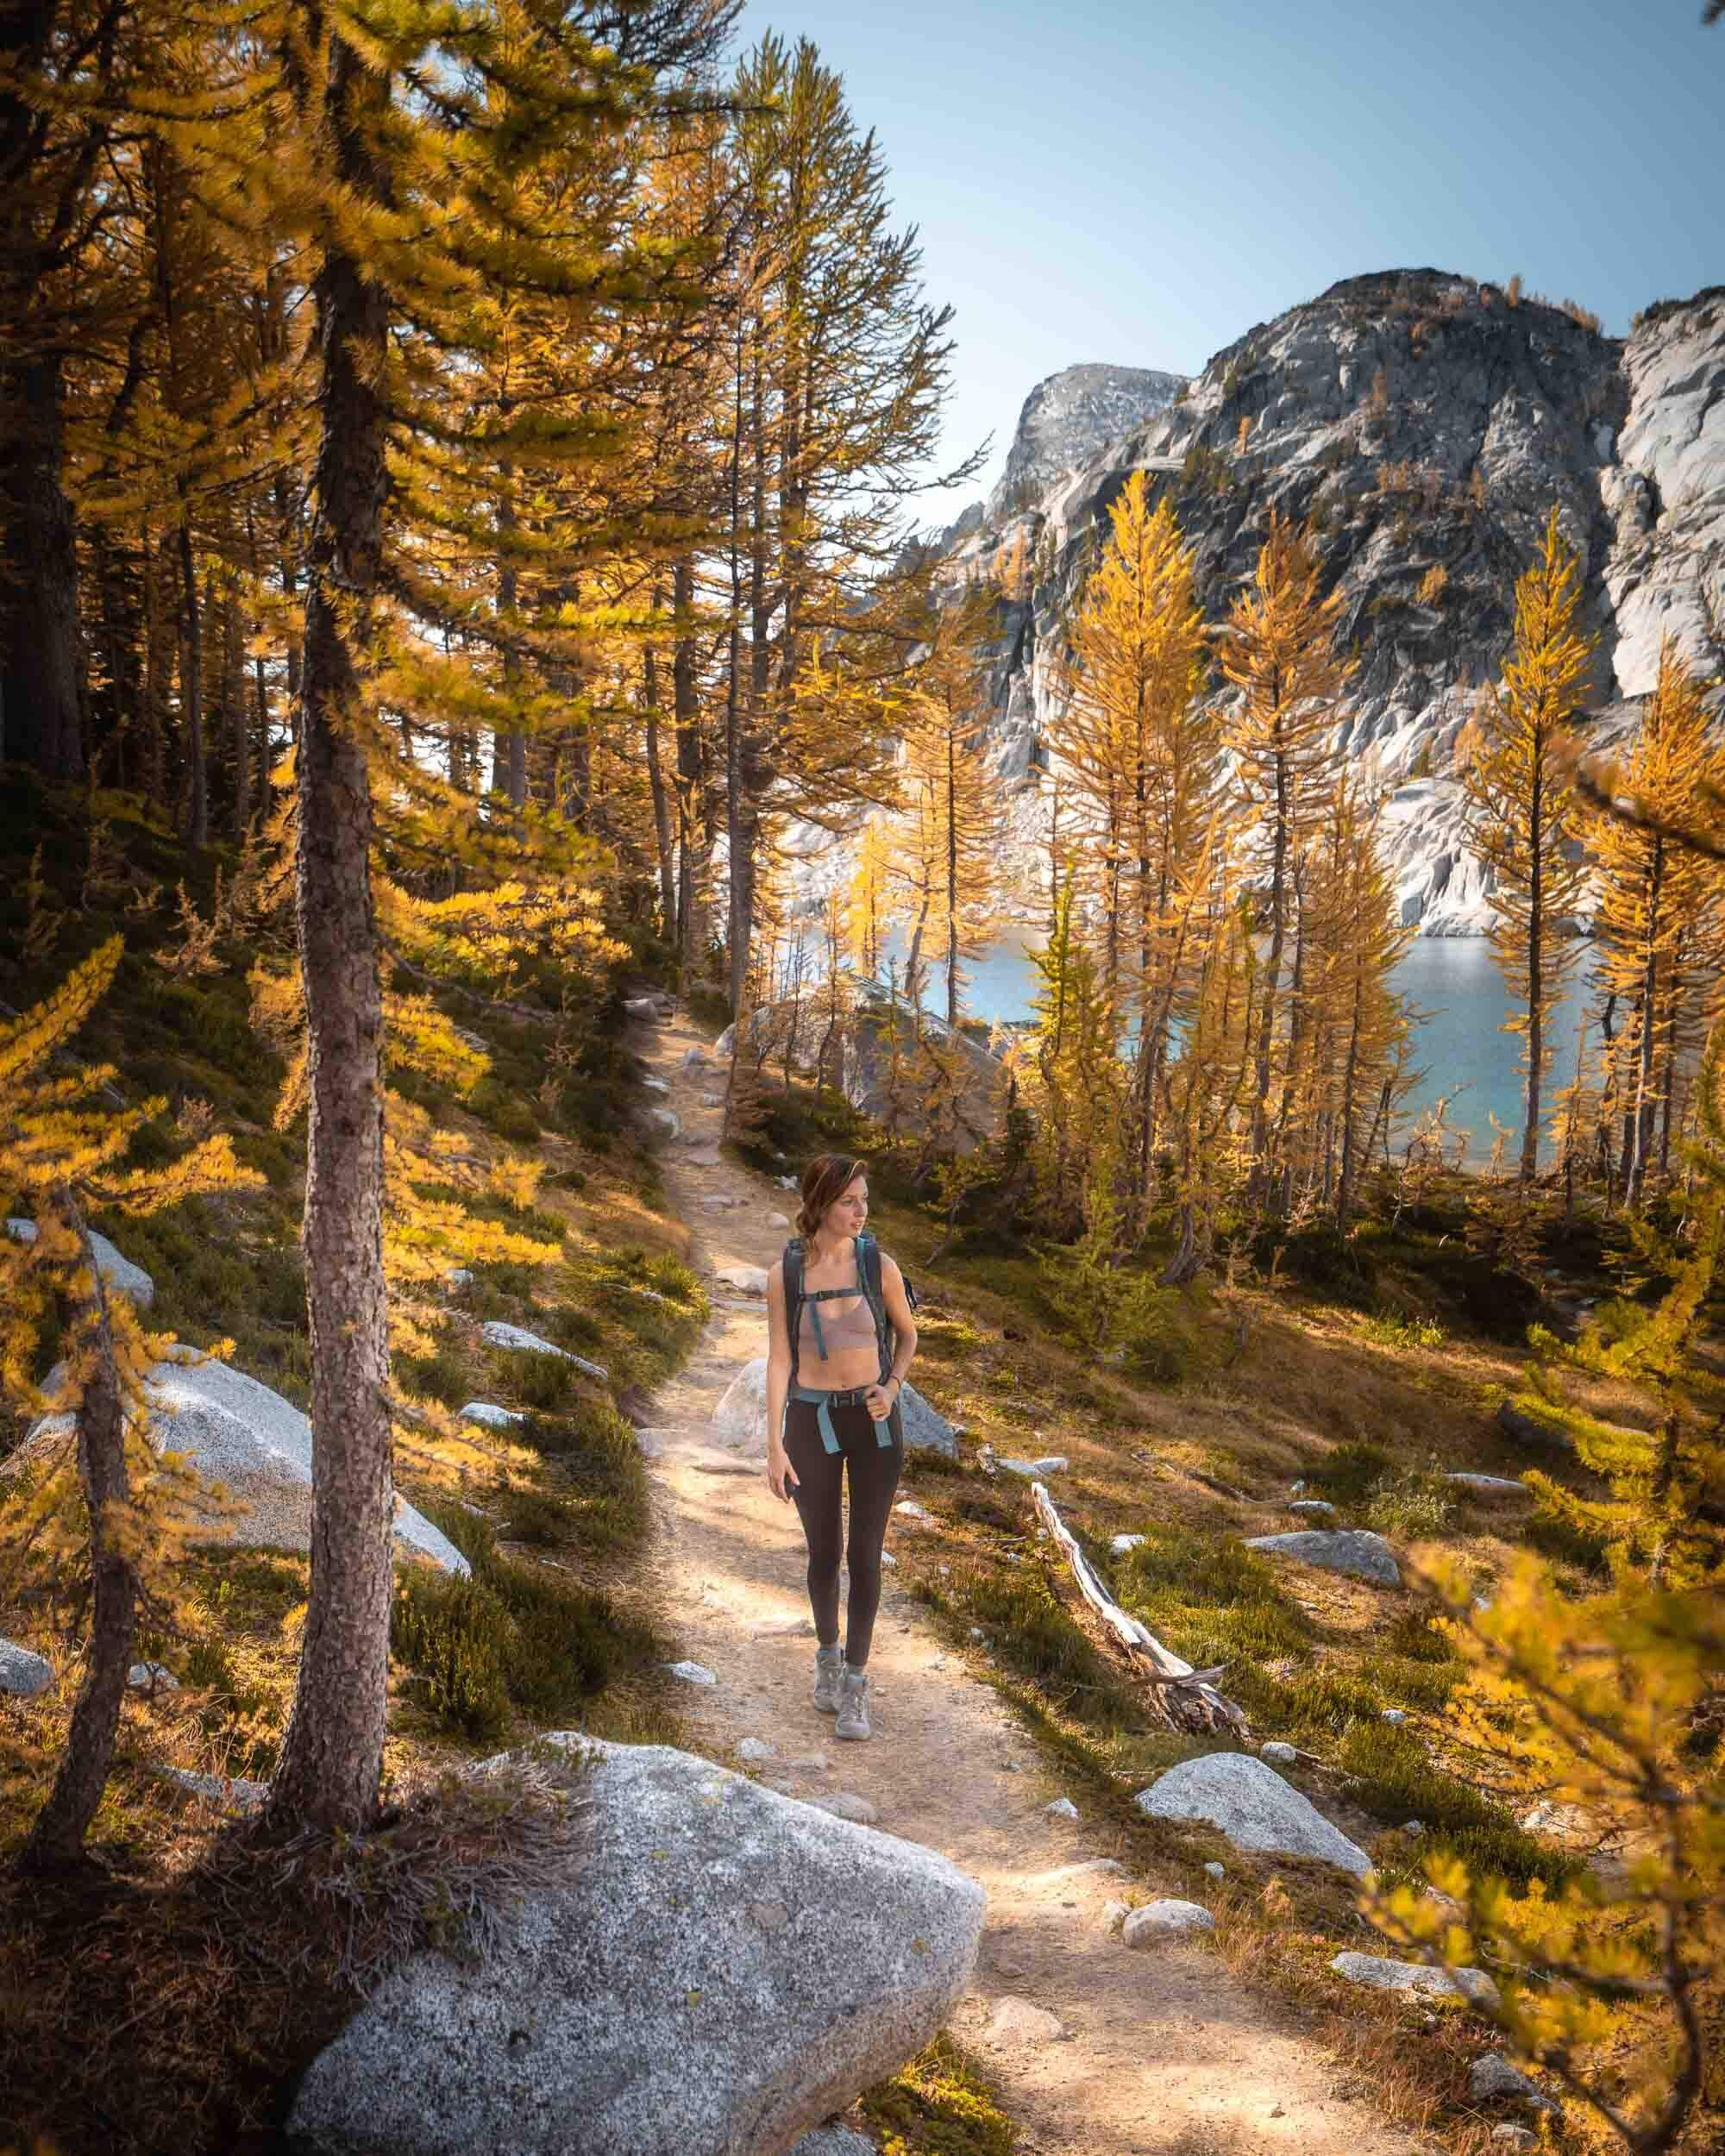
In Mid-October the trail through the Core Enchantment Zone is lined with golden Larches.
The Enchantments At A Glance
Distance: Approximately 19 miles
Difficulty: Extremely Difficult
Total Elevation Gain: 5,000 feet
Total Elevation Loss: 7,000 feet
Highest Elevation (Aasgard Pass): 7,841 feet
A Note On The Trail Distance: There is a lot of discrepancy in the distances reported for The Enchantments. During my research, I routinely came across mileage that varied from 18-23 miles. To me, a 5 mile split on a trail that is—at most—23 miles long is mind-boggling. I clocked 19.25 miles on my Gaia GPS App, and Quin got 22.5 miles on his Apple Health App. While the discrepancy between our two distances explains why there’s so much discrepancy online. . . it doesn’t get us any closer to an accurate distance. I’ve given approximate distances for each section of the hike based on my GPS and the amount of time each leg of the hike took us.
They are just that – APPROXIMATE. My best advice is to mentally prepare for a 23-mile hike and be pleasantly surprised if you get back to your car a few miles sooner than you anticipated!
Length of Time: Because The Enchantments is such a long trail, the length of time it takes to hike will vary wildly on the individual. That being said, I think for the average hiker, 12 to 14 hours is a fairly solid bet. It took Quin and me approximately 13 hours to thru-hike the Enchantments (starting at the Stuart/Colchuck Lake Trailhead at 5:10 AM and finishing at the Snow Lake Trailhead at 6:05 PM). We are not exceptionally fast hikers, we didn’t train at all, and we stop A LOT to take photographs.
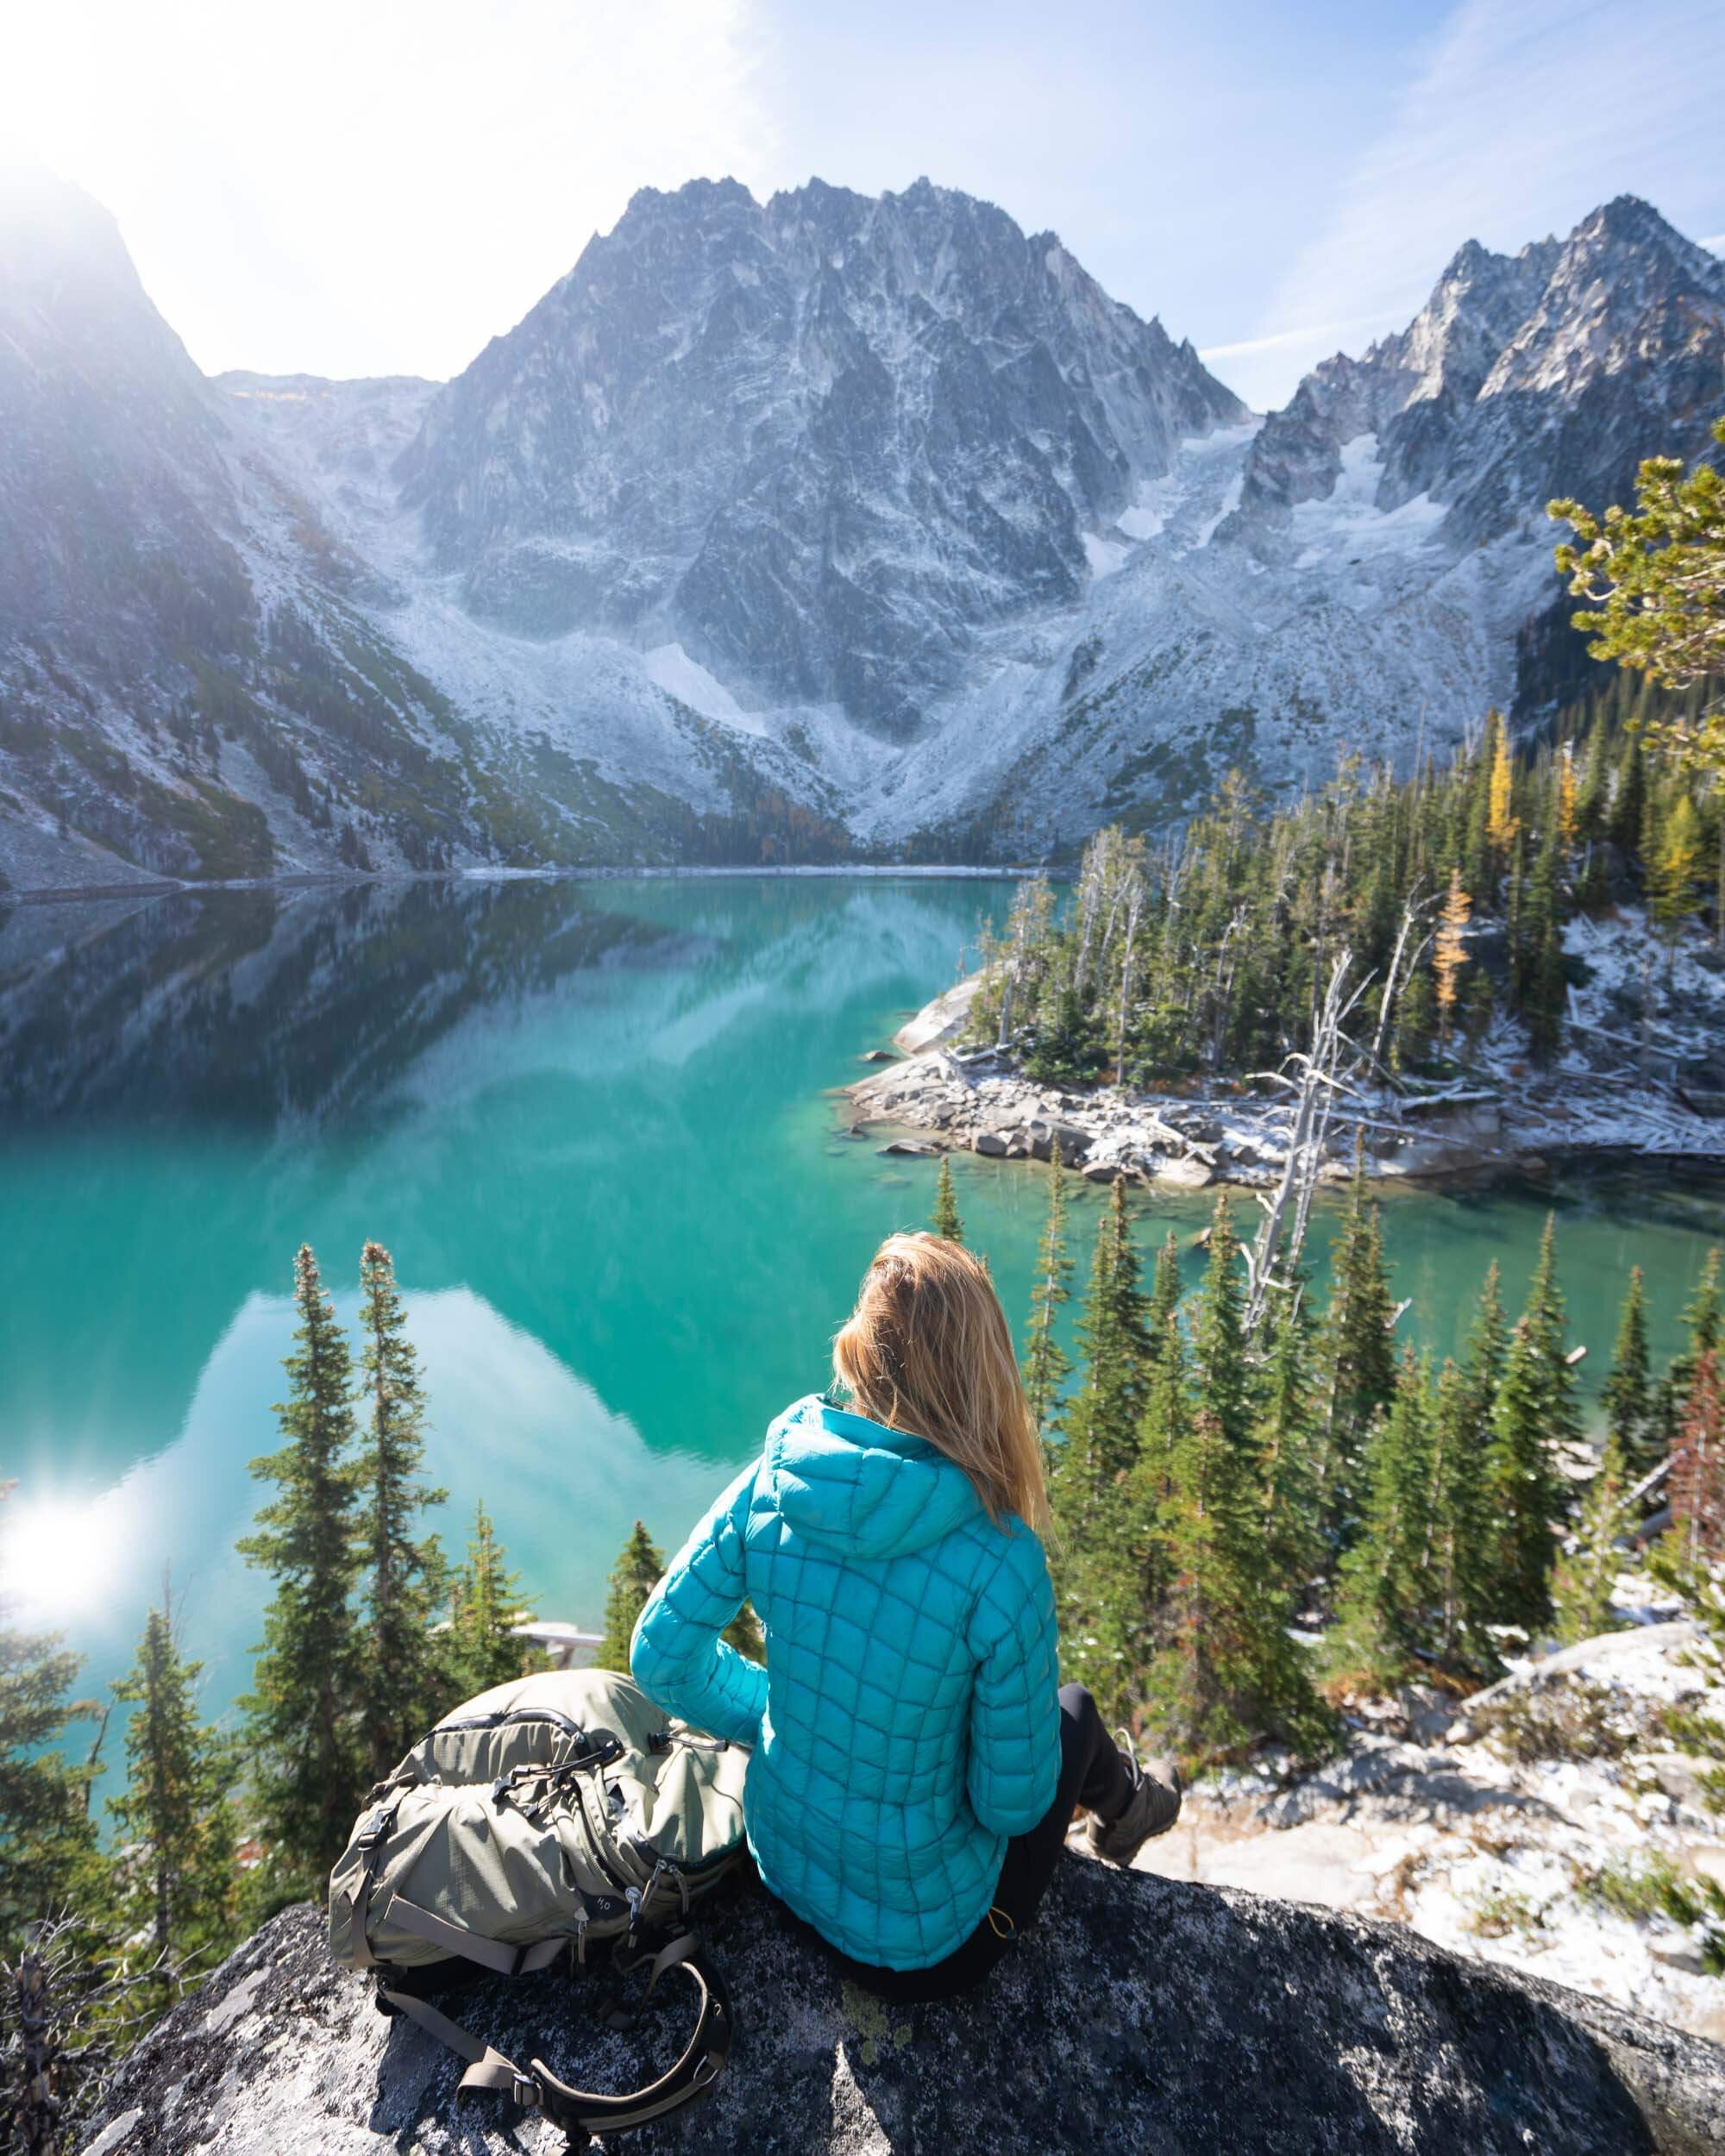
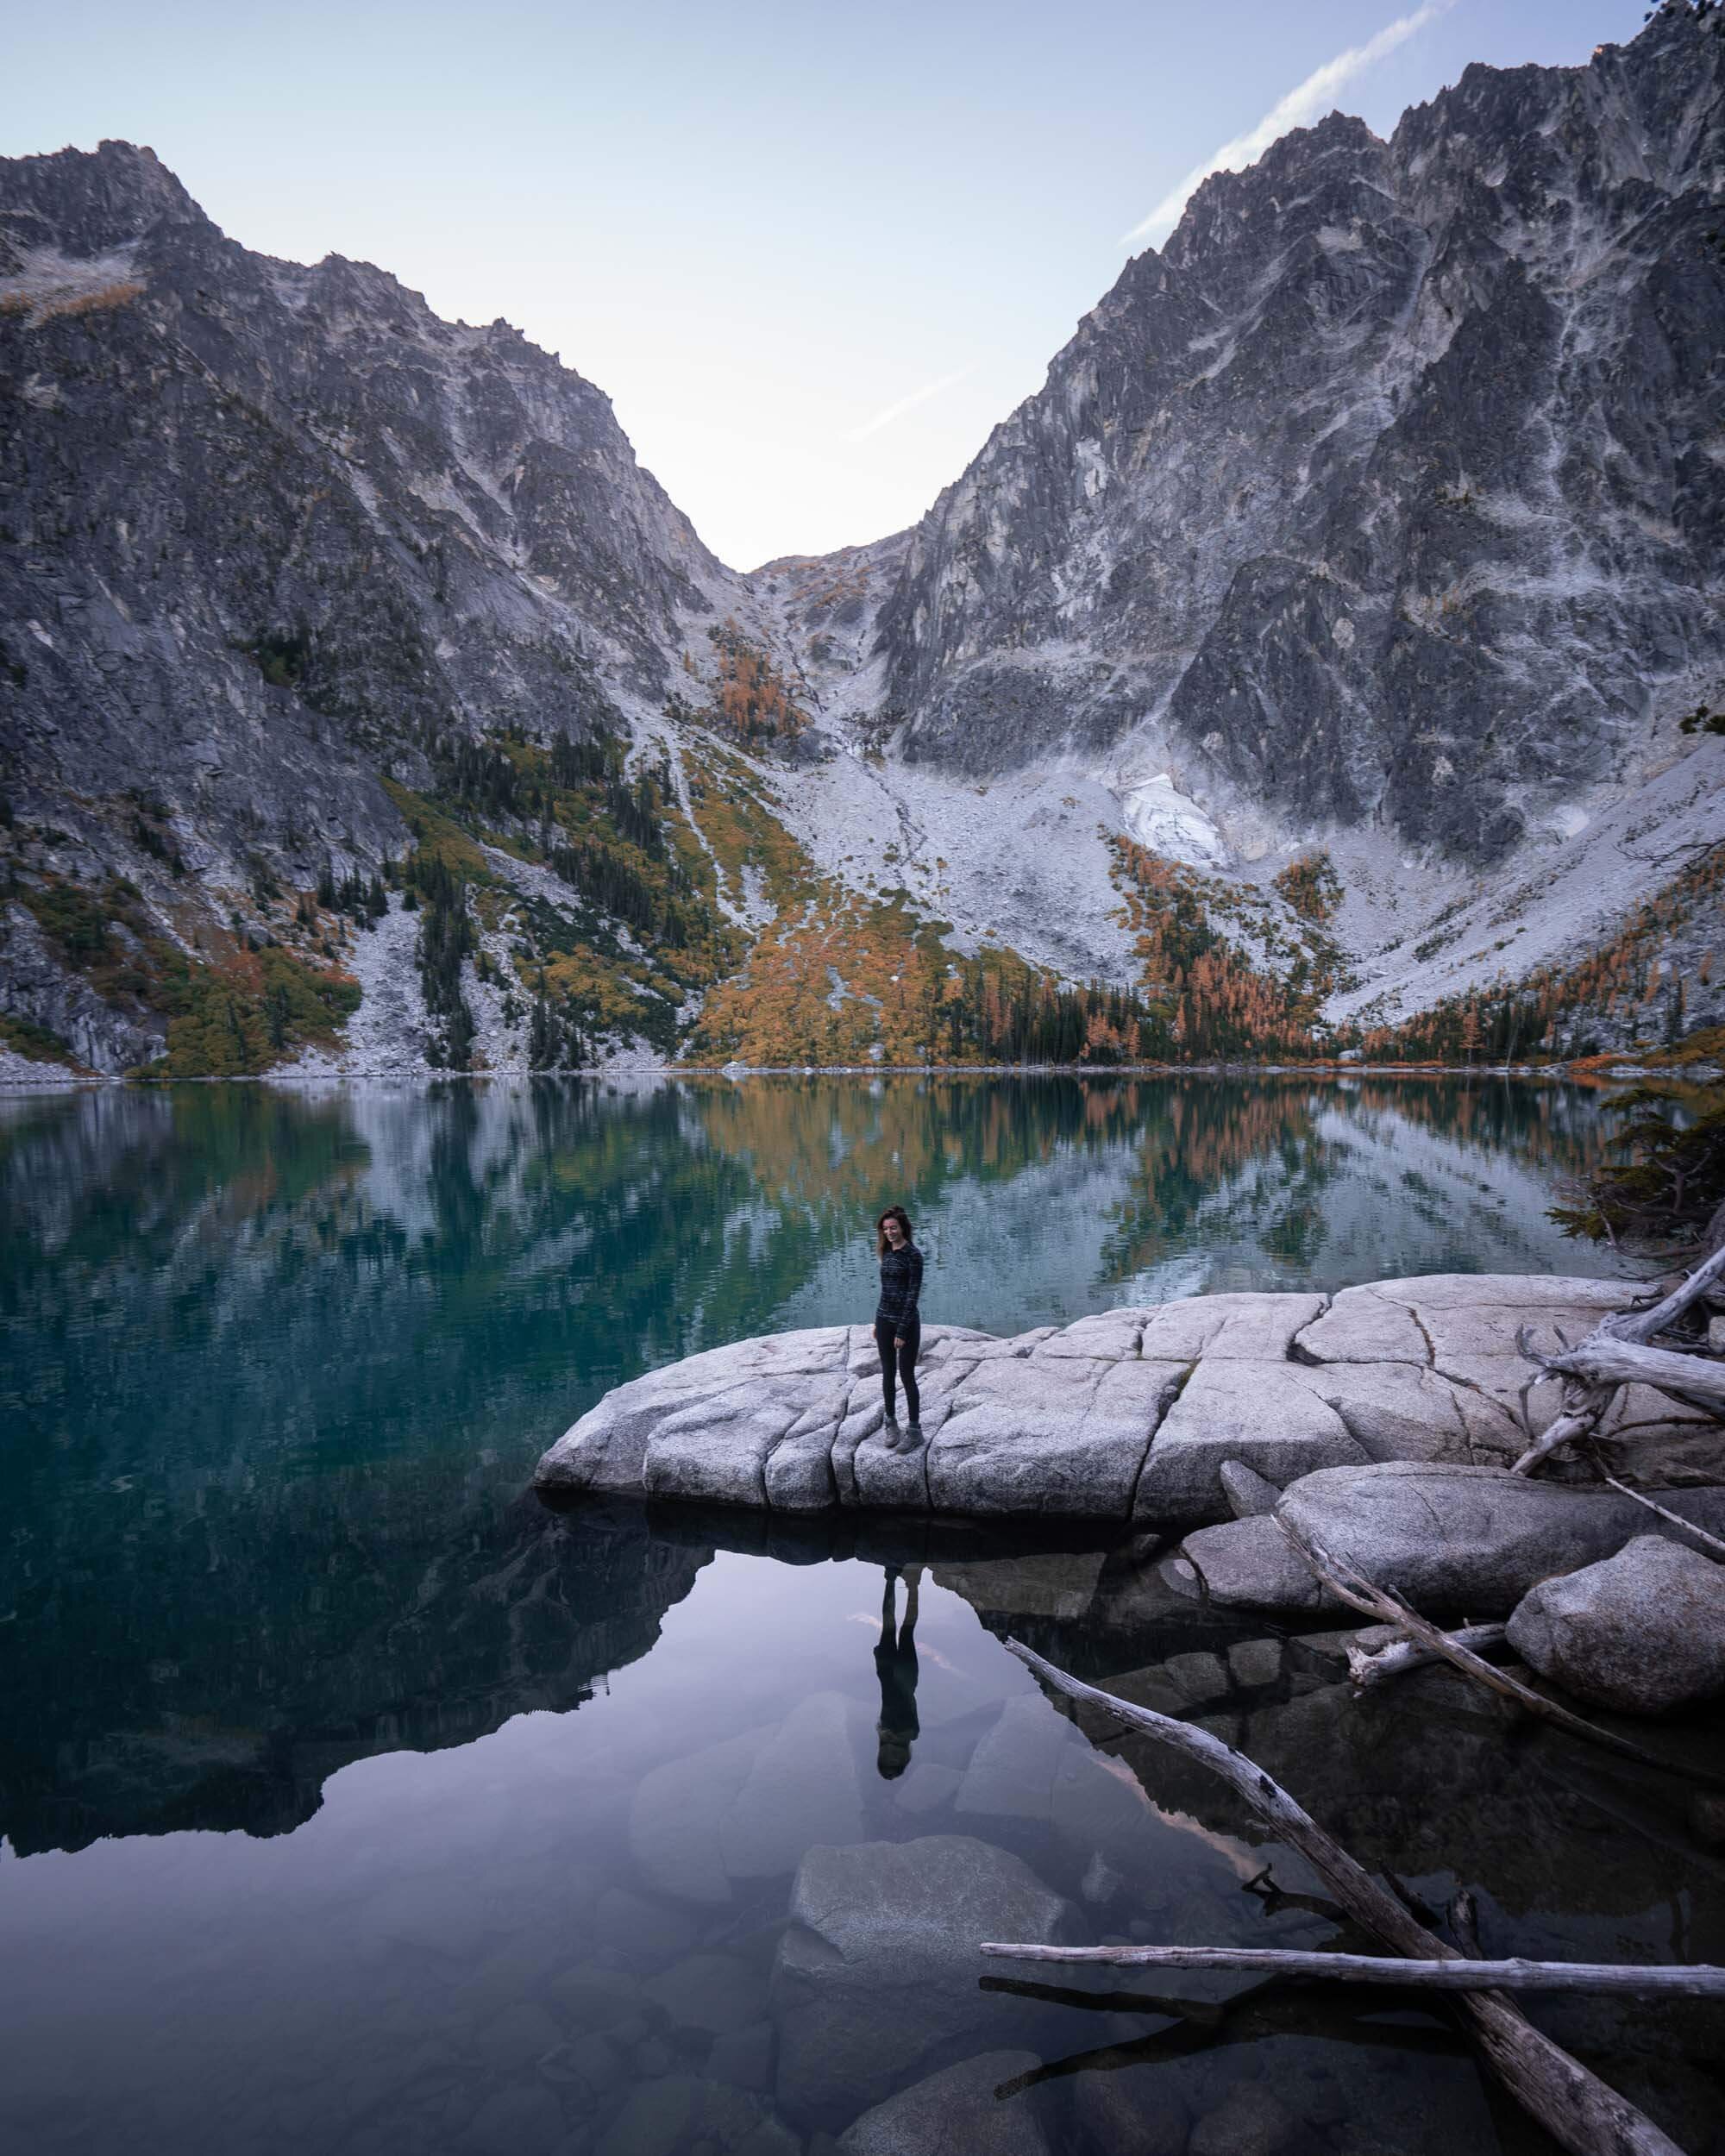
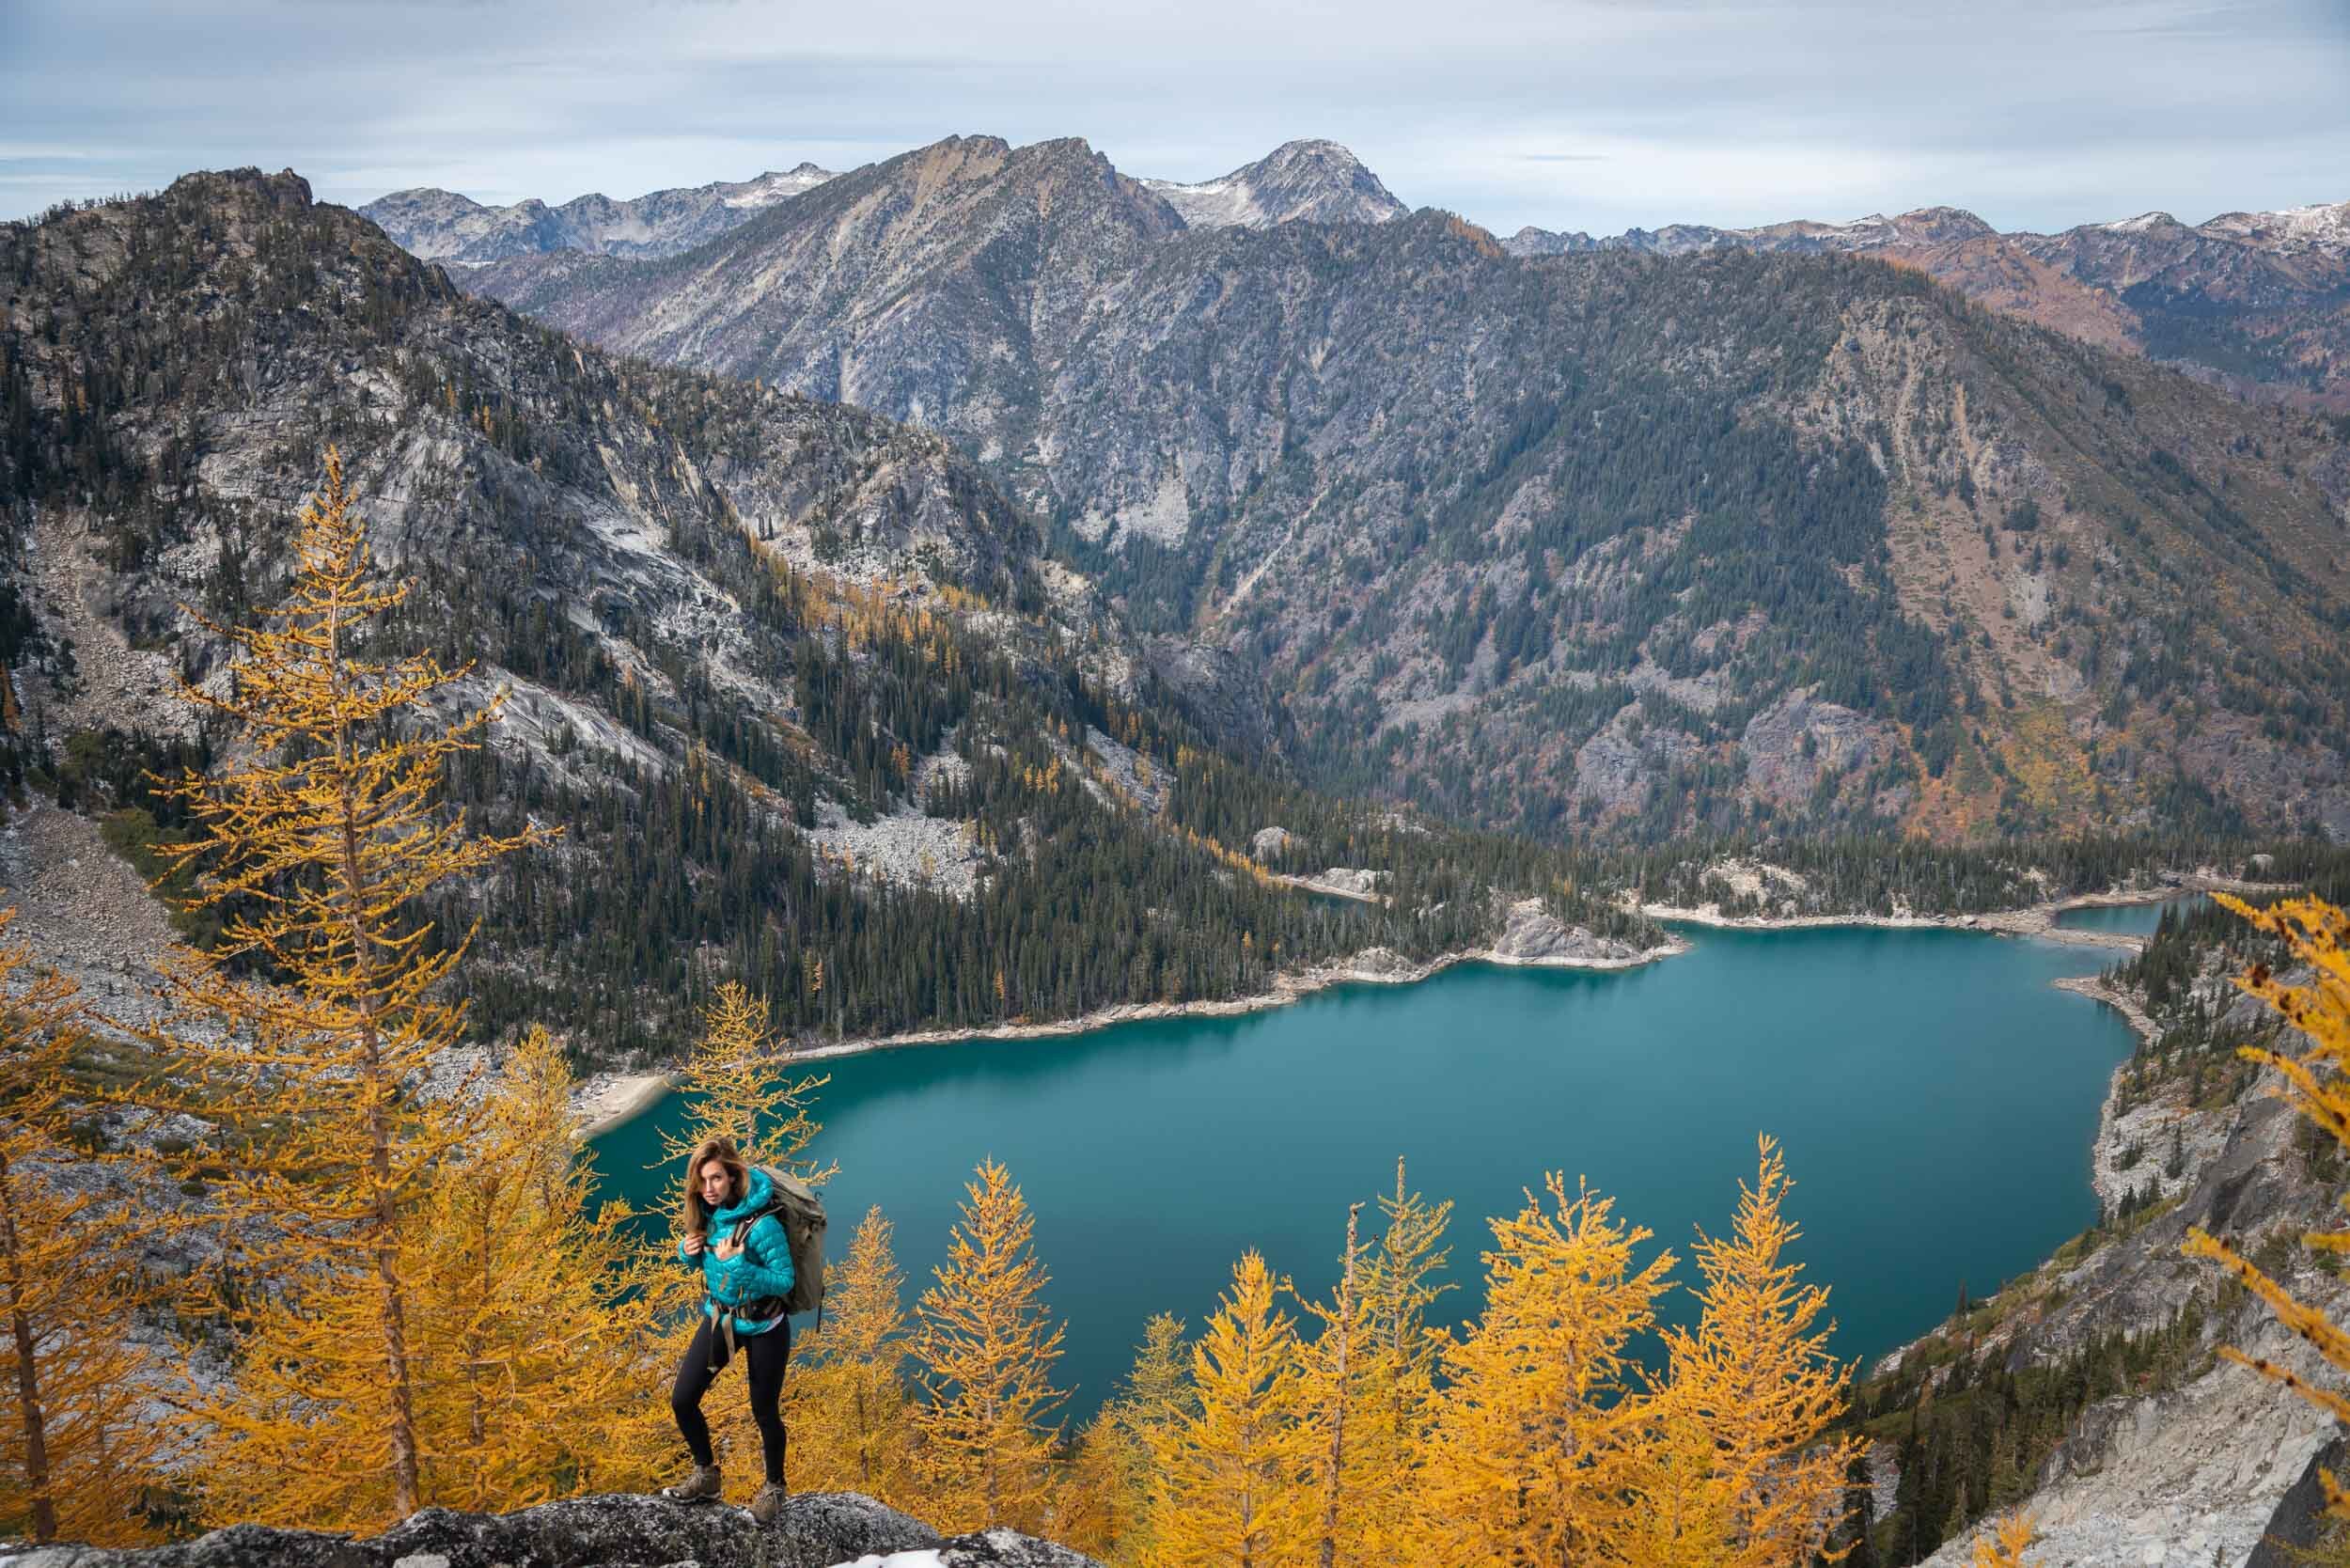
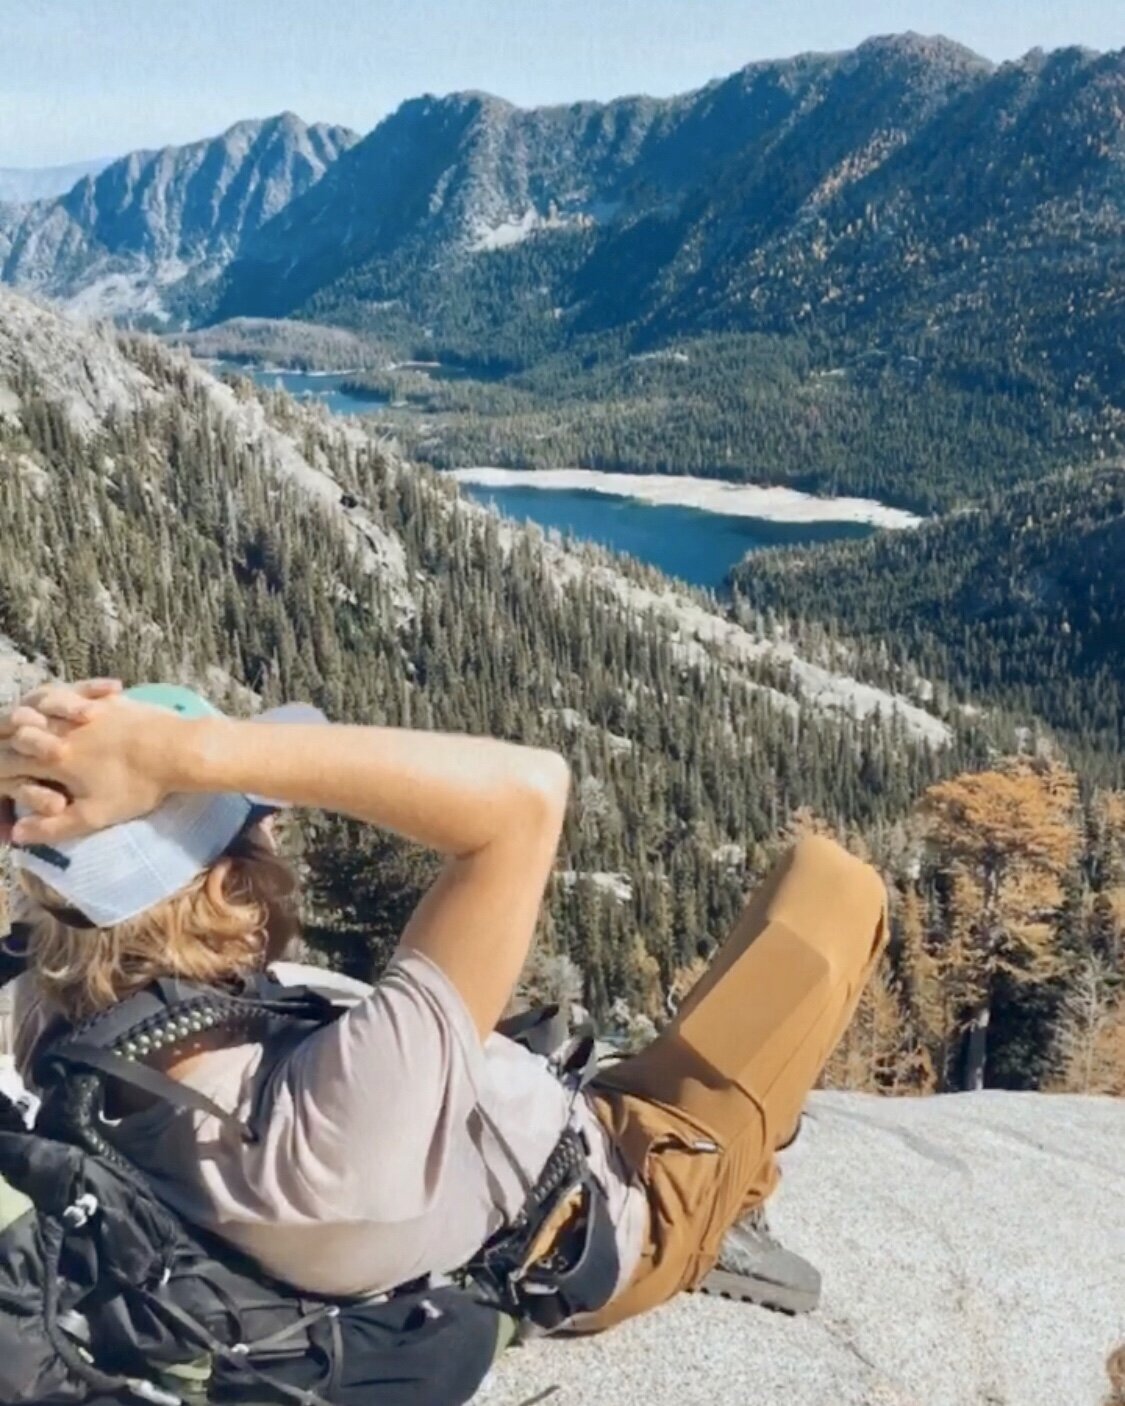
Taking a break at Colchuck Lake. Wearing Rab Microlight Alpine Down Jacket.
What Permits Do You Need For Hiking The Enchantments
Most people who choose to hike The Enchantments in one day do so because they want to avoid the permit system. Camping overnight in the Enchantments is strictly regulated between May 15th-October 31st. If you want to backpack, you’ll need to secure one of the highly sought after overnight permits awarded by the Forest Service through a lottery that opens in February. You can also try for one of the limited same-day permits available at the ranger station in Leavenworth. Either way, you will need a lot of luck.
You DON’T NEED one of these elusive overnight permits if you are a day hiker. But you can’t show up empty-handed. Day users can obtain a free, self-issue, wilderness permit at the trailhead. This is not the same as the very difficult to get overnight permit, required for camping in The Enchantments.
You will need a National Forest Recreation Pass, which can be purchased at the trailhead for $5. The “America The Beautiful National Parks Pass” will also work. This may seem obvious, but if you leave a car at both trailheads, you will need a pass for each vehicle!
When to Hike The Enchantments
The Enchantments overnighting permit season runs from May 15th to October 31st, however the trail is frequently covered in snow both early and late in the season. To be on the safe side, plan your hike for mid-July to late-September. For Larches, some time during the first two weeks of October is generally your best bet. Regardless of when you hike, check both trip reports and weather forecasts before getting started.
What Direction Should You Hike In
You can thru-hike The Enchantments in either direction, but I would suggest starting from the Colchuck Lake Trailhead and ending at the Snow Lake Trail Head. That is the direction that Quin and I hiked in, and that’s the direction that this guide assumes.
Starting at the Colchuck Trailhead allows you to get almost all the elevation gain over with in the first 6.5 miles or so. And a lot of that is during the approximately 1-mile climb up Aasgard Pass. Personally, I will always choose short and really steep over long and still pretty steep.
Moreover, the Snow Lake Trailhead is located almost 2,000 feet below the Colchuck Trial Head. So if you start at the Snow Lake Trailhead, not only will you be traveling uphill for nearly 10 miles, you will be adding 2,000 feet of elevation gain to your hike.
Transportation To The Trailheads
Drive Two Cars: The easiest way to thru-hike the enchantments is to leave one car at the Snow Lake Trailhead and a second car at the Stuart/Colchuck Lake Trailhead. As far as car shuttles go, this one is pretty easy. The trailheads are only 8 miles apart from each other, and you will pass right by the Snow Lake Trailhead on your way to the Stuart/Colchuck Lake Trailhead.
Use A Professional Shuttle Company: If you don’t have access to two cars, you can theoretically use one of the local shuttle systems. Of course, we hiked The Enchantments in October of 2020 (year of Covid-19…or at least the first year…), so the shuttles weren’t running. Loop Connector and Leavenworth Shuttle & Taxi are two local options.
Hitch A Ride: Hitchhiking is always an option, but it comes with risks. Other than the cliche horror flick safety concerns, you have to worry about being able to find a ride at the end of your hike. Colchuck Lake is a popular hike, and during the day, you’ll likely see some people driving up Icicle Creek Road. The thing is, you probably won’t finish your hike until the evening, and not many people drive up to a trailhead at night.
Pro Tip: Budget half an hour for the trip between Snow Lake Trailhead and Stuart/Colchuck Lake Trailhead. It may only be 8 miles, but once you turn off Icicle Creek Road, it’s a bumpy ride on a classic PNW forestry road.
What To Pack For The Enchantments
On the day we hiked The Enchantments, the temperature ranged from about 40° F to 70°. Even though we had nearly perfect weather, I still used almost all my layers at one point or another. The weather can change quickly and dramatically in The Enchantments, and it’s essential to be prepared for anything Mother Nature feels like throwing your way.
Storage
BACKPACK: Osprey Tempest 22 Pack for women and the Osprey Talon 22 for men. My go to when I need a little more space without sacrificing comfort. It carries beautifully, cinches in close, and has enough pockets to keep everything organized without feeling fussy.
RUNNING VEST: I’ve started using a running vest for hikes when I don’t need much gear because it keeps everything light, close, and easy to grab without taking off my pack. The Salomon Active Skin 8 has become my favorite because it fits like a hug, carries water up front, and has just enough space for the basics without ever feeling bulky.
Clothing
SUN SHIRT – The Crater Lake Hoody is my favorite sun shirt because it’s so light and soft it almost feels like air. It offers full UPF 50+ protection for long days in exposed terrain, so I don’t have to carry buckets of sunscreen.
SHORTS – You don’t need to reinvent the wheel here. Whatever works for you! I’ve been really enjoying the Lululemon Pace Rival High Rise Shorts and Outdoor Voices Warmup 5” Shorts.
HIKING PANTS – To be honest I’ve never been a big hiking pants person. I generally just wear one of my favorite pairs of leggings, because that’s what I’m most comfortable in. But this summer I picked up a pair of REI Trailmade Pants and they were nice! The Trailmade Pants are affordable, durable, and surprisingly versatile for hiking and backpacking. And I have to admit it was nice to have a pair of pants that were a bit more airy than leggings.
INSULATED LAYER (Down Jacket) – The Patagonia Fitz Roy Down Jacket is a cold-weather essential I bring on alpine or winter trips when serious warmth is non-negotiable. It’s stuffed with premium 800-fill down, so it’s incredibly warm for its weight. I’d recommend sizing down. But when I’m really trying to go lighter without sacrificing warmth it’s hard to beat Rab’s Mythic G Down Jacket. Best to pick this one up on sale if you can!
RAIN JACKET: The Rab Phantom Jacket is an ultralight, fully waterproof shell that packs down small and disappears in your bag until you need it. I’m a fair weather hiker, but in the mountains weather can change fast, so it’s great to have rain protection that doesn’t weigh me down.
Shoes
TRAIL RUNNERS – The Hoka Challenger Trail Running Shoes is my go-to shoe for warm weather hiking. I prefer trail runners over hiking boots because they’re lighter, more breathable, and dry quickly. I’ve worn mine on everything from day hikes to multi-day trips like the John Muir Trail, and they’ve been incredibly durable for how lightweight they are.
BOOTS – The Danner Inquire Chukka Mid is my favorite hiking boot! I wear it when I want more ankle support than a trail runner but still need something light and flexible. Or when I just want to look cute!
Hiking Gear Essentials
WATER PURIFIER – The Katadyn BeFree is my favorite filter for speed and simplicity. It’s ultralight, easy to squeeze, and perfect for quickly filling bottles on the go.
The Grayl Water Filter is much heavier but unbeatable for international travel or areas with questionable water sources because it removes viruses as well as bacteria and protozoa. It works like a French press—fill, press, and drink—with no need for extra bottles or gear.
HEADLAMP – Nitecore NU25 400 Lumen Rechargeable Headlamp
GPS COMMUNICATION – I carry the Garmin InReach Messenger Plus for peace of mind on backcountry trips — it lets me send texts and share my location even when there’s no service. The battery lasts for days, and it’s a small, reliable way to stay connected and safe when I’m off the grid. AND you can send photos and voice notes! Watch the video I made about the Garmin Messenger Plus! It’s one of my favorites.
** Garmin also recently released the new inReach Mini 3 with photo and voice messaging capabilities. So you’ve got lots of good options!
SMART WATCH – I’ve been wearing the Garmin Fenix Watch to track my activity for years, and the JMT was no exception.
TREKKING POLES – Durston Iceline Trekking Poles. I just picked up the Durston Iceline Trekking Poles because I wanted something ultralight but sturdy to take pressure off my knees on big hikes. They’re incredibly light (under 10 oz per pair) and I couldn’t be happier with them.
MULTI-TOOL – Swiss Army Classic Knife
FIRST AID – Band-Aids, Leukotape, pain relievers, and antibacterial cream.
POWER BANK – Nitecore Power Bank
Camera
At some point, you’re going to want to take a photo – even if it’s just on your phone! Given the hike’s difficulty, Quin and I tried to minimize the heavy camera gear we packed.
SONY RX100 VII – The Sony RX100 VII is my favorite compact camera for backpacking because it’s small enough to slip in a pocket but still delivers professional-quality photos. The 24–200mm zoom range makes it incredibly versatile, and it’s the perfect option when I don’t want to carry one of my heavier cameras but still care about image quality.
Check out my COMPLETE CAMERA GEAR GUIDE for a list of the gear we use on our travels!
Bug Spray:
Mosquitos are notoriously vicious in The Cascades. By the time we hiked The Enchantments in October, it wasn’t an issue. But if you’re hiking in July or August, Bug Spray is a must.
Pro Tip: Always be aware of the weather. If you are hiking The Enchantments early in the season (basically before mid-July), you may encounter snow and ice at the higher elevations. If that’s the case, you may want to pack micro-spikes or other traction devices. Make sure to check Washington Trails Association or AllTrails for an up to date trail reports.
Pro Tip 2: If you’re looking for more outdoor gear and apparel, check out my Complete Hiking and Camping Gear Guide.
Leave No Trace
Leave No Trace is built on seven core principles that outline the best available minimum impact guidance for enjoying the outdoors responsibly. The principles include:
Plan Ahead and Prepare
Travel and Camp on Durable Surfaces (aka stay on the trail)
Dispose of Waste Properly (use the provided pit toilets)
Leave What You Find
Minimize Campfire Impacts (There are no campfires permitted in The Enchantments)
Respect Wildlife
- Be Considerate of Other Visitors
I encourage you to visit The Leave No Trace Center for Outdoor Ethics for more detail regarding these priciples, as well as information on how you can protect the beautiful places we all love so much. © 1999 by the Leave No Trace Center for Outdoor Ethics: www.LNT.org.
Pro Tip: There are well-signed pit toilets strategically placed throughout The Enchantments. Please use them for your solid waste needs! (we’re talking poop here, not garbage). There’s really no excuse not to.
LNT & Mountain Goat: Mountain Goats are attracted to the salt in human urine (which is why you often see them near trails or at campsites). This is also why it’s recommended that you pee on large rock surfaces. Otherwise, the goats may dig up fragile vegetation to get the salt.
In The Enchantments, Mountain Goats have been known to occasionally follow people around. While they are pretty darn cute, they are also wild animals, and can be aggressive. Do not follow, harass, or feed them. If you feel threatened, you can toss rocks at the goats to scare them off. But this should be a last resort.
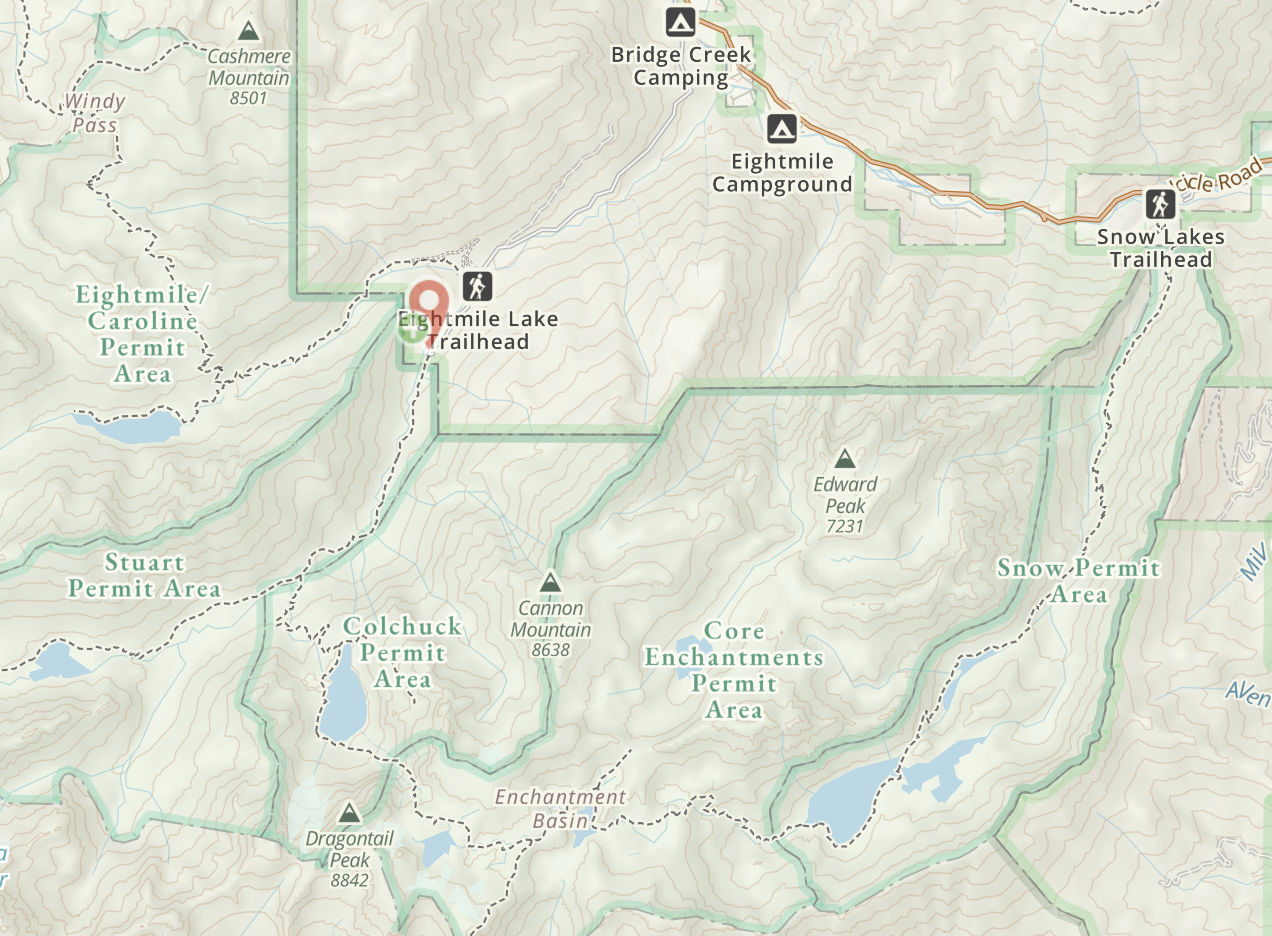
Start at the Stuart/Colchuck Lakes Trailhead (Labeled as the Eightmile Lake Trialhead for some reason on this map) and finnish at the Snow Lakes Trailhead.
How To Thru-Hike The Enchantments
I’ve broken the thru-hike down into a few different segments. Approaching the hike in this way will help with time management and expectations. With no further ado, let’s get hiking!
Stuart/Colchuck Lakes Trailhead To Colchuck Lake
Distance: 4.5 miles
Total Distance Hiked: 4.5 miles
Difficulty: Moderate
Elevation Gain: 2300
Time: 2 hours
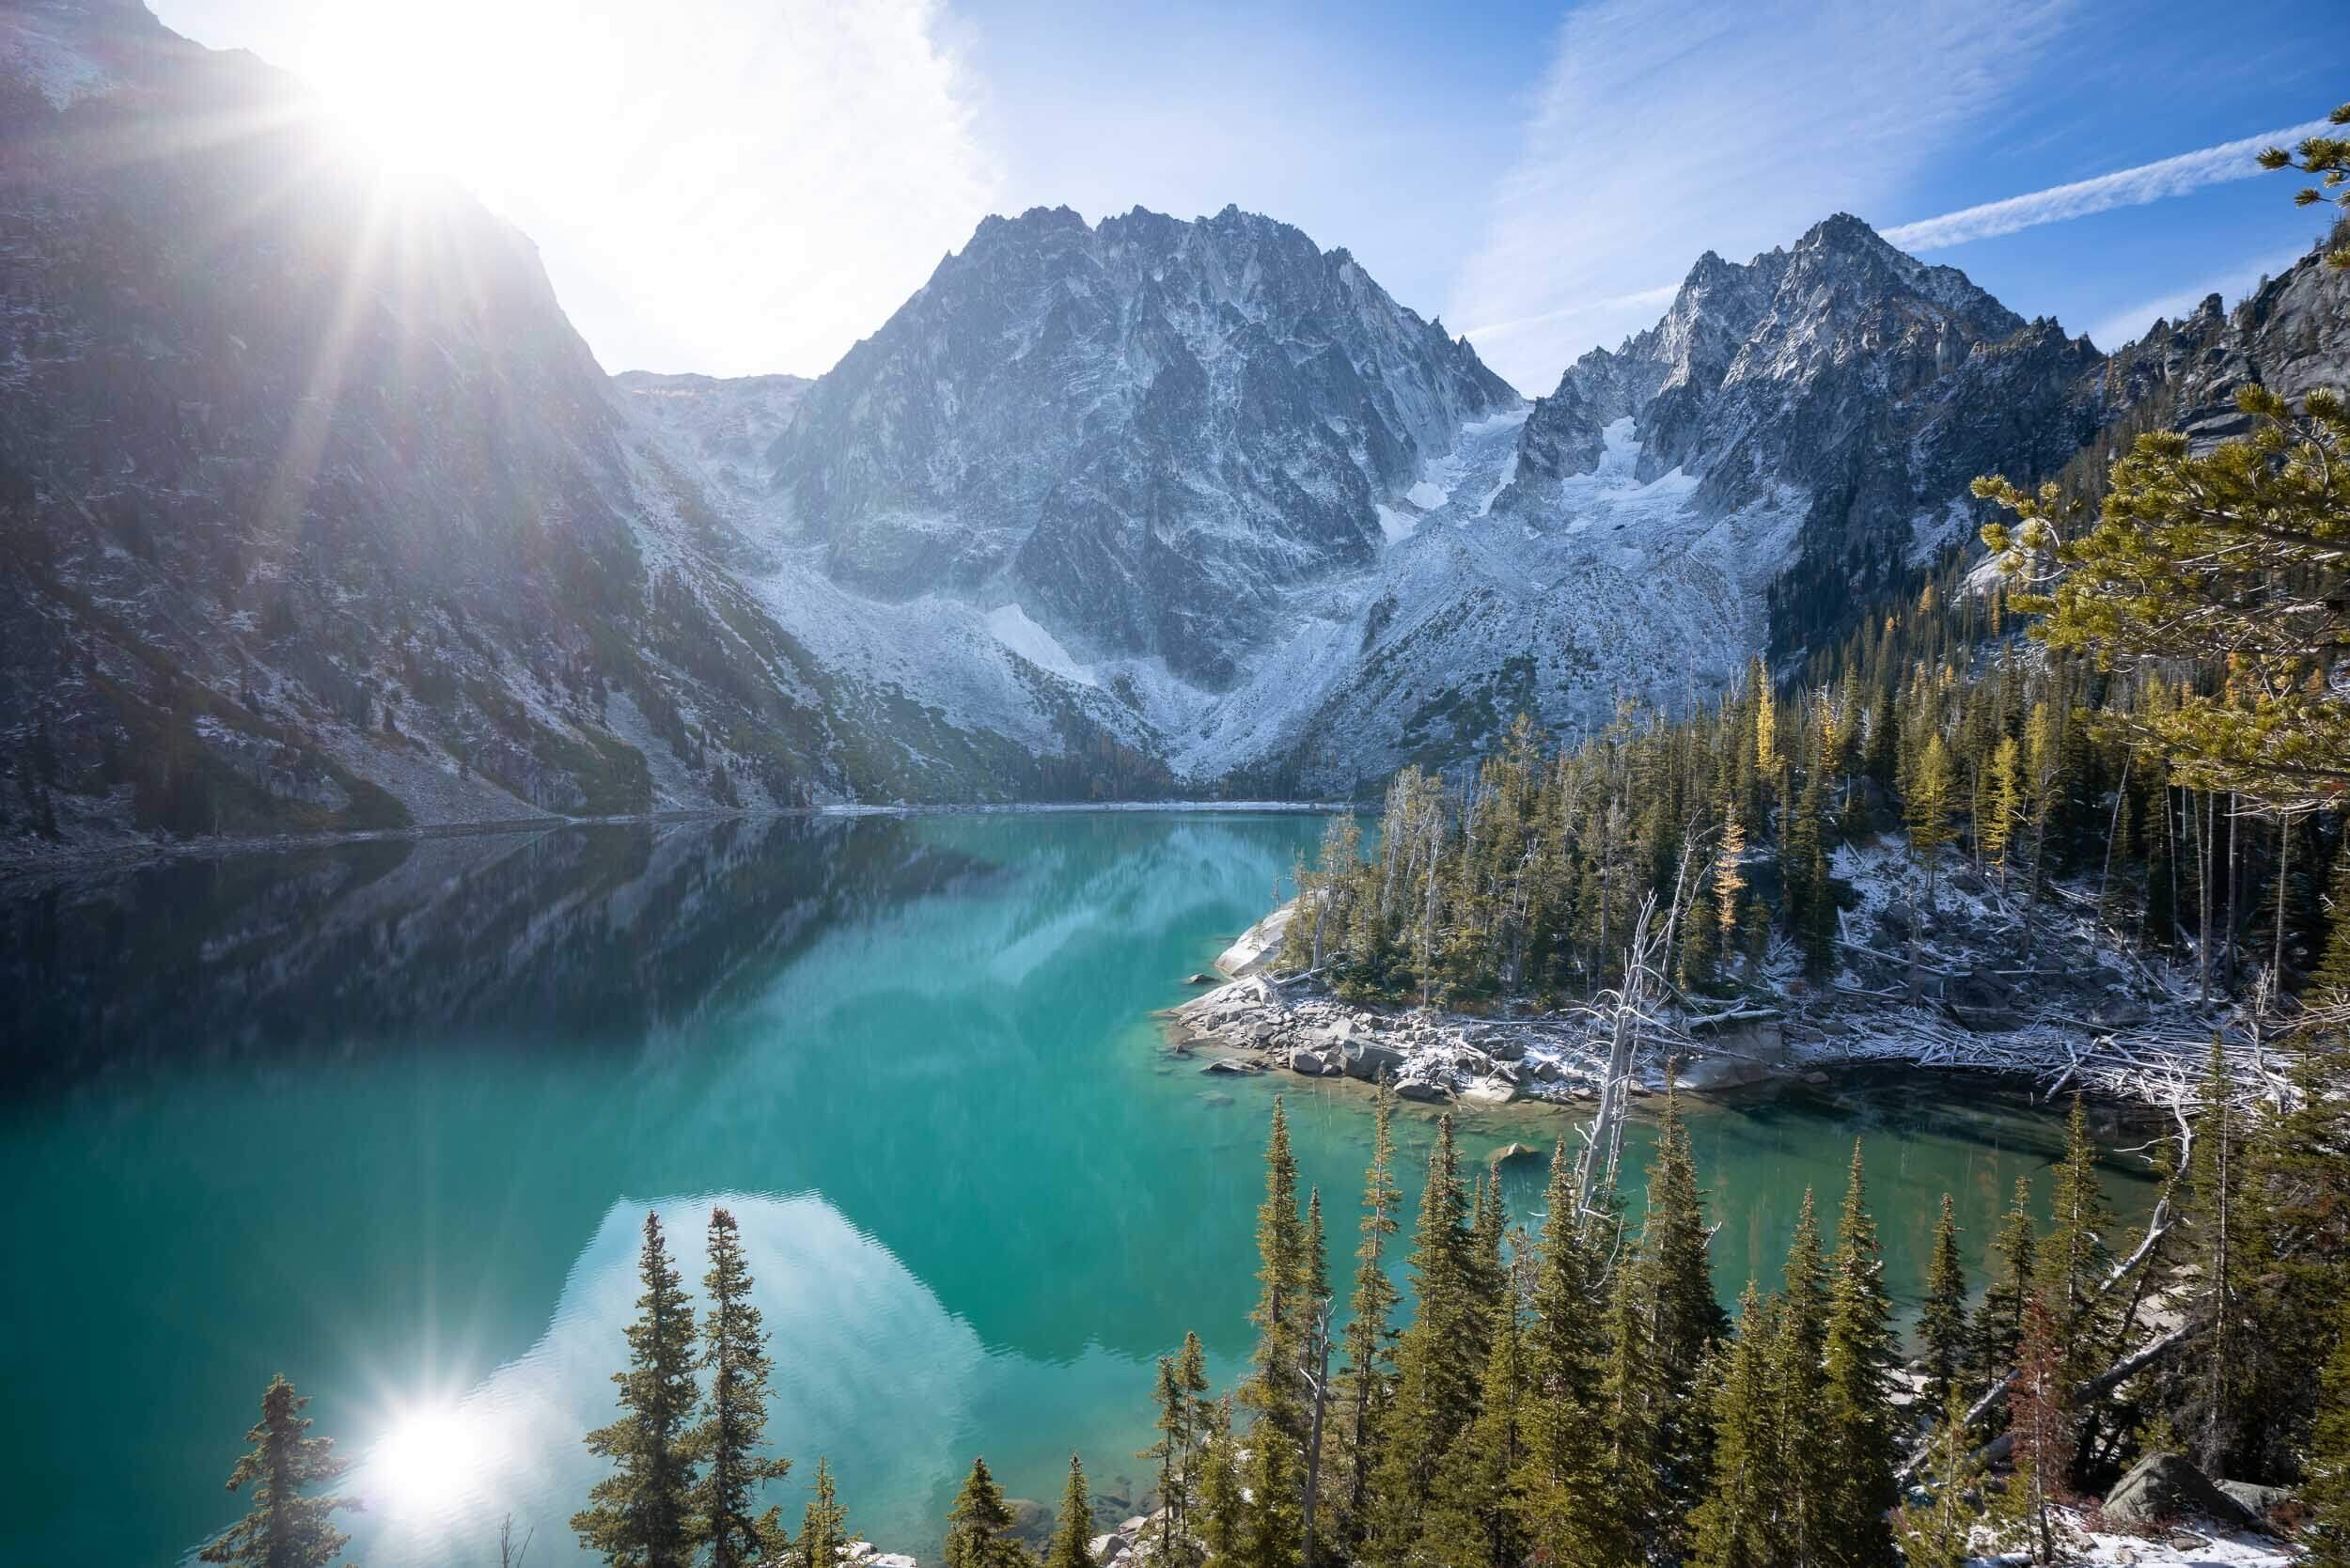
Views of Colchuck Lake. Dragontail Peak is the prominent peek directly across the lake in this image, and Aasgard pass is just to the left of Dragontail Peak.
Early morning reflections at Colchuck Lake.
We left our van in the Stuart/Colchuck Lake Trailhead parking lot at 5 AM. I filled out the day permit and attached it to my backpack the night before, knowing that I’d be a little more than a half-brained zombie at that ungodly hour. It was pitch black outside, but a dozen or so bobbing headlights milling around let me know that we weren’t alone, despite the early walkup call. I knew the trail would be busy; it was Larch season after all. I was still a little surprised, given the hike’s difficulty and the fact that it was a Tuesday morning. But it’s also 2020, and the days of the week stopped having meaning for most of us months ago.
I was happy to do this portion of the trail in the dark. I’ve done it before, and while the forest is pretty, there aren’t any real views to speak of – so you aren’t missing out on much. The first two miles or so are relatively comfortable with only a slight incline. The second half is more difficult, but it’s a nice warm up for what’s to come. Plus, you can take a much-deserved break when you reach Colchuck Lake!
Pro Tip: Don’t miss the turnoff to Colchuck Lake! After a series of rocky switchbacks, you will reach the trail junction for Stuart and Colchuck Lakes (approximately 2.5 miles in). You want to go left. There is a sign, but it can be easy to miss in the dark. Shortly after turning onto the Colchuck Lake Trail, you will cross a log bridge. The trail heads right after the bridge.
Colchuck Lake To The Start Of Aasgard Pass
Distance: 1.25 miles
Total Distance Hiked: 5.75 miles
Difficulty: Easy
Elevation Gain: Relatively flat. The most challenging part of this section is a short boulder field crossing at the lake’s end.
Time: 45 minutes
You’ll need to cross this relatively short bolder field to reach the bottom of Aasgard Pass.
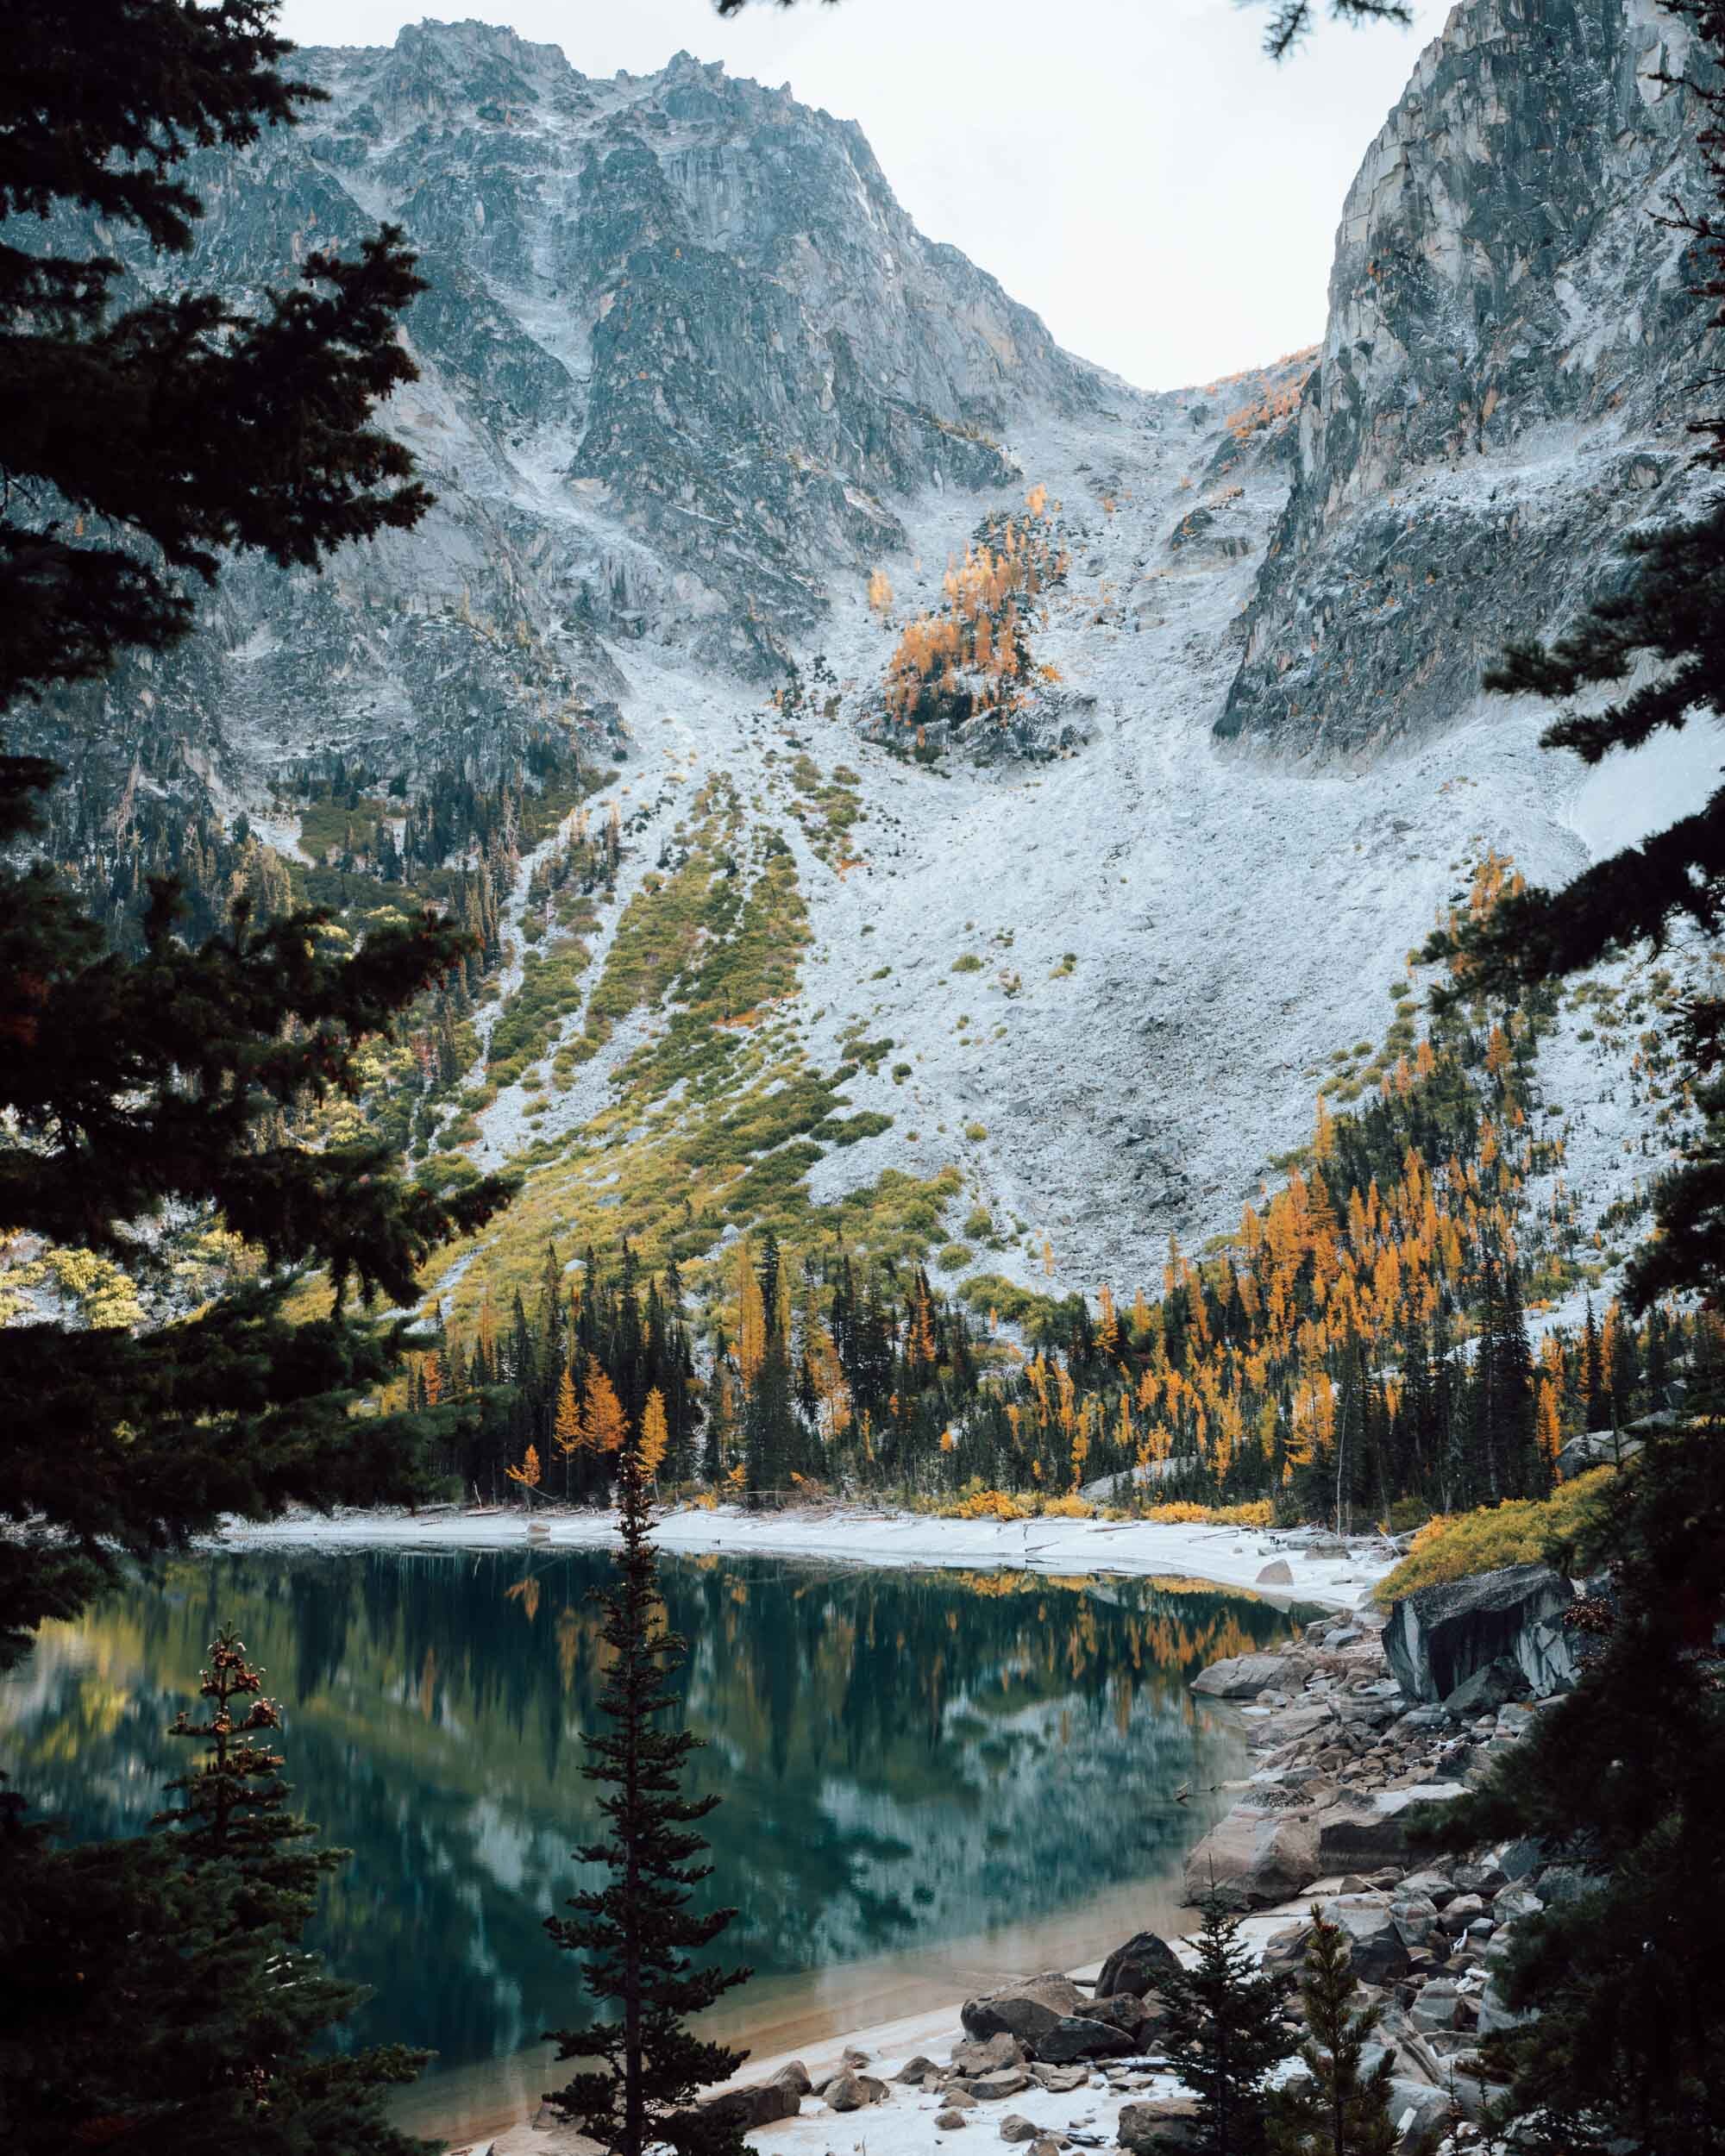
Colchuck Lake is a popular destination in and of itself, and it’s not difficult to see why. If I hadn’t already been many times, it would have been tough to continue without spending a significant amount of time here. At the very least, I’d suggest taking a short break to admire the views of Aasgard Pass, waiting for you on the other side of Colchuck’s brilliant blue water. You can see the Pass on the right side of Dragontail Peak.
Once you’ve finished admiring the views at Colchuck Lake, follow the trail counter-clockwise until you reach Aasgard Pass. You will need to navigate a boulder field at the far end of the lake. There are cairns, but it’s not always clear where the trail is. It also doesn’t really matter. Just keep moving forward, and eventually, you’ll get dumped back out on the trail.
Aasgard Pass
Distance: 1 mile
Total Distance Hiked: 6.75 miles
Difficulty: Extremely Difficult
Elevation Gain: 2,000 feet
Time: 1.5 hours
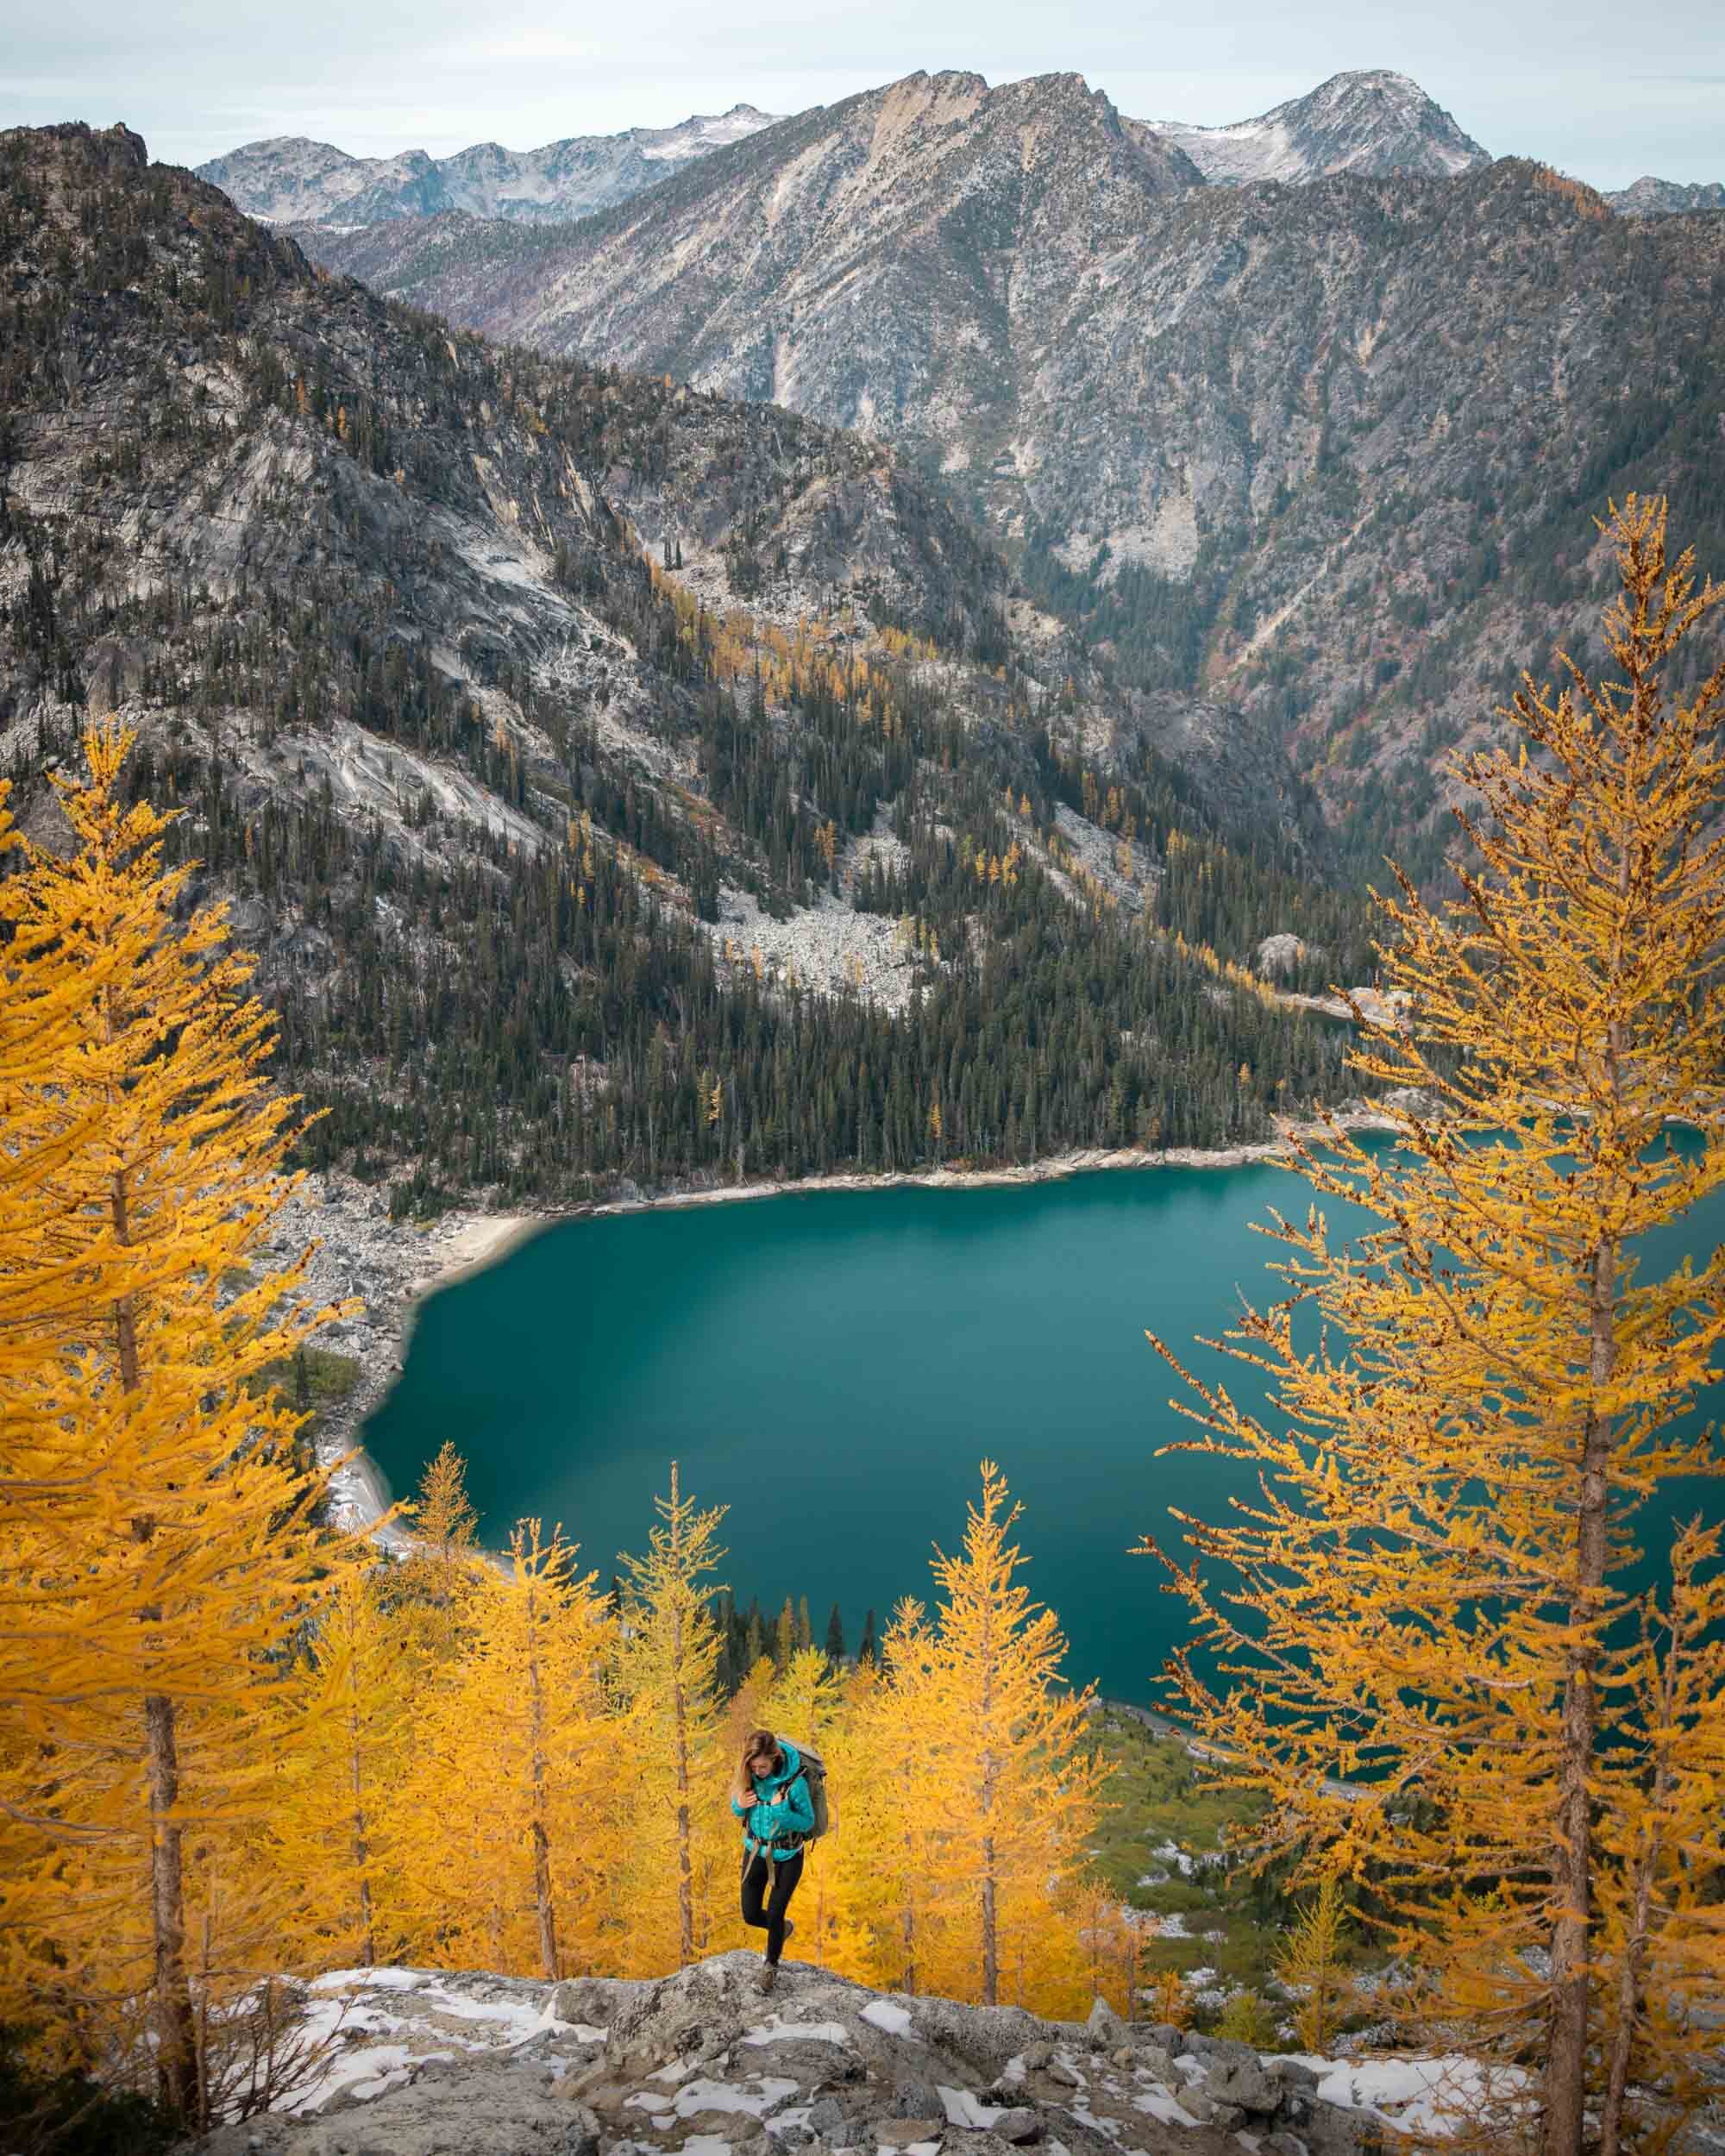
The Larches above Colchuch Lake generally turn gold in early October. Wearing: Prana Pillar Legging, Rab Down Jacket, Keen Hiking Boots.
You’ve got this! I’ve hiked up Aasgard Pass three times in my life, and each time it was far longer and harder than I remember it being. But the part I want to emphasize here is that I’ve done it three times! Which means that it’s not so hard that I never wanted to do it again. On the contrary, this time around, I was actually pretty excited. This was the first time that I would get to keep going after I reached the top! Spoiler alert: It was more than worth the momentary struggle.
The trail up Aasgard Pass is steep, rocky, and difficult to follow at points. Keep following the rock cairns, and you should be fine. Just make sure that you keep to the left side of the grove of evergreen trees. Otherwise, you head into treacherous territory.
Slow and steady wins the proverbial race up Aasgards Pass. There are multiple false summits, and the Pass is longer than it looks from the base. So take your time, stop for water breaks, enjoy the increasingly stunning views of Colchuck Lake, and take comfort in the knowledge that this is without question the most difficult part of your journey.
The Core Enchantments
Distance: 3 miles
Total Distance Hiked: 9.75 miles
Difficulty: Easy
Elevation Loss: 1,000 feet
Time: We spent 3 hours in the Core Enchantment Basin. Given the relatively short distance and easy terrain, you could probably do it in half that time if you really hustled – but why would you want to?
Congratulations! You Made it to The Core Enchantments. This is the moment you’ve been waiting for. As the saying goes, it’s all downhill from here. Okay, okay, that’s not technically true. But you could have fooled me.
Quin and I made it to the Pass at 9:30 AM, four and a half hours after saying goodbye to the van. Almost immediately, we were surrounded by sparkling alpine lakes stretching out in every direction across the granite landscape. We hadn’t eaten anything yet, so we took the opportunity to find a nice spot in the sun overlooking Tranquil Lake and feasted on the baguette and cheese we had packed. As it turned out this meal, would be the only substantial meal we ate until we got back to the van almost 14 hours later.
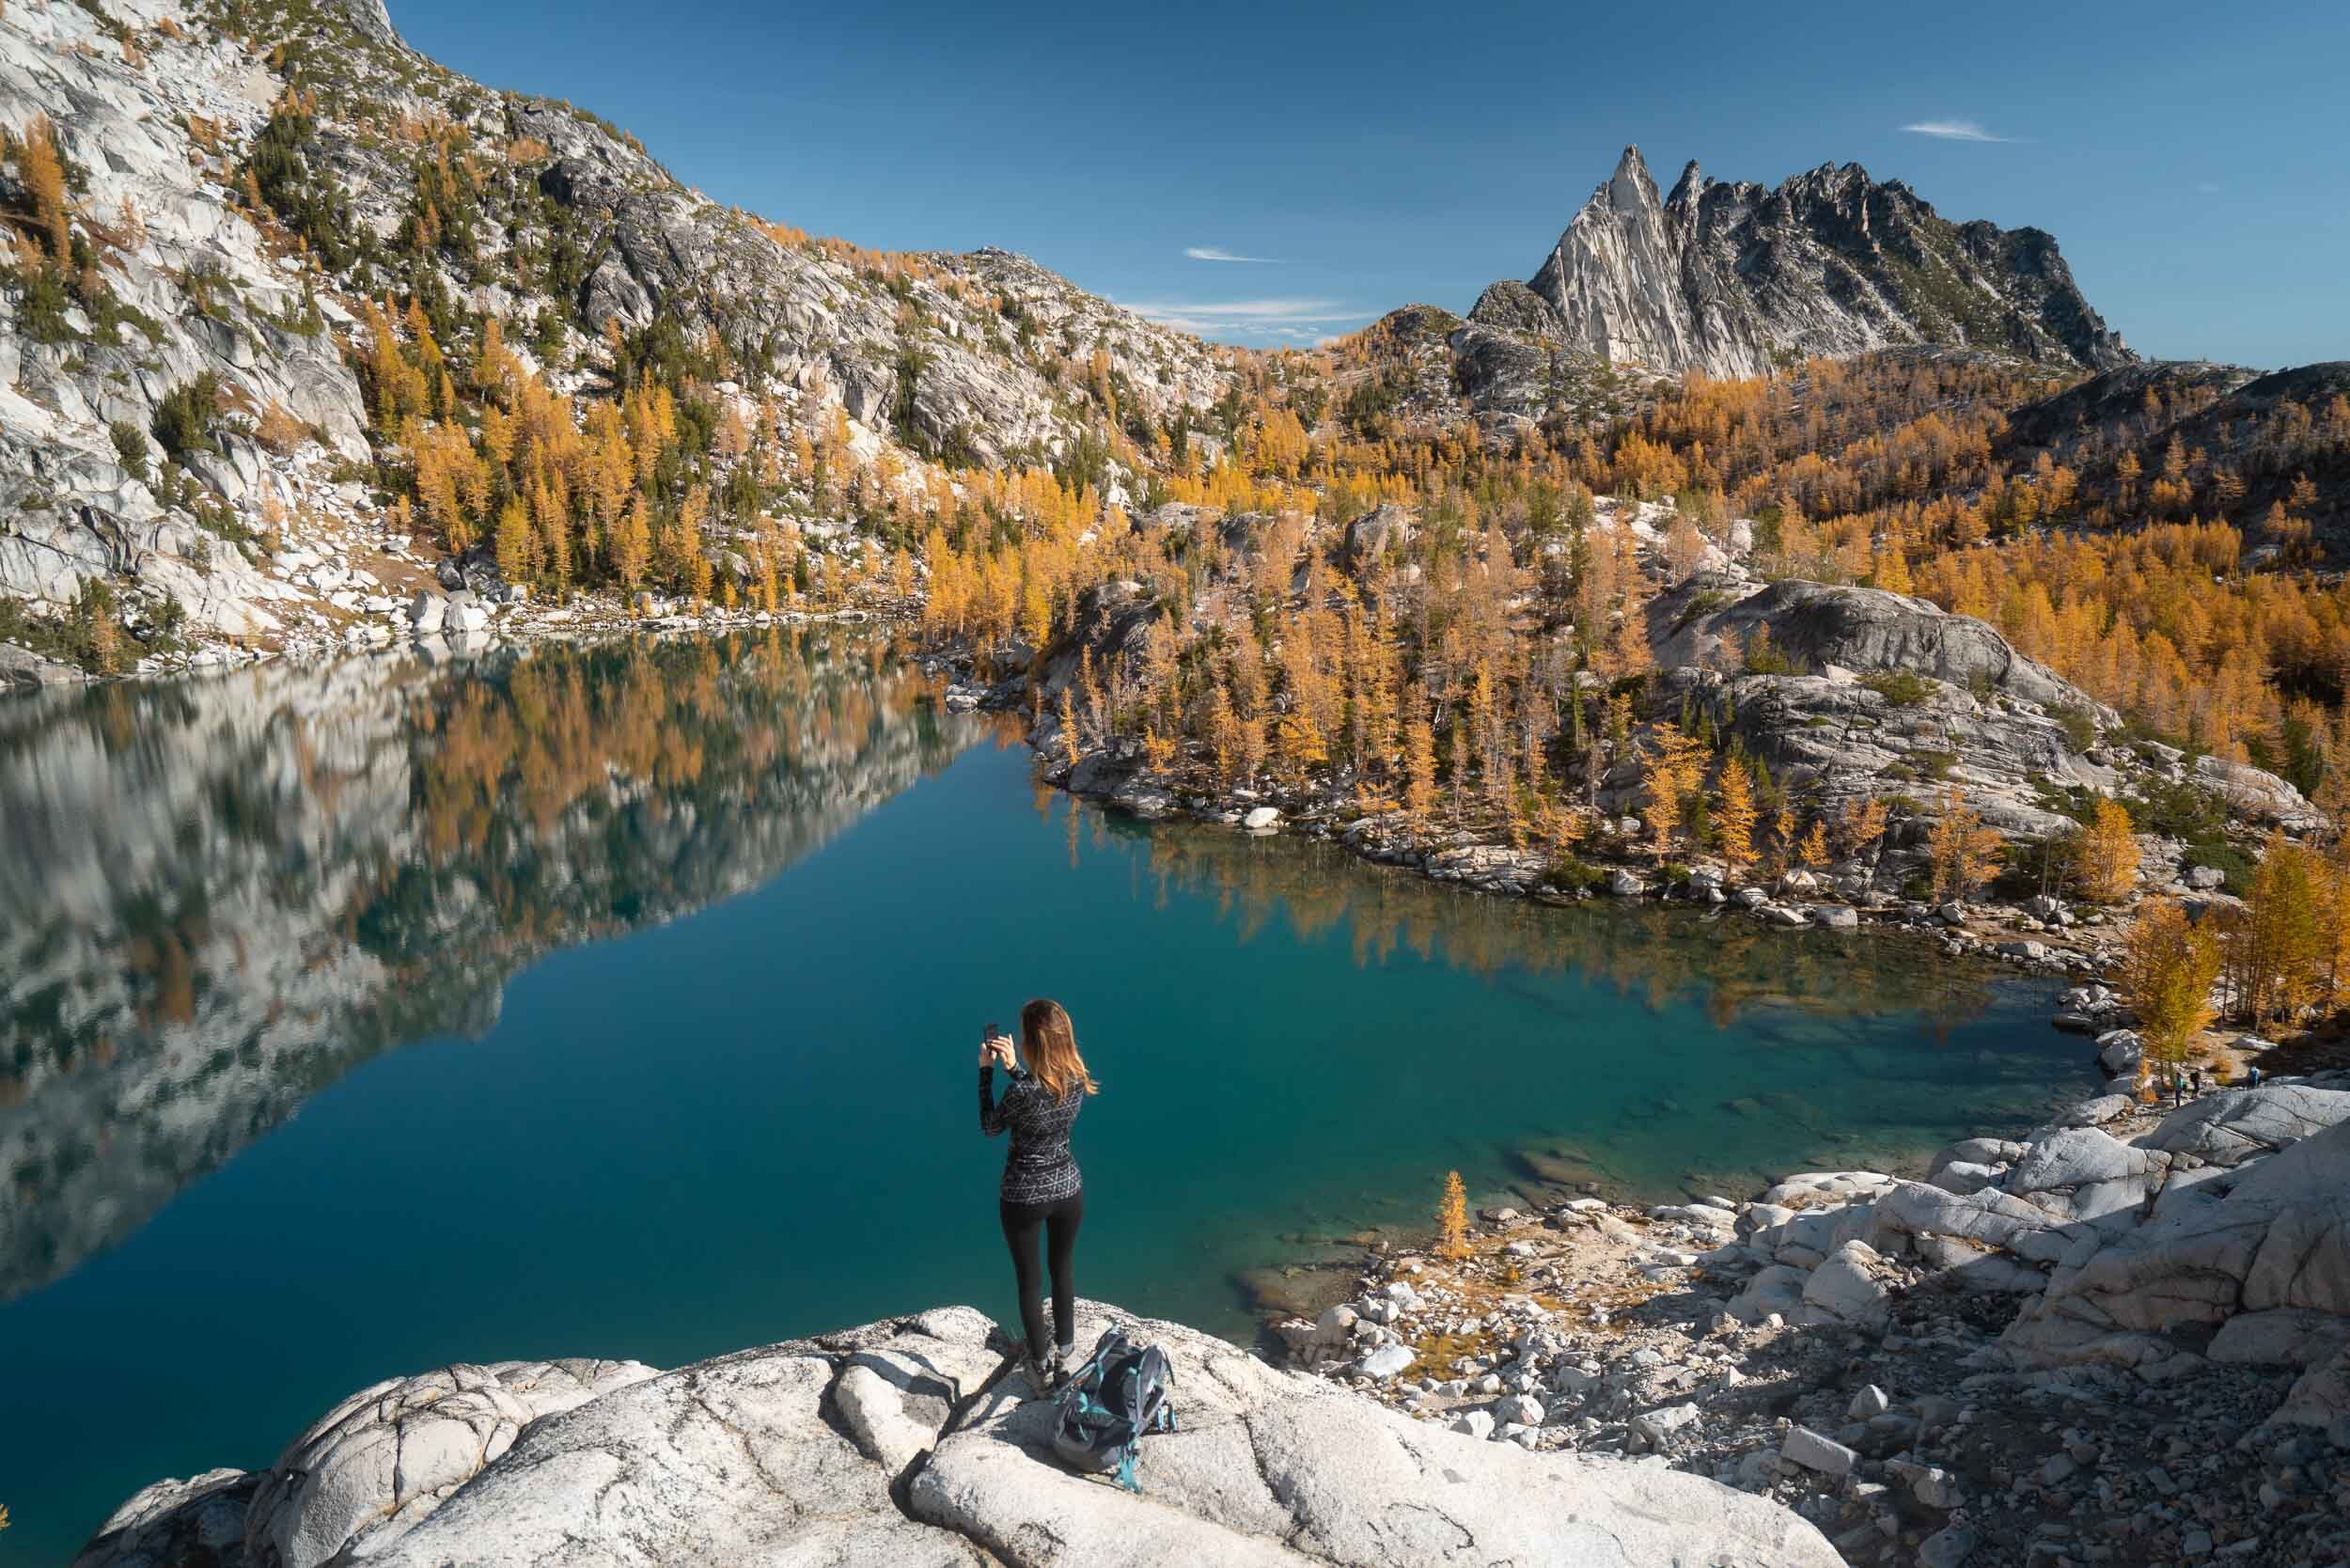
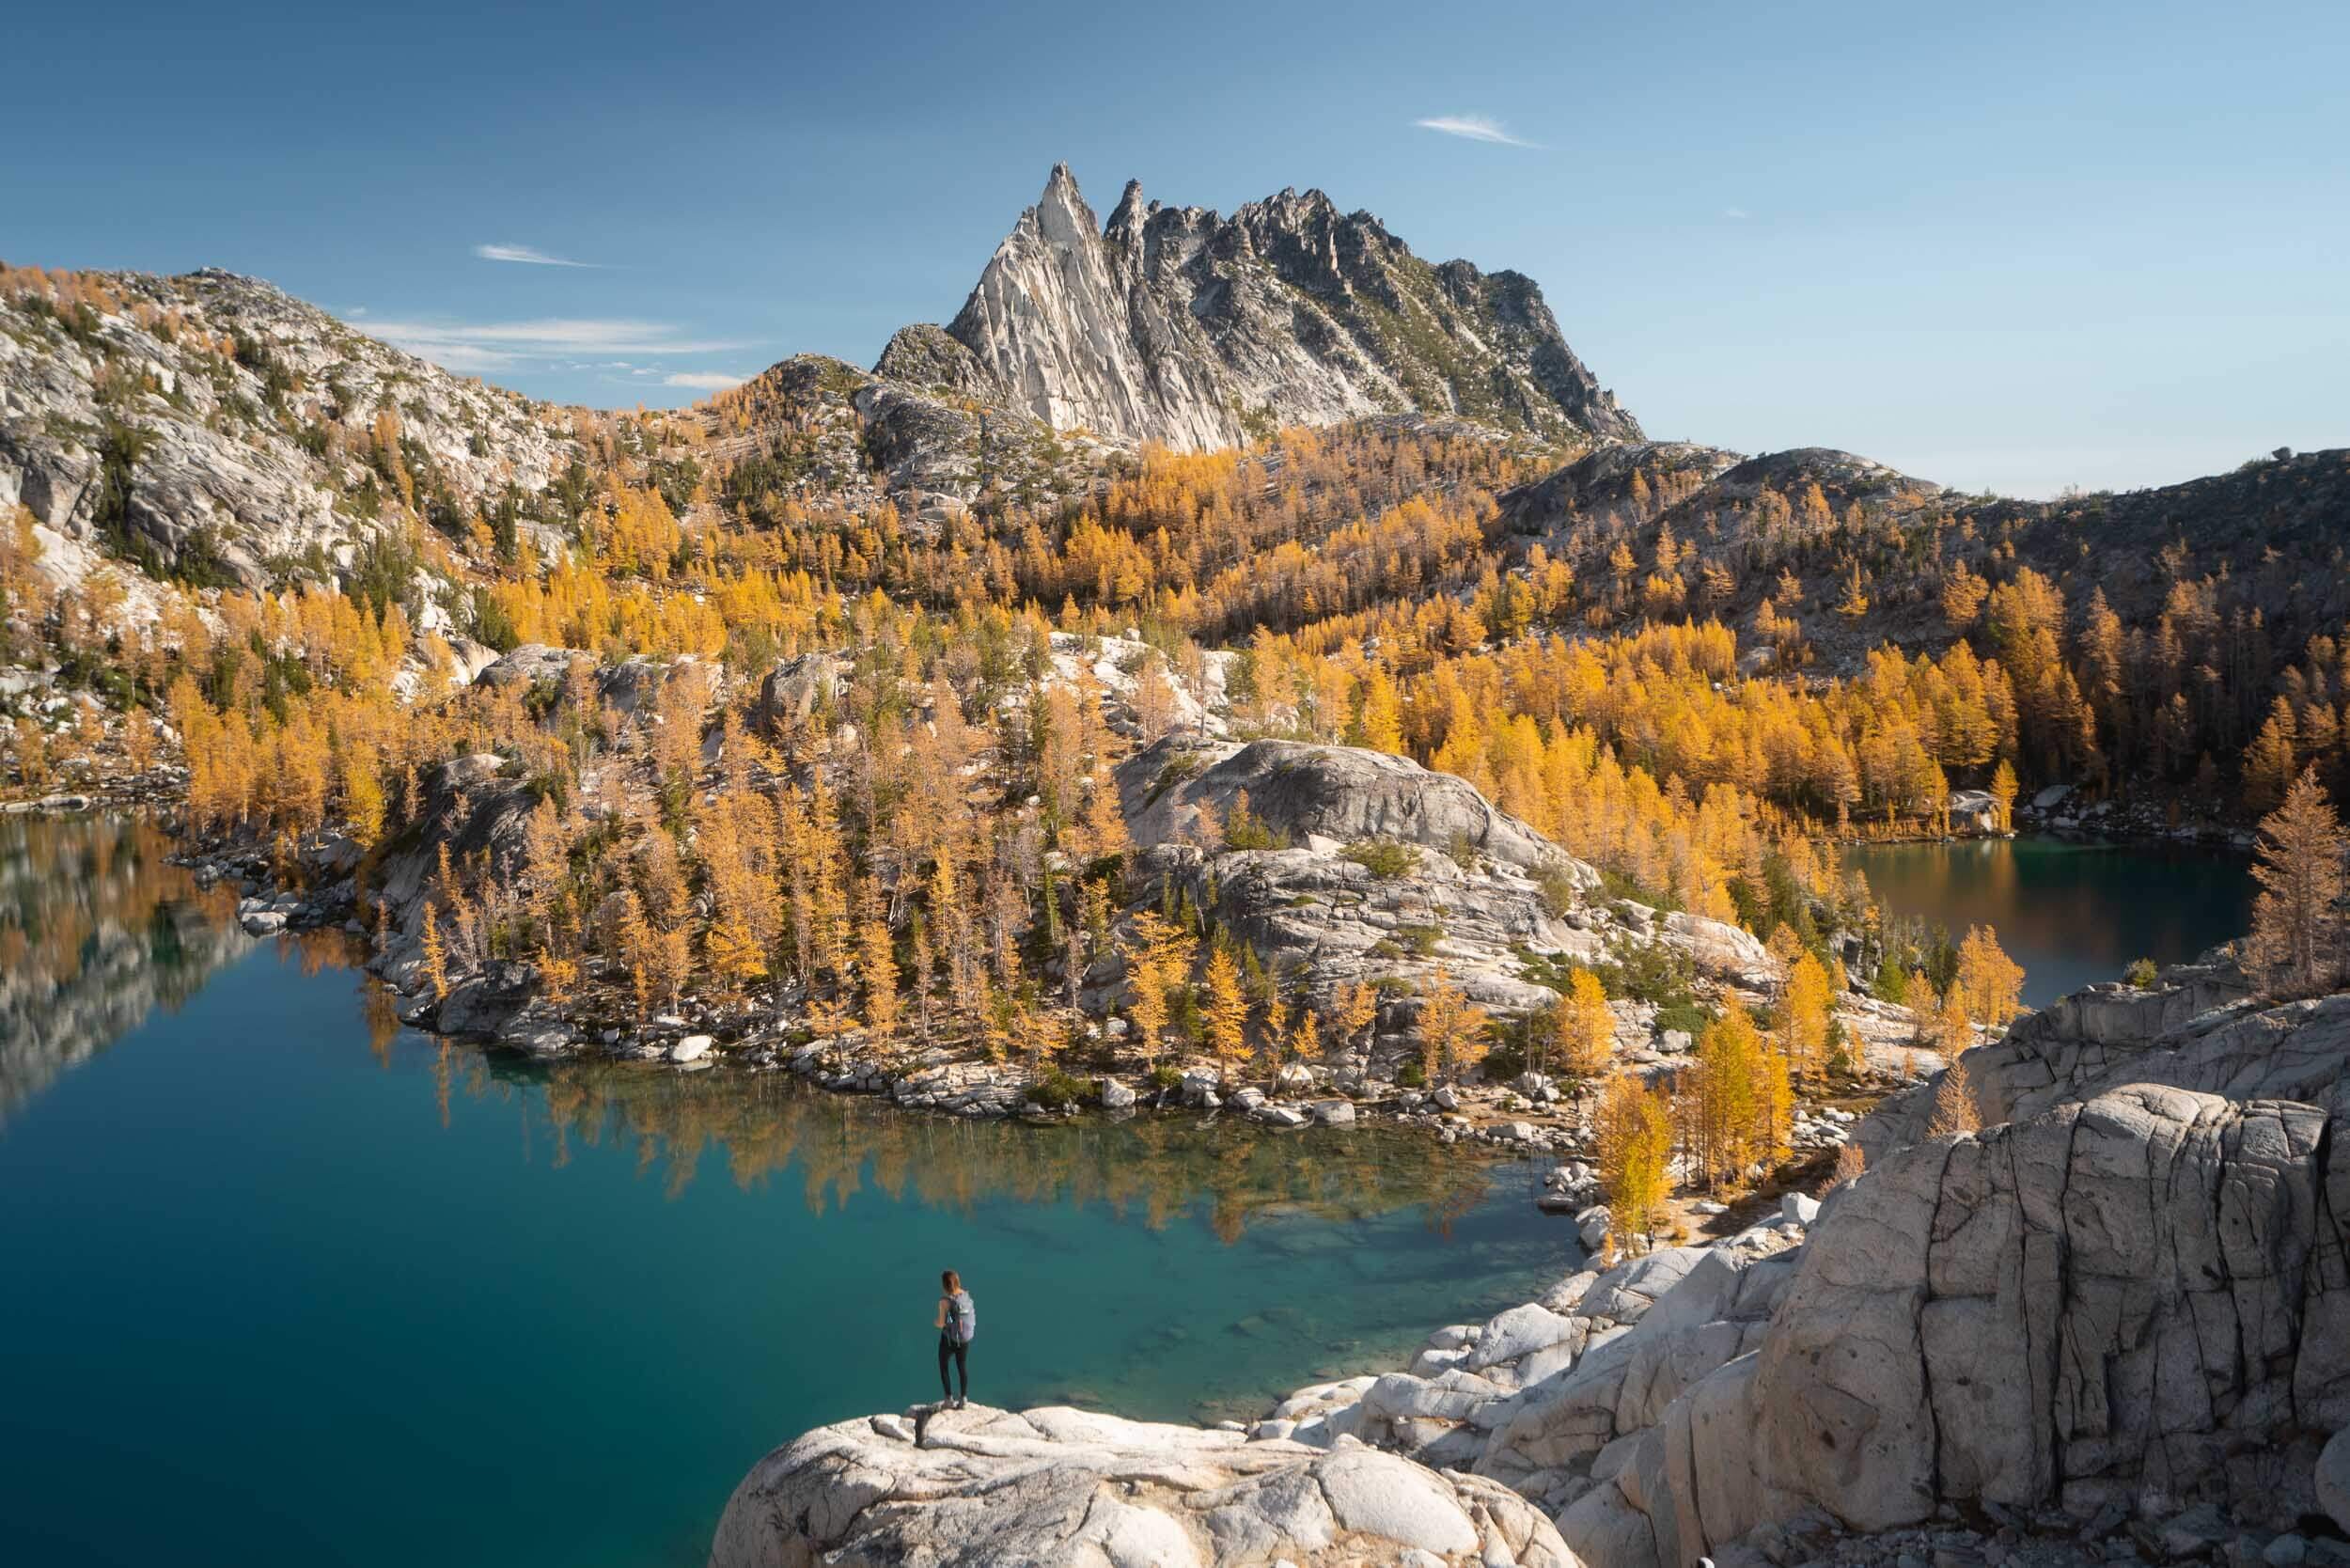
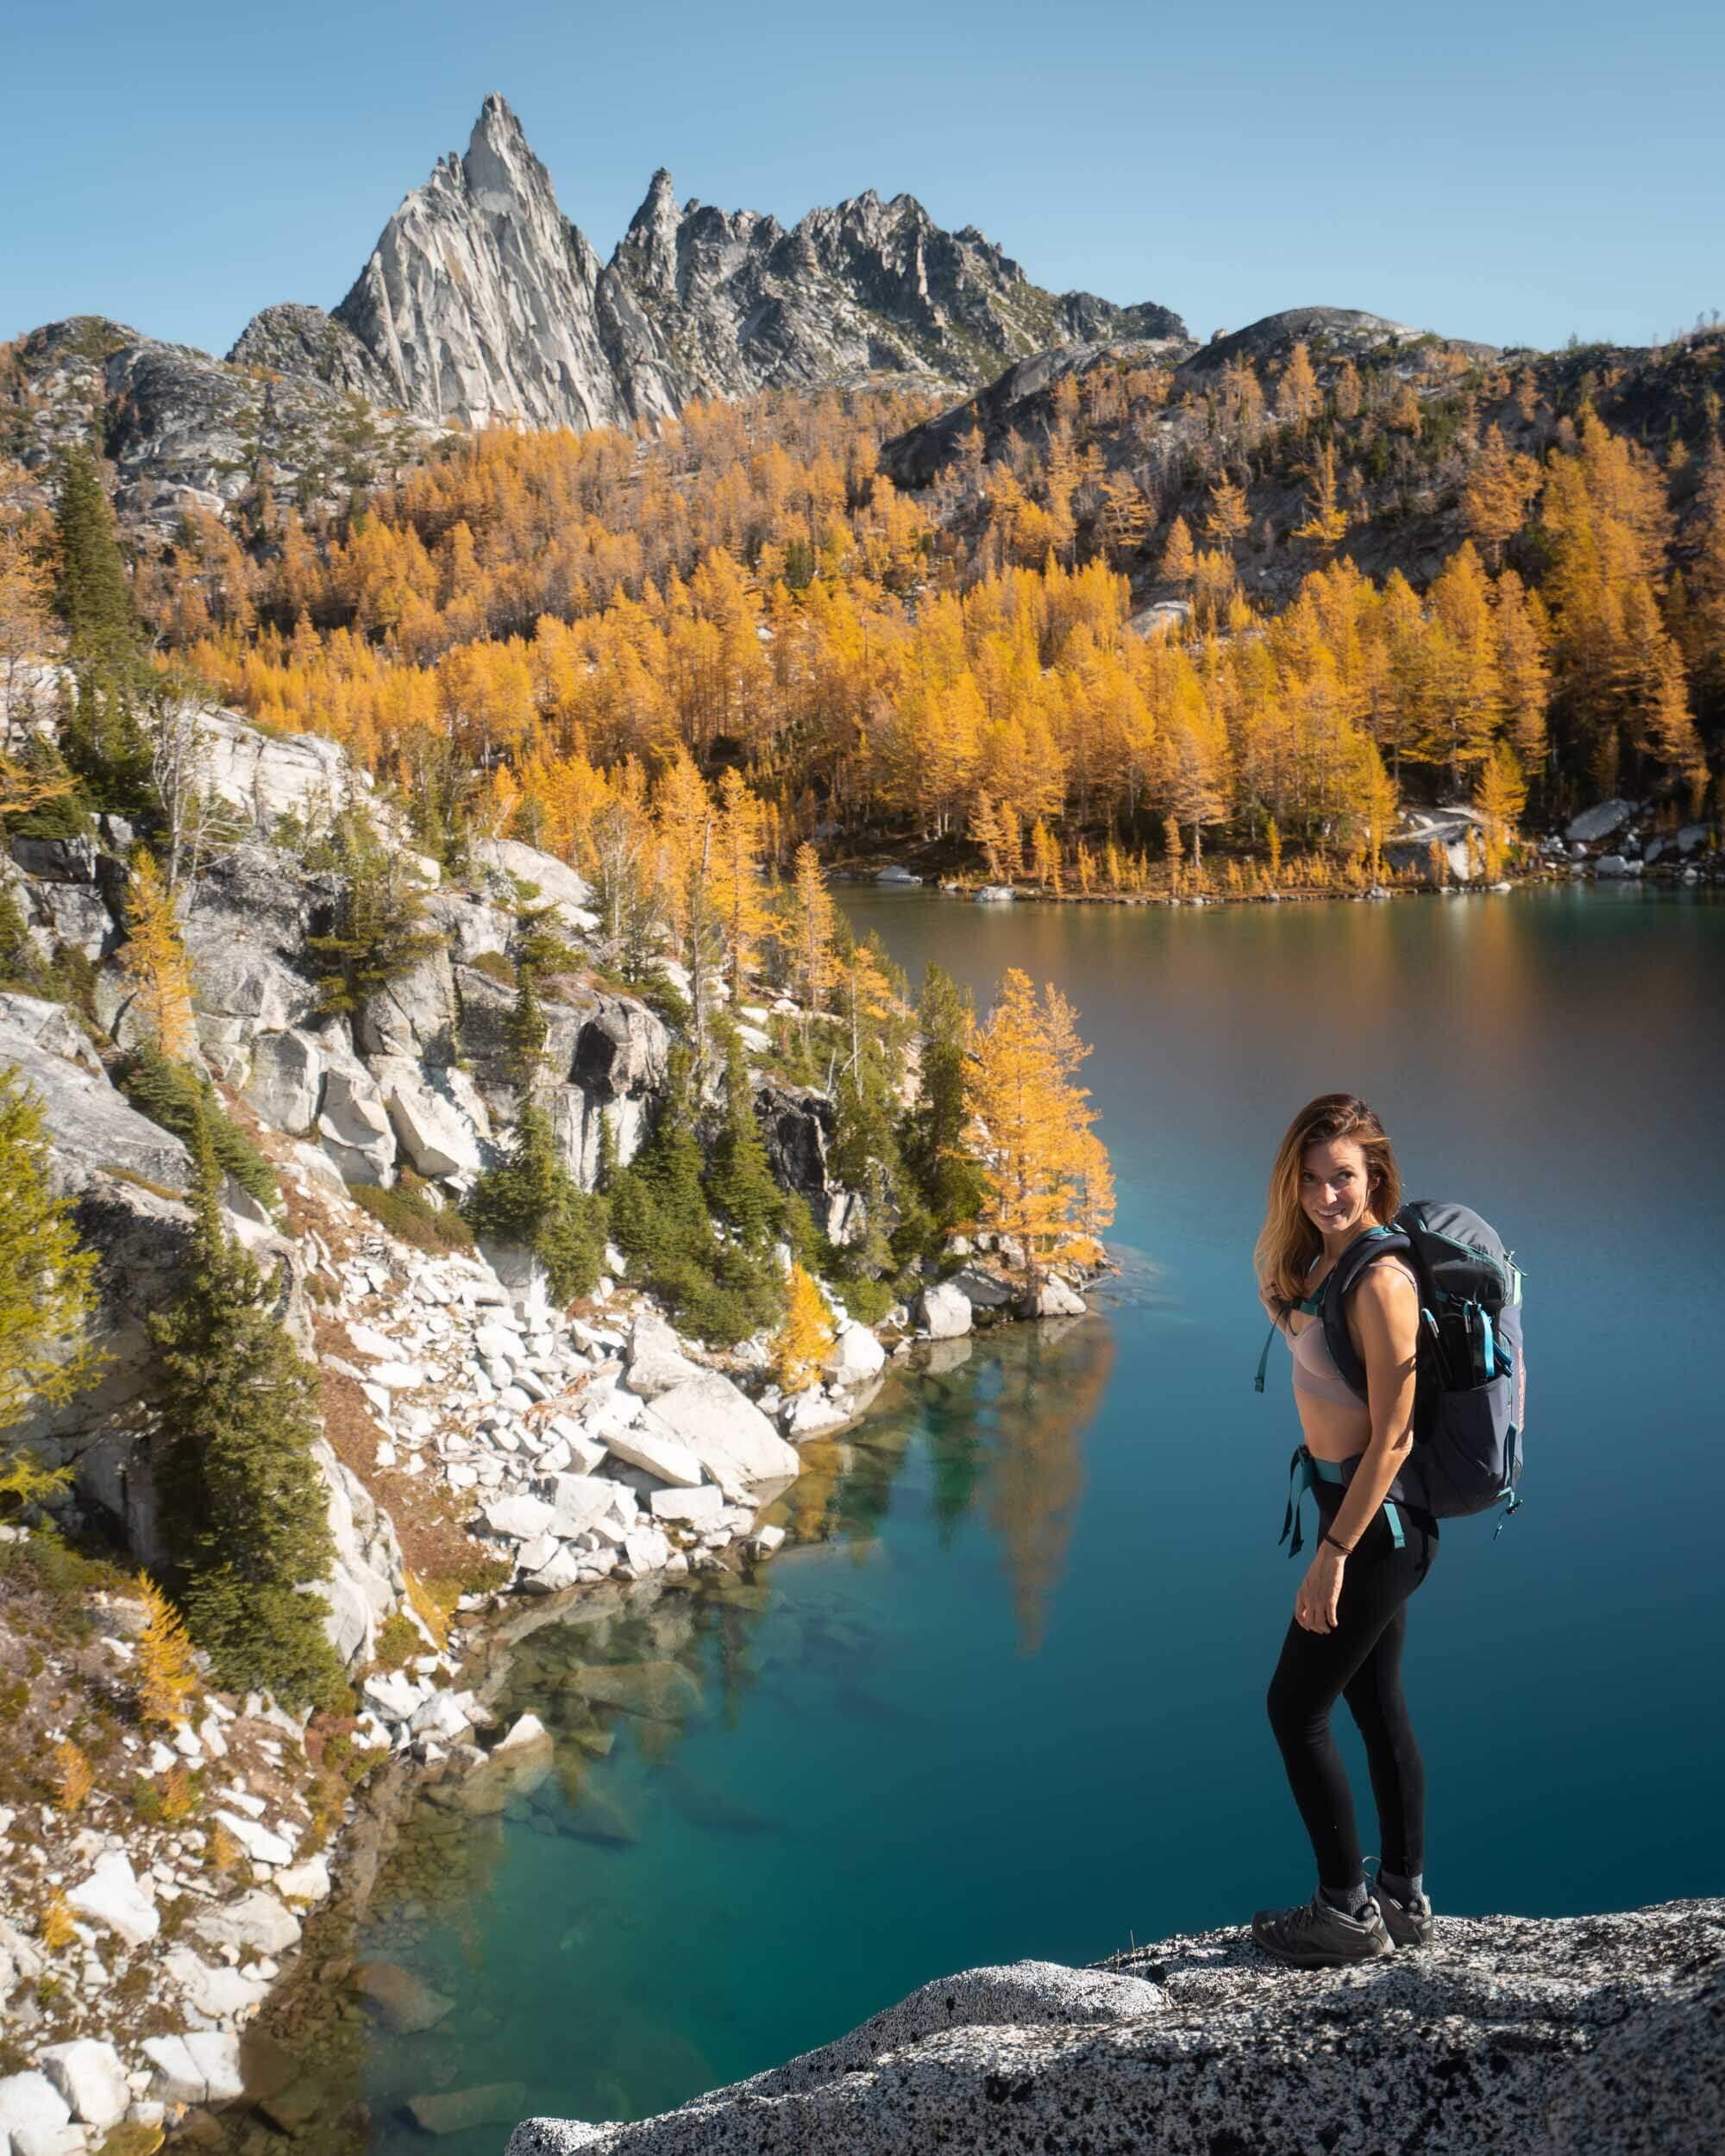
The view of Prusik Peak looming over Inspiration Lake. Wearing Icebreaker base layers for my top and bottom.

After about 10 miles of hiking my feet were ready for an ice bath!
Once we left Tranquil Lake, we made our way past several smaller lakes until we hit the Pass overlooking the Core Enchantment Basin. The view of Prusik Peak looming over Inspiration Lake at this point is one of the best on the entire trail – or anywhere, for that matter. A close second were the views of Prusik Peak from above Perfection Lake.
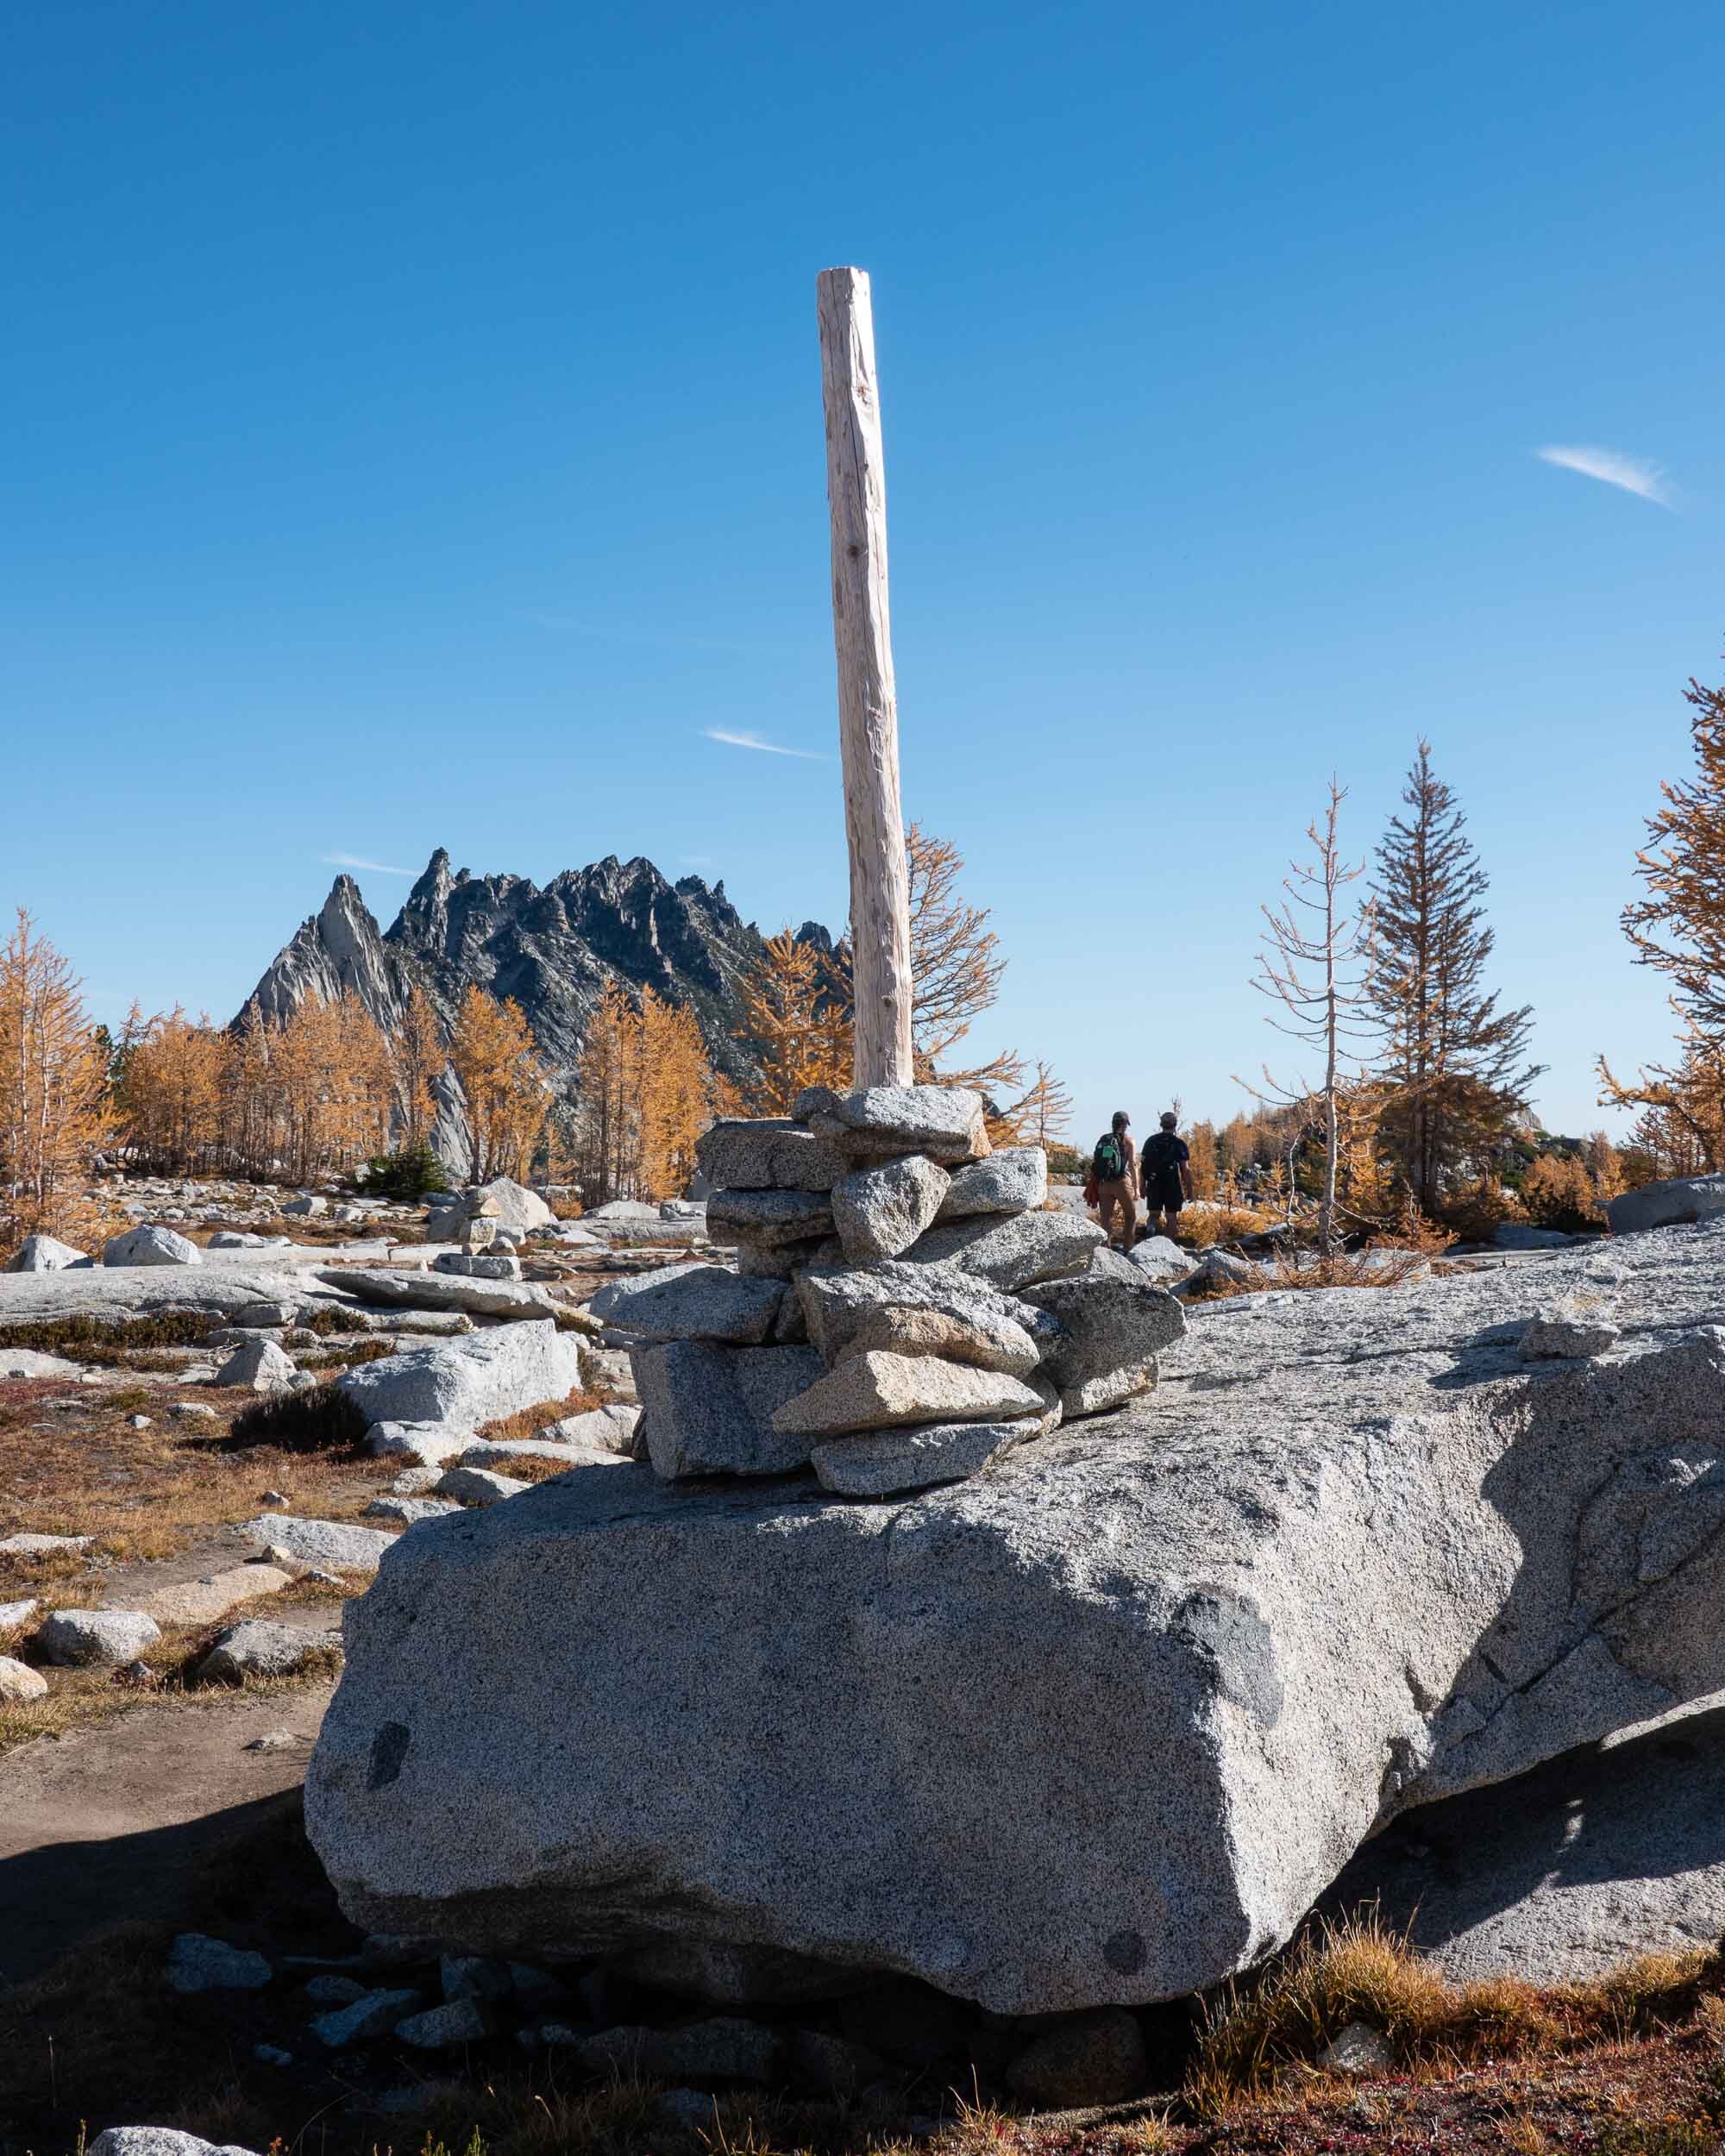
Rock cairns mark the trail through large portions of The Core Enchantments.
Pro Tip: Because a large portion of the trail through the Core Enchantments traverses over large slabs of granite, it can be easy to lose the trail. However, numerous cairns mark the way. Try and stick to the path designated by the cairns to avoid created unnecessary and confusing social paths through the landscape.
Descent From Core Enchantments To Snow Lake
Distance: 1.5 miles
Total Distance Hiked: 11.25 miles
Difficulty: Difficult
Elevation Loss: 1,400 feet
Time: 1 hours
Once we reached this view point above Snow Lakes the cameras never came back out. This is a screen shot from a story video I took – sorry for the poor quality!
After frolicking our way through the Core Enchantments, Quin and I abruptly found ourselves on the edge of Lake Viviane, gazing down on Snow Lakes in the distance. The lakes seemed impossibly far away, and just like that, the spell was broken. The descent to Snow Lakes isn’t nearly as steep as Aasgard Pass, but it’s still steep, rocky, and uneven.
Pro Tip: When we hiked this section, we passed a man that had tripped and suffered a pretty gnarly looking head injury. The point is, take your time on this decent and try to complete it before the sunsets. I wouldn’t want to do it in the dark, even with a headlamp.
Snow Lake To Nada Lake
Distance: 2 miles
Total Distance Hiked: 13.25 miles
Difficulty: Easy
Elevation Loss: 600 feet
Time: 1.25 hour
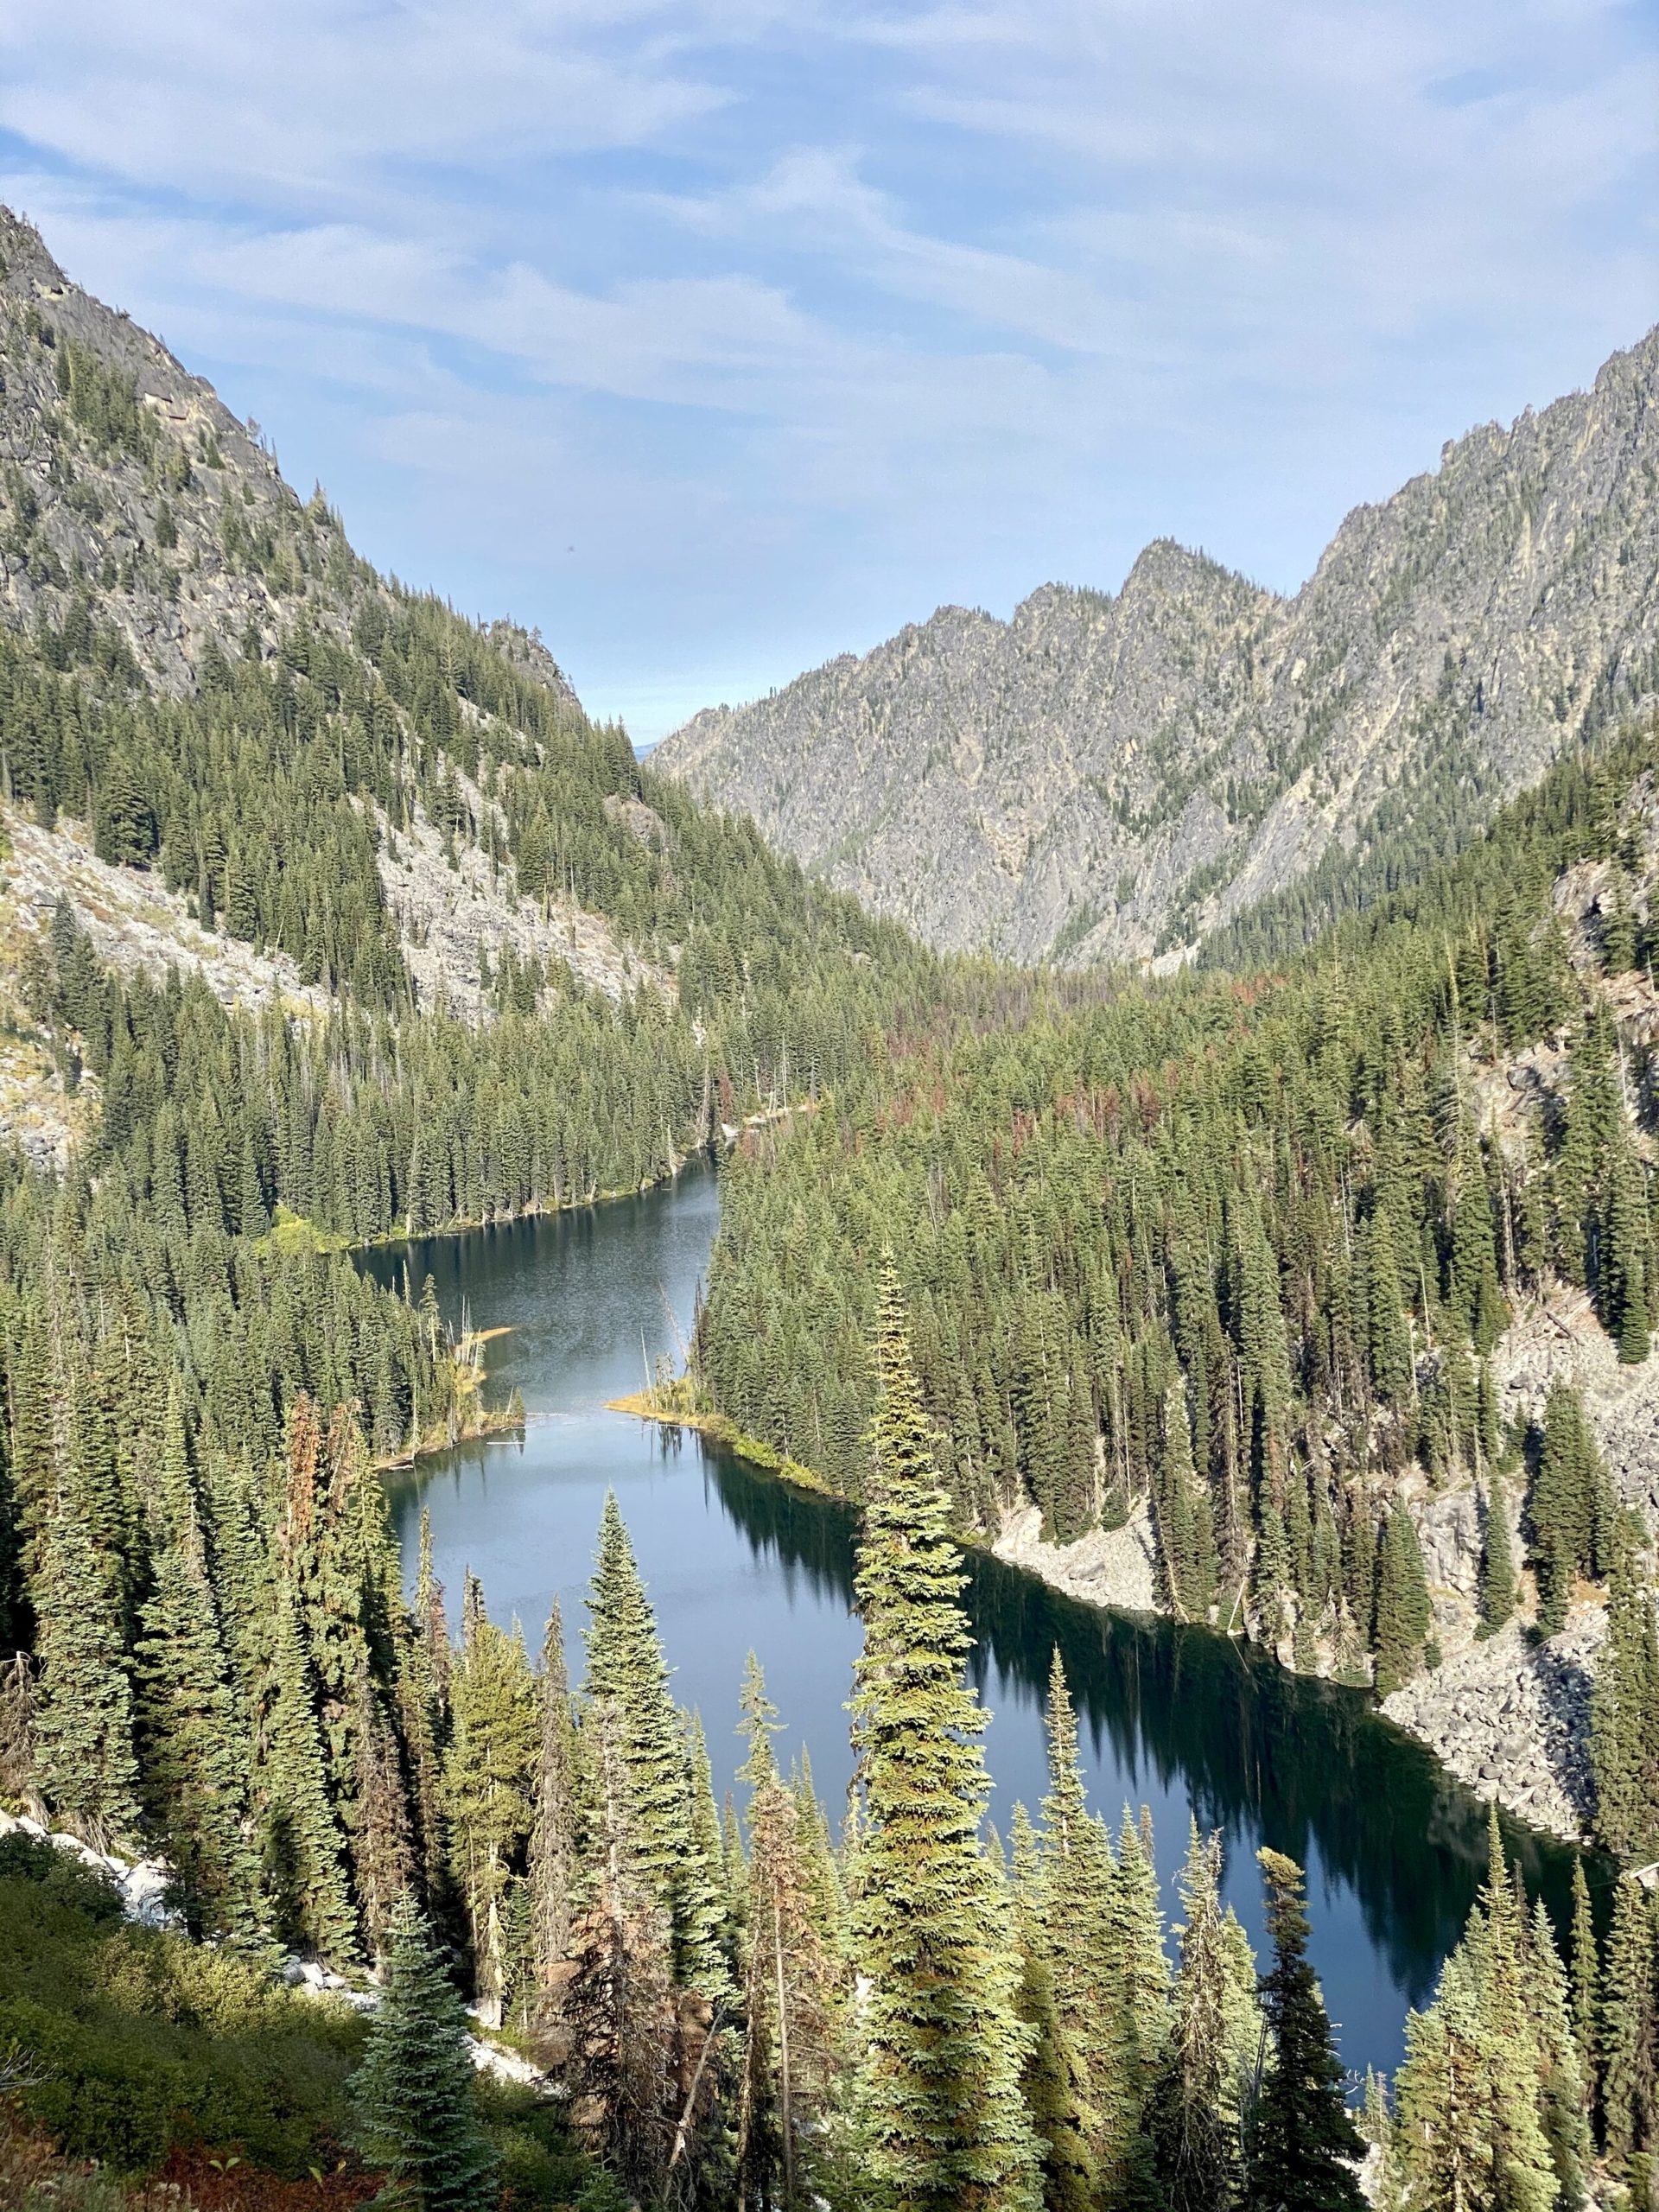
Looking down on Nada Lake after passing Snow Lakes.
I think of this section as the beginning of the end. Not so much in an ominous sense, but everything is kind of a blur from here on out. There was only one focus at this point in the hike – getting back to the car. Our cameras had been long since packed away, and covering ground was the main objective. Luckily, that was pretty easy to achieve. The only potential obstacle along this section of the trail is a small dam that you will need to cross as you’re leaving Snow Lakes. In October, there was no water, and it was a nonissue. If you’re hiking earlier in the season, you might need to remove your shoes.
Pro Tip: By the time we hit Nada Lake, the dull aching in my feet, legs, and back that had been slowly creeping in since our descent was swiftly morphing into a sort of living rigor mortis. If it hadn’t been for the two ibuprofen that I washed down with a cool drink of freshly filtered alpine water, the last 6 miles would have been a serious struggle. I guess I’m just saying, make sure your first aid kit is stocked.
The Final Push: Nada Lake To The Snow Lake Trailhead
Distance: 6 miles
Total Distance Hiked: 19.25 miles
Difficulty: Moderate
Elevation Loss: 3600 feet
Time: 2.5 hours
Remember when I said that Aasgard Pass was “without question the most difficult part of your journey?” I wouldn’t go so far as to say that I lied, so much as I neglected to distinguish between different types of difficult. With 2,000 feet of elevation gain in less than a mile and no discernible trail, Aasgard Pass is physically demanding. But it was the last six miles from Nada Lake to the Snow Lakes Parking lot that almost did me in. Maybe it was the knowledge that the best was already behind me, or perhaps it was the fact that every part of my body was aching at this point, but I think there’s a fair argument to be made that this is actually the hardest stretch of The Enchantments.
Don’t get me wrong, the scenery is still pretty – although noticeably less enchanting. Plus, it’s easy to cruise along this portion of the trail at a good clip. If I could do it again, though, I would probably opt to spend even more time in the core zone and risk hiking these last few miles in the dark. I wouldn’t have missed much.
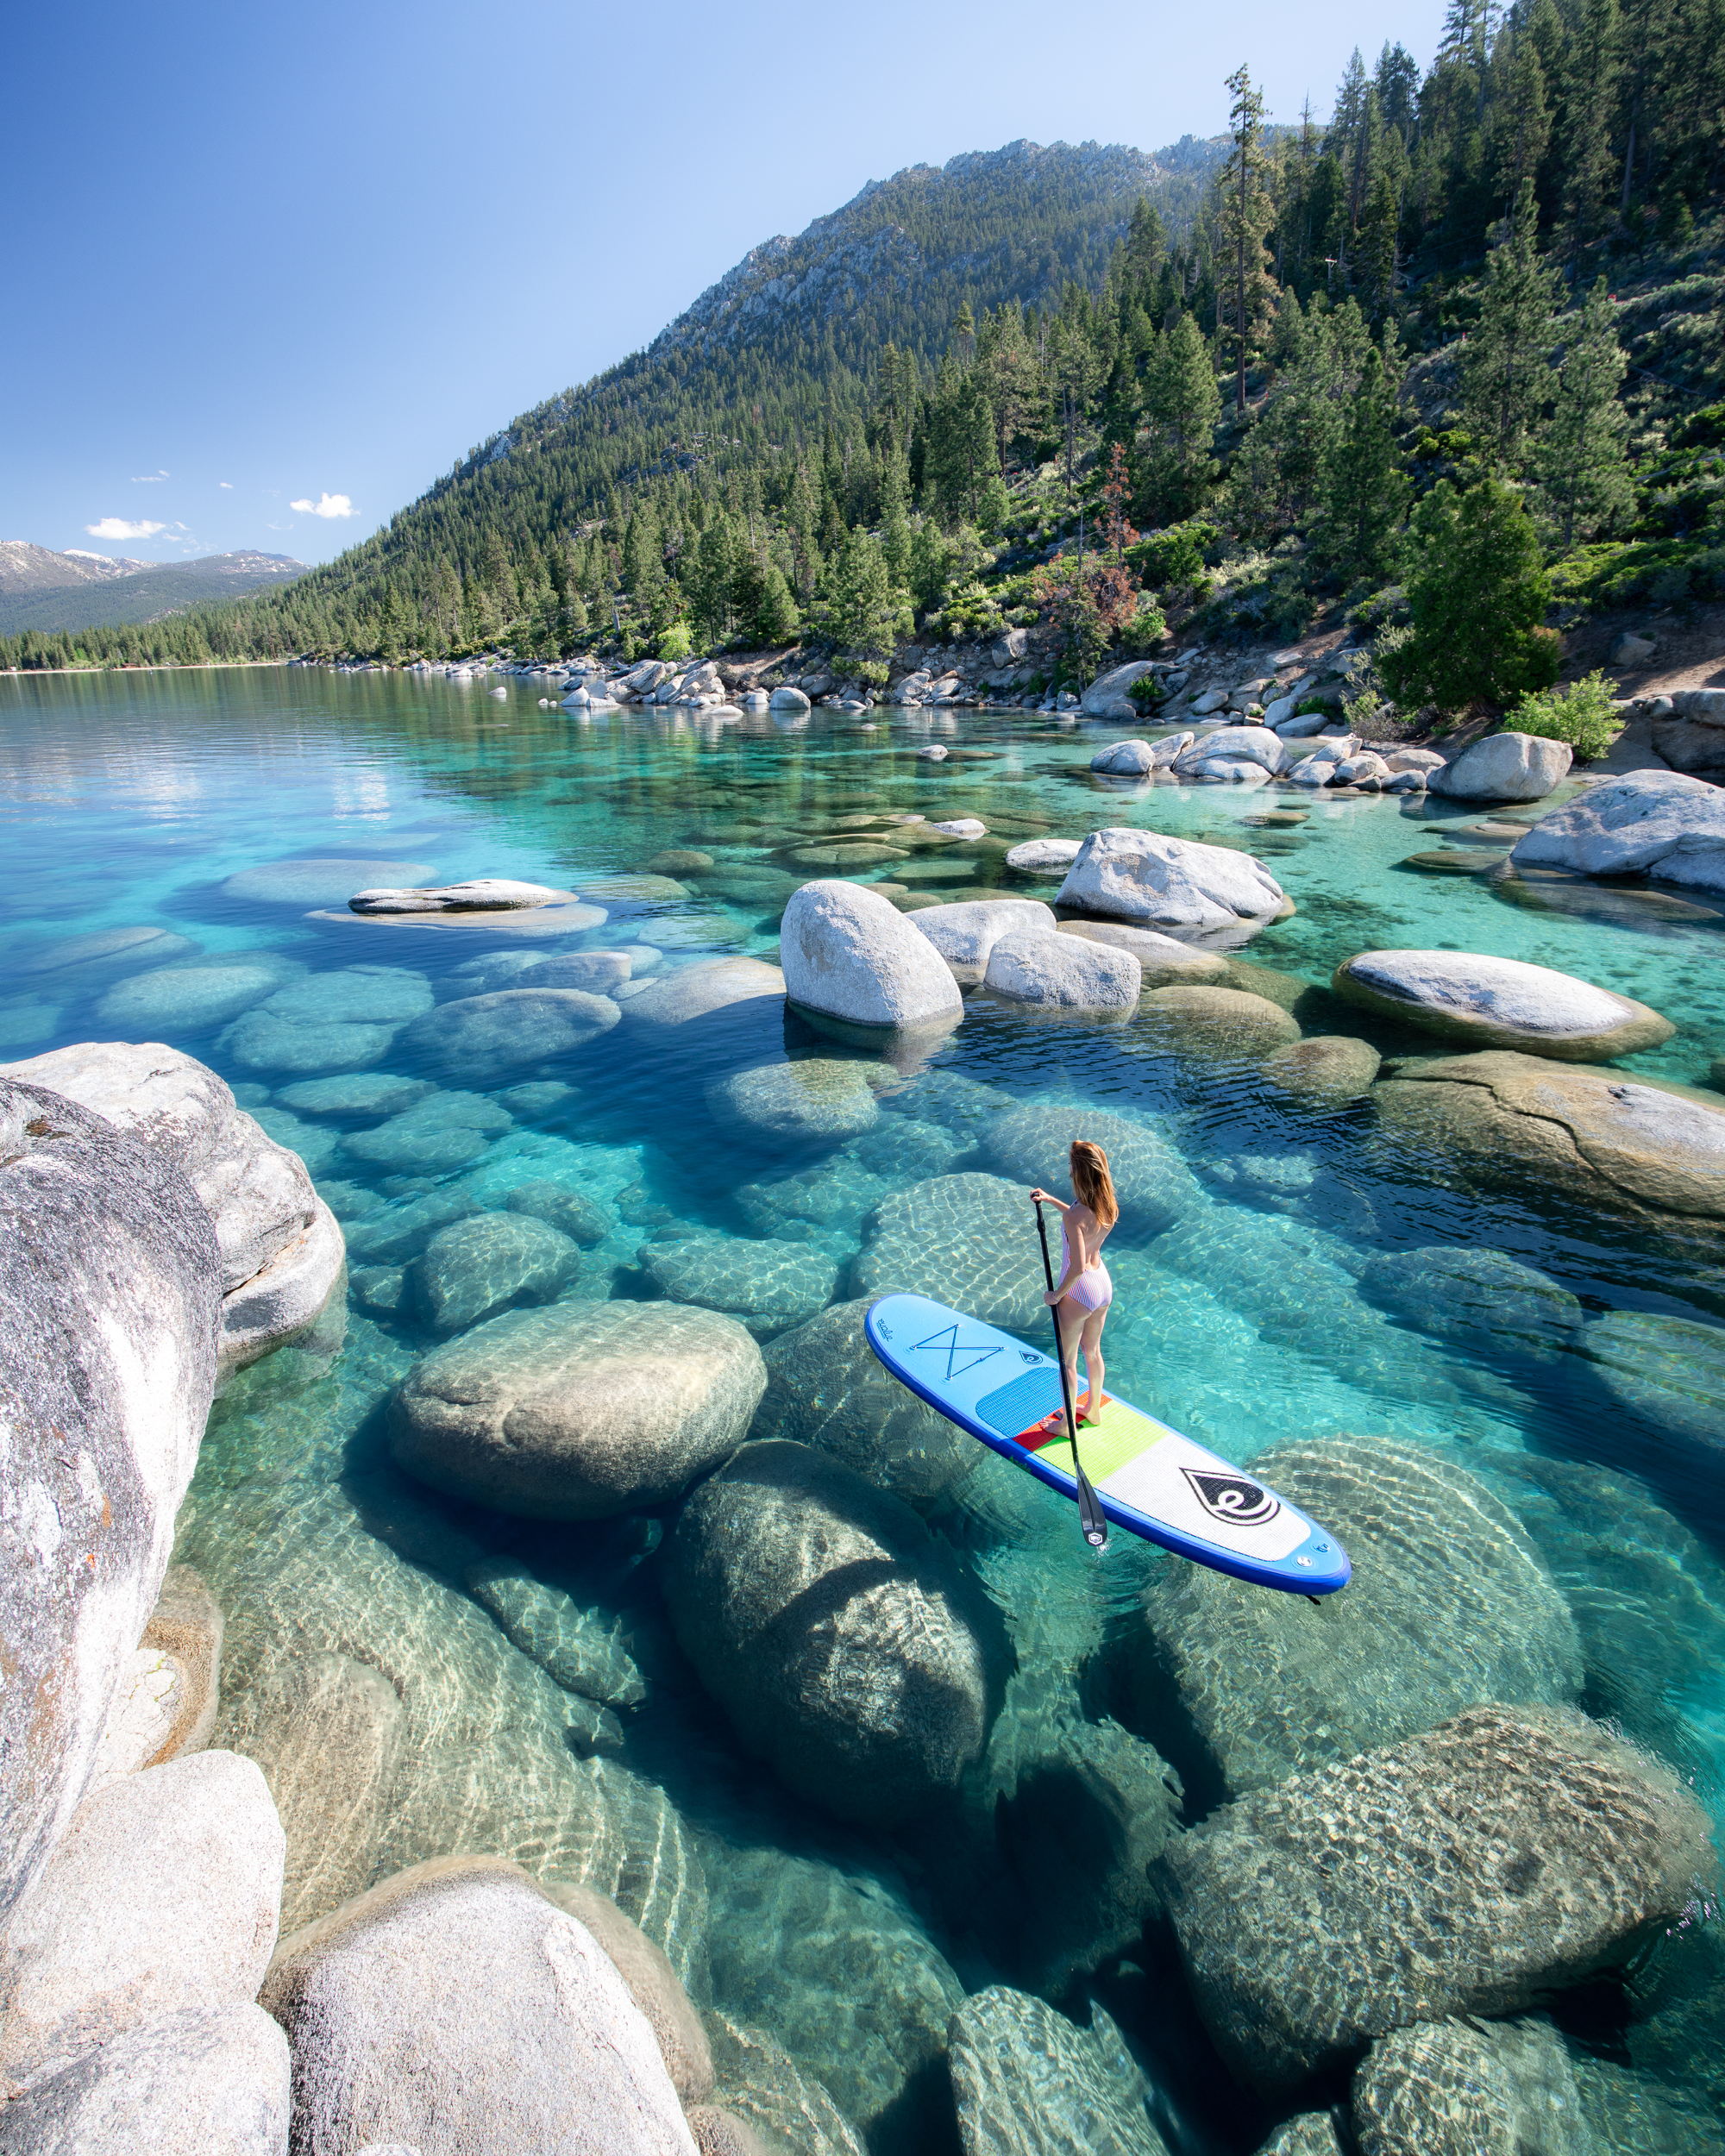
There are endless blue alpine lakes to stop and admire in The Enchantments. Wearing Icebreaker base layers, Keen Terridora Hiking Boots, and Patagonia’s 9 Trails Backpack.
So Is Day Hiking The Enchantments Worth It?
The Enchantments get a lot of hype in Washington. To be honest, I didn’t think there was any way it could live up to a lifetime of built-up expectations. But it did! I’m definitely going to continue to enter the lottery for overnight permits. Given my interest in photography, I would love to shoot some of the alpine lakes in the core during golden hour, but that’s pretty tough to pull off on a day hike. I would absolutely thru-hike The Enchantments in one day again though, just for the experience of it. Even if I didn’t take a single photograph. And there are not many places I can say that about!
Please note that this blog post includes affiliate links. If you do choose to purchase something, I may earn a small commission – at no additional cost to you. As always, all ideas and opinions expressed in this post are entirely my own.
Questions? Did I miss anything? Leave a comment, and I’ll see you on the trail!
Thank you so much for your support! Happy Adventuring. – jess


It’s so good to see a post from you, especially in these troublesome times the world is going through. Having been off Instagram for what is 8-9 months I don’t seem to see any of your posts, but I have sent emails.
Firstly I adore your photos, they really are a beauty and something that many should see, that even with this pandemic, their is beauty still in this world and it still grows, if anything the planet is growing stronger.
Secondly, this blog is so incredibly detailed! I’ve never heard of the “Enchantments” before so I kinda came into this blog blind sided but I find it so informative on every aspect, from what you’ll need, to location, distance, time, photos, maps.
This is more than a blog this is an educational piece of information :). I’ve learnt more about the Enchantments in this one blog than I know about most of the hikes in my own area.
Then again I would never expect anything less from you 🙂
Great blog
Love from Tj Lotay
P.s You look so lovely and happy in your photos.
Thank you so much Tj! It’s great to hear from you. I always appreciate your feedback on my posts. This was a special hike, so I’m glad you enjoyed learning about it. I hope that your social media break has treated you well. Wishing you all my best.
Great photos !!!
The USDA Forest Service shows the hike as 18-19 miles (they’ve measured for years). Trusting your GPS tracker with all of its multi-pathing and signal dropping errors over the surveyed distance doesn’t make sense. Also, they show the mileage for each segment. know the area well. You’ve got great photos, but their experience with the trails and terrain means they know what they are doing.
Hiking Distances and Elevations:
Snow Lake: Snow Creek Trailhead to the Upper Snow Lake Dam
6.5 miles / 3800 foot elevation gain (and another 1.5 miles to the far end of the lake).
Colchuck Lake: Stuart Lake Trailhead to first view of the lake
4.2 miles / 2200 foot elevation gain.
Stuart Lake: Stuart Lake Trailhead to first view of the lake
4.6 miles / 1600 foot elevation gain.
Eightmile Lake: Eightmile Trailhead to the lake outlet
3.3 miles / 1300 foot elevation gain.
Lake Caroline: Eightmile Trailhead to the lake
5.6 miles / 3100 foot elevation gain.
Core Enchantments:
from Colchuck Lake to the top of Aasgard Pass:
2.5 miles / 2500 foot elevation gain
from the inlet of Upper Snow Lake to Lake Viviane:
1.5 miles / 1400 foot elevation gain
The Whole Core Enchantment Loop, Stuart Lake Trailhead to Snow Lake Trailhead:
approximately 19 miles / 6000 foot gain and 7800 foot loss
Thanks so much for the input Morgan! I’m glad to see that my distances are very similar to the Forest Service distances you sent. There are so many different lakes and side trips you can take up in the Core Zone, so I’m sure that’s why there is variations online.
Thanks for sharing your experience Jess! Living in St. Louis, I’m a little jealous that you guys have The Enchantments in your backyard. I completed this hike in early September, and your account is definitely spot on. The Enchantments will definitely be a challenge to ‘one up’. What hikes are next on the bucket list? I am looking to venture towards the Southwest this winter.
Stay well,
Jon Turek
Hey Jon. Fun to hear that you had a similar experience. I’m sure September was a lovely time to be in The Enchantments as well. I’ve always wanted to hike the Rim to Rim trail at The Grand Canyon as well as the Haute Route in Switzerland. Buckskin Gultch is on my redemption list too.
Such informative information not to mention breathtaking views! What an epic hike. I might need 2 days!
Yes! I think it would be amazing to spend a few days on the hike. It’s just a matter of getting those tricky permits. 🙂
Wow! Thank you for all the detailed insight & tips. I really appreciate learning about your experience.
Your welcome Maggie. Thanks again for taking the time to check out my blog. Means a lot!
I am from Florida and know nothing about the Pacific Northwest, so this was very helpful and interesting. I am adding it to our wish list of places to see.
I hope you’re able to visit someday! It’s definitely a very different vibe from Florida.
Your guides are awesome, one of the few blogs I actually enjoy reading through. If you could pitch a tent at any lake in the core zone & had just one night… which would it be? scored a late season permit and snow is def in the forecast, but still going for it!
Thanks so much Carly. That’s awesome to hear! Because we thru-hiked The Enchantments in one day, I wasn’t able to check out all of the lakes up there, just the ones along the main trail. So, my opinion is definitely based on my limited experience. There were some awesome camp sites looking out over Perfection Lake that I would definitely check out. But if I had a backcountry permit, I would probably hike up to Gnome Tarn and camp there. That’s the one place I really wanted to go that we didn’t have time to hike up to.
Thank you so much for your article! So helpful. Curious your age – I am 60
, in great shape and my husband is 55 also in great shape. Excited to try this:)
Hi Jackie. I’m in my thirties, but I think anyone of any age in good shape would have fun doing this! 🙂
Hi! Loved this post and feeling inspired for my first trip to the Enchantments next weekend! I have been going back and forth about what pants to wear- I usually opt for leggings but it will be warm this weekend… did you feel like you made the right choice with leggings as well? Thanks!
I almost always wear leggings, and from what I remember I was happy with that decision. If it’s going to be warm, shorts would be fine as well! I just know that I’m generally more comfortable in leggings – they just feel like a second skin to me.
Well, that’s one way to do it. The downside of getting old is such a day hike is beyond my capability for enjoyment. The upside of getting old and being retired is more TIME! I got lucky to get a permit for an Oct 1 entry this year, and am planning to spend 10 DAYS in the core really soaking in the beauty and getting off the beaten path! Thanks for the photos, they are a help in my planning for the expedition!
Oh wow!! Lucky you! That would certainly be my preference as well. I’ve actually never been able to get permits for the enchantments, which is why I had to do it in one day. But I would love to backpack there and be able to spend more time in the core at some point. That should be a beautiful time of year with all the larches!
Amazing write-up!!! Thank you for sharing with the world!!! I did (half) the hike yesterday……. my son bonked 3/4 up the pass climb. I continued on for another mile or so before backtracking down. The trip down from AAsgard destroyed my knees and double destroyed from the lake back. But to quote you, “it was worth it”. need to go finish it off. Keep up the great work!!!
Have you hiked up and down Asgard Pass in the same day? If so, how is that. Tinking of going to leprechauns lake and turning a rod and going down Asgard Pass instead of Snow Lake.
I know that this is way too late to be helpful for you, but I figured I’d answer anyway incase anyone else has a similar question! Yes, I have hiked up and down Asgard Pass in one day. I think there’s a good argument to be made for both. The last handful of miles going out through Snow Lake is long and tedious. If you’re knees are up for the steep decline, turning around and going back out through Asgard Pass is a great option. Plus, it eliminates the hassle of figuring out a shuttle between trailheads.
What an incredible adventure, Jess! Your detailed descriptions and stunning photos really capture the beauty of the Enchantments. I can’t believe you managed to complete it in one day! I’m feeling inspired to tackle this hike myself. Any tips for first-timers like me?